brief introduction
This series of articles records the author's learning experience in learning HarmonyOS mobile application development in the first month of his junior year. This article is the project of wechat chat interface, which has several functions
1. Chat information function, including pictures and text
2. Send location function
3. Select the function of sending local pictures
4. Take pictures and send pictures
If you are debugging the real machine, please change the package name in the config file to your own application package name. The application permissions include file reading and writing, location acquisition, camera call and microphone call.
Previous articles
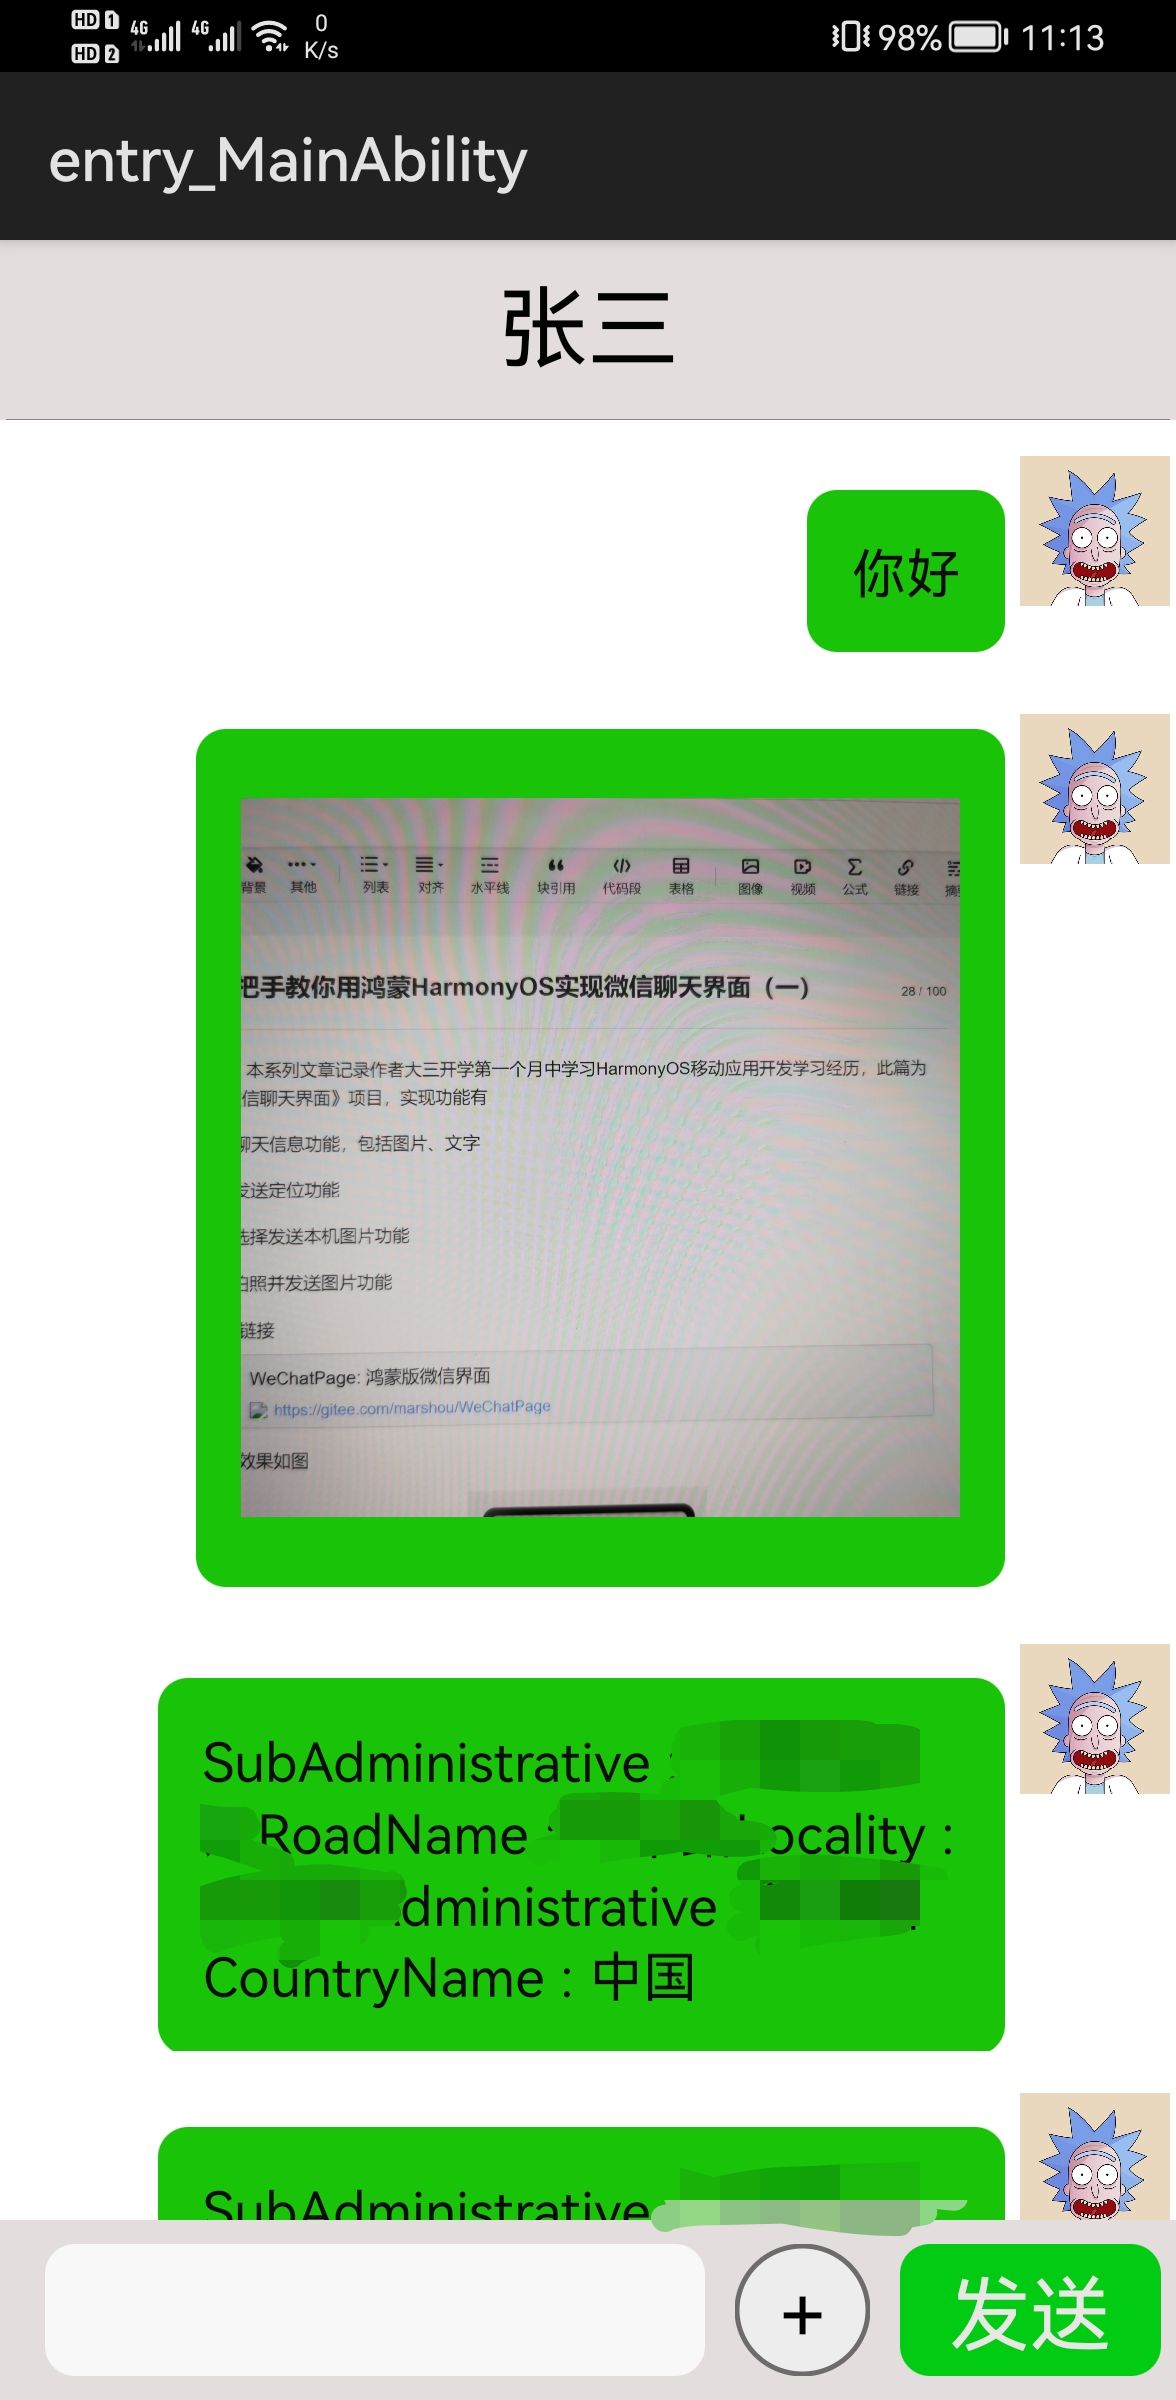
The effect of chat interface is shown in the figure below
The effect of picture selection is shown in the figure
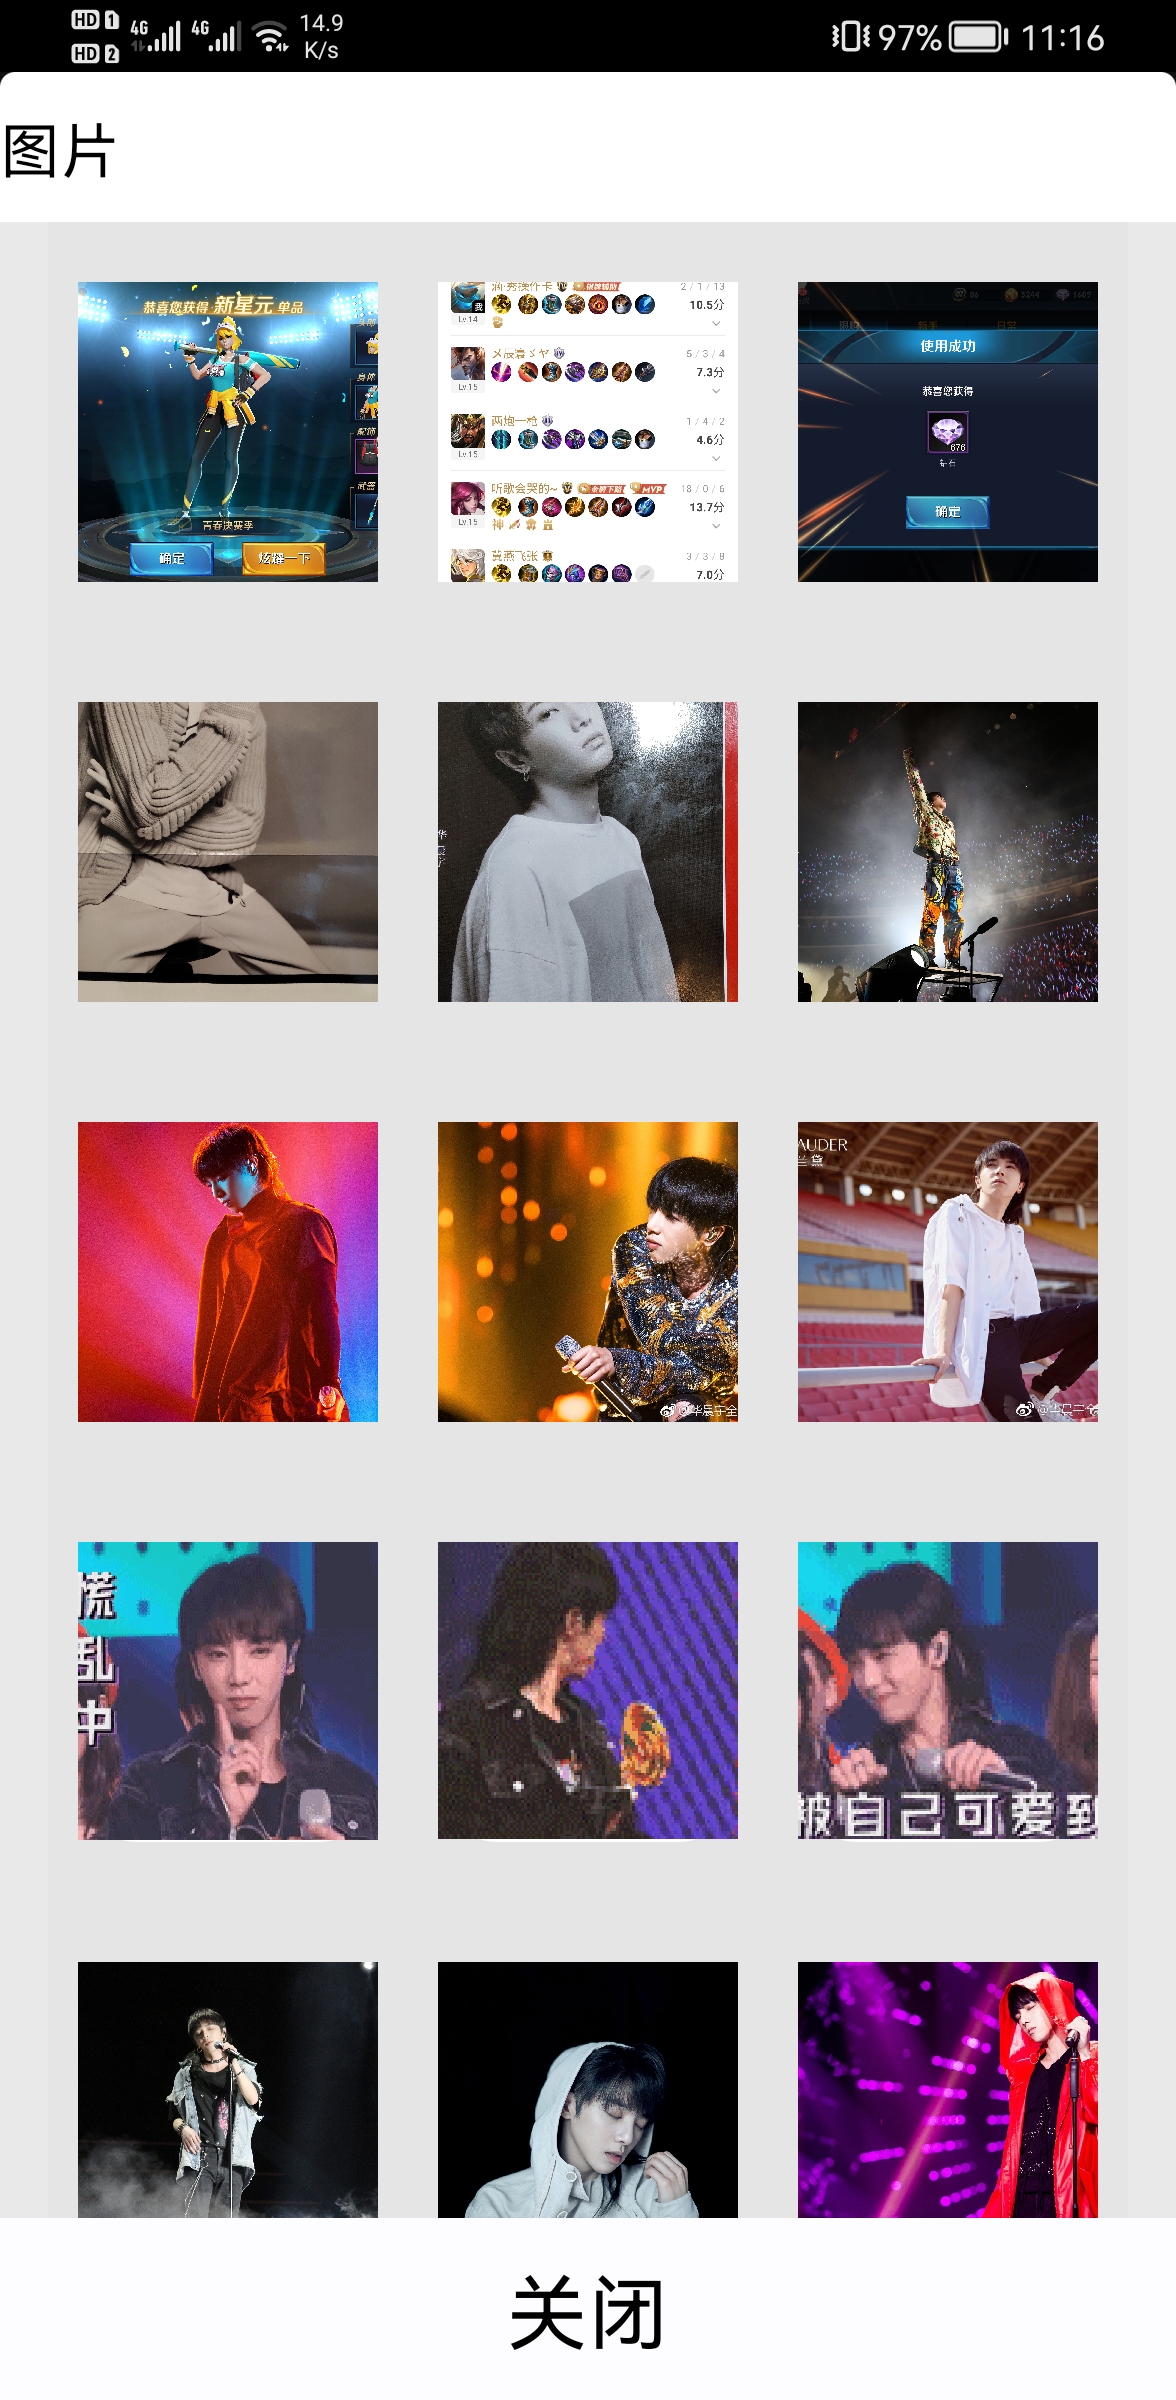
Image acquisition
This article is about the acquisition of pictures. One way is to place static resources in the project, and the other is to get pictures from the local machine.
The first method is very simple. You only need to add src attribute to the Image component.
 <Image
            ohos:id="$+id:image_message"
            ohos:width="match_content"
            ohos:image_src="$media:rick_c137"
            ohos:height="match_content"
            ohos:scale_mode="zoom_center"
            ohos:background_element="$graphic:message_background"
            ohos:left_margin="15vp"
            ohos:left_padding="15vp"
            ohos:right_padding="15vp"
            ohos:right_margin="15vp"
            ohos:top_margin="15vp"
            ohos:top_padding="15vp"
            ohos:bottom_margin="15vp"
            ohos:bottom_padding="15vp"
            ohos:margin="5vp"/>
The second scenario is more common, which is to access media resources according to the uri of the picture file, convert it into a PixelMap object and pass it to the Image component.
 Component container = LayoutScatter.getInstance(context).parse(ResourceTable.Layout_image_message_list_item, null, false);
            Image image = (Image) container.findComponentById(ResourceTable.Id_image_message);

            DataAbilityHelper helper=DataAbilityHelper.creator(context);
            ImageSource imageSource;
            Uri uri = Uri.parse(aMessage.getMessage());
            FileDescriptor fd = null;
            try {
                fd = helper.openFile(uri, "r");
            } catch (DataAbilityRemoteException | FileNotFoundException e) {
                e.printStackTrace();
            }
            imageSource = ImageSource.create(fd, null);
            //create a bitmap
            PixelMap pixelMap = imageSource.createPixelmap(null);
            image.setPixelMap(pixelMap);
            imageSource.release();
            helper.release();

            return container;
How to get the Uri of the picture? Query the local resources through the DataAbilityHelper class (refer to the official documentation Document Center ), media storage related classes AVStorage.images.media.external in AVStorage class_ DATA_ ABILITY_ The Uri is the Uri obtained for processing image media information. Similarly, the video resource is the Uri at the splice of the resource id obtained according to the query result
Uri.appendEncodedPathToUri(AVStorage.Images.Media.EXTERNAL_DATA_ABILITY_URI, String.valueOf(id));
The class that gets the picture URI resource in the project
public class PictureManager {
    private static final String TAG = PictureManager.class.getSimpleName();

    private List<Uri> imagePathElements = new ArrayList<>();

    private Context context;

    /**
     * The construction method of this class
     *
     * @param context Context
     */
    public PictureManager(Context context) {
        this.context = context;
        loadFromMediaLibrary(context);
    }

    private void loadFromMediaLibrary(Context context) {
        Uri remoteUri = AVStorage.Images.Media.EXTERNAL_DATA_ABILITY_URI;
        DataAbilityHelper helper = DataAbilityHelper.creator(context, remoteUri, false);
        try {
            ResultSet resultSet = helper.query(remoteUri, null, null);
            LogUtil.info(TAG, "The result size: " + resultSet.getRowCount());
            processResult(resultSet);
            resultSet.close();
        } catch (DataAbilityRemoteException e) {
            LogUtil.error(TAG, "Query system media failed.");
        } finally {
            helper.release();
        }
    }

    private void processResult(ResultSet resultSet) {
        while (resultSet.goToNextRow()) {
            String path = resultSet.getString(resultSet.getColumnIndexForName(AVStorage.AVBaseColumns.DATA));
            String title = resultSet.getString(resultSet.getColumnIndexForName(AVStorage.AVBaseColumns.TITLE));
            String id = resultSet.getString(resultSet.getColumnIndexForName(AVStorage.Images.Media.ID));
            Uri uri = Uri.appendEncodedPathToUri(AVStorage.Images.Media.EXTERNAL_DATA_ABILITY_URI, String.valueOf(id));

            LogUtil.info(TAG, "The title is: " + title);
            LogUtil.info(TAG, "The path is: " + path);
            LogUtil.info(TAG, "The id is: " + id);
            LogUtil.info(TAG, "The uri is: " + uri);
            imagePathElements.add(uri);
        }
    }

    public List<Uri> getimageElements() {
        LogUtil.info(TAG, "The size is: " + imagePathElements.size());
        return imagePathElements;
    }
}
How to select a picture is to display the picture on the mobile phone by line through the listcontinue component, and call the send message method to send the picture through the click method of adding the picture.
How do I display Uri as a picture? In Hongmeng, the Image component can be set by calling setPixelMap method, and the parameter is PixMap object. You can use ImageSource to create a FileDescriptor create a bitmap
DataAbilityHelper helper=DataAbilityHelper.creator(slice.getContext());
ImageSource imageSource;
FileDescriptor fd = null;
fd = helper.openFile(uri, "r");
imageSource = ImageSource.create(fd, null);
PixelMap pixelMap = imageSource.createPixelmap(null);
image.setPixelMap(pixelMap);
The following shows three pictures in a row in the project, so Uri is stored in array. If you want to display only one picture, replace the array with a single object.
DataAbilityHelper helper=DataAbilityHelper.creator(slice.getContext());
        //Define picture source object
        ImageSource imageSource;
        Uri[] uris = imageLineItem.getUris();
        FileDescriptor fd = null;

        image1.setClickedListener(component1 -> {
            mainAbilitySlice.addAndUpdateMessage(mainAbilitySlice.getMessageDataSize(), String.valueOf(uris[0]),"image");
            mainAbilitySlice.getDialog().destroy();
        });

try {
            fd = helper.openFile(uris[0], "r");
        } catch (DataAbilityRemoteException | FileNotFoundException e) {
            e.printStackTrace();
        }
        imageSource = ImageSource.create(fd, null);
        //create a bitmap
        PixelMap pixelMap = imageSource.createPixelmap(null);
        image1.setPixelMap(pixelMap);
        imageSource.release();
        helper.release();
Content entity class of listcontinue
public class ImageLineItem {
    private int index;
    private Uri[] uris;

    public ImageLineItem(int index) {
        this.index = index;
    }

    public int getIndex() {
        return index;
    }

    public void setIndex(int index) {
        this.index = index;
    }

    public Uri[] getUris() {
        return uris;
    }

    public void setUris(Uri[] uris) {
        this.uris = uris;
    }
}
Provider class
public class ImageLineProvider extends BaseItemProvider {
    private static final String TAG = ImageLineProvider.class.getSimpleName();
    private List<ImageLineItem> list;
    private AbilitySlice slice;

    private MainAbilitySlice mainAbilitySlice;

    public void setMainAbilitySlice(MainAbilitySlice mainAbilitySlice){
        this.mainAbilitySlice = mainAbilitySlice;
    }

    public ImageLineProvider(List<ImageLineItem> list, AbilitySlice slice) {
        LogUtil.info(TAG,"list.size() : "+list.size());
        this.list = list;
        this.slice = slice;
    }

    @Override
    public int getCount() {
        return list == null ? 0 : list.size();
    }

    @Override
    public Object getItem(int position) {
        if (list != null && position >= 0 && position < list.size()){
            return list.get(position);
        }
        return null;
    }

    @Override
    public long getItemId(int position) {
        return position;
    }

    private Component getItemComponent(int position) {
        return getComponent(position);
    }

    private Component getComponent(int position) {
        LogUtil.info(TAG,"list.size()"+list.size());
        final Component cpt;
        cpt = LayoutScatter.getInstance(slice).parse(ResourceTable.Layout_images_line, null, false);
        ImageLineItem imageLineItem = list.get(position);
        Image image1,image2,image3;
        image1 = (Image) cpt.findComponentById(ResourceTable.Id_image1);
        image2 = (Image) cpt.findComponentById(ResourceTable.Id_image2);
        image3 = (Image) cpt.findComponentById(ResourceTable.Id_image3);

        DataAbilityHelper helper=DataAbilityHelper.creator(slice.getContext());
        //Define picture source object
        ImageSource imageSource;
        Uri[] uris = imageLineItem.getUris();
        FileDescriptor fd = null;

        image1.setClickedListener(component1 -> {
            mainAbilitySlice.addAndUpdateMessage(mainAbilitySlice.getMessageDataSize(), String.valueOf(uris[0]),"image");
            mainAbilitySlice.getDialog().destroy();
        });
        image2.setClickedListener(component1 -> {
            mainAbilitySlice.addAndUpdateMessage(mainAbilitySlice.getMessageDataSize(), String.valueOf(uris[1]),"image");
            mainAbilitySlice.getDialog().destroy();
        });
        image3.setClickedListener(component1 -> {
            mainAbilitySlice.addAndUpdateMessage(mainAbilitySlice.getMessageDataSize(), String.valueOf(uris[2]),"image");
            mainAbilitySlice.getDialog().destroy();
        });

        try {
            fd = helper.openFile(uris[0], "r");
        } catch (DataAbilityRemoteException | FileNotFoundException e) {
            e.printStackTrace();
        }
        imageSource = ImageSource.create(fd, null);
        //create a bitmap
        PixelMap pixelMap = imageSource.createPixelmap(null);
        image1.setPixelMap(pixelMap);
        imageSource.release();
        helper.release();

        try {
            fd = helper.openFile(uris[1], "r");
        } catch (DataAbilityRemoteException | FileNotFoundException e) {
            e.printStackTrace();
        }
        imageSource = ImageSource.create(fd, null);
        //create a bitmap
        pixelMap = imageSource.createPixelmap(null);
        image2.setPixelMap(pixelMap);
        imageSource.release();
        helper.release();

        try {
            fd = helper.openFile(uris[2], "r");
        } catch (DataAbilityRemoteException | FileNotFoundException e) {
            e.printStackTrace();
        }
        imageSource = ImageSource.create(fd, null);
        //create a bitmap
        pixelMap = imageSource.createPixelmap(null);
        image3.setPixelMap(pixelMap);
        imageSource.release();
        helper.release();

        return cpt;
    }

    @Override
    public Component getComponent(int position, Component convertComponent, ComponentContainer componentContainer) {
        return getItemComponent(position);
    }
}
This is the end of the way to obtain the picture. The next part will talk about how to realize the effect shown in the previous picture.
Gitee link
WeChatPage: Hongmeng wechat interface