Refer to the previous operation: ssm + js realizes the registration function
thinking
① Backstage
- Mapper
a. Query operation, query status = 1
b. Write mapping file
c. Po
d. Dto - Service: finish paging settings
a. Paging operation while querying
b. PageHelper - Controller
a. Get the front-end submission page number and number
b. Returns the data of the query
② Front end
- Page to display the queried data
- Use jquery to query and display data when the page is loaded
- Bootstrap framework
Operation steps
1. Display all data in pages
(1) Add the dependency of the paging plug-in in the pom file
<dependency>
    <groupId>com.github.pagehelper</groupId>
    <artifactId>pagehelper-spring-boot-starter</artifactId>
    <version>1.3.1</version>
</dependency>
(2) Add the required po and dto

Determine the existing attributes in dto according to business needs
(3) Create Mapper add sql statement
① UserInfoMapper
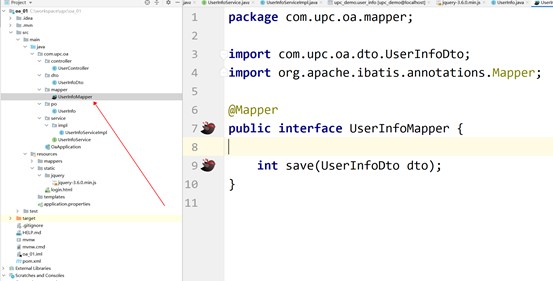
② Add a query method and pay attention to the query status
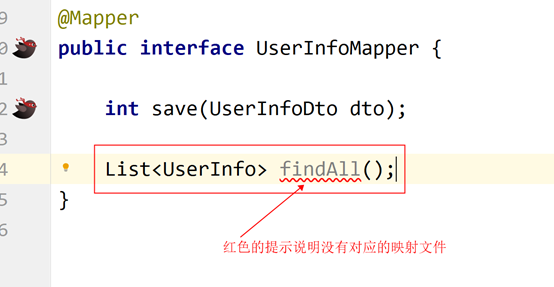
③ Add mapping
- Using annotations
- Use mapping file
<select id="findAll" resultType="com.upc.oa.po.UserInfo">
    select
        userId, userName, userRealName, userSex, userEmail
    from user_info
    where userStatus=1
</select>
④ Each method written must be tested
(4) Pagination is required to create business logic
① In the original case, only paging data is required
- Interface
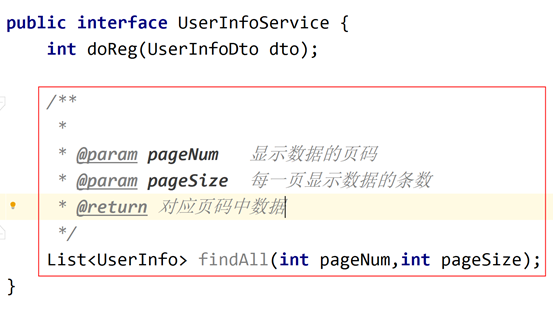
- Implementation class
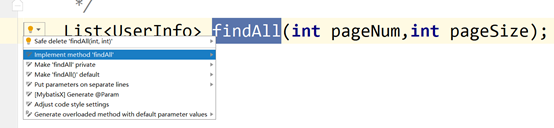
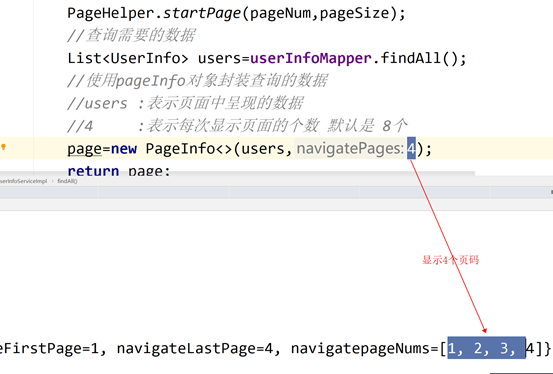
② At present, it is necessary to display not only data, but also total pages, total records, etc - Create interface
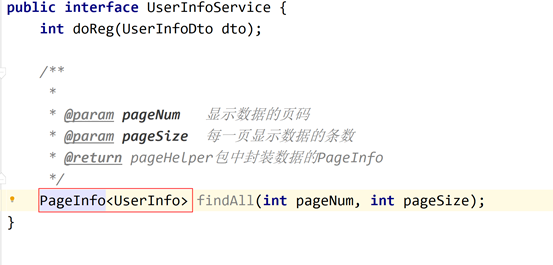
- Create implementation class
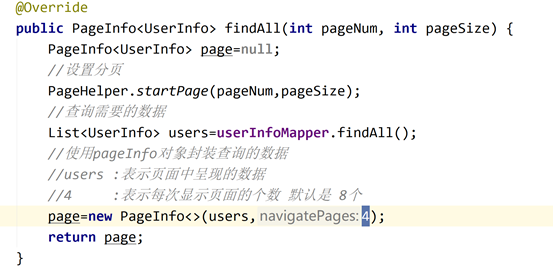
- explain
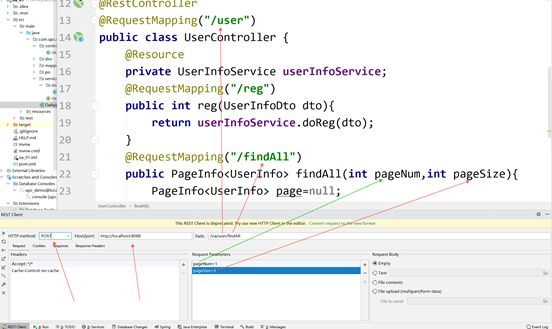
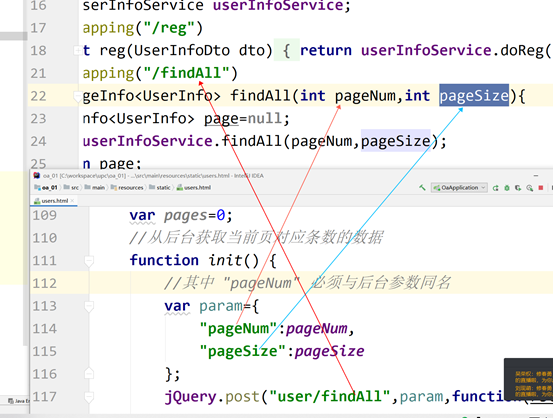
(5) Create controller
① Create UserController

② How to add Pagination
@RequestMapping("/findAll")
public PageInfo<UserInfo> findAll(int pageNum,int pageSize){
    PageInfo<UserInfo> page=null;
    page=userInfoService.findAll(pageNum,pageSize);
    return page;
}
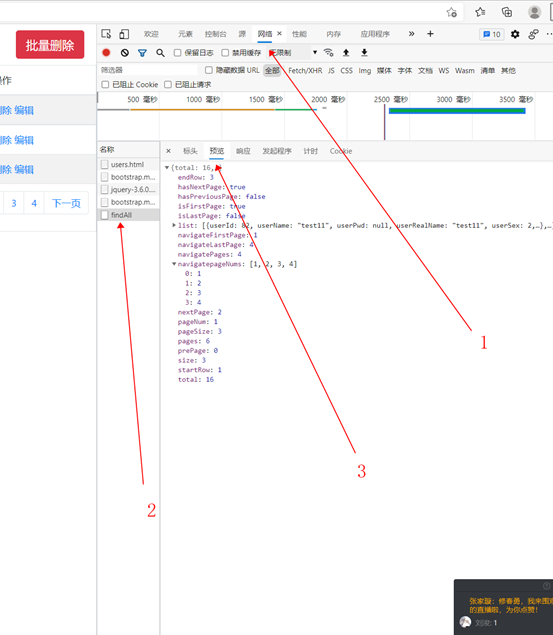
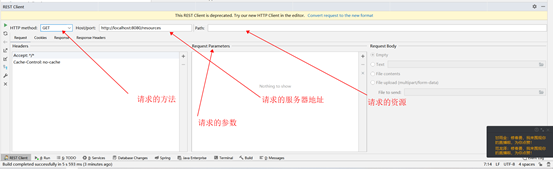
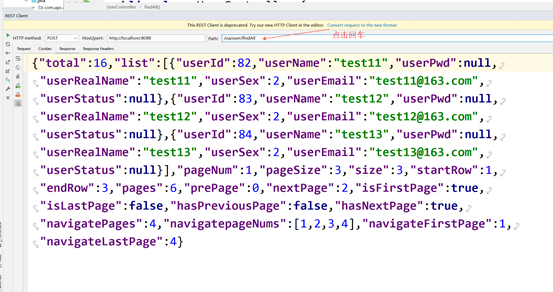
③ Test our controller with httpclint, a plug-in included in idea
- Start the project and run the main method in the xxapplication program
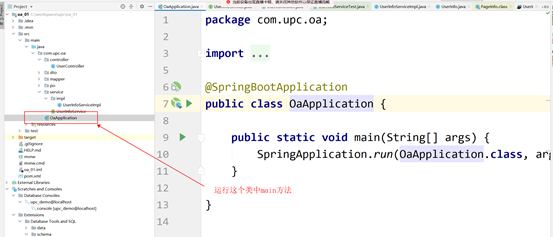
See the following

Can pass http://localhost:8088/oa/xxx/xxx - Using httpClient to test the controller

2. Front end
(1) Add jquery and bootstrap
① Jquery
② Bootstrap
- Provide a large number of css styles and a small number of js components
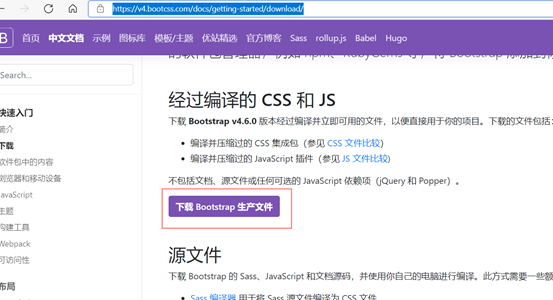
- Download bootstrap
https://www.bootcss.com/
Select the bootstrap 4 version
https://v4.bootcss.com/docs/getting-started/download/
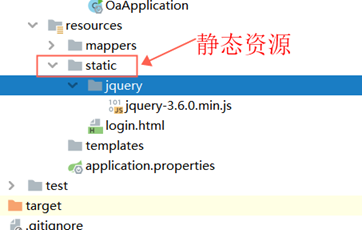
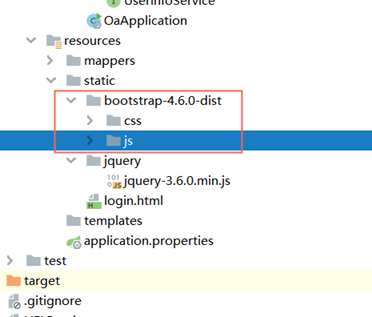
- Copy to static directory
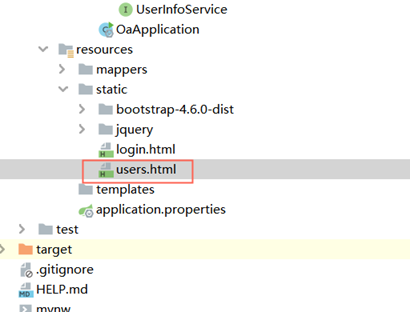
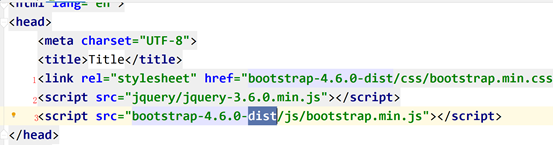
(2) Create a page and add jquery and bootstrap dependencies in the page
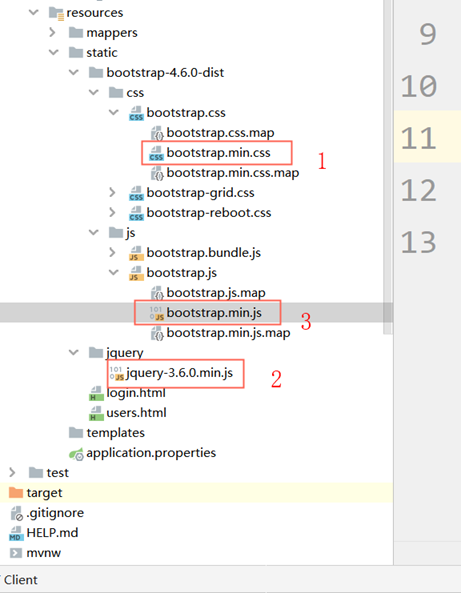
be careful:
The introduction of Jquery file must precede the bootstrap.js file
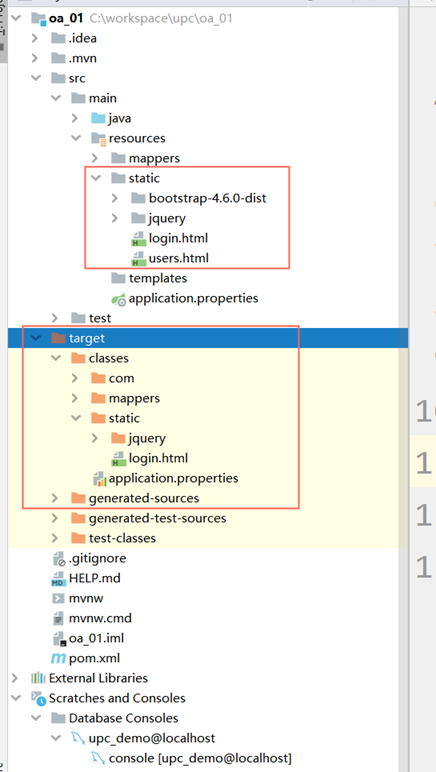
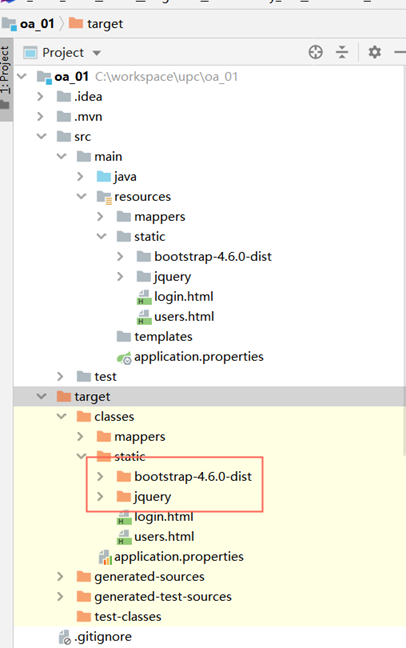
(3) After adding content to static, unrecognized requests may appear, which need to be recompiled before running
Write pages for data display
(1) Attention
① The Jquery js file must be imported before the bootstrap js file

(2) If the running program cannot recognize after adding js and css files, you must recompile and run the program again
(3) For projects built with maven management, after adding dependencies to pom files, they may be unrecognized and re introduced
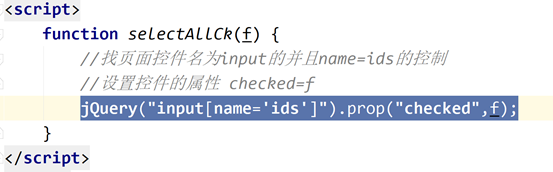
Select all
(1) Page

(2) Js
When the page is loaded, the user information not deleted in the database is displayed
(1) Using jquery, after the page is loaded, it automatically sends a post request to the background to obtain the data in the first page
(2) Use js to update the data to the page
<script>
    var pageNum=1;
    var pageSize=3;
    var pageNums=0;

    function init() {
        var param={
            "pageNum":pageNum,
            "pageSize":pageSize
        };
        jQuery.post("user/findAll",param,function (rst) {
          pageNums=rst.pages;
          jQuery("#pages").html(pageNums);
          jQuery("#pageNum").html(pageNum);
          jQuery("#totals").html(rst.total);
          //The table tbody location where the queried data is displayed
            //1. Get the queried data
            var arrs=rst.list;
            var trs='';
            for(var i=0;i<arrs.length;i++)
            {
                //Get the user object corresponding to each row
                var u=arrs[i];
                //Loop once to generate a row of data in the page
                //Use backquotes to define the template
                trs+=`
                 <tr>
                    <td>
                        <input type="checkbox" name="ids"
                            value="${u.userId}">
                    </td>
                    <td>${u.userName}</td>
                    <td>${u.userRealName}</td>
                    <td>${u.userSex==1?'male':'female'}</td>
                    <td>${u.userEmail}</td>
                    <td>
                        <a href="#"> delete</a>
                        <a href="#"> Edit</a>
                    </td>
                </tr>
                `;
            }
            //Add the tr built from the data to the table
            jQuery("#data").html(trs);
            //=======================
            //Set page number
            var nums=rst.navigatepageNums;
            var nav=`
                <ul class="pagination">
                    <li class="page-item">
                        <a href="#" class="page-link"
                            οnclick="pageUtil(${pageNum-1})">previous page</a>
                    </li>
                   `;
                //Cycle through page numbers
                for(var i=0;i<nums.length;i++)
                {
                    nav+=`
                        <li class="page-item ${pageNum==nums[i]?'active':''}">
                            <a href="#" class="page-link"
                                οnclick="pageUtil(${nums[i]})">${nums[i]}</a>
                        </li>
                    `;
                }
                nav+=`
                    <li class="page-item">
                        <a href="#" class="page-link"
                            οnclick="pageUtil(${pageNum+1})">next page</a>
                    </li>
                </ul>
            `;
                jQuery("#right").html(nav);
        })
    }

    //After the page is loaded, execute the init method
    jQuery(function () {
        init();
    });
</script>
(1) Implement paging operation
<script>
    //Complete paging operation
    //Page number to display data
    function pageUtil(num) {
        if(num<=1)
        {
            num=1;
        }
        if(num>=pageNums)
        {
            num=pageNums;
        }
        pageNum=num;
        init();
    }
</script>
② Call paging function
//Add the tr built from the data to the table
jQuery("#data").html(trs);
//=======================
//Set page number
var nums=rst.navigatepageNums;
var nav=`
    <ul class="pagination">
        <li class="page-item">
            <a href="#" class="page-link"
                οnclick="pageUtil(${pageNum-1})">previous page</a>
        </li>
       `;
    //Cycle through page numbers
    for(var i=0;i<nums.length;i++)
    {
        nav+=`
            <li class="page-item ${pageNum==nums[i]?'active':''}">
                <a href="#" class="page-link"
                    οnclick="pageUtil(${nums[i]})">${nums[i]}</a>
            </li>
        `;
    }
    nav+=`
        <li class="page-item">
            <a href="#" class="page-link"
                οnclick="pageUtil(${pageNum+1})">next page</a>
        </li>
    </ul>
`;
    jQuery("#right").html(nav);
- View requested resources