1. Experimental Requirements
(1) Experiment 1
Learn and master the compilation and assembly of executable programs. The learning tasks are as follows:
1) Read, understand and learn the materials "Generating static and dynamic libraries with gcc. pdf" and "Generating and using.Pdf for static libraries. a and. so libraries" faithfully under Linux (Ubuntu).
2) The program code base of the first job is adapted. In addition to the x2x function, another X2Y function is extended to write (self-defined function). The main function code will call x2x and x2y. The three functions are written into 3 separate.c files and compiled into 3.o target files with gcc. The x2x and X2Y target files are generated into 1.a static library file with ar tool.Then link the target file of main function with this static library file using gcc to generate the final executable and record the size of the file.
3) Generate a.so dynamic library file with ar tool for x2x and x2y target files, then link the target file of main function with this dynamic library file with gcc to generate the final executable program, record the size of the file, and compare with the previous one.
(2) Experiment 2
Gcc is not alone in the battle. Please explain the purpose of the software in the GCC compilation toolset and understand the EFF file format. The learning tasks are as follows:
Read, understand, and learn from the materials "Common commands for Linux GCC. pdf" and "Stories behind GCC compilers. pdf" as they are.
(3) Experiment 3
Behind each program is a stack of excellent code libraries. Learn how to program an open CV image library to learn how to complete a comprehensive program design with the help of third-party library functions. "Learn opencv, mom won't worry if you can't program images anymore!".
Practice compiling and installing Opencv3.x, the well-known C/C++ image processing open source software library, under Ubuntu 16/18 system.
1. Write a code test1.cpp to open pictures for special display (see opencv programming reference);
Note the gcc compilation command:
gcc test1.cpp -o test1 `pkg-config --cflags --libs opencv
Explain this compilation command, how does it get the path to the opencv header file, the link lib library file?
2. Practice using the opencv library to write a program that opens the camera to compress video. Refer to example codes 1 and 2 and answer:
1) If you are asked to open a video file on your hard disk to play, how do you modify Line 7 of Sample Code 1?
2) What data structure is Mat in the while loop at line 9 of sample code 1? Why do you have to add a waitKey delay code and delete it?
3) Sample Code 1 code will run continuously in a while loop. If you try to close the image display window with the mouse, you will find that it can not be closed at all. It is very unfriendly to force interruption of the program with keyboard Ctrl+C. How can you improve it?
II. EXPERIMENTAL PROCESS AND RESULTS
Experiment 1
(1) hello Instance Use Library
1. Preparation process
1) Create a directory
mkdir test1
cd test1

2) Source Code
hello.h program:
#ifndef HELLO_H
#define HELLO_H
void hello(const char *name);
#endif//HELLO_H
hello.c program:
#include<stdio.h>
void hello(const char *name)
{
	printf("Hello %s\n",name);
}
main.c program:
#include"hello.h"
int main()
{
	hello("everyone");
	return 0;
}

3) gcc compiled to.o file
gcc -c hello.c

2. Use of static libraries
1) Create static libraries
Creation tool:ar
File Naming Specification: prefix lib with.a file
ar -crv libmyhello.a hello.o

2) Use static libraries in programs
①gcc -o hello main.c -L. -lmyhello

For custom static libraries, main.c can be placed between -L.and -lmyhello, but not after them, or myhello will be prompted not to be defined.
-L.: Represents that the connected library is in the current directory.
②gcc main.c libmyhello.a -o hello

(3) Generate main.o gcc-c main.c, regenerate executable file: gcc-o Hello main.c libmyhello.a

3) Verify the characteristics of static libraries
Running the executable without deleting the static library indicates that the static library is not associated with program execution, and that the static library is connected to the code at program compilation time.
rm libmyhello.a
./hello

3. Use of dynamic libraries
1) Create dynamic libraries
Creation tool: gcc
File Naming Specification: prefix lib with.so file
gcc -shared -fPIC -o libmyhello.so hello.o
-shared:Represents the specified build dynamic link library, not omitted
-fPIC: Represents code compiled as location-independent, not omitted
 In command-o Must not be omitted
When executing this command, the terminal reported a recompile with -fPIC error.
Solution: Recompile command line gcc-fPIC-c hello.c and execute.

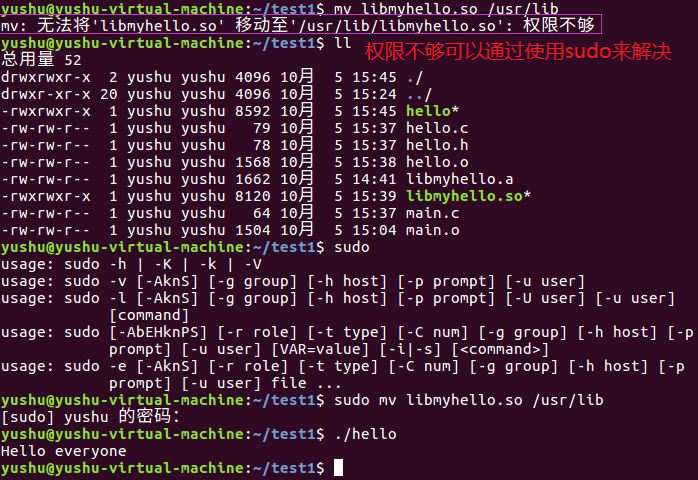
2) Execute dynamic libraries in programs
Gcc-o Hello main.c-L. -lmyhello or GCC main.c libmyhello.so-o hello
Error running executable hello:
 Error Reason: Connect using the dynamic library of the current directory, but at runtime, look for library files in/usr/lib.
Solution: Copy libmyhello.so to directory/usr/lib.
mv libmyhello.so /usr/lib
4. Comparing Static Library with Dynamic Library
gcc Compiled to.o Files: gcc -c hello.c
 Create a static library: ar -crv libmyhello.a hello.o
 Create dynamic libraries: gcc -shared -fPIC -o libmyhello.so hello.o
 Use libraries to generate executables: gcc -o hello main.c -L. -lmyhello
 Execute executable:./hello

When both static and dynamic libraries exist, the program prefers dynamic libraries.
(2) A instance use library
1. Preparation process
1) Create a directory
mkdir test2
cd test2
2) Source Code
A1.c Program:
#include<stdio.h>
void print1(int arg)
{
	printf("A1 print arg:%d\n",arg);
}
A2.c Program:
#include<stdio.h>
void print2(char *arg)
{
	printf("A2 printf arg:%s\n",arg);
}
A.h Program:
#ifndef A_H
#define A_H
void print1(int);
void print2(char *);
#endif
test.c program:
#include<stdio.h>
#include"A.h"
int main()
{
	print1(1);
	print2("test");
	exit(0);
}
3) Operation steps

2. Use of static libraries
gcc -c A1.c A2.c //gcc compiled to.o file
ar crv libafile.a A1.o A2.o //Create Static Library
gcc -o test test.c libafile.a //Use static libraries in programs
./test
Operation steps:

Solutions for errors: Modify exit(0) in test.c to return 0.
3. Use of dynamic libraries
gcc -c -fPIC A1.c A2.c  //gcc compiled to.o file
gcc -shared *.o -o libsofile.so //Create dynamic libraries
gcc -o test test.c libsofile.so //Executing dynamic libraries in programs
./test
ldd test  //View links
sudo cp libsofile.so /usr/lib  //Copy the corresponding.so file to the corresponding path
./test
Operation steps:

You can use the corresponding library file directly with GCC - O test.c - L. -Iname.
-L .: Indicates that you can define your own path in the current directory path,Even if used-Lpath That's it.
-Iname: name: Name of corresponding library file(Remove lib),If used libafile.a,be name by afile;If used libsofile.so,be name by sofile.
(3) x2 instance use library
1. Preparation process
1) Source Code
sub1.c program:
float x2x(int a,int b)
{
	float c=0;
	c=a+b;
	return c;
}
sub2.c program:
float x2y(int a,int b)
{
	float c=0;
	c=a/b;
	return c;
}
Program sub.h:
#ifndef SUB_H
#define SUB_H
float x2x(int a,int b);
float x2y(int a,int b);
#endif
main.c program:
#include<stdio.h>
#include"sub.h"
void main()
{
	int a,b;
	printf("Please input the value of a:");
	scanf("%d",&a);
	printf("Please input the value of b:");
	scanf("%d",&b);
	printf("a+b=%.2f\n",x2x(a,b));
	printf("a/b=%.2f\n",x2y(a,b));
}
Generate.o file: gcc-c sub1.c sub2.c
2) Operation steps
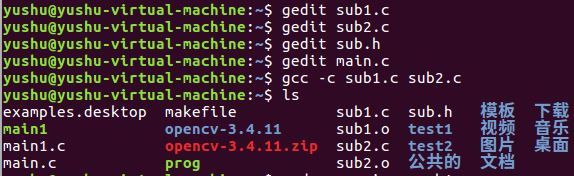
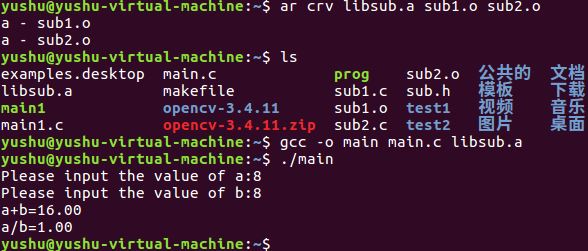
2. Use of static libraries
ar crv libsub.a sub1.o sub2.o  //Create Static Library
gcc -o main main.c libsub.a    //Use static libraries in programs
./main
Operation steps:
3. Use of dynamic libraries
gcc -shared -fPIC -o libsub.so sub1.o sub2.o //Create dynamic libraries
gcc -o main main.c libsub.so          //Executing dynamic libraries in programs
./main
sudo mv libsub.so /usr/lib           //Copy libsub.so to directory/usr/lib
gcc -shared -fPIC -o libsub.so sub1.o sub2.o//Create dynamic libraries
gcc -o main main.c libsub.so         //Executing dynamic libraries in programs
./main
Operation steps:

4. Comparing Static Library with Dynamic Library
ll //command

Comparison results: Static libraries are much smaller than dynamic libraries, and the resulting executable file sizes differ slightly.
Experiment 2
Common commands for Linux GCC
1. Source Code
test.c program:
#include <stdio.h>
int main(void)
{
  printf("Hello World!\n");
  return 0;
}
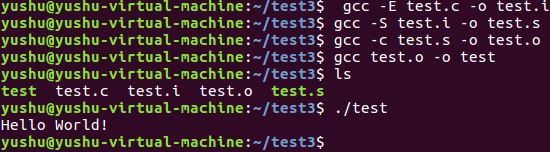
2. Compilation process
The one-step compilation instructions are: GCC test.c-o test
1) Preprocessing
Gcc-E test.c-o test.i or gcc-E test.c
2) Compile
gcc -S test.i -o test.s
3) Compilation
gcc -c test.s -o test.o
4) Connection
gcc test.o -o test
(2) The story behind the GCC compiler
1. Preparations
1) Create a directory
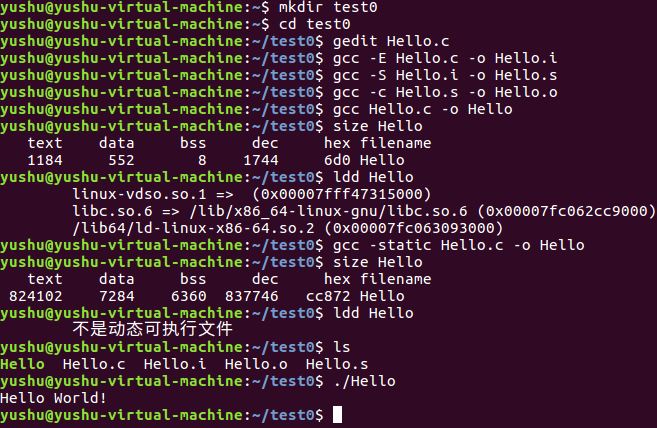
mkdir test0
cd test0
2) Source Code
Hello.c program:
#include <stdio.h>
 int main(void)
 {
 printf("Hello World! \n");
 return 0;
 }
2. Compilation process
1) Preprocessing
1. Delete all #define s, expand all macro definitions, and handle all conditional preediting
Translate instructions, such as #if #ifdef #elif #else #endif, etc.
(2) Processing #include precompiled instructions inserts the included files into the location of the precompiled instructions.
(3) Delete all comments'//'and'/* */'.
(4) Add line numbers and file identifiers for debugging and compilation error warning line numbers at compile time.
Keep all #pragma compiler instructions, which are required for subsequent compilation.
gcc -E Hello.c -o Hello.i
2) Compile
The compilation process consists of a series of lexical analysis, grammatical analysis, semantic analysis and optimization of the preprocessed file to generate the corresponding assembly code.
gcc -S Hello.i -o Hello.s
3) Compilation
Assembler procedure calls process assembly code to generate instructions that the processor can recognize and save in a target file with a suffix of.o. Since almost every assembly statement corresponds to a processor instruction, assembly is simpler than the compilation process by calling the assembler as in Binutils Translate one by one according to the comparison table of assembly instructions and processor instructions.
When a program consists of multiple source code files, each file must be assembled to generate a.o target file before proceeding to the next link. Note: The target file is already part of the final program, but it cannot be executed until it is linked.
gcc -c Hello.s -o Hello.o
Direct callable as Assemble:`as -c hello.s -o hello.o`
Use Binutils In as take hello.s The file assembly generates the target file,
(hello.o Target file is ELF Format redirectable file)
4) Links
(1) Static linking refers to adding static libraries directly to an executable file at the compilation stage so that it can be executed
Files are larger. A linker copies the code of a function from its location (in a different target file or static link library) to the final executable. To create an executable, the main tasks that a linker must accomplish are symbol parsing (associating the definition and reference of symbols in the target file) and repositioning.(Correspond the symbol definition to the memory address and modify all references to the symbol).
(2) Dynamic linking means that only some descriptive information is added during the link phase, and the corresponding dynamic libraries are loaded into memory from the system when the program is executed.
In Linux systems, the order of dynamic library search paths when gcc compiles links is usually: first, find the path specified by the parameter-L of the gcc command; then address the path specified by the environment variable LIBRARY_PATH; and then find the default path/lib, /usr/lib, /usr/local/lib.
In Linux systems, the order of dynamic library search paths when executing binary files is usually: first, the dynamic library search path specified when compiling the target code is searched; then, the path specified by the environment variable LD_LIBRARY_PATH is addressed; then, the dynamic library search path specified in the configuration file/etc/ld.so.conf; and then, the default path/lib, /usr/lib.
On Linux systems, you can view a shared library on which an executable depends using the ldd command.
/**************/
gcc Hello.c -o Hello //Link using dynamic libraries
size Hello //View size using size
ldd Hello
/*************/
gcc -static Hello.c -o Hello //Link using static libraries
size Hello //View size using size
ldd Hello
The final file generated after the linker is linked is ELF Format executable, one ELF Executable files are often linked to different segments, such as.text,.data,.rodata,.bss Equal Segment.
3. Operational steps
4. Analyzing ELF files
1) Segment of ELF file
ELF files are located between the ELF Header and the Selection Header Table.
A typical ELF The file contains the following sections:
.text: Instruction code snippet for compiled programs.
.rodata: ro representative read only,Read-only data (such as constants) const).
.data: Initialized C Program global variables and static local variables.
.bss: Uninitialized C Program global variables and static local variables.
.debug: Debug the symbol table, and the debugger uses this information to help debug.
View information about its individual section s:
readelf -S Hello

2) Disassembly ELF
Since ELF files cannot be opened as plain text files, if you want to view an ELF package directly
Contains instructions and data that require disassembly.
1. Disassemble as follows:
objdump -D Hello
(2) Disassemble and mix the C language source code:
gcc -o Hello -g Hello.c //To add the -g option
objdump -S Hello
Experiment 3
(1) Install OpenCV
1. Installation package
1) Download OpenCV 3.4.11 packages
Domestic Quick Download Address:https://www.bzblog.online/wordpress/index.php/2020/03/09/opencvdownload/
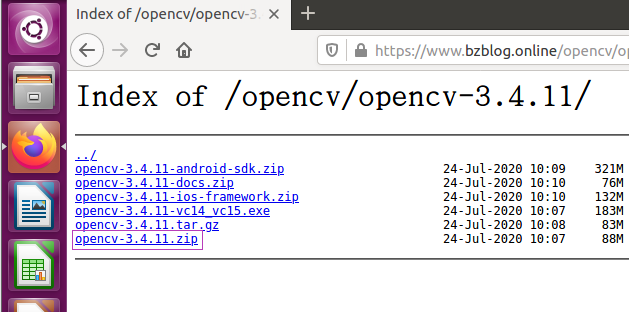
2) Decompression package
Copy opencv-3.4.11.zip into the home folder and unzip it.
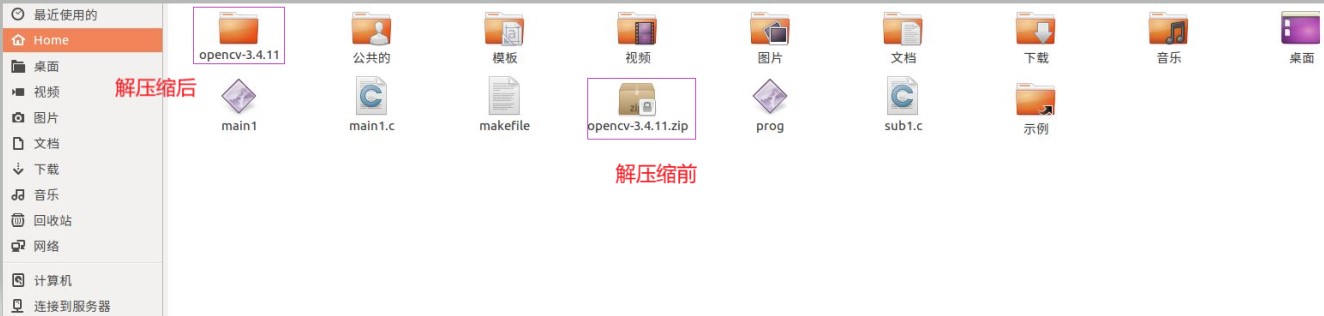
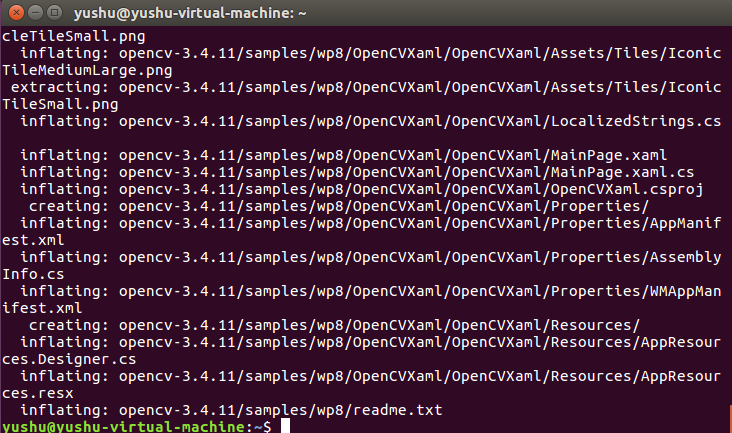
Enter command line mode:
unzip opencv-3.4.1.zip
3) Install opencv using cmake
Enter the unzipped folder: opencv-3.4.11
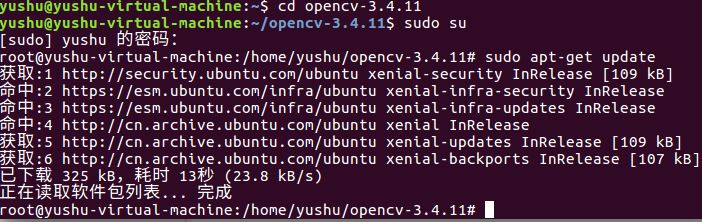
cd opencv-3.4.11

Enter the root user and update:
sudo su
sudo apt-get update
Execute the command to install cmake:
sudo apt-get install cmake

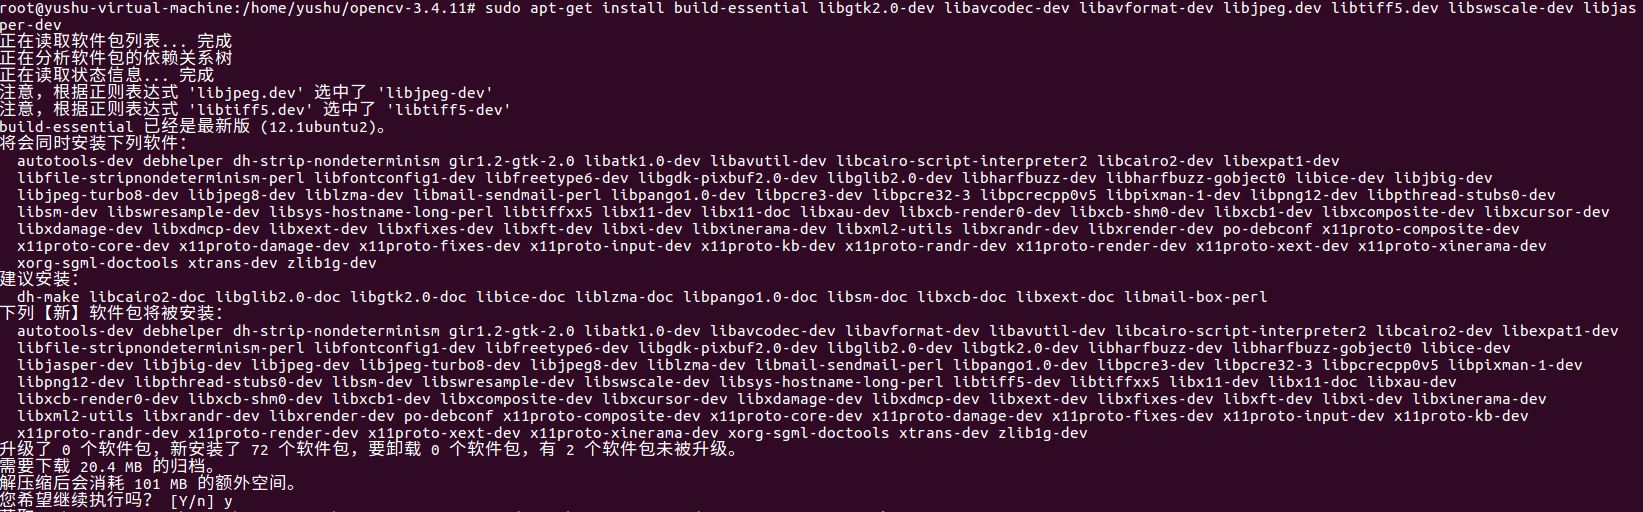
Copy commands to install dependent libraries:
sudo apt-get install build-essential libgtk2.0-dev libavcodec-dev libavformat-dev libjpeg.dev libtiff5.dev libswscale-dev libjasper-dev
 Create the build folder and enter:
mkdir build
cd build

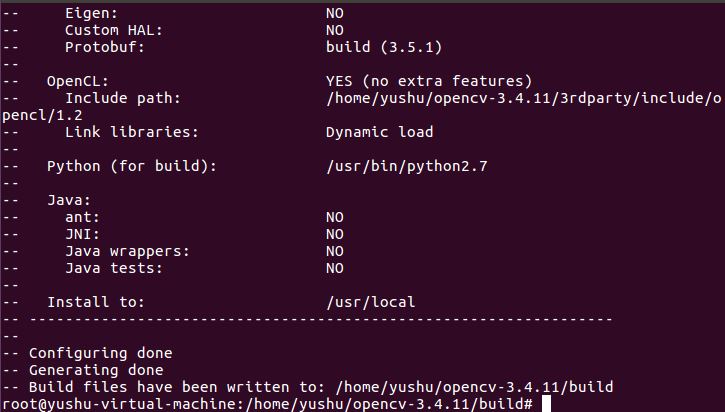
Compile parameters using cmake:
cmake -D CMAKE_BUILD_TYPE=Release -D CMAKE_INSTALL_PREFIX=/usr/local ..
4) Create a compilation using make
Under the build folder:
sudo make
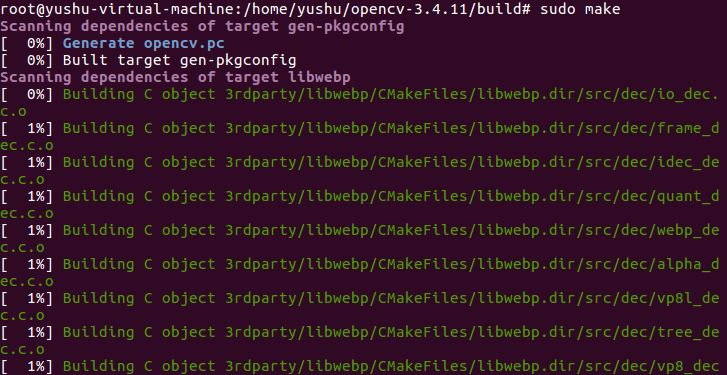
Compilation complete:
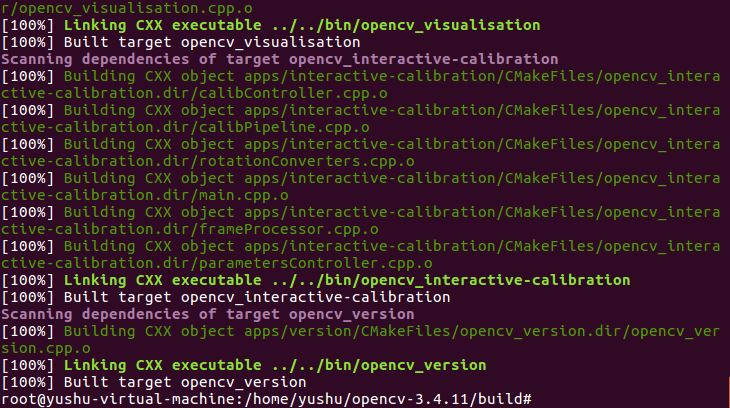
5) Installation
sudo make install
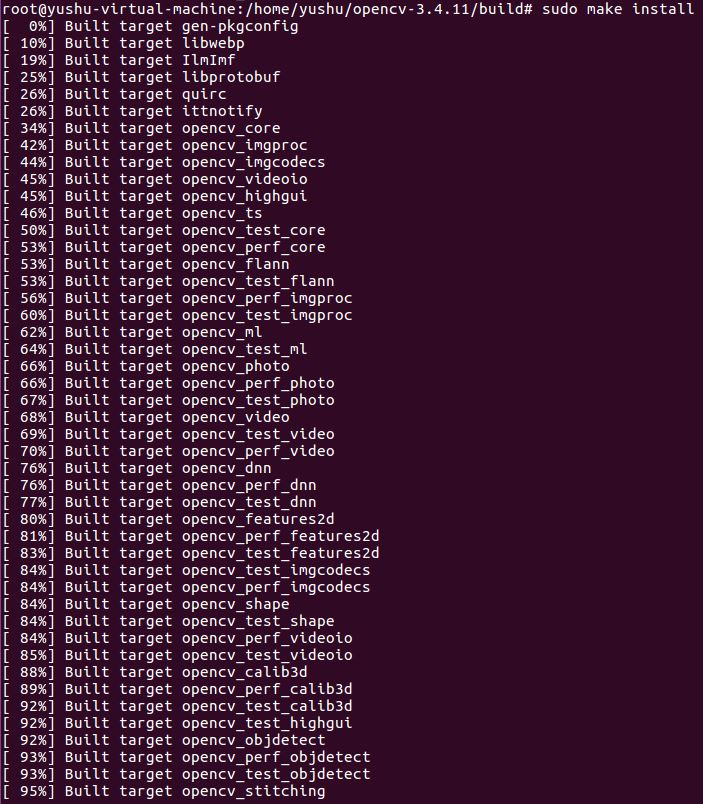
There were no errors during the installation, that is, the installation is complete.
2. Configuring the environment
Modify the opencv.conf file, the open file is empty, add the installation path of the opencv library: /usr/local/lib
sudo gedit /etc/ld.so.conf.d/opencv.conf

After saving, you will see a warning message:
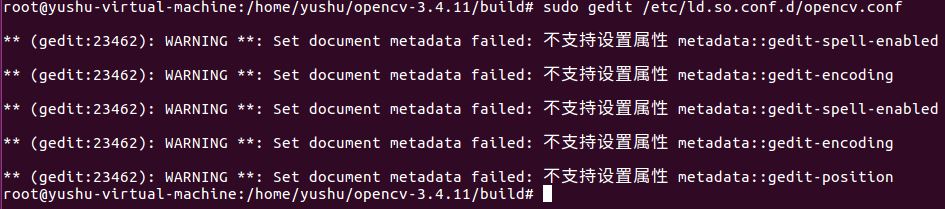
Update System Shared Link Library:
sudo ldconfig

Configure bash, modify the bash.bashrc file:
sudo gedit /etc/bash.bashrc
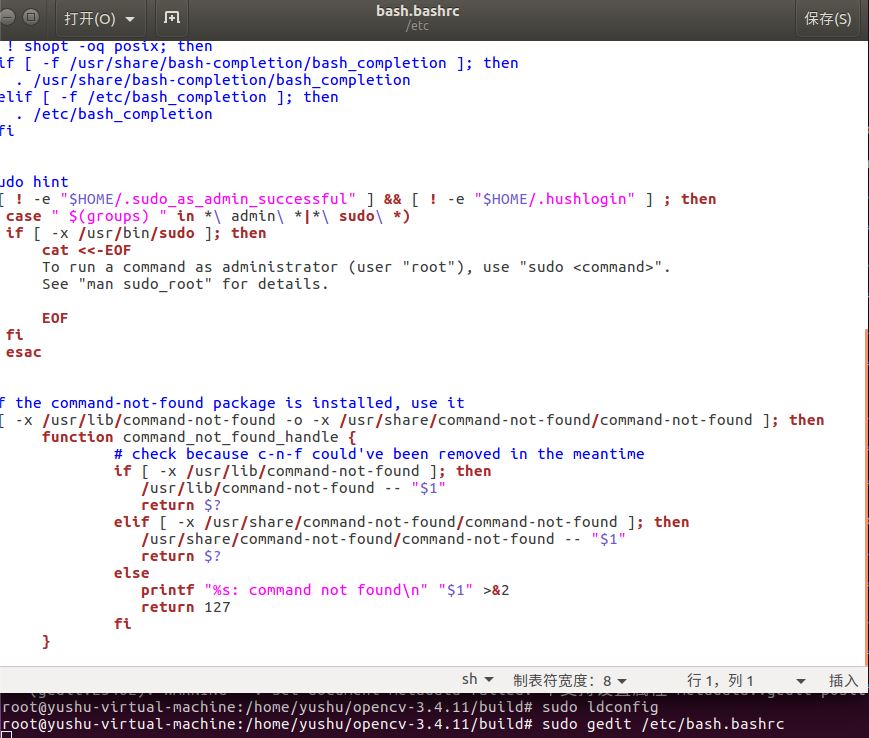
Add at the end of the file:
PKG_CONFIG_PATH=$PKG_CONFIG_PATH:/usr/local/lib/pkgconfig
export PKG_CONFIG_PATH

Save the exit and execute the command to make the configuration work:
source /etc/bash.bashrc

To update:
sudo updatedb

View version information for opencv:
pkg-config --modversion opencv

Installation was successful.
(2) Picture display
1. Write code
1) Create a new folder mytest under opencv-3.4.11
cd opencv-3.4.11
mkdir mytest

2) Create test1.cpp and enter programming
touch test1.cpp
sudo gedit  /test.cpp

3) test1.cpp program
#include <opencv2/highgui.hpp>
#include <opencv2/opencv.hpp>
using namespace cv;
using namespace std;
int main(int argc, char** argv)
{
	CvPoint center;
    double scale = -3;

	IplImage* image = cvLoadImage("Q.jpg");
	argc == 2? cvLoadImage(argv[1]) : 0;

	cvShowImage("Image", image);


	if (!image) return -1; 	center = cvPoint(image->width / 2, image->height / 2);
	for (int i = 0;i<image->height;i++)
		for (int j = 0;j<image->width;j++) {
			double dx = (double)(j - center.x) / center.x;
			double dy = (double)(i - center.y) / center.y;
			double weight = exp((dx*dx + dy*dy)*scale);
			uchar* ptr = &CV_IMAGE_ELEM(image, uchar, i, j * 3);
			ptr[0] = cvRound(ptr[0] * weight);
			ptr[1] = cvRound(ptr[1] * weight);
			ptr[2] = cvRound(ptr[2] * weight);
		}

	Mat src;Mat dst;
	src = cvarrToMat(image);
	cv::imwrite("test.png", src);

    cvNamedWindow("test",1);  	imshow("test", src);
	 cvWaitKey();
	 return 0;
}
2. Compile Files
Execute command:
gcc test1.cpp -o test1 `pkg-config --cflags --libs opencv`
gcc Compiler: gcc + file name + -o + Output File Stream Name +` Support packages

Compilation errors require the interface module to be compiled with a C++ compiler, changing gcc to g++.
g++ test1.cpp -o test1 `pkg-config --cflags --libs opencv`

Prepare a picture in the same folder with the file name Q.jpg

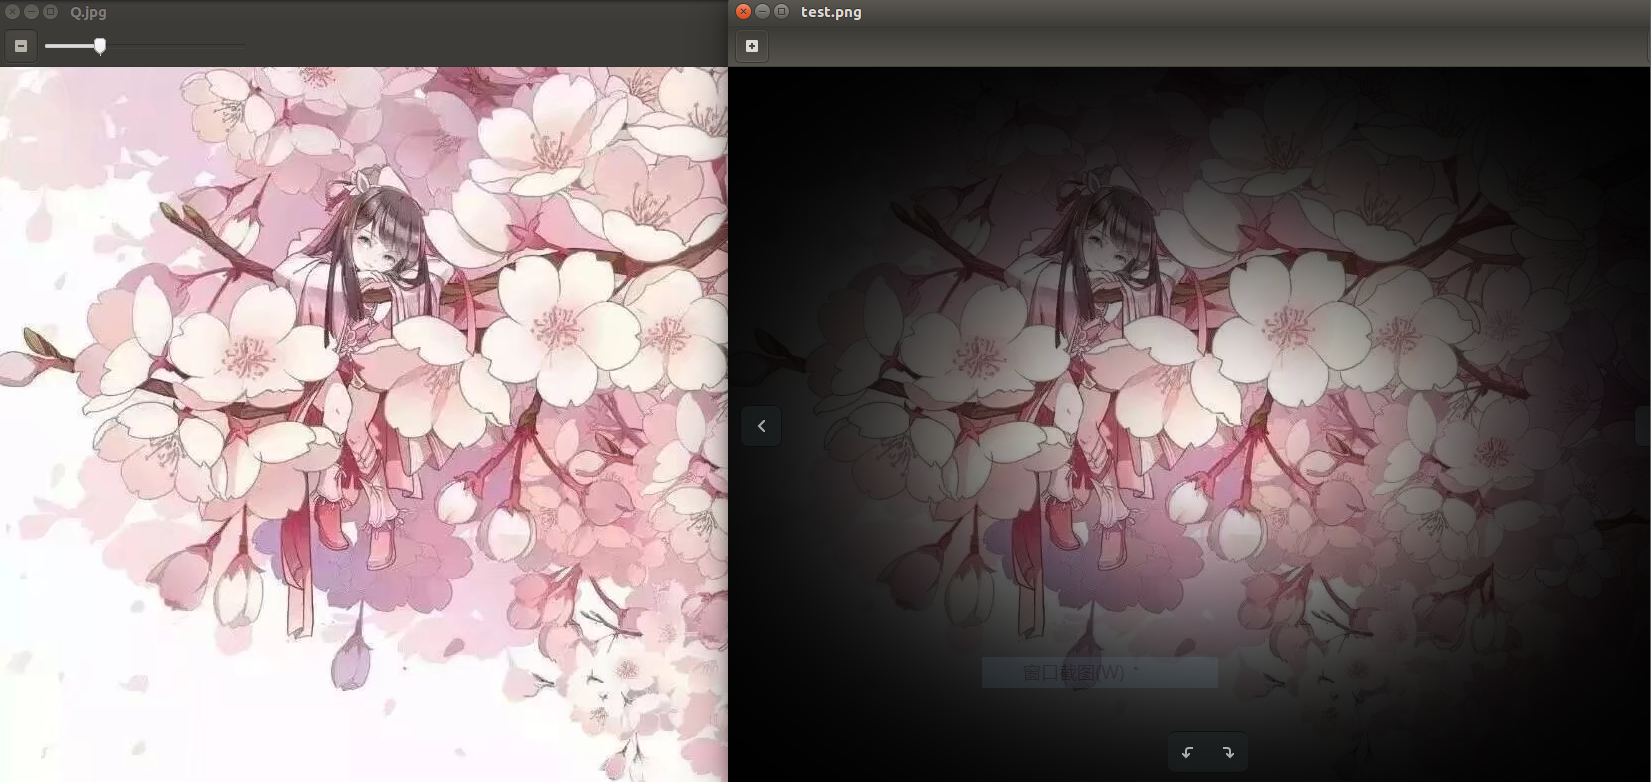
3. Output Results
Execute command:
./test1
Generate a test.png from Q.jpg:

The effect is different:
The compilation process obtains the path to the opencv header file, the link lib library file:
If the compilation does not specify a path, the header file looks at the gcc environment variables and looks for the system default directory: /usr/include, /usr/local/include, links the Lib library gcc environment variables and finds the default path: /lib, /usr/lib, /usr/local/lib.
(3) Compressed video
1. Virtual Machine Acquires Camera Rights
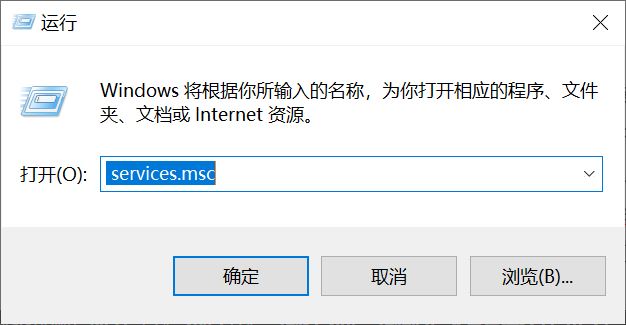
1) Use the shortcut key Win + R, enter services.msc, and return.
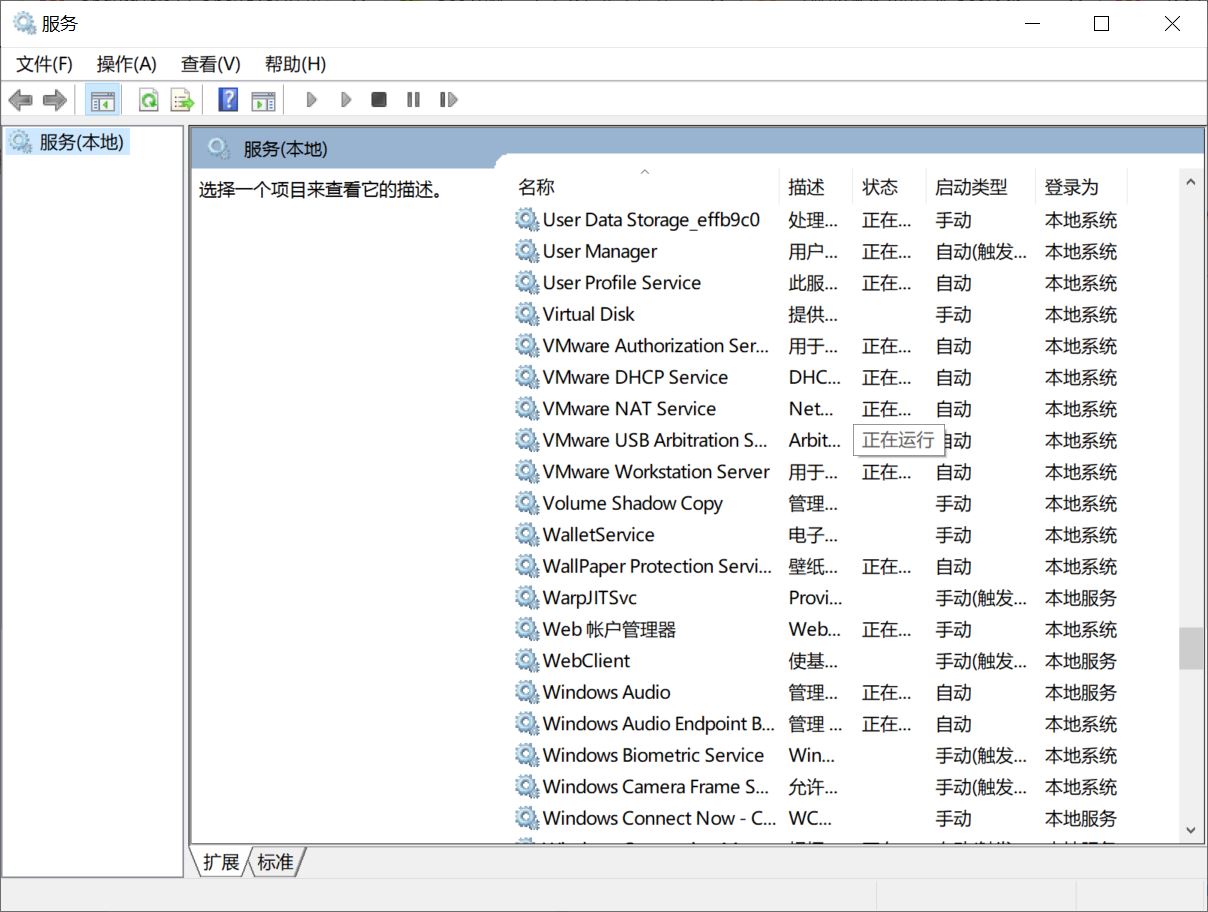
2) Find the VMware USB Arbitration Service and make sure it is started.
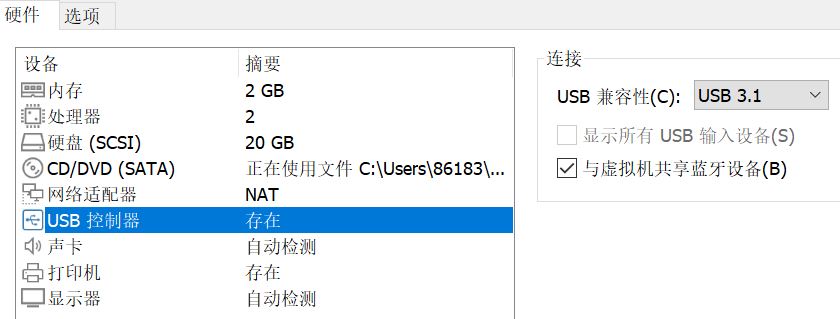
3) Click on "Virtual Machine", then click on "Settings (S)...".
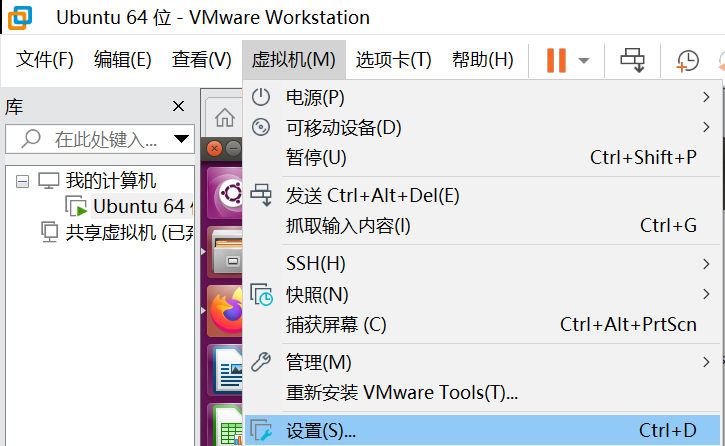
4) Select USB Controller, set USB Compatibility to USB 3.1, and click OK.
5) Select "Virtual Machine" and then "Removable Device".

Because my computer does not have a built-in camera, I can only connect an external camera.
2. Play video
1) Create test2.cpp file
gedit test2.cpp

2) test2.cpp source
#include <opencv2/opencv.hpp>
using namespace cv;

int main()
{
	//Read video from camera
	VideoCapture capture("K.mp4");
	//Cycle through each frame
	while(1){
		Mat frame;//Define a Mat variable to store images for each frame
		capture >> frame;//Read Current Frame
		if(frame.empty())//Play finished, exit
			break;
		imshow("Read Video Frame",frame);//Show current frame
		waitKey(30);//Cover up 30ms
	}
	return 0;
}
Prepare a video K.mp4:

3) Compile test2.cpp file
g++ test2.cpp -o test2 `pkg-config --cflags --libs opencv`

4) Output results
./test2


5) Problem Analysis
(1) If you need to open a video file on your hard disk to play, how do you modify Line 7 of the sample code?
Make the sample code in line 1, line 7 VideoCapture capture(0)Modify to VideoCapture capture("/home/opencv-3.4.11/K.mp4"),That is, change 0 to the name of the video you want to play and the path it stores.

VideoCapture capture(0),The latter parameter is set to 0, which means that the video is read from the camera and each frame is displayed circularly; if set to the file name of a video, for example: K.mp4 ,The video is read and looped through each frame.
(2) What data structure is Mat in the while loop at line 9 of the sample code? Why do you have to add a waitKey delay code and delete it?
while In the loop Mat The data structure is actually a dot matrix, corresponding to each point on the image, each image is composed of an infinite number of points, that is Mat Is an image matrix.

waitKey()The parameter units of the function are ms The function of milliseconds is to refresh the image continuously. Without this, the real-time display of the picture can not be achieved, that is, the change of the picture can not be seen.
(3) The sample code will run continuously in the while loop. If you try to close the image display window with the mouse, you will find that you can't close it at all. It is very unfriendly to force interruption of the program with keyboard Ctrl+C. How can you improve it?
Add a judgment to close.
3. Recording videos
1) Create test3.cpp file
gedit test3.cpp

2) test3.cpp source
/*********************************************************************
Turn on the computer camera, space controls video recording, ESC exits and saves video RecordVideo.avi
*********************************************************************/
#include<iostream>
#include <opencv2/opencv.hpp>
#include<opencv2/core/core.hpp>
#include<opencv2/highgui/highgui.hpp>
using namespace cv;
using namespace std;

int main()
{
	//Turn on the computer camera
	VideoCapture cap(0);
	if (!cap.isOpened())
	{
		cout << "error" << endl;
		waitKey(0);
		return 0;
	}

	//Get the resolution of the cap
	int w = static_cast<int>(cap.get(CV_CAP_PROP_FRAME_WIDTH));
	int h = static_cast<int>(cap.get(CV_CAP_PROP_FRAME_HEIGHT));
	Size videoSize(w, h);
	VideoWriter writer("RecordVideo.avi", CV_FOURCC('M', 'J', 'P', 'G'), 25, videoSize);

	Mat frame;
	int key;//Record keyboard keys
	char startOrStop = 1;//0Start recording video; 1End recording video
	char flag = 0;//Recording Flag 0 - Not Recording; 1 - Recording

	while (1)
	{
		cap >> frame;
		key = waitKey(100);
		if (key == 32)//Press the space to start recording and pause recording to switch back and forth
		{
			startOrStop = 1 - startOrStop;
			if (startOrStop == 0)
			{
				flag = 1;
			}
		}
		if (key == 27)//Press ESC to exit the whole program and save the video file to disk
		{
			break;
		}

		if (startOrStop == 0 && flag==1)
		{
			writer << frame;
			cout << "recording" << endl;
		}
		else if (startOrStop == 1)
		{
			flag = 0;
			cout << "end recording" << endl;

		}
		imshow("picture", frame);
	}
	cap.release();
	writer.release();
	destroyAllWindows();
	return 0;
}
3) Compile test3.cpp file
g++ test3.cpp -o test3 `pkg-config --cflags --libs opencv`

4) Output results
./test3
An.avi file is generated and frames are generated over and over again.

When the ESC key is pressed, the video capture screen turns off.
3. EXPERIMENTAL SUMMARY
During the experiment in Title 1, I learned how to skillfully generate static and dynamic libraries by using gcc to generate static and dynamic libraries. a and dynamic libraries. so and their comparisons. Although there were some problems in the process, they were quickly solved by querying the data. I did not encounter any problems during the experiment in Title 2, butIt was an experiment in topic 3 - during the process of installing OpenCV under Ubuntu, the steps were too cumbersome and difficult to install. Especially during video recording, I found that there was no built-in camera in my computer, and finally an external camera was connected to complete the experiment. But for OpenCVUsing it, I found it interesting through the learning of picture display and compressed video.
4. References
1. The story behind the GCC compiler. pdf
2. Common commands for Linux GCC.pdf
3. Generating static and dynamic libraries with gcc.pdf
4. Generation and Use of Static Library.a and.so Library Files.pdf
5. Week 4 Embedded System Operations - opencv Programming Reference. docx
6,https://cungudafa.blog.csdn.net/article/details/84451066([Embedded] Windows10&Ubantu16.04&Raspberry Pie 3B+Install opencv Tutorial)
7,https://blog.csdn.net/ssj925319/article/details/109231145(Example of OpenCV3.4.11 installation and use under Ubuntu 18.04)
8,https://blog.csdn.net/qq_43279579/article/details/109026927(gcc generates static libraries.a and dynamic libraries.so)
9,https://blog.csdn.net/qq_43279579/article/details/109289755(opencv on Ubuntu - related use of camera)