notes preceding the text of a book or following the title of an article
——Holding the sword in the end of the world, starting from your little accumulation, you must strive for perfection everywhere you reach, that is, tossing every day.
Important news
This article will cover
1. Use dio to send basic get requests
2. Use dio to send get request parameters
3. Parsing response json data
1 Introduction
dio is used to access the network framework in the cross platform development of flutter. When using it, we first introduce dependency
dependencies:
 dio: 3.0.9
You can also visit Domestic pub warehouse To see the latest version of dio.
General add dependencies are as follows
dependencies:
  dio: ^3.0.9
The difference between the two writing methods is that there will be a small version of automatic upgrade every time the shuttle pub get is added. Without this symbol, there will be no automatic small upgrade
2 Dio get request
2.1 DIO get request has no parameters
  //get request has no parameters
  void getRequestFunction1() async {
    ///Create Dio object
    Dio dio = new Dio();
    ///Request address to get user list
    String url = "http://192.168.0.102:8080/getUserList";
    ///Initiate get request
    Response response = await dio.get(url);
    ///Response data
    var data = response.data;

    setState(() {
      result = data.toString();
    });
  }
Data response results
{
    "code": 200,
    "data": [
        {
            "id": 3,
            "userName": "Tester",
            "realName": "Zhang San",
            "age": 22
        }
    ],
    "message": "Request succeeded"
}
Breakpoint debugging is as follows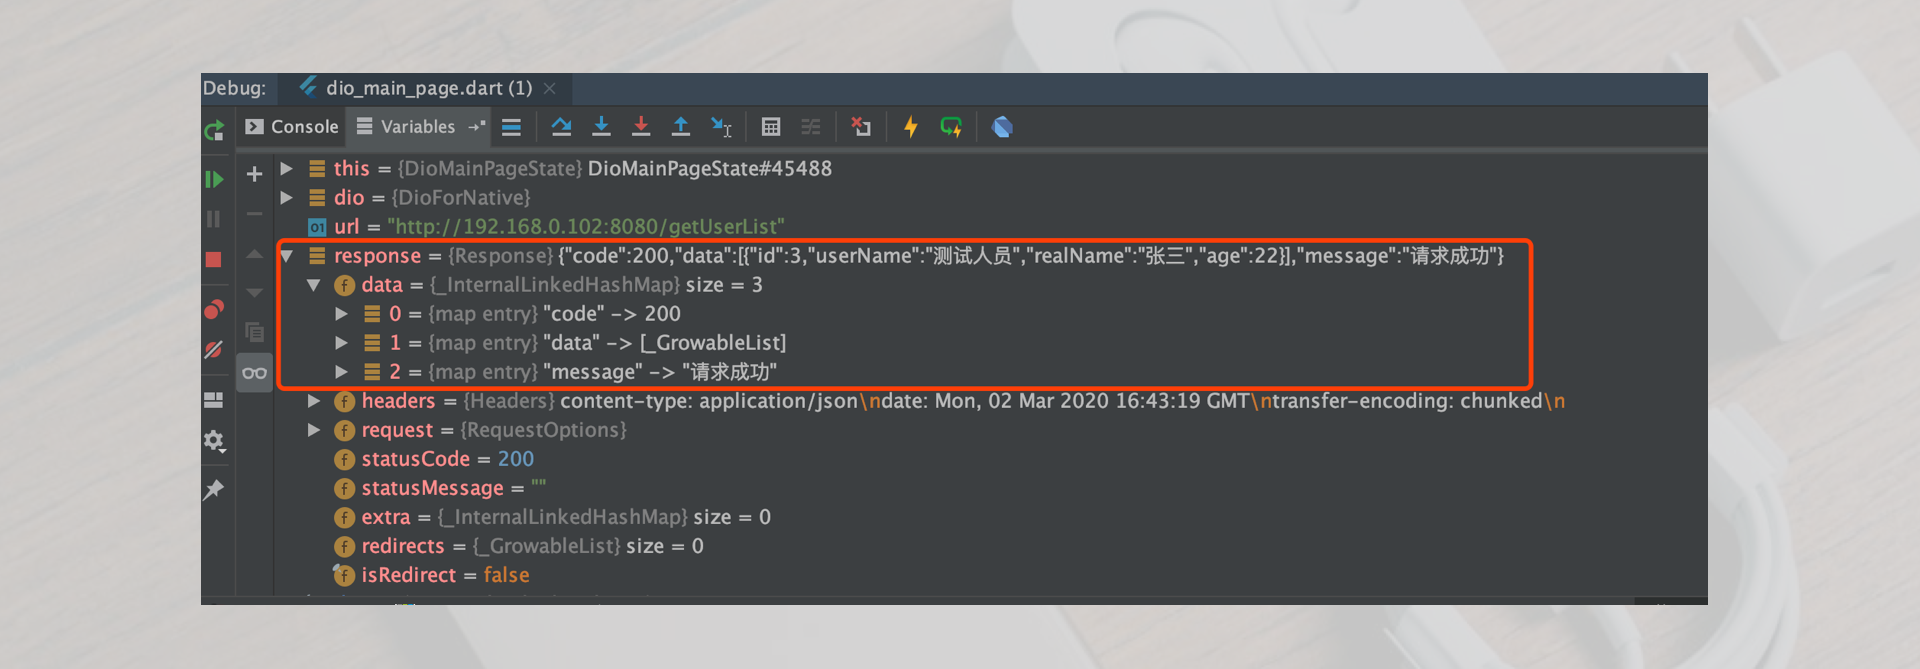
2.2 DIO get request has parameters
  ///get request has parameters
  ///Get user information according to user ID
  void getRequestFunction2() async {
    ///User id
    int userId =3;
    ///Create dio
    Dio dio = new Dio();
    ///Request address
    ///Parameter transfer mode 1
    String url = "http://192.168.0.102:8080/getUser/$userId";
    ///Parameter transfer mode 2
    String url2 = "http://192.168.0.102:8080/getUser?userId=$userId";
    ///Parameter transfer mode 3
    String url3 = "http://192.168.0.102:8080/getUser";

    Map<String,dynamic> map = Map();
    map["userId"]= userId;
    ///Initiate get request
    Response response = await dio.get(url3,queryParameters: map);

    ///Response data
    Map<String,dynamic> data = response.data;
    ///Resolve response data to UserBean
    UserBean userBean = UserBean.fromJson(data);
  }

}
In the above code, parameter passing method 1 and 2 are spliced in the request link, and request method 3 is to put the parameters in a map, and then configure the parameters through Dio's queryParameters. The data structure returned above is
{
    "code": 200,
    "data": {
        "id": 3,
        "userName": "Tester",
        "realName": "Zhang San",
        "age": 22
    },
    "message": "Request succeeded"
}
breakpoint debugging 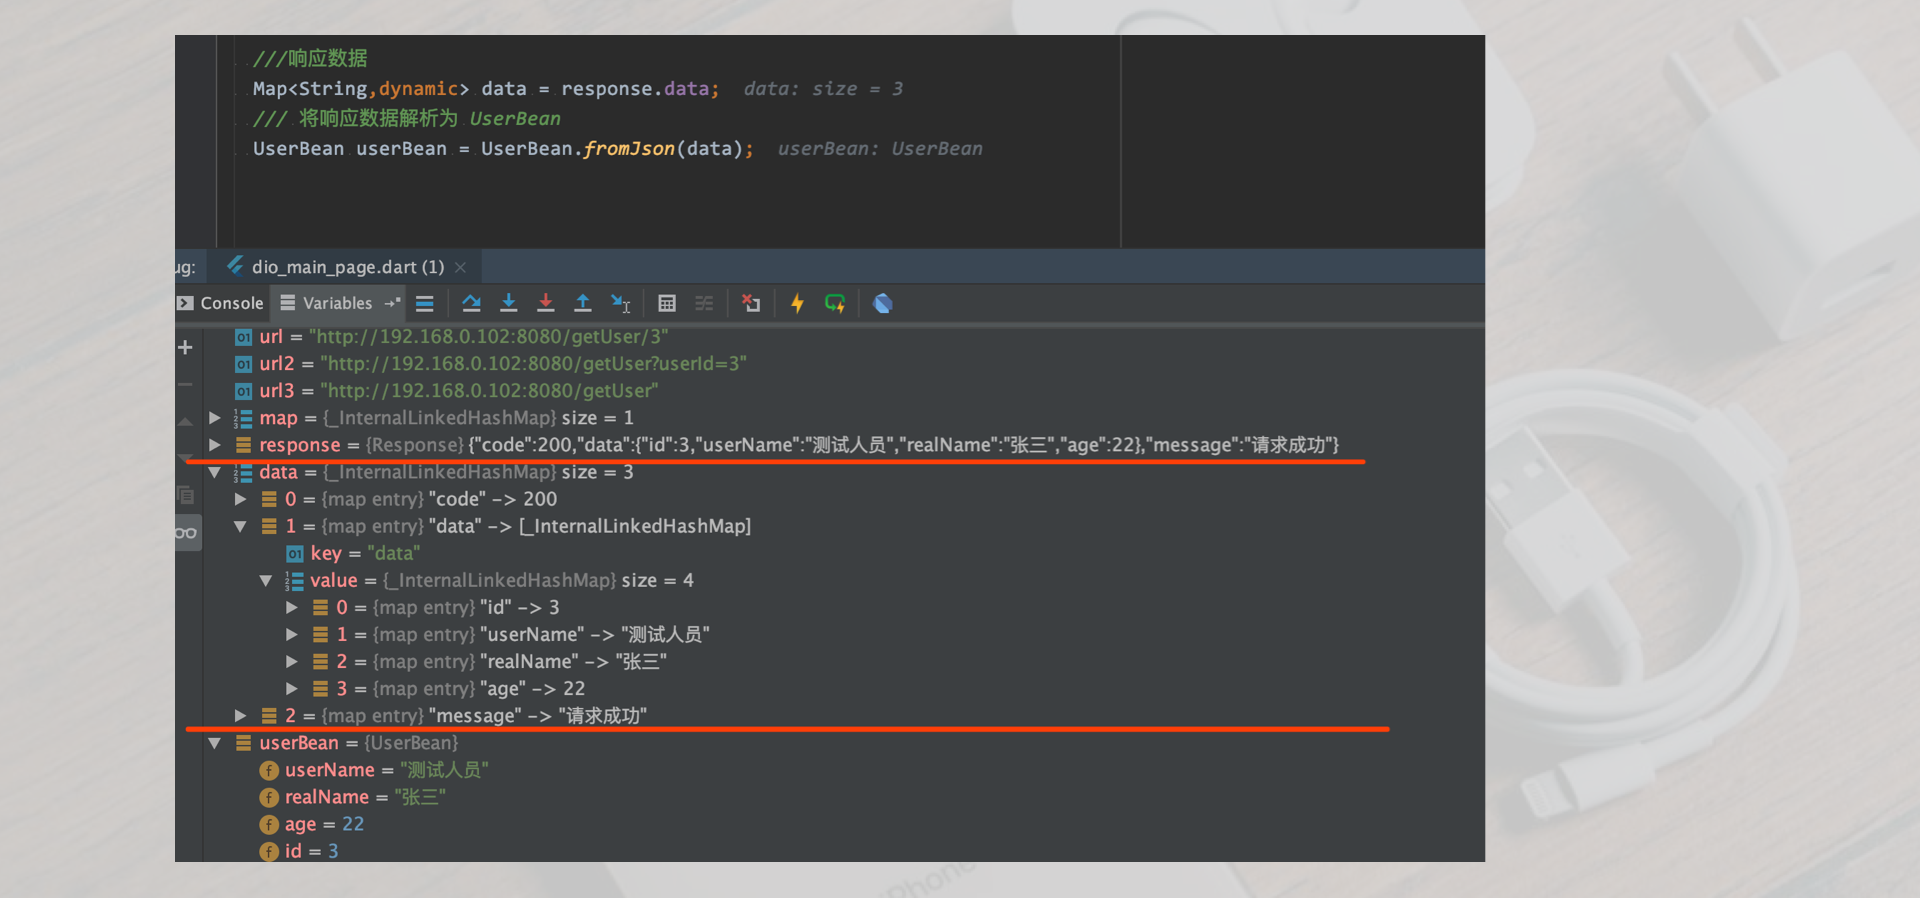
3 JSON data analysis
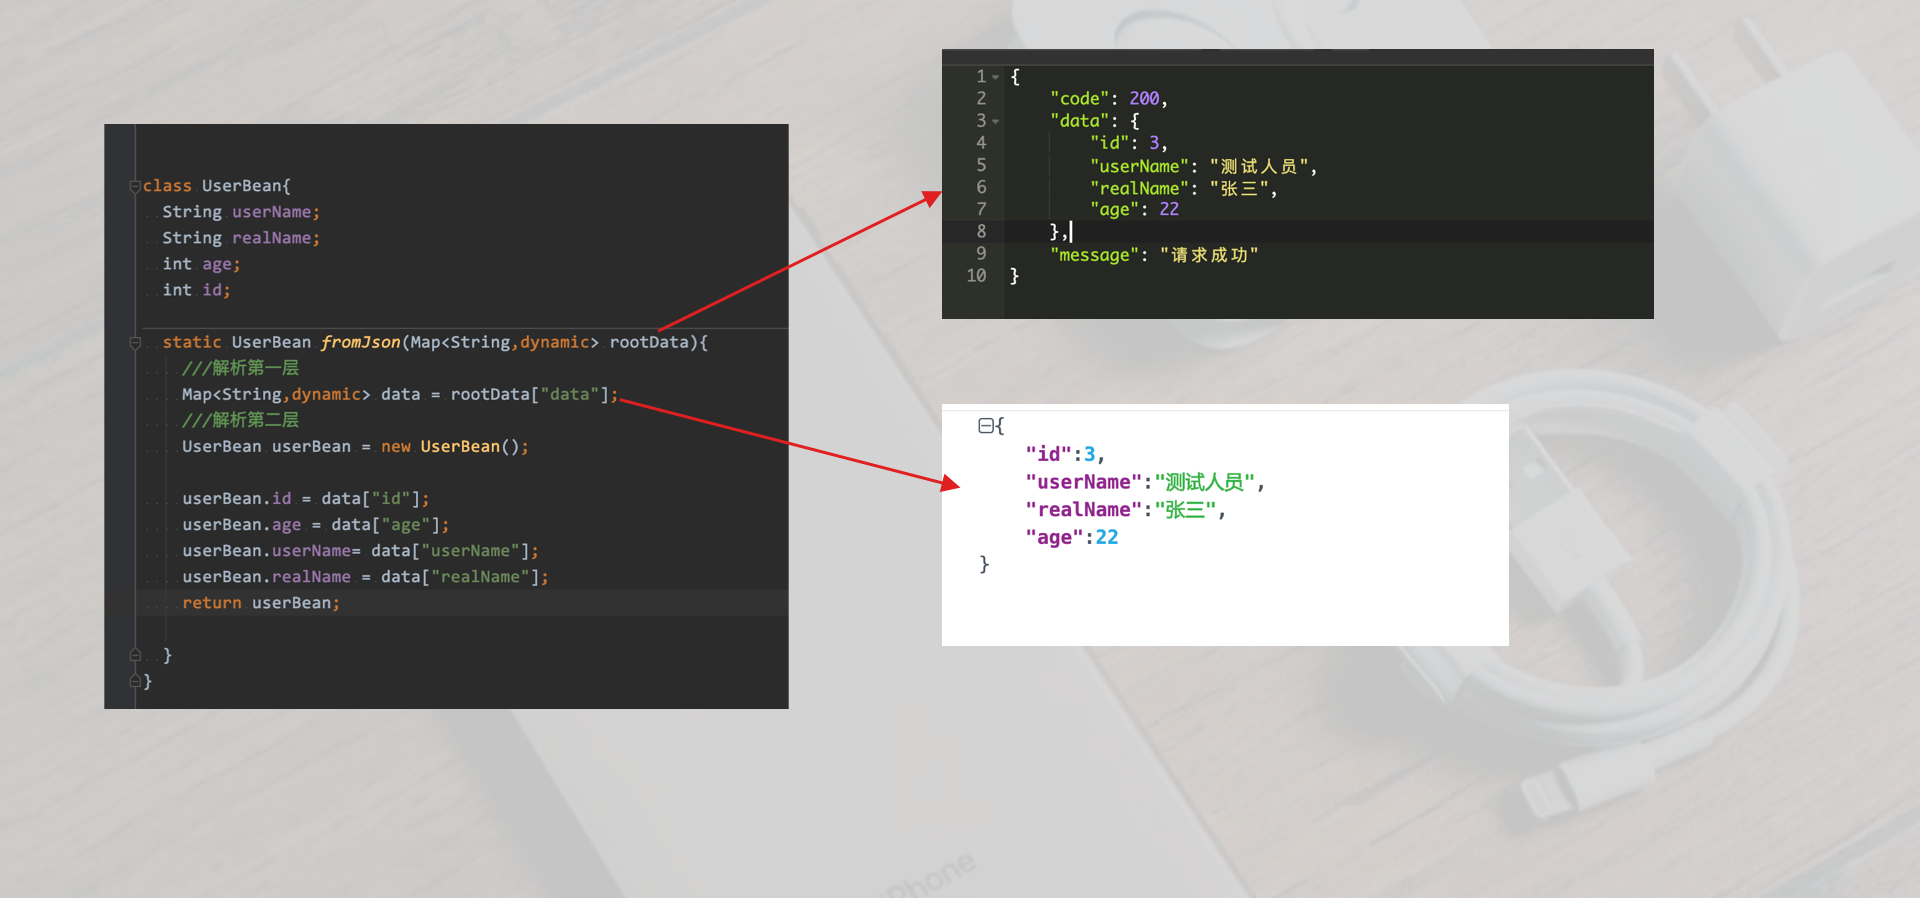
For the data model UserBean object used here
class UserBean{
  String userName;
  String realName;
  int age;
  int id;

  static UserBean fromJson(Map<String,dynamic> rootData){
    ///Analysis of the first layer
    Map<String,dynamic> data = rootData["data"];
    ///Analysis of the second layer
    UserBean userBean = new UserBean();

    userBean.id = data["id"];
    userBean.age = data["age"];
    userBean.userName= data["userName"];
    userBean.realName = data["realName"];
    return userBean;

  }
}
For data analysis in UserBean, see the figure below

complete