The way of Spring learning -- Annotation development
1, Introduce related packages and constraints
After spring 4, to use annotation form, you must introduce aop package
Here we can find the related packages in maven warehouse.
In the configuration file, you also need to introduce a context constraint.
<beans xmlns="http://www.springframework.org/schema/beans"
       xmlns:xsi="http://www.w3.org/2001/XMLSchema-instance"
       xmlns:context="http://www.springframework.org/schema/context"
       xsi:schemaLocation="http://www.springframework.org/schema/beans
        http://www.springframework.org/schema/beans/spring-beans.xsd
        http://www.springframework.org/schema/context
        http://www.springframework.org/schema/context/spring-context.xsd">
2, Bean implementation
We used to use bean tags for bean injection, but in actual development, there are more cases using annotations.
First, we need to configure in Bean which packages to scan for annotations.
<context:component-scan base-package="com.zanglili"/>
Here we scan the annotations under the zanglili package
Then add related classes under the specified package
package com.zanglili;

import org.springframework.stereotype.Component;

@Component("user")
public class User {
    public String getName() {
        return name;
    }

    public void setName(String name) {
        this.name = name;
    }

    //@Value("DirtyLily")
    public String name ="zanglili";

}
Write a test class
import com.zanglili.User;
import org.springframework.context.ApplicationContext;
import org.springframework.context.support.ClassPathXmlApplicationContext;
public class MainTest {
    public static void main(String[] args) {
        ApplicationContext context = new ClassPathXmlApplicationContext("beans.xml");
        User user1 = (User) context.getBean("user");
        System.out.println(user1.name);
    }

}
Let's run it
No problem at all
We can use the @ Value tag to inject the property Value above the property.
1. We can inject above the attribute.
    @Value("DirtyLily")
    public String name;
Like this, we output the results to see what's going on. The property was assigned successfully!
If the property provides a Setter method, you can also assign values on the Setter method.
    @Value("DirtyLily")
    public void setName(String name) {
        this.name = name;
    }
The result is the same.
3, Derived notes
@Component also has three derived annotations, which are used for better layering in later large projects. Currently, there is no difference in function.
- @Controller: web layer
- @Service: service layer
- @Repository: dao layer
4, Scope
Use the @ Scope annotation on the class to specify the Scope.
There are mainly several parameters
- Singleton: by default, Spring creates this object in singleton mode. Close the factory and all objects will be destroyed.
- prototype: multiple mode. Close the factory and all objects will not be destroyed. The internal garbage collection mechanism will recycle
There are also request session s and other scopes. For details, you can refer to the official documents. I won't go over them here.
5, Configuring beans based on Java classes
Spring can provide bean definition information through a Java class, which is also very common now. The realization is also very simple. We come to Kangkang.
First, we create a dog class with a name string
package com.dao;

import org.springframework.stereotype.Component;

@Component
public class dog {
    public int age;
    public String name = "dog";
}
We need to write an @ Component annotation on it, and put this class into the Spring container as a Spring component.
After that, we will write a Configuration class, which is equivalent to beans in XML. Use @ Configuration to mark it as a Configuration class, and use @ Bean annotation method in the class, which is equivalent to < Bean > in XML Configuration. The method name is equal to beanId. For instance
package com.config;

import com.dao.dog;
import org.springframework.context.annotation.Bean;
import org.springframework.context.annotation.Configuration;

@Configuration
public class Myconfig {
    @Bean
    public dog dog(){
        dog lili = new dog();
        lili.age = 5;
        return  lili;
    }
}
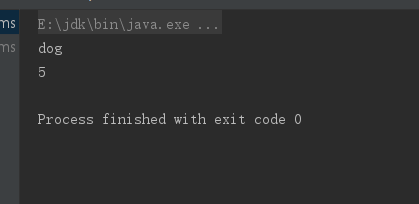
We returned a 5-year-old dog through Myconfig,
The above code is equivalent to < bean id = "dog" class = "dog > < / bean >
Let's test it
import com.config.Myconfig;
import com.dao.dog;
import org.junit.Test;
import org.springframework.context.ApplicationContext;
import org.springframework.context.annotation.AnnotationConfigApplicationContext;

public class Mytest {
    @Test
    public void test2(){
        ApplicationContext applicationContext =
                new AnnotationConfigApplicationContext(Myconfig.class);
        dog dog = (dog) applicationContext.getBean("dog");
        System.out.println(dog.name);
        System.out.println(dog.age);
    }
}
Note here that our ApplicationContext should point to an annotationconfiguapplicationcontext instead of the previous ClassPathXmlApplicationContext, in which the parameter is the configuration class we configured.
The end result is the same as we think!
Six, summary
Here is still the summary of the @ maniac teacher.
This is how the teacher's blog is written
XML vs. annotations
- XML can be applied to any scenario with clear structure and convenient maintenance
- Annotation is not a class provided by itself. It is easy and convenient to develop
xml and annotation integration development: Recommended Best Practices
-
xml management Bean
-
Annotation complete attribute injection
-
In the process of using, scanning is not necessary. Scanning is for annotation on the class
About Java class configuration and annotation development, we will see a lot in spring boot and spring cloud later. So far, we need to know the function of these annotations!
Please refer to the teacher's blog for details.
https://blog.kuangstudy.com/index.php/archives/524/

