Today is February 2, 2022. It's less than two weeks from this year's Valentine's Day.
Introducing a website to you, Cunt. I love you
Reference sample website:
Application process
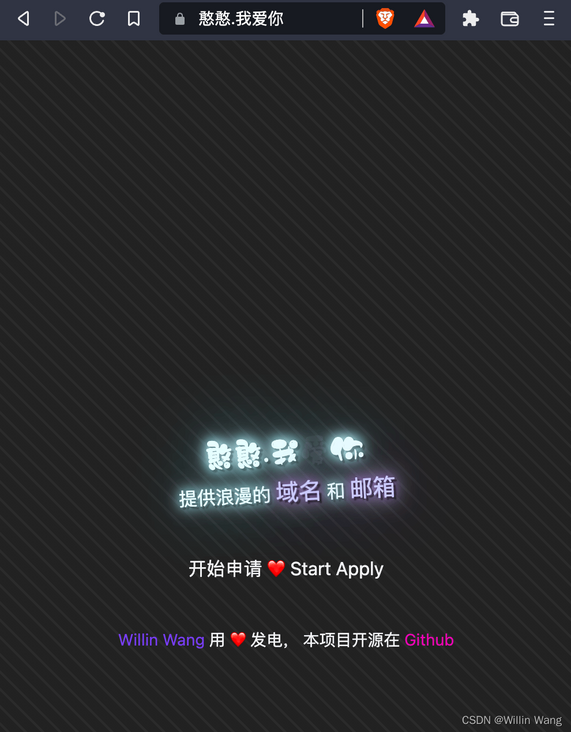
Open the home page of your website: Cunt. I love you
(Since the site database uses PlanetScale free service, located in the eastern United States, access may be slightly slower. Please be patient.)

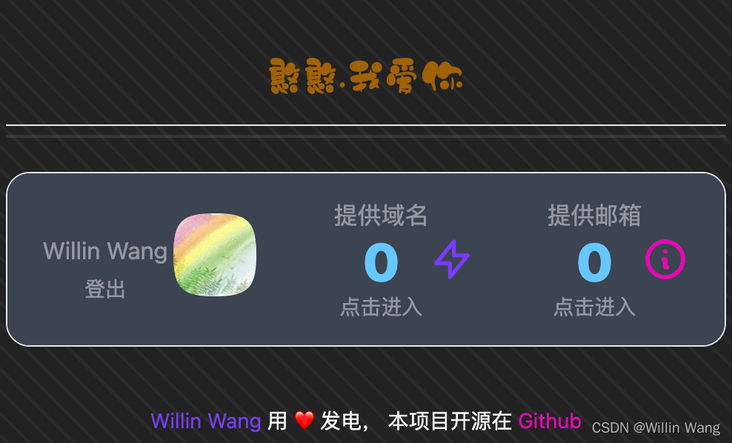
Sign in with an Authin account (you can register with your mobile phone, your mailbox, your Github account, or your WeChat applet, and you'll add more ways to sign in later).

You can click to enter domain name application and mailbox application respectively.
Domain name application
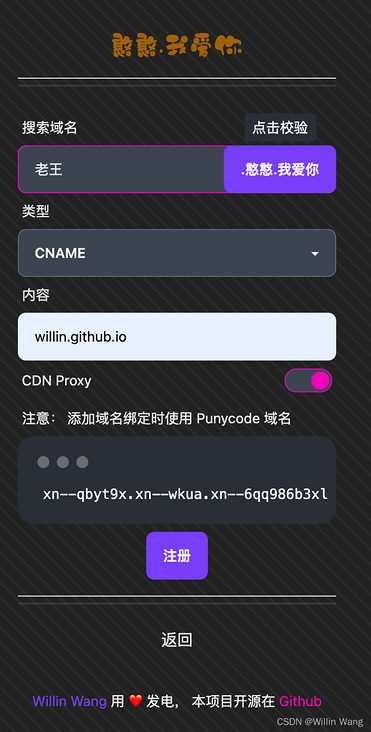
The domain name application interface is as follows:

There are three types of binding supported:
CNAME: You can use Github Pages, Netlify, Gitee, Coding.net, Cloudflare, etc. Platforms that provide hosted services
- Value reference: willin.github.io
- Note: Vercel is not supported because by default Vercel does not support binding secondary domain names (unless ownership is under your personal name)
A:IPv4 needs to set up its own server and bind it
- Value reference: 1.2.3.4 (ip address of your server)
AAAA: IPv6 needs to set up its own server and bind
- Not expressing, less recommending for non-professionals
- If you need to bind IPv4 and IPv6 at the same time, it is recommended to register type A and then contact me by ISSUE or email
There is also a Proxied (CDN) that you can try to turn on or off to test if you don't know what it does.
Mailbox application
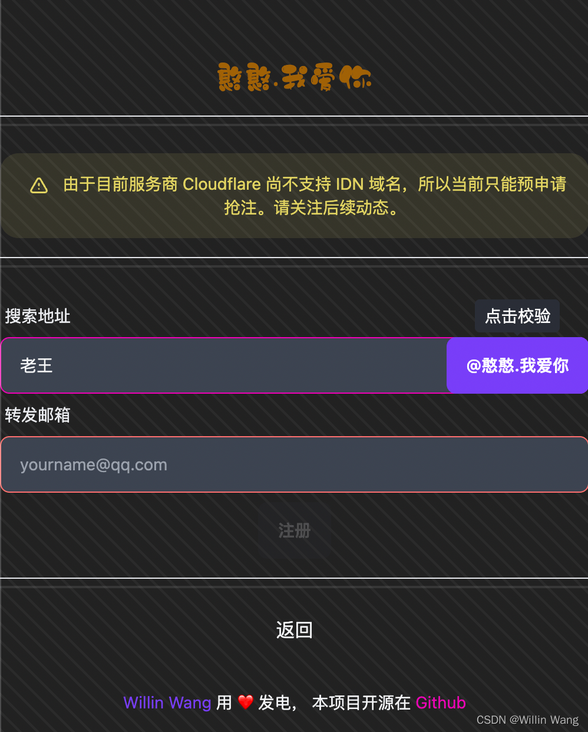
The domain name application interface is as follows:

Cloudflare's mail forwarding service is currently used, but because IDN domain names are not yet supported, you can preempt and have them for the first time.
Other Instructions
If you need help
Welcome to follow me on Github: willin If you have problems preparing gifts for your loved one, you can get free technical advice.
Want another domain name
- js.cool (Vercel binding is now supported after several negotiations)
- log.lu (look forward to it)
Feel generous
- You can share this website with more people
You can also appreciate it through the following channels:
Itch for a try
Maybe you also have a lot of ideas that you want to achieve. You can:
- Use Authing Quick integration to develop your own applications
Fork source code for this project (fully open source) and provides your own domain name service
Perfect and optimize this project on Github
Open Source
Next, start an important part. As the saying goes, it is better to teach a person to fish than to teach a person to fish. I will Cunt. I love your source code Open source, and a detailed explanation of the design and implementation of the entire process.
Design
The project took me about three hours to complete. To enhance my strengths and avoid my weaknesses, I used a UI framework, so there was no additional UI design and I started the project quickly with a few basic components.
Technical Selection
First, the first step is to select the technology. Since I'm offering a free service, I try to choose some free service providers and related technology stacks as well.
Choice of service provider:
- Cloudflare : Provide free domain name resolution, CDN acceleration, and open interfaces
- Vercel : Free application hosting for individuals, supporting Node.js environment, using Next.js framework
- PlanetScale : Cloud MySQL service with a free quota
- Prisma : Cloud Studio Management Database
In fact, the Cloudflare family barrel was meant to be used Cloudflare Pages (Static Web Site)+ Cloudflare Workers (Serverless method execution) and KV (Key-value pair storage), but due to time and energy constraints, a simpler and faster implementation is used.
Technology stack:
- Typescript : Although I like to do more with less code, TS gives me a more efficient stage for teamwork
Next.js : a full stack framework (front end uses React, back end is similar to http module and Express), supports SSR (server-side rendering) and SSG (static site generation)
- @authing/nextjs : Authing SSO Integrated SDK
- Prisma : The next generation ORM framework that supports multiple databases (MySQL for this project) and database migration (Migration)
Tailwind CSS : next generation CSS framework, practical first
- Daisy UI : Encapsulates some UI style components
Database Design
Since I use Authin user integration, the design of user tables and user-related interfaces are omitted.
// Domain Name Type
enum DomainType {
  A
  AAAA
  CNAME
}

// Audit Status
enum Status {
  // Pending review
  PENDING
  // activation
  ACTIVE
  // Deleted
  DELETED
  // Disabled by Administrator
  BANNED
}

// Domain Name Record Table
model Domains {
  // ID of the Cloudflare domain name record as the primary key ID of the table
  id        String      @id @default(cuid()) @db.VarChar(32)
  // Self-incrementing IDS makes no sense, just to reduce queries (after all, there is a call quota limit). Self-incrementing primary keys and self-incrementing IDs are not recommended for real projects
  no        Int         @default(autoincrement()) @db.UnsignedInt
  name      String      @db.VarChar(255)
  punycode  String      @db.VarChar(255)
  type      DomainType  @default(CNAME)
  content   String      @default("") @db.VarChar(255)
  proxied   Boolean     @default(true)
  // User id of Authin
  user      String      @default("") @db.VarChar(32)
  status    Status      @default(ACTIVE)
  createdAt DateTime    @default(now())
  updatedAt DateTime    @updatedAt

  @@index([no])
  @@index([name, punycode])
  @@index([user, status, createdAt])
}

// Mailbox table
model Emails {
  // Since the Cloudflare mailbox does not yet provide an open interface, manual auditing and manipulation is required, where the default cuid is filled in as the primary key id
  id        String      @id @default(cuid()) @db.VarChar(32)
  // Self-incrementing IDS makes no sense, just to reduce queries (after all, there is a call quota limit). Self-incrementing primary keys and self-incrementing IDs are not recommended for real projects
  no        Int         @default(autoincrement()) @db.UnsignedInt
  name      String      @db.VarChar(255)
  punycode  String      @db.VarChar(255)
  content   String      @default("") @db.VarChar(255)
  user      String      @default("") @db.VarChar(32)
  status    Status      @default(PENDING)
  createdAt DateTime    @default(now())
  updatedAt DateTime    @updatedAt

  @@index([no])
  @@index([name, punycode])
  @@index([user, status, createdAt])
}
Very simple, please refer to the notes for instructions. In addition, I was meant to save only one name, but since I will re-register it, for example, if I register a Chinese King, and you register a corresponding punycode code name xn--qbyt9x, there will be conflicts, so all of them will be saved.
Technical preparation
- Chinese domain name requires unycode knowledge: RFC 3492 Standard
Cloudflare API Interface
- Create a parse: Create DNS Record
- Modify a parse: Patch DNS Record
- Delete a parse: Delete DNS Record
- Authing SSO integration, refer to my previous articles: Full Stack Framework Application Fast Integration Authing SSO
First put Next. The JS website framework is set up and deployed to Vercel for testing. You can add Tailwind CSS and Autohing SSO integration. The first step of preparation is complete.
interface design
For fast (lazy) implementation, I created four interfaces for add-delete check.
Query interface:
graph TD
    Start1(Start)
    --> |Check Domain Name Existence| check1{Whether to sign in}
    --> |F| fail1[fail]
    --> End1(End)
    check1 --> |T| check12{Check if domain name is reserved}
    --> |T| fail1
    check12 --> |F| check13{Check database duplication}
    --> |T| fail1
    check13 --> |F| success1[Allow registration]
    --> End1
Create an interface:
graph TD
    Start2(Start)
    --> |Create a domain name| check2{Whether to sign in}
    --> |F| fail2[fail]
    --> End2(End)
    check2 --> |T| check22{Check if domain name is reserved}
    --> |T| fail2
    check22 --> |F| check23{Whether the user has registered the domain name}
    --> |T| fail2
    check23 --> |F| check24{Check database duplication}
    --> |T| fail2
    check24 --> |F| success2[register]
    --> End2
The database queries whether the user has registered a domain name and whether the same name exists and can be completed with a single query, which is split to improve query performance.
Modify interface:
graph TD
    Start3(Start)
    --> |Check Domain Name Existence| check3{Whether to sign in}
    --> |F| fail3[fail]
    --> End3(End)
    check3 --> |T| check32{modify id Records matching the user}
    --> |F Modify Record Number 0| fail3
    check32 --> |T| success3[Successful modification]
    --> End3
Deleting an interface is the same as modifying it. The mailbox interface is similar to a domain name and will not be repeated.
code implementation
Encapsulate Cloudflare SDK
Of course, there are ready-made libraries that I can use directly, but with few lines of code, I'm doing it myself.
import { Domains } from '@prisma/client';
import { CfAPIToken, CfZoneId } from '../config';

const BASE_URL = 'https://api.cloudflare.com/client/v4';

export type CFResult = {
  success: boolean;
  result: {
    id: string;
  };
};

const headers = {
  Authorization: `Bearer ${CfAPIToken}`,
  'Content-Type': 'application/json'
};

export const createDomain = async (
  form: Pick<Domains, 'name' | 'content' | 'type' | 'proxied'>
): Promise<string> => {
  const res = await fetch(`${BASE_URL}/zones/${CfZoneId}/dns_records`, {
    method: 'POST',
    headers,
    body: JSON.stringify({ ...form, ttl: 1 })
  });
  const data = (await res.json()) as CFResult;
  if (data.success) {
    return data.result.id;
  }
  return '';
};

export const updateDomain = async (
  id: string,
  form: Pick<Domains, 'name' | 'content' | 'type' | 'proxied'>
): Promise<boolean> => {
  const res = await fetch(`${BASE_URL}/zones/${CfZoneId}/dns_records/${id}`, {
    method: 'PATCH',
    headers,
    body: JSON.stringify({ ...form, ttl: 1 })
  });
  const data = (await res.json()) as CFResult;
  console.error(data);
  return data.success;
};

export const deleteDomain = async (id: string): Promise<boolean> => {
  const res = await fetch(`${BASE_URL}/zones/${CfZoneId}/dns_records/${id}`, {
    method: 'DELETE',
    headers
  });
  const data = (await res.json()) as CFResult;
  return !!data.result.id;
};
Encapsulation Check Tool Class
There needs to be a regular basis, and if you need an online debugging tool, you can access: regexper.js.cool
Domain Name (CNAME) Check Rules:
/^((?!-))(xn--)?[a-z0-9][a-z0-9-_]{0,61}[a-z0-9]{0,1}\.(xn--)?([a-z0-9-]{1,61}|[a-z0-9-]{1,30}\.[a-z]{2,})$/;Mailbox verification rules:
/^[a-z0-9!#$%&'*+/=?^_`{|}~-]+(?:\.[a-z0-9!#$%&'*+/=?^_`{|}~-]+)*@(?:[a-z0-9](?:[a-z0-9-]*[a-z0-9])?\.)+[a-z0-9](?:[a-z0-9-]*[a-z0-9])?$/;IPv4 Check Rules:
/^((25[0-5]|2[0-4][0-9]|[01]?[0-9][0-9]?)\.){3}(25[0-5]|2[0-4][0-9]|[01]?[0-9][0-9]?)$/;IPv6 Check Rule:
/^((([0-9A-Fa-f]{1,4}:){7}([0-9A-Fa-f]{1,4}|:))|(([0-9A-Fa-f]{1,4}:){6}(:[0-9A-Fa-f]{1,4}|((25[0-5]|2[0-4][0-9]|1[0-9][0-9]|[1-9]?[0-9])(\.(25[0-5]|2[0-4][0-9]|1[0-9][0-9]|[1-9]?[0-9])){3})|:))|(([0-9A-Fa-f]{1,4}:){5}(((:[0-9A-Fa-f]{1,4}){1,2})|:((25[0-5]|2[0-4][0-9]|1[0-9][0-9]|[1-9]?[0-9])(\.(25[0-5]|2[0-4][0-9]|1[0-9][0-9]|[1-9]?[0-9])){3})|:))|(([0-9A-Fa-f]{1,4}:){4}(((:[0-9A-Fa-f]{1,4}){1,3})|((:[0-9A-Fa-f]{1,4})?:((25[0-5]|2[0-4][0-9]|1[0-9][0-9]|[1-9]?[0-9])(\.(25[0-5]|2[0-4][0-9]|1[0-9][0-9]|[1-9]?[0-9])){3}))|:))|(([0-9A-Fa-f]{1,4}:){3}(((:[0-9A-Fa-f]{1,4}){1,4})|((:[0-9A-Fa-f]{1,4}){0,2}:((25[0-5]|2[0-4][0-9]|1[0-9][0-9]|[1-9]?[0-9])(\.(25[0-5]|2[0-4][0-9]|1[0-9][0-9]|[1-9]?[0-9])){3}))|:))|(([0-9A-Fa-f]{1,4}:){2}(((:[0-9A-Fa-f]{1,4}){1,5})|((:[0-9A-Fa-f]{1,4}){0,3}:((25[0-5]|2[0-4][0-9]|1[0-9][0-9]|[1-9]?[0-9])(\.(25[0-5]|2[0-4][0-9]|1[0-9][0-9]|[1-9]?[0-9])){3}))|:))|(([0-9A-Fa-f]{1,4}:){1}(((:[0-9A-Fa-f]{1,4}){1,6})|((:[0-9A-Fa-f]{1,4}){0,4}:((25[0-5]|2[0-4][0-9]|1[0-9][0-9]|[1-9]?[0-9])(\.(25[0-5]|2[0-4][0-9]|1[0-9][0-9]|[1-9]?[0-9])){3}))|:))|(:(((:[0-9A-Fa-f]{1,4}){1,7})|((:[0-9A-Fa-f]{1,4}){0,5}:((25[0-5]|2[0-4][0-9]|1[0-9][0-9]|[1-9]?[0-9])(\.(25[0-5]|2[0-4][0-9]|1[0-9][0-9]|[1-9]?[0-9])){3}))|:)))(%.+)?$/;Page Request Encapsulation
Take the domain name registration submission as an example:
async function submit(e: SyntheticEvent) {
  e.preventDefault();
  // Because I use both Vue and React less often
  // So to get form data, I'm using Vanilla JS, which is more versatile
  // If you are unfamiliar with it, you can use React
  const target = e.currentTarget as typeof e.currentTarget & {
    type: { value: DomainType };
    content: { value: string };
    proxied: { checked: boolean };
  };
  const type = target.type.value;
  const content = target.content.value;
  if (!validateContent(type, content)) {
    return;
  }
  const form = {
    type,
    content,
    proxied: target.proxied.checked,
    name,
    punycode: toASCII(name)
  };
  // I recommend encapsulating the Fetch, so I don't do it for efficiency (lazy)
  const res = await fetch(`/api/domain/create`, {
    method: 'POST',
    body: JSON.stringify(form),
    headers: {
      'content-type': 'application/json'
    }
  });
  // So processing like this is not elegant, and it can also be uniformly encapsulated, error prompting using notification bar components and so on
  const result = (await res.json()) as { success: boolean; id: string };
  if (result.success) {
    router.reload();
  } else {
    alert('Error! Please try again later');
  }
}
Reusable code can be encapsulated. Refer to the idea of software engineering: high cohesion, low coupling. What I'm pointing out here is a more negative textbook with bloated code and low readability.
Points of Attention
- Because Tailwind CSS 3 uses a new JIT mechanism, purgecss no longer needs
- Focus on React performance, such as Hooks like useState, and try to be at the page level, not at the component level (especially those that loop through the generated components)
- Use useMemo, debounce, and so on to cache, shake, and limit streams to improve application performance
- Use Next. When working with JS frameworks (or common React applications), in most cases, it's helpful to know more about swr and some of its core ideas
The rest of the code is dull and simple.
Almost that much. Remember to share it!