1, Three attributes of component instance
(1)state
View status: there is a property on the written component instance, state, which represents the status of the component.

Next, we write a stateful component:
<body>
    <div id="test"></div>

    <script type="text/babel">
        // Create component
        class Component extends React.Component {
            // Initialization, called 1 time
            constructor(props) {
                super(props)
                // Initialization status
                this.state = {size: false}
                // Solve the problem of this pointing in changeSize, and the changeSize method in the class points to the instance
                this.changeSize = this.changeSize.bind(this)
            }
            // Called 1+n times. 1 is the initialization time. It will be called every time you click Update
            render() {
                // console.log(this)
                return <h1 onClick={this.changeSize}>{this.state.size ? 'large' : 'Small'}</h1>
            }
            // Called n times, changed several times, called several times
            changeSize() {
                // Changesize is placed on the prototype object of the Component for use by the instance
                // Because changeSize is a callback of onClick, it is not called through an instance and belongs to direct call
                // The method in class will turn on local strict mode by default, so this point of changeSize is undefined
                //console.log(this)

                // Get the original size value
                const size = this.state.size
                // The state cannot be changed directly. It should be changed with the help of a built-in APIsetState in react
                this.setState({size: !size})
            }
        }
        // Render component to page
        ReactDOM.render(<Component/>, document.getElementById('test'))
    </script>
</body>

When clicking a component, if it is displayed as "small", it will change to "large". If it is displayed as "large", it will change to "small". It will be changed according to the value of state. Because there are only two states here, I choose true and false. It is "large" when the value of state is true and "small" when the value of state is false.
In this process, the render 1+n times are invoked, and the 1 is the initialization. Every click Update is called once. changeSize calls n times, and changes several times to invoke several times.
Because the component is stateless and null at the beginning, we need to initialize first and assign a value to state. When a class component is created, the constructor will be called first, so we can initialize the state value in the constructor, and then use render() to receive the input data and return the content to be displayed. At this time, the content to be displayed is already on the page, Just haven't added click event yet.
Next, write a click event changeSize and put it on the prototype object of the created component for use by the instance. As mentioned earlier, for a class component, react automatically helps new create an instance of the class, so I don't know what the instance is, and I can't call it through the instance. In the h1 tag of render(), click the event changeSize as the callback of onClick, which is not an instance call, but a direct call. Therefore, this in the changeSize event should point to the global window. Also, because the methods in the class will automatically turn on the local strict mode, this points to undefined.

The next thing to do is to change the point of this in the click event changesize and add this in the structure changeSize = this.changeSize.bind(this), point the method in the class to the instance.
After use:
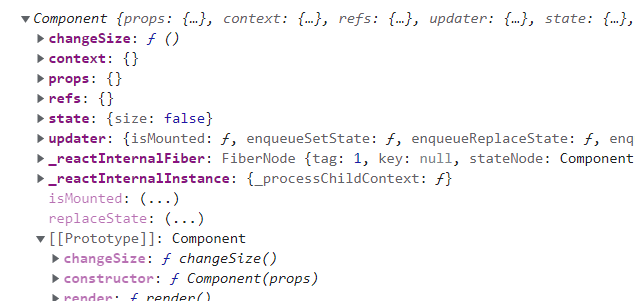
Use the changeSize on the prototype to generate a new changeSize and mount it on the instance, which also has this method.
(2)props
props is another attribute of react, which is also placed in the react instance.

<body>
    <div id="test"></div>

    <script type="text/babel">
        // Create class component
        class Person extends React.Component {// Inherit a built-in class in react

            render() {
                // Can deconstruct
                const {name} = this.props
                return (
                    <ul>
                        <li>{name}</li>
                        <li>{this.props.age}</li>

                    </ul>
                )
            }
        }
        // Render component to page
        ReactDOM.render(<Person name="zs" age="18"/>, document.getElementById('test'))
    </script>
</body>
Its value is directly passed in when rendering the page.
During development, the data should be transmitted from the background. The attributes in a piece of data may be relatively long. When we get the data and transmit the value, we should use the expansion operator:
        const person1 = {
            name: "zs",
            age: "18"
        }
        // Render component to page
        ReactDOM.render(<Person {...person1}/>, document.getElementById('test'))
Expand and pass in the attributes.
props limit
In order to facilitate data processing in development, some restrictions should be added to the data. For example, the name can be limited to string type and the age to number type.
<script type="text/babel">
        // Create class component
        class Person extends React.Component {// Inherit a built-in class in react

            render() {
                // Can deconstruct
                const {name} = this.props
                return (
                    <ul>
                        <li>{name}</li>
                        <li>{this.props.age}</li>
                        <li>{this.props.sex}</li>
                    </ul>
                )
            }
        }
        // Limit the type and necessity of label attributes
        /*
        Person.propTypes = {
            name: React.PropTypes.string,
        }
        */
        Person.propTypes = {
            // string type is required
            name: PropTypes.string.isRequired,
            sex: PropTypes.string,
            age: PropTypes.number,
        }
        // Specifies the default label attribute value
        Person.defaultProps = {
            // The default gender is male
            sex: 'male',
            age: 18
        }
        // Render component to page
        ReactDOM.render(<Person name="zs" age={18}/>, document.getElementById('test'))

    </script>
Add an attribute to the class, propTypes,react. Find this attribute in the code and you will know that the code inside is the added limit. A method name: react. Is annotated in the above code PropTypes. String. Proptypes in this method is a built-in object in react, but in react V15 5 has been abandoned in the beginning. In later versions, this part is divided into a js library, which is used for restriction.
name: PropTypes. string. In isRequired, string represents that the value of this attribute is of string type, and isRequired represents a required item. We can also set default values for some of these properties. If no value is passed, the default value will be used.
To customize a component, you want its business code to be inside the component, so you should put the limit of props inside the component. A component can new multiple instances, and each instance needs to use restrictions. Therefore, restrictions are added to classes and the keyword static is used.
class Person extends React.Component {// Inherit a built-in class in react

            // props is read-only and cannot be modified

            render() {
                // Can deconstruct
                const {name} = this.props
                return (
                    <ul>
                        <li>{name}</li>
                        <li>{this.props.age}</li>
                        <li>{this.props.sex}</li>
                    </ul>
                )
            }

            // Limit the type and necessity of label attributes
            // Add attributes to class
            static propTypes = {
                // string type is required
                name: PropTypes.string.isRequired,
                sex: PropTypes.string,
                age: PropTypes.number,
            }
            // Specifies the default label attribute value
            static defaultProps = {
                // The default gender is male
                sex: 'male',
                age: 18
            }
        }
(3)refs
String form
Tags within a component can define a ref attribute to identify themselves. The ref attribute added to the element can be displayed in the instance. If multiple elements add the ref attribute, they will be stored in the instance in the form of "ref value: add element label".
<script type="text/babel">
        // Create class component
        class Demo extends React.Component {// Inherit a built-in class in react
            render() {
                return (
                    <div>
                        <input ref="input1" type="text" placeholder="Click the button"/>
                        <button onClick={this.test1}>click</button>
                        <input ref="input2" type="text"/>
                    </div>
                )
            }
            // Click button event
            test1 = () => {
                console.log(this)
                // Get the node to be operated
                const {input1} = this.refs
                // Displays the value in the node input input box
                alert(input1.value)
            }
        }
        // Render component to page
        ReactDOM.render(<Demo/>, document.getElementById('test'))
    </script>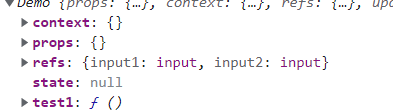
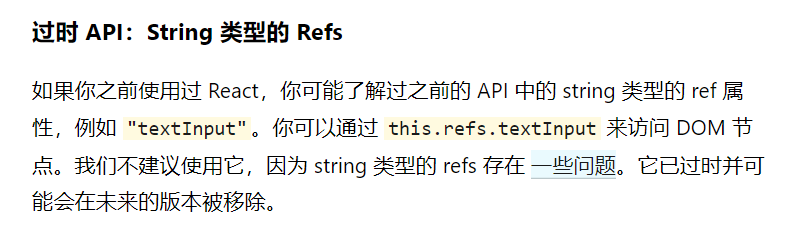
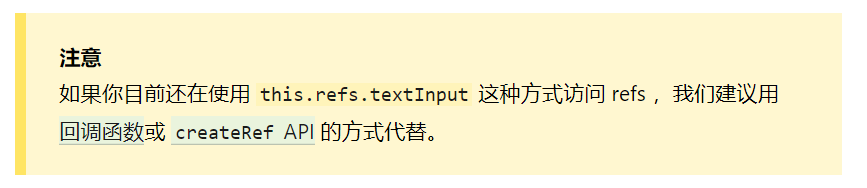
This is the simplest way to use it, but it is not recommended on the official website. There may be some problems. This method of use is outdated and may be removed in future versions. There are two other methods, the callback function or the createRef method.
Callback function form
This method directly writes an arrow function at the ref attribute of the element. This method is called inline.
<script type="text/babel">
        // Create class component
        class Demo extends React.Component {// Inherit a built-in class in react
            render() {
                // react in the form of callback will actively help to call ref
                return (
                    <div>
                        <input ref={(currentNode) => {this.input1 = currentNode}} type="text" placeholder="Click the button"/>
                        <button onClick={this.test}>Click the button</button>
                    </div>
                )
            }
            // Click button event
            test = () => {
                console.log(this)
                const {input1} = this
                alert(input1.value)
            }
        }
        // Render component to page
        ReactDOM.render(<Demo/>, document.getElementById('test'))
    </script>
When the code runs to the ref statement, react will take the initiative to call Ref. There will be one more function on the instance of react.

There is another way to write the callback function, which defines the callback function of ref as the binding function of class.
Bind a function on the element, and then write the content of the function to the outside.
<script type="text/babel">
        // Create class component
        class Demo extends React.Component {// Inherit a built-in class in react
            render() {
                // react in the form of callback will actively help to call ref
                return (
                    <div>
                        <input ref={this.saveInput} type="text"/>
                        <button onClick={this.test}>Click the button</button>
                    </div>
                )
            }
            // Click button event
            test = () => {
                const {input1} = this
                alert(input1.value)
            }
            // How class binds functions
            saveInput = (currentNode) => {
                this.input1 = currentNode;
            }
        }
        // Render component to page
        ReactDOM.render(<Demo/>, document.getElementById('test'))
    </script>
There are some differences between the two methods. The inline method will be executed twice during the update process. There is an empty process. The class binding function is executed only once. The official website says that it is irrelevant in most cases. That is, both methods can be used without affecting the code.
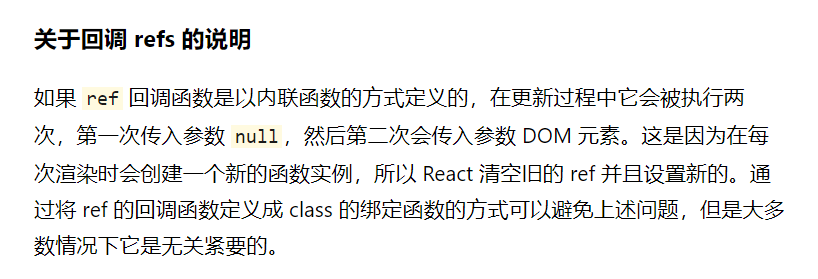
The result of executing twice can not be demonstrated only by the code written above, because they are only executed once during initialization, and render() is not updated during event interaction, and it is only executed twice during the update process.
When the first attribute state of the component is mentioned above, it is written that when switching the state, render is called 1+n times. 1 is the initialization time. It will be called every time you click Update. Add a state to the above code to update render.
<script type="text/babel">
        // Create class component
        class Demo extends React.Component {// Inherit a built-in class in react
            state = {size: false}
            render() {
                // react in the form of callback will actively help to call ref
                return (
                    <div>
                        <input ref={(currentNode) => {this.input1 = currentNode;console.log("Inline",currentNode)}} type="text" placeholder="Click the button"/>
                        <button onClick={this.test}>Click the button</button>
                        <h1 onClick={this.changeSize}>{this.state.size ? 'large' : 'Small'}</h1>
                    </div>
                )
            }
            // Click button event
            test = () => {
                // console.log(this)
                const {input1} = this
                alert(input1.value)
            }
            // Click event of status
            changeSize = ()=> {
                const size = this.state.size
                this.setState({size: !size})
            }
        }
        // Render component to page
        ReactDOM.render(<Demo/>, document.getElementById('test'))
    </script>
When clicking switch, the following information will be output on the console:
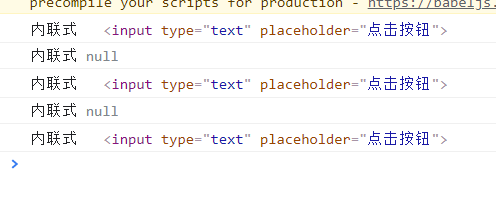
The first output is output during initialization. Switch the state to update. Each update will first pass in null, and then pass in the parameter DOM element.
createRef API form
<script type="text/babel">
// Create class component
class Demo extends React.Component {// Inherit a built-in class in react
/*
createRef After calling, a container is returned, which can store the node identified by ref
Only one can be placed, and the one placed later will cover the one in front
Create several as needed
*/
myRef = React.createRef()
render() {
return (
<div>
<input ref={this.myRef} type="text" placeholder="Click the button"/>
<button onClick={this.test}>Click the button</button>
</div>
)
}
// Click button event
test = () => {
console.log(this)
alert(this.myRef.current.value)
}
}
// Render component to page
ReactDOM.render(<Demo/>, document.getElementById('test'))
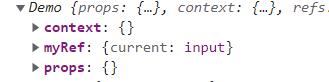
</script>Use react to call createRef. After calling, a container will be returned, in which the node identified by ref is stored. The created myref will be placed in the instance. It has a name of current and the value is the identified node. In render, this points to the instance and uses this myRef. current. Value can get the value entered in the input box.
However, only one container can be placed. If two nodes are bound to the same container, the latter will crowd out the former and only one will be displayed. If you want to bind multiple nodes, you must call createref multiple times. You need to create several nodes, which is troublesome. Therefore, it is often used to bind ref in the way of callback function.
2, Three properties of functional components
In the above content, we have been emphasizing instances. Only classes have instances, but functions do not, so in react16 The function can be passed in the form of component REFPS and 8.0, but the function can not be passed in the form of component REFPS.
Hook is React16 New features and syntax added in version 8.0. state,refs and other React features (life cycle hook function) can be used in function components.
State Hook: React.useState()
import React from "react"
import  ReactDOM  from "react-dom"

function Component() {

    const [count, setCount] = React.useState(0)

    function add() {
        // First kind
        // setCount(count+1)
        // The second is to pass in a function
        setCount((count)=>{return count+1})
    }

    return (
        <div>
            <h2>{count}</h2>
            <button onClick={add}>+1</button>
        </div>
    )
}

export default Component
State Hook allows function components to have state and read and write state data
const [xxx, setXxx] = React.useState(initValue)
useState() Description:
Parameter: the specified value is cached internally during the first initialization
Return value: an array containing two elements. The first is the internal current status value, and the second is the function that updates the status value
Setxxx() can be written in two ways:
setXxx(newValue): the parameter is a non function value, which directly specifies a new status value and internally overwrites the original status value
setXxx(value = > newValue): the parameter is a function that receives the original status value and returns a new status value, which is used internally to overwrite the original status value
Ref Hook: React.useRef()
import React from "react"
import  ReactDOM  from "react-dom"

function Component() {

    const myRef = React.useRef()

    function show() {
        alert(myRef.current.value)
    }

    return (
        <div>
            <input type="text" ref={myRef} />
            <button onClick={show}>Display data</button>
        </div>
    )
}

export default Component
Ref Hook can store / find tags or any other data in the function component.
Function: save label object, function and react Createref().
State and refs can be used for functional components because react16 A new feature Hook has been added in version 8.0. props can be used because functions can pass parameters.