

What is Tauri
Tauri is a cross platform GUI framework, which is basically similar to the idea of Electron. The front-end implementation of Tauri is also based on a series of Web languages, and the back-end of Tauri uses Rust. Tauri can create smaller, faster and more secure cross platform desktop applications.
Why Rust?
Rust is a language that gives everyone the ability to build reliable and efficient software. It performs particularly well in terms of high performance, reliability and productivity. Rust has amazing speed and high memory utilization. Without runtime and garbage collection, it can be competent for services with particularly high performance requirements, can run on embedded devices, and can easily integrate with other languages. Rust's rich type system and ownership model ensure memory safety and thread safety, so that you can eliminate all kinds of errors at compile time. Rust also has excellent documentation, friendly compilers and clear error messages. It also integrates first-class tools - package manager and construction tools
Based on this, make Rust the best choice. Developers can easily use Rust to extend Tauri's default Api to realize customization.
Tauri VS Electron
| Detail | Tauri | Electron |
|---|---|---|
| Installer Size Linux | 3.1 MB | 52.1 MB |
| Memory Consumption Linux | 180 MB | 462 MB |
| Launch Time Linux | 0.39s | 0.80s |
| Interface Service Provider | WRY | Chromium |
| Backend Binding | Rust | Node.js (ECMAScript) |
| Underlying Engine | Rust | V8 (C/C++) |
| FLOSS | Yes | No |
| Multithreading | Yes | Yes |
| Bytecode Delivery | Yes | No |
| Multiple Windows | Yes | Yes |
| Auto Updater | Yes | Yes |
| Custom App Icon | Yes | Yes |
| Windows Binary | Yes | Yes |
| MacOS Binary | Yes | Yes |
| Linux Binary | Yes | Yes |
| iOS Binary | Soon | No |
| Android Binary | Soon | No |
| Desktop Tray | Yes | Yes |
| Sidecar Binaries | Yes | No |
Environmental installation
macOS
Because the installation process is relatively simple, the author uses macOS. This article only introduces the installation steps of macOS. You can check the official website for the installation steps of Windows.
1. Make sure Xcode is installed
$ xcode-select --install
2. Node.js
It is recommended to use nvm for node version management:
$ curl -o- https://raw.githubusercontent.com/nvm-sh/nvm/v0.35.2/install.sh | bash
$ nvm install node --latest-npm
$ nvm use node
It is highly recommended to install Yarn instead of npm.
3.Rust environment
Install rustup:
$ curl --proto '=https' --tlsv1.2 -sSf https://sh.rustup.rs | sh
Verify that Rust was successfully installed:
$ rustc --version

rustc 1.58.1 (db9d1b20b 2022-01-20)
tips: if the rustc command fails to execute, you can restart the terminal.
So far, the Tauri development environment has been installed.
Project construction
1. Create a Tauri project
$ yarn create tauri-app
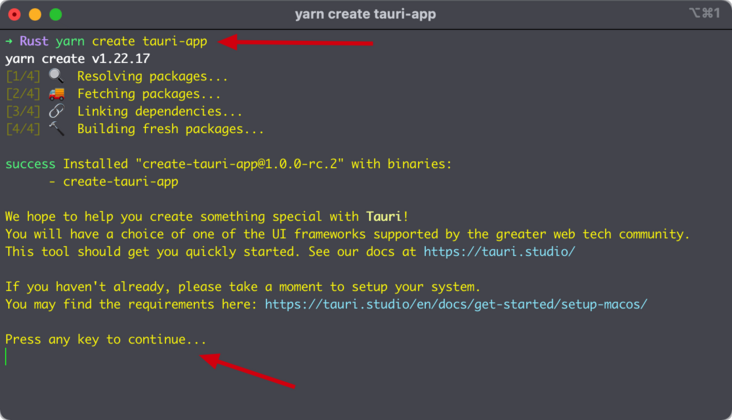
Press enter to continue
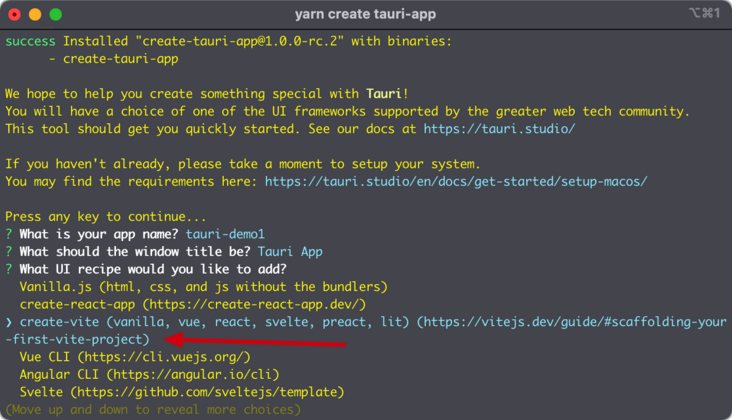
It can be seen that the current mainstream Web framework Tauri supports,
We choose Create vite
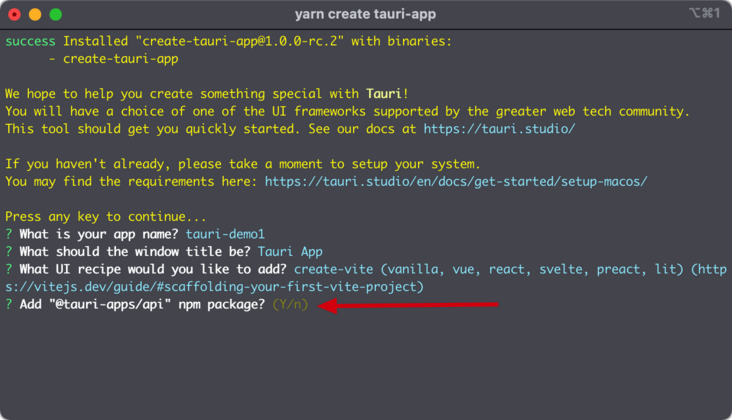
Select Y here to install @ Tauri apps / API,
Then select Vue TS
Check the Tauri related settings to make sure everything is ready
$ yarn tauri info
yarn run v1.22.17
$ tauri info

Operating System - Mac OS, version 12.2.0 X64

Node.js environment
  Node.js - 14.17.0
  @tauri-apps/cli - 1.0.0-rc.2
  @tauri-apps/api - 1.0.0-rc.0

Global packages
  npm - 6.14.13
  pnpm - Not installed
  yarn - 1.22.17

Rust environment
  rustc - 1.58.1
  cargo - 1.58.0

Rust environment
  rustup - 1.24.3
  rustc - 1.58.1
  cargo - 1.58.0
  toolchain - stable-x86_64-apple-darwin

App directory structure
/dist
/node_modules
/public
/src-tauri
/.vscode
/src

App
  tauri.rs - 1.0.0-rc.1
  build-type - bundle
  CSP - default-src 'self'
  distDir - ../dist
  devPath - http://localhost:3000/
  framework - Vue.js
✨  Done in 20.72s.
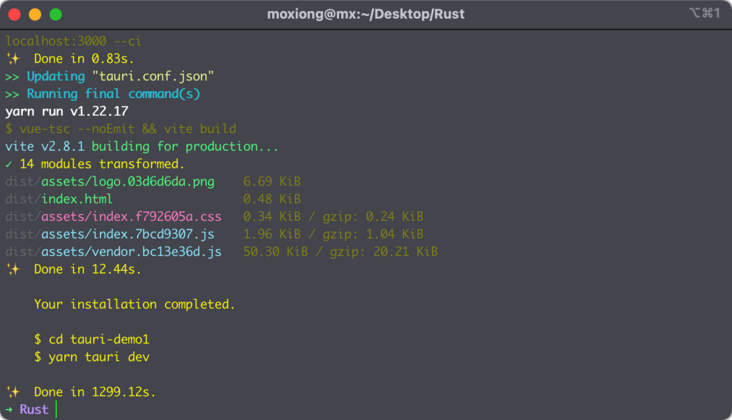
So far, a new Tauri project has been created.
tips: Tauri also supports integration based on existing front-end projects. The specific process can be viewed on the official website, which will not be introduced in this article.
Project directory introduction
├── README.md
├── dist                 - web Project packaging and compilation directory
│   ├── assets
│   ├── favicon.ico
│   └── index.html
├── index.html
├── node_modules
├── package.json
├── public
│   └── favicon.ico
├── src                  - vue Project directory (page development)
│   ├── App.vue
│   ├── assets
│   ├── components
│   ├── env.d.ts
│   └── main.ts
├── src-tauri            - rust Related catalogue( tauri-api (related configuration)
│   ├── Cargo.lock
│   ├── Cargo.toml       - rust configuration file
│   ├── build.rs
│   ├── icons            - Application related icons
│   ├── src              - rust entrance
│   ├── target           - rust Compilation directory
│   └── tauri.conf.json  - tauri Related configuration files
├── tsconfig.json
├── tsconfig.node.json
├── vite.config.ts
└── yarn.lock
function
Running items:
$ cd tauri-demo1
$ yarn tauri dev
Wait for the project to run
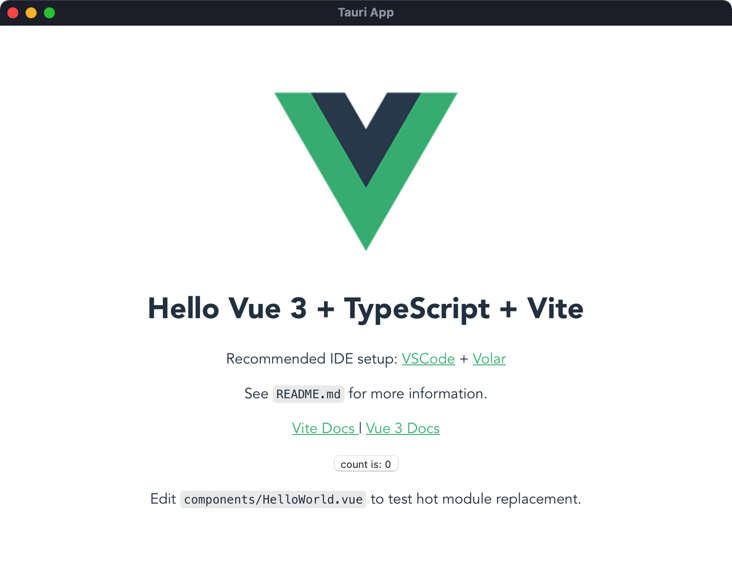
It can be seen that a desktop application based on Vue 3 + TypeScript + Vite has been running.
API call and function configuration
Tauri's APIs include JavaScript APIs and Rust APIs. This paper mainly selects some Rust APIs to explain (Rust related knowledge can be learned by yourself). JavaScript related APIs are relatively simple and can be learned according to official documents.
1. Splash screen
Adding a splash screen is very necessary for initializing time-consuming applications and can improve the user experience.
The general principle is to hide the main application view and display the startup screen view in the application initialization stage, and dynamically close the startup screen view and display the main view after the initialization is completed.
First, create a splashScreen. In the project root directory HTML file is used as the start-up screen view. The specific display content can be configured by yourself. The code is as follows:
<!DOCTYPE html>
<html lang="en">

<head>
  <meta charset="UTF-8">
  <meta http-equiv="X-UA-Compatible" content="IE=edge">
  <meta name="viewport" content="width=device-width, initial-scale=1.0">
  <title>Loading</title>
</head>

<body style="background-color: aquamarine;">
  <h1>Loading...</h1>
</body>

</html>
Second, change Tauri Conf.json configuration item:
"windows": [
  {
    "title": "Tauri App",
    "width": 800,
    "height": 600,
    "resizable": true,
    "fullscreen": false,
+   "visible": false // Hide home view by default
  },
  // Add launch view
+ {
+   "width": 400,
+   "height": 200,
+   "decorations": false,
+   "url": "splashscreen.html",
+   "label": "splashscreen"
+ }
]
Set the visible property of the main view under the windows configuration item to false, so that the main view will be hidden in the initialization phase;
Create a new startup view under windows configuration. The view size can be customized.
The next step is to dynamically control the display and hiding of the two views.
Open SRC Tauri / main RS file, add the following Rust Code:
use tauri::Manager;

// Create a Rust command
#[tauri::command]
fn close_splashscreen(window: tauri::Window) {
  // Close startup view
  if let Some(splashscreen) = window.get_window("splashscreen") {
    splashscreen.close().unwrap();
  }
  // Show home view
  window.get_window("main").unwrap().show().unwrap();
}

fn main() {
  tauri::Builder::default()
    // Registration command
    .invoke_handler(tauri::generate_handler![close_splashscreen])
    .run(tauri::generate_context!())
    .expect("error while running tauri application");
}
The execution logic of the above Rust code is to create a close_ The splashScreen function is used to close the startup view and display the main view, and register this function as a Rust command, which is registered during application initialization, so that the command can be called dynamically in JavaScript.
Next, in Src / APP Add the following code to Vue:
// Import invoke method
import { invoke } from '@tauri-apps/api/tauri'

// Add a listening function to listen to the DOM content loading completion event
document.addEventListener('DOMContentLoaded', () => {
  // After the DOM content is loaded, call the command registered in Rust through invoke
  invoke('close_splashscreen')
})
We can take a look at the source code of the invoke method:
/**
 * Sends a message to the backend.
 *
 * @param cmd The command name.
 * @param args The optional arguments to pass to the command.
 * @return A promise resolving or rejecting to the backend response.
 */
async function invoke<T>(cmd: string, args: InvokeArgs = {}): Promise<T> {
  return new Promise((resolve, reject) => {
    const callback = transformCallback((e) => {
      resolve(e)
      Reflect.deleteProperty(window, error)
    }, true)
    const error = transformCallback((e) => {
      reject(e)
      Reflect.deleteProperty(window, callback)
    }, true)

    window.rpc.notify(cmd, {
      __invokeKey: __TAURI_INVOKE_KEY__,
      callback,
      error,
      ...args
    })
  })
}
The invoke method is used to communicate with the back-end (Rust). The first parameter cmd is the command defined in Rust, and the second parameter args is optional. It matches the additional information of the first parameter. Method through window rpc. Notify to communicate, and the return value is Promise.
So far, the relevant logic of adding the startup view has been completed. We can run it to see the effect.
Since our demo project is initialized very quickly and it is not easy to see the startup view, we can delay the execution of invoke('close_splashscreen ') through setTimeout to facilitate debugging and viewing:
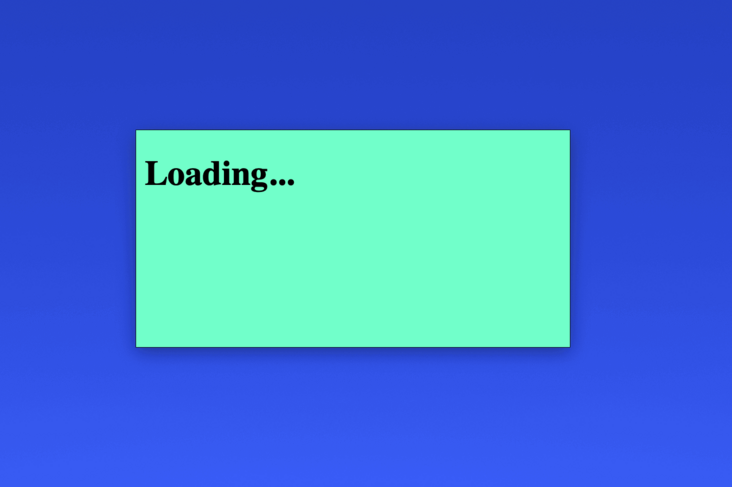
It can be seen that after the project is running, the startup view is displayed first, then the startup view disappears and the main view is displayed.
2.Window Menu
Adding a menu to an application is a basic function and is also important.
Open SRC Tauri / main RS file, add the following Rust Code:
use tauri::{ Menu, Submenu, MenuItem, CustomMenuItem };

fn main() {
  let submenu_gear = Submenu::new(
    "Gear",
    Menu::new()
      .add_native_item(MenuItem::Copy)
      .add_native_item(MenuItem::Paste)
      .add_native_item(MenuItem::Separator)
      .add_native_item(MenuItem::Zoom)
      .add_native_item(MenuItem::Separator)
      .add_native_item(MenuItem::Hide)
      .add_native_item(MenuItem::CloseWindow)
      .add_native_item(MenuItem::Quit),
  );
  let close = CustomMenuItem::new("close".to_string(), "Close");
  let quit = CustomMenuItem::new("quit".to_string(), "Quit");
  let submenu_customer = Submenu::new(
    "Customer",
    Menu::new()
      .add_item(close)
      .add_item(quit)
    );
  let menus = Menu::new()
    .add_submenu(submenu_gear)
    .add_submenu(submenu_customer);

  tauri::Builder::default()
    // add menu
    .menu(menus)
    // Listen for custom menu events
    .on_menu_event(|event| match event.menu_item_id() {
      "quit" => {
        std::process::exit(0);
      }
      "close" => {
        event.window().close().unwrap();
      }
      _ => {}
    })
    // Registration command
    .invoke_handler(tauri::generate_handler![close_splashscreen])
    .run(tauri::generate_context!())
    .expect("error while running tauri application");
}
First, we introduce Menu, Submenu, MenuItem and CustomMenuItem.
View the source code of Menu and Submenu:
/// A window menu.
#[derive(Debug, Clone)]
#[non_exhaustive]
pub struct Menu {
  pub items: Vec<MenuEntry>,
}

impl Default for Menu {
  fn default() -> Self {
    Self { items: Vec::new() }
  }
}

#[derive(Debug, Clone)]
#[non_exhaustive]
pub struct Submenu {
  pub title: String,
  pub enabled: bool,
  pub inner: Menu,
}

impl Submenu {
  /// Creates a new submenu with the given title and menu items.
  pub fn new<S: Into<String>>(title: S, menu: Menu) -> Self {
    Self {
      title: title.into(),
      enabled: true,
      inner: menu,
    }
  }
}

impl Menu {
  /// Creates a new window menu.
  pub fn new() -> Self {
    Default::default()
  }

  /// Adds the custom menu item to the menu.
  pub fn add_item(mut self, item: CustomMenuItem) -> Self {
    self.items.push(MenuEntry::CustomItem(item));
    self
  }

  /// Adds a native item to the menu.
  pub fn add_native_item(mut self, item: MenuItem) -> Self {
    self.items.push(MenuEntry::NativeItem(item));
    self
  }

  /// Adds an entry with submenu.
  pub fn add_submenu(mut self, submenu: Submenu) -> Self {
    self.items.push(MenuEntry::Submenu(submenu));
    self
  }
}
The menu structure is used to implement the application menu. Its built-in new correlation function is used to create menu and add_ The item method is used to add a custom menu item, add_ native_ The item method is used to add the menu item of Tauri's native implementation, add_submenu is used to add menu entries.
Submenu this structure is used to create the entry of menu items.
As shown in the figure:
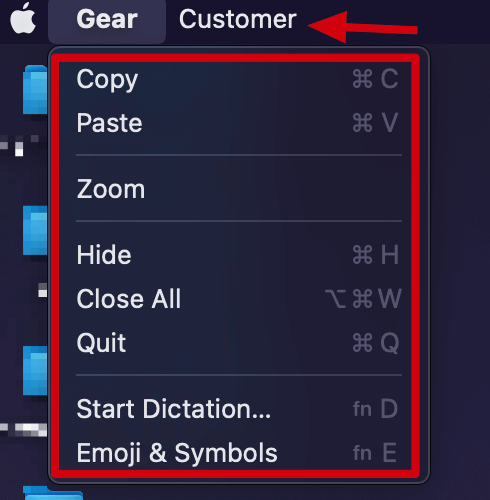
The Gear and Customer indicated by the arrow are Submenu, and the red box is the MenuItem item contained under Submenu.
We created a Submenu named Gear and added some MenuItem items that are natively supported by Tauri.
We also created a Submenu named Customer and added two custom CustomMenuItem items. The events of CustomMenuItem need to be defined by the developer:
// Listen for custom menu events
on_menu_event(|event| match event.menu_item_id() {
  "quit" => {
    // Logical customization
    std::process::exit(0);
  }
  "close" => {
    // Logical customization
    event.window().close().unwrap();
  }
  _ => {}
})
Pass on_ menu_ The event method listens to the trigger event of a custom menu item. The parameter it receives is a closure. Match the event id of the menu item with match and add custom logic.
matters needing attention
The MenuItem menu item supported by Tauri has compatibility problems. You can see the source code:
/// A menu item, bound to a pre-defined action or `Custom` emit an event. Note that status bar only
/// supports `Custom` menu item variants. And on the menu bar, some platforms might not support some
/// of the variants. Unsupported variant will be no-op on such platform.
#[derive(Debug, Clone)]
#[non_exhaustive]
pub enum MenuItem {

  /// A menu item for enabling cutting (often text) from responders.
  ///
  /// ## Platform-specific
  ///
  /// - **Windows / Android / iOS:** Unsupported
  ///
  Cut,

  /// A menu item for pasting (often text) into responders.
  ///
  /// ## Platform-specific
  ///
  /// - **Windows / Android / iOS:** Unsupported
  ///
  Paste,

  /// Represents a Separator
  ///
  /// ## Platform-specific
  ///
  /// - **Windows / Android / iOS:** Unsupported
  ///
  Separator,
  ...
}
It can be seen that these built-in menu items are not supported on Windows, Android and iOS platforms, but with the release of the stable version, I believe these compatibility problems should be well solved.
debugging
In the development mode, debugging is relatively easy. Here's how to debug Rust and JavaScript code respectively in development mode.
Rust Console
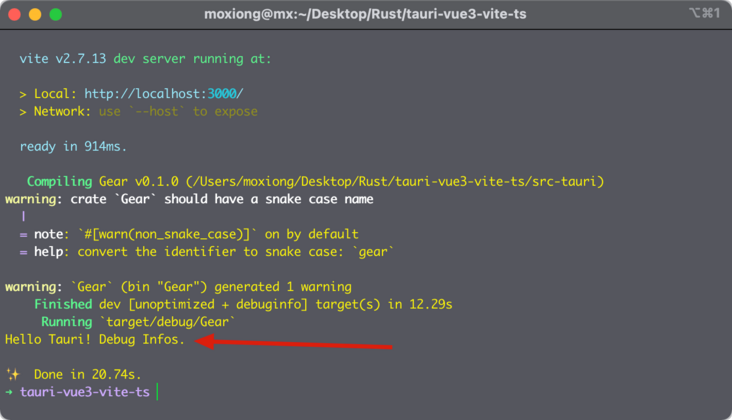
Debug Rust code, we can use println! Macro to print debugging information:
let msg = String::from("Debug Infos.")
println!("Hello Tauri! {}", msg);
Debugging information will be printed on the terminal:
WebView JS Console
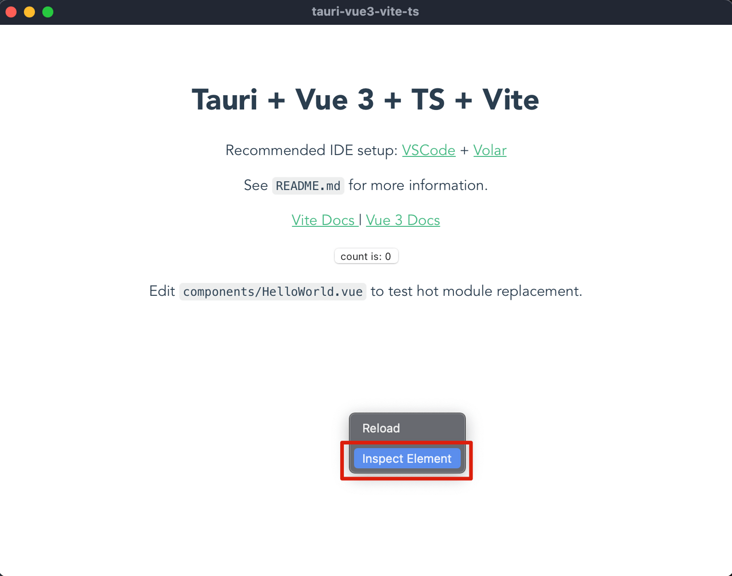
We can use console related functions to debug JavaScript code. Right click in the application window and select Inspect Element to open the WebView console.
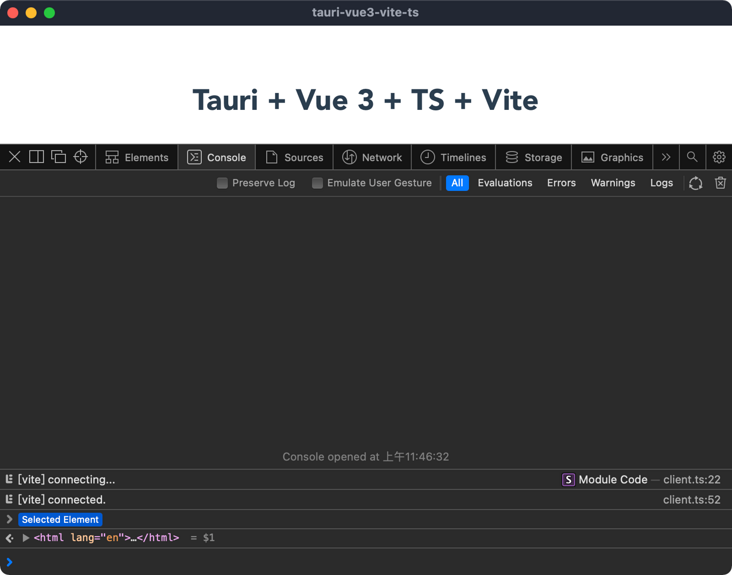
The console related operations will not be repeated.
tips: in some cases, we may also need to view the WebView console in the final package, so Tauri provides a simple command to create a debugging package:
yarn tauri build --debug
The application packaged by this command will be placed in the SRC Tauri / target / debug / bundle directory.
Application packaging
yarn tauri build
This command embeds the Web resource with the Rust code into a single binary file. The binary itself will be located in SRC Tauri / target / release / [app name], and the installer will be located in SRC Tauri / target / release / bundle /.
Roadmap
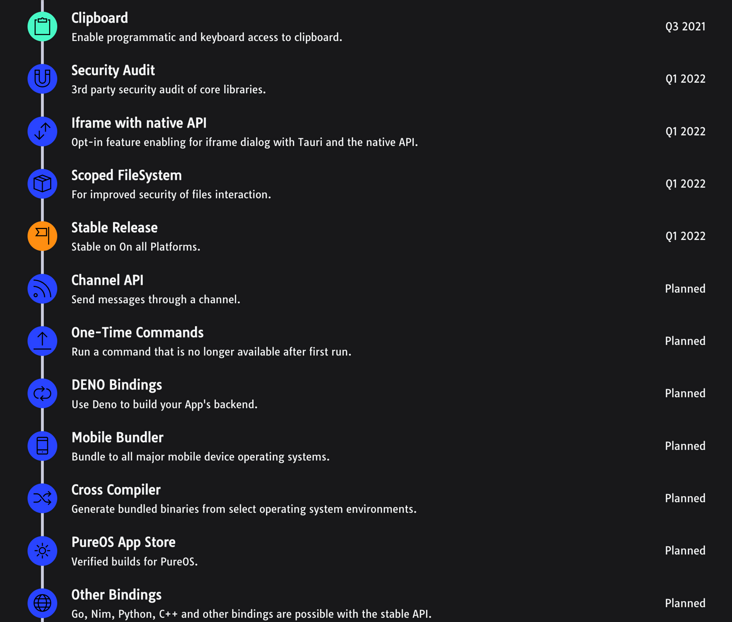
It can be seen from Tauri's Roadmap that the stable version will be released in 2022 Q1, including subsequent support for Deno and packaging to mobile devices. Therefore, the development of Tauri is worth looking forward to.
summary
Tauri's main products are smaller, faster and safer. Compared with the problems criticized by Electron, such as too large package and excessive memory consumption, Tauri is indeed a potential desktop application development framework. At the same time, with the blessing of Rust, it makes this desktop application development framework very attractive. However, since Tauri has not released a stable version so far, and some functions still have problems such as multi platform compatibility, it can not be applied in a large area in the production environment. I believe that with the development of Tauri, these problems will be solved, and a large part of the future desktop application development market will be occupied by Tauri. As developers, this is the best time to learn about Tauri and Rust. Let's take action~