preface
This article describes how to deploy k8s clusters on ubuntu, which can be roughly divided into the following steps:
- Modify ubuntu configuration
- Install docker
- Install kubedm, kubectl, and kubelet
- Initialize master node
- Join the slave node to the network
If you are unfamiliar with some of the above names, it doesn't matter. They will be explained one by one below. If you want to know about docker and k8s, you can refer to them 10 minutes to understand Docker and K8S . Well, before we start, let's take a look at the servers we have. If you are interested in how to build the following virtual machine networks, you can refer to them Virtual box virtual machine group network:
| host name | Host ip | edition | CPU | Memory |
|---|---|---|---|---|
| master1 | 192.168.56.11 | Ubuntu server 18.04 | 2 nucleus | 1G |
| worker1 | 192.168.56.21 | Ubuntu server 18.04 | 2 nucleus | 1G |
Because k8s there are management nodes and work nodes, we will deploy management nodes on master1 and work nodes on worker1. If you want to know how to create these two nodes, you can refer to Virtual box virtual machine group network . In terms of server configuration, k8s requires a minimum CPU of 2 cores, otherwise an error will be reported during installation. Although this error can be avoided, the virtual machine is configured as it wants for stability. As for memory k8s, there are no hard requirements, so I allocate it according to the performance of my computer.
Note that no specific version is specified for the installation of docker, k8s and other software in this article. On June 27, 2019, when this article is completed, the downloaded version is as follows. If there is a special version, please specify the version yourself.
| Software name | edition |
|---|---|
| docker | 18.09.5 |
| kubectl | 1.15.0-00 amd64 |
| kubeadm | 1.15.0-00 amd64 |
| kubelet | 1.15.0-00 amd64 |
I Modify ubuntu configuration
First, k8s ask our ubuntu to do some configuration that meets its requirements. It is very simple. It includes the following two steps: closing Swap memory and configuring password free login. In this step, both hosts need to be configured.
Close swap memory
In fact, this swap can be compared to the virtual memory on windows. It can keep the server running inefficiently when the memory is full, rather than directly blocking. However, newer versions of k8s require that swap be turned off. So let's go ahead and modify the / etc/fstab file:
sudo vi /etc/fstab
You should be able to see the following contents. Just # comment out the second item. Note that the first item should not be commented, otherwise the system may report a file system read only error after restart.
UUID=e2048966-750b-4795-a9a2-7b477d6681bf /   ext4    errors=remount-ro 0    1
# /dev/fd0        /media/floppy0  auto    rw,user,noauto,exec,utf8 0       0
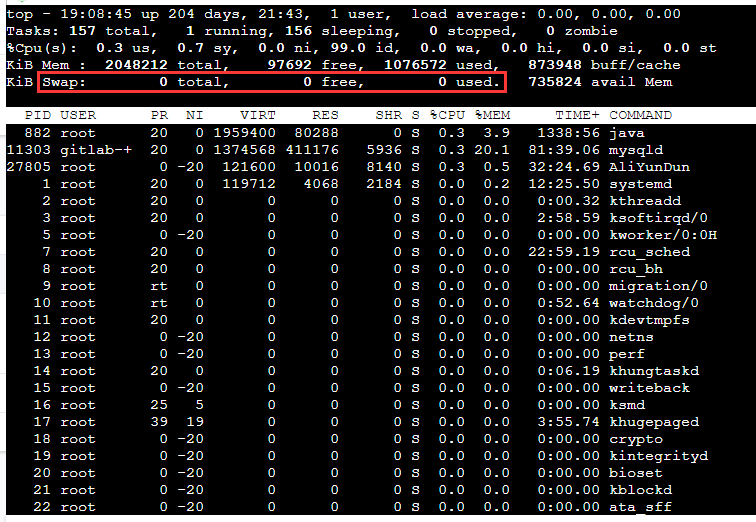
Then enter reboot to restart. After restarting, use the top command to view the task manager. If the following KiB Swap is 0, it indicates that the shutdown is successful.
Close the task manager after swap
The above is to permanently close the swap memory. In fact, it can also be closed temporarily. Use the swapoff -a command. The effect will disappear after restart.
Configure password free login
The reason why k8s requires that the management node can log in to the work node directly without secret is that after the cluster is built, the kubelet of the management node needs to log in to the work node for operation. As for how to operate, it is very simple, which is not mentioned in detail here. You can see the article Virtual box virtual machine group network The last chapter of key free login.
II Install docker
Docker is the foundation of k8s. After installation, you also need to modify some configurations to adapt to k8s. Therefore, this chapter is divided into two parts: docker installation and docker configuration. If you have installed and used docker for a period of time, it is recommended to use docker -v to view the installed version of docker, and query the k8s suitable for this version on the k8s official website for installation. In this step, both hosts need to be installed.
Installation of docker
The installation of docker in ubuntu is really simple. Just execute the following commands. Please remember to switch the image source to China before installation.
sudo apt install docker.io
After the installation is completed, use docker -v to verify whether docker is available.
Configuration of docker
After installation, some configurations are required, including switching the docker download source to the domestic image station and modifying cgroups.
What is cgroups? You can understand it as a process isolation tool. Docker uses it to implement container isolation. By default, docker uses cgroupfs, and k8s also uses a process isolation tool systemd. If two isolation groups are used, exceptions may be caused, so we need to change docker's to systemd.
Both are in / etc / docker / daemon JSON, so let's configure it together. First, execute the following command to edit the daemon json:
sudo vi /etc/docker/daemon.json
After opening, enter the following:
{
  "registry-mirrors": [
    "https://dockerhub.azk8s.cn",
    "https://reg-mirror.qiniu.com",
    "https://quay-mirror.qiniu.com"
  ],
  "exec-opts": [ "native.cgroupdriver=systemd" ]
}
Then: wq save and restart docker:
sudo systemctl daemon-reload
sudo systemctl restart docker
Then you can view the modified docker cgroup status through docker info | grep Cgroup. It is found that if it changes to systemd, the modification is successful.
III Installation k8s
After installing docker, you can download the three main components of k8s: kubelet, kubedm and kubectl. In this step, both hosts need to be installed. Let's briefly introduce the three:
- Kubelet: the core service of k8s
- Kubedm: This is an integrated tool for quick installation of k8s. We will use it to complete our k8s deployment on master1 and worker1.
- kubectl: k8s command line tool, which is used to perform subsequent operations after deployment
In fact, the download of these three is very simple. Just use apt get directly, but for some reasons, their download address does not exist. Therefore, we need to use the domestic mirror station to download, which is also very simple. We can execute the following five commands in sequence:
# Make apt support ssl transmission
apt-get update && apt-get install -y apt-transport-https
# Download gpg key
curl https://mirrors.aliyun.com/kubernetes/apt/doc/apt-key.gpg | apt-key add -
# Add k8s mirror source
cat <<EOF >/etc/apt/sources.list.d/kubernetes.list
deb https://mirrors.aliyun.com/kubernetes/apt/ kubernetes-xenial main
EOF
# Update source list
apt-get update
# Download kubectl, kubedm and kubelet
apt-get install -y kubelet kubeadm kubectl
Directly in / etc / apt / sources Add to list https://mirrors.aliyun.com/kubernetes/apt/ No, because the Alibaba mirror station uses ssl for transmission, you need to install apt transport HTTPS and download the key of the mirror station before downloading.
IV Installing the master node
After the download is completed, the main play will come. Initialize the master node. This chapter only needs to be configured on the management node. It can be roughly divided into the following steps:
- Initialize master node
- Deploy flannel network
- Configure kubectl tool
Initialize master node
Initialization can be easily completed by using kubedm's init command, but several parameters need to be carried, as shown below. First, do not copy directly. Change the ip address assigned to the -- apiserver advertisement address parameter to its own master host address, and then execute.
kubeadm init \
--apiserver-advertise-address=192.168.56.11 \
--image-repository registry.aliyuncs.com/google_containers \
--pod-network-cidr=10.244.0.0/16
Here are the meanings of some common parameters:
- --Apiserver advertisement address: the deployment address of the main service apiserver in k8s. Fill in your own management node ip
- --Image repository: the docker image source to be pulled. Because kubedm will pull k8s many components for deployment during initialization, it is necessary to specify the domestic image source, otherwise the image will not be pulled.
- --Pod network CIDR: This is the node network adopted by k8s, because we will use flannel as the k8s network, so fill in 10.244 0.0/16 is good
- --Kubernetes version: this parameter is used to specify the k8s version you want to deploy. Generally, you don't need to fill it in. However, if there is an installation error caused by the wrong version during initialization, you can use this parameter to specify it manually.
- --Ignore preflight errors: ignore the errors encountered during initialization. For example, if I want to ignore the errors caused by insufficient 2 cores of CPUs, I can use -- ignore preflight errors = cpu nnum. The error name is given when an initialization error occurs.
When you see the following words yes, it means that the initialization is successful. Please copy the command starting with kubedm join in the last line and use it when installing the work node. If you accidentally lose the command, you can use kubedm token create -- print join command on the master node to regenerate a command.
Your Kubernetes master has initialized successfully!

To start using your cluster, you need to run the following as a regular user:

  mkdir -p $HOME/.kube
  sudo cp -i /etc/kubernetes/admin.conf $HOME/.kube/config
  sudo chown $(id -u):$(id -g) $HOME/.kube/config

You should now deploy a pod network to the cluster.
Run "kubectl apply -f [podnetwork].yaml" with one of the options listed at:
  https://kubernetes.io/docs/concepts/cluster-administration/addons/

You can now join any number of machines by running the following on each node
as root:

kubeadm join 192.168.56.11:6443 --token wbryr0.am1n476fgjsno6wa --discovery-token-ca-cert-hash sha256:7640582747efefe7c2d537655e428faa6275dbaff631de37822eb8fd4c054807
If any Error occurs during initialization, causing initialization to terminate, use kubedm reset to reset and then re initialize.
Configure kubectl tool
This step is relatively simple. You can directly execute the following commands:
mkdir -p /root/.kube && \
cp /etc/kubernetes/admin.conf /root/.kube/config
After execution, no information will be refreshed. You can test whether kubectl is available through the following two commands:
# View joined nodes
kubectl get nodes
# View cluster status
kubectl get cs
Deploy flannel network
What is flannel? It is a network planning service specially set for k8s. It allows docker containers created by different node hosts in the cluster to have unique virtual IP addresses in the whole cluster. If you want to deploy flannel, you can directly execute the following commands:
kubectl apply -f https://raw.githubusercontent.com/coreos/flannel/a70459be0084506e4ec919aa1c114638878db11b/Documentation/kube-flannel.yml
The installation is completed by outputting the following:
clusterrole.rbac.authorization.k8s.io/flannel created
clusterrolebinding.rbac.authorization.k8s.io/flannel created
serviceaccount/flannel created
configmap/kube-flannel-cfg created
daemonset.extensions/kube-flannel-ds-amd64 created
daemonset.extensions/kube-flannel-ds-arm64 created
daemonset.extensions/kube-flannel-ds-arm created
daemonset.extensions/kube-flannel-ds-ppc64le created
daemonset.extensions/kube-flannel-ds-s390x created
At this point, the k8s management node deployment is complete.
V Join the slave node to the network
First, you need to repeat steps 1 to 3 to install docker, k8s and modify the server configuration, and then execute the command saved in step 4 to complete the joining. Note that this command is different for everyone. Do not copy it directly:
kubeadm join 192.168.56.11:6443 --token wbryr0.am1n476fgjsno6wa --discovery-token-ca-cert-hash sha256:7640582747efefe7c2d537655e428faa6275dbaff631de37822eb8fd4c054807
After the following contents are output in the console, the join is successful:
This node has joined the cluster:
* Certificate signing request was sent to apiserver and a response was received.
* The Kubelet was informed of the new secure connection details.
Run 'kubectl get nodes' on the master to see this node join the cluster.
Then log in to master1 to view the joined node status. You can see that worker1 has joined and the status is ready. So far, k8s construction is completed:
root@master1:~# kubectl get nodes
NAME      STATUS   ROLES    AGE    VERSION
master1   Ready    master   145m   v1.15.0
worker1   Ready    <none>   87m    v1.15.0
Default network card problem repair
If you are a virtual machine deployed using virtualBox, And the virtual machines cannot directly access each other using the ip address of network card 1 (for example, set up a dual network card, network card 1 is NAT address translation for Internet access, and network card 2 is host only for access between virtual machines). You need to execute the contents of this section to modify k8s's default network card. Otherwise, some commands will not be available. If your default network card can access between virtual machines, there is no such problem.
Modify kubelet default address
To access the kubelet configuration file:
sudo vi /etc/systemd/system/kubelet.service.d/10-kubeadm.conf
Add the following before ExecStart on the last line:
Environment="KUBELET_EXTRA_ARGS=--node-ip=192.168.56.21"
Restart kubelet:
systemctl stop kubelet.service && \
systemctl daemon-reload && \
systemctl start kubelet.service
So far, the modification is completed. For more information, see kubectl logs, exec and port forward failed to execute. Problem solving .
Modify the default network card of flannel
Edit flannel profile
sudo kubectl edit daemonset kube-flannel-ds-amd64 -n kube-system
Find spec.template spec.containers. Args field and add -- iface = network card name. For example, my network card is enp0s8:
- args:
  - --ip-masq
  - --kube-subnet-mgr
  # Add here
  - --iface=enp0s8
: wq after saving the changes, enter the following to delete all flannel s, k8s which will be rebuilt automatically:
kubectl delete pod -n kube-system -l app=flannel
So far, the modification is completed. See for more details Solve k8s the problem that other node pod s cannot be accessed through svc .
summary
By now, you should have built a complete and usable two node k8s cluster. Next, you can go deeper k8s, rank in order, and recommend reading in turn through the following contents:
reference resources
- Kubedm best practices for installing Kubernetes 1.14
- CGroup driver in Docker: cgroupfs and system D
- Ubuntu16.04 Kubernetes
- Introduction to Flannel
- k8s official documents
Author: hopgordy
Link: https://www.jianshu.com/p/f2d4dd4d1fb1
Source: Jianshu
The copyright belongs to the author. For commercial reprint, please contact the author for authorization, and for non-commercial reprint, please indicate the source.