Random talk about Autonomous vehicle_ 06
I ReadMe
- Bloggers used autoware1 Version 12.0, but the installation process of this version is slightly cumbersome, and there will be a problem of flower screen, which will be a headache for novices. Therefore, you can directly skip the old version (although 1.14.0 is also old...) and install a version that you think is easier: 1.14.0.
- If you want to install 1.12 0 version of Autoware, please move to: Ubuntu18.04 actual autoware1 12.0 (including ROS installation, QT installation and autoware flower screen solution)
- And 1.12 0 similarly, students only need to install ROS melody and QT in the early stage (the version is slightly different, and the version above 5.9.5 needs to be installed). There is no need to upgrade and install OpenCV. Similarly, students who want to use GPU can only install CUDA10.0.
- Official installation guide for Autoware: Source Build For Autoware
II Install ROS melody
The blogger has written an installation tutorial about ROS melody before, so it will not be repeated here. Please move if necessary: Link here .
III Install QT 5.9 five
- Download the installation package: QT opensource Linux x64-5.9 5.run
Download link: Link here - Open the terminal and cd to the location of the download package:
"""Change Execution Authority"""
sudo chmod +x qt-opensource-linux-x64-5.9.5.run

"""install"""
sudo ./qt-opensource-linux-x64-5.9.5.run
- Install step by step according to the installation wizard.
- Configure system path
"""open bashrc file"""
sudo vi /etc/bash.bashrc

"""stay bashrc Add at the end of the file:"""
export QTDIR=/opt/Qt5.9.5/5.9.5/gcc_64
export PATH=$QTDIR/bin:$PATH
export LD_LIBRARY_PATH=$QTDIR/lib:$LD_LIBRARY_PATH

"""After saving, in the terminal source once"""
source /etc/bash.bashrc

"""Confirm whether it is added successfully"""
echo $PATH
IV Install autoware1 fourteen
We won't explain in detail what each instruction does here. We can directly execute it in order.
### Various dependencies and configurations
$ sudo sh -c 'echo "deb http://packages.ros.org/ros/ubuntu
$ (lsb_release -sc) main" > /etc/apt/sources.list.d/ros-latest.list'

### Reopen a terminal
$ sudo apt-key adv --keyserver 'hkp://keyserver.ubuntu.com:80' --recv-key C1CF6E31E6BADE8868B172B4F42ED6FBAB17C654
$ sudo apt update
$ sudo apt install git
$ sudo apt install -y python-catkin-pkg python-rosdep ros-melodic-catkin
$ sudo apt install -y python3-pip python3-colcon-common-extensions python3-setuptools python3-vcstool
$ pip3 install -U setuptools

### Download and installation section
$ mkdir -p autoware.ai/src
$ cd autoware.ai
$ wget -O autoware.ai.repos "https://gitlab.com/autowarefoundation/autoware.ai/autoware/raw/1.14.0/autoware.ai.repos?inline=false"
$ vcs import src < autoware.ai.repos
$ sudo rosdep init $ rosdep update
$ rosdep install -y --from-paths src --ignore-src --rosdistro melodic
$ source /opt/ros/melodic/setup.bash

### compile
# CUDA not configured
colcon build --cmake-args -DCMAKE_BUILD_TYPE=Release
# CUDA configured
AUTOWARE_COMPILE_WITH_CUDA=1 colcon build --cmake-args -DCMAKE_BUILD_TYPE=Release
V Start autoware1 fourteen
### Input in sequence at the terminal
cd autoware.ai
source install/setup.bash
roslaunch runtime_manager runtime_manager.launch
Under normal conditions, it can be opened smoothly without problems like 1.12 The splash screen phenomenon in version 0.
Vi Run a bag and experiment
- Download the network shared bag and unzip it
### Download the network shared bag and unzip it
$ cd ~
$ cd .autoware
$ wget https://autoware-ai.s3.us-east-2.amazonaws.com/sample_moriyama_data.tar.gz
$ wget https://autoware-ai.s3.us-east-2.amazonaws.com/sample_moriyama_150324.tar.gz
$ tar zxfv sample_moriyama_150324.tar.gz
$ tar zxfv sample_moriyama_data.tar.gz
- Start Autoware
$ roslaunch runtime_manager runtime_manager.launch
- Perform a series of operations in the Runtime Manager of Autoware
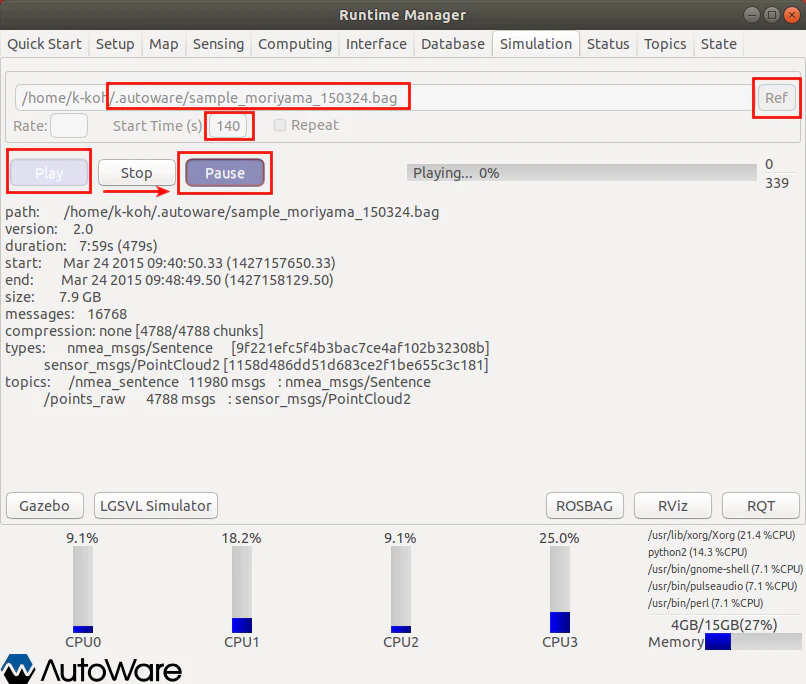
1: Simulation
- Choose 「.autoware/sample_moriyama_150324.bag」
- Set the start time to 140, then click Play and Pause just after it has started playing
2: Launch RViz
- Launch RViz through the RViz button
- Load default.rviz(File -> Open Config)
autoware/documentation/autoware_quickstart_examples/config/default.rviz

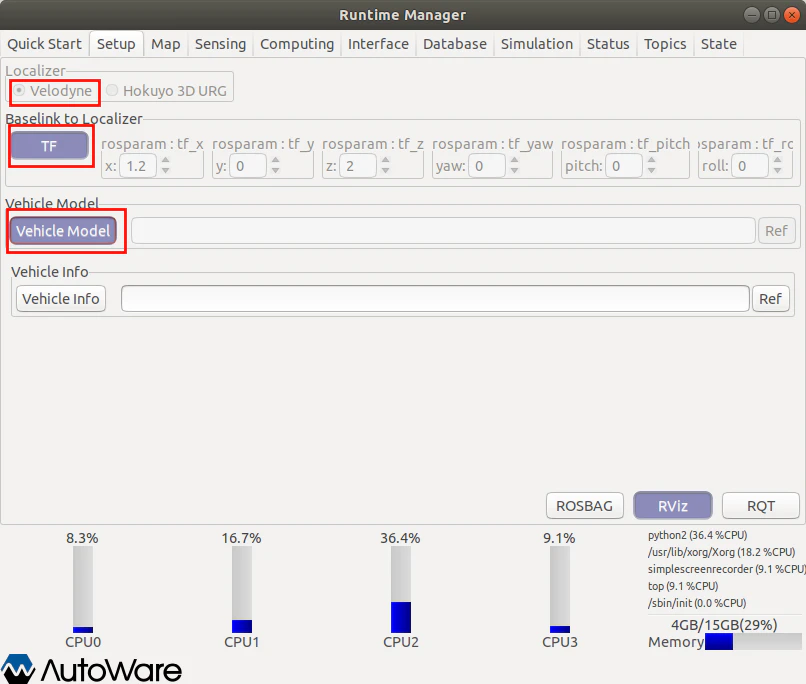
3: Setup
4: Map
- Point Cloud choose:「.autoware/data/map/pointcloud_map」and select them all
- TF choose: 「.autoware/data/tf/tf.launch」

- Select them all

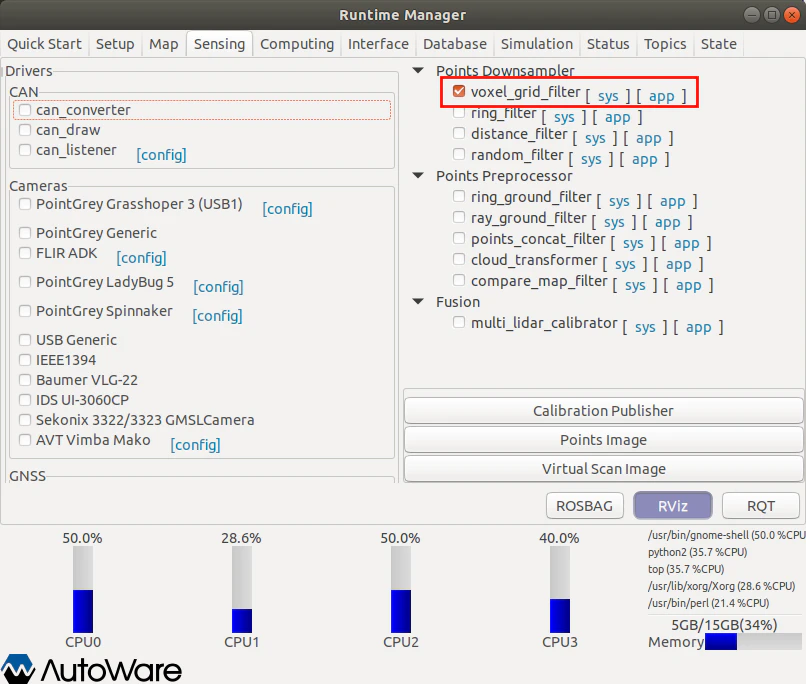
5: Sensing
6: Computing

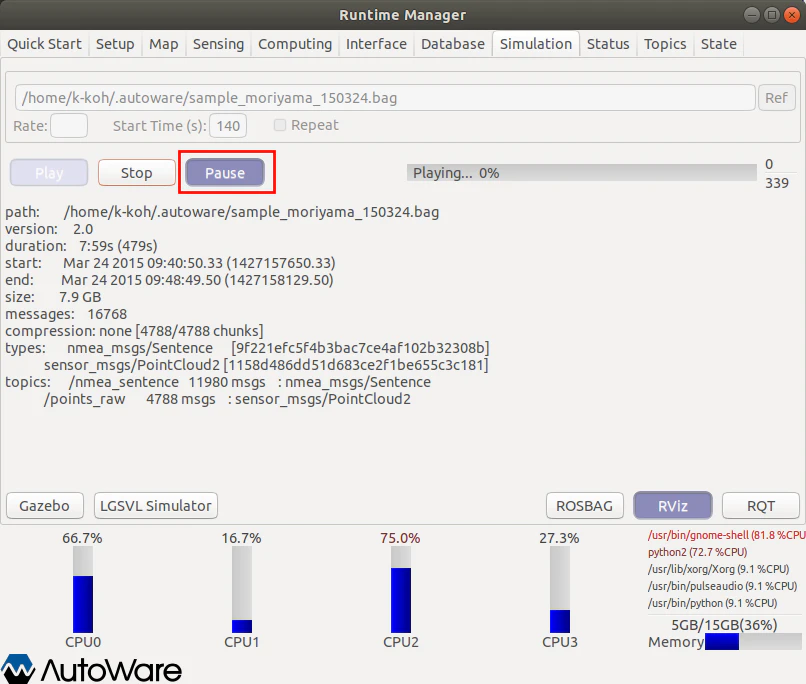
7: Simulation again
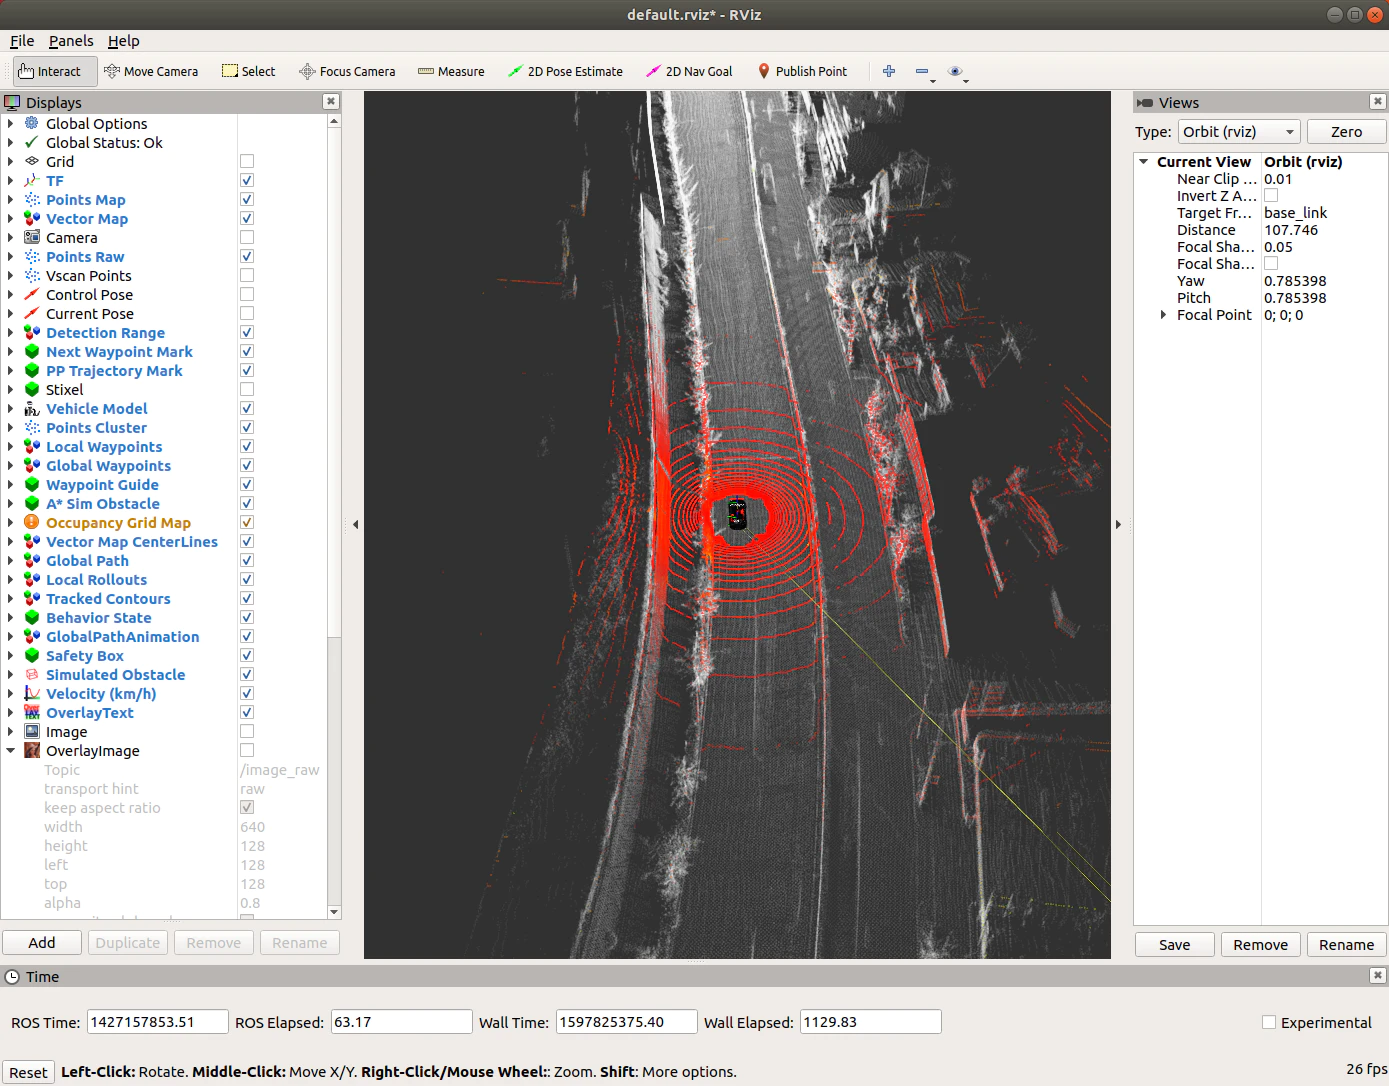
8: Firstly Results

9: Final Results
- Click Points Map two times

Video demonstration: (mute video, and scientific Internet access is required) Link here
VII Sharing and understanding
- Autoware1.14.0 is easier and faster to install, but it is different from 1.12 As in version 0, there is no built-in calibration function. The calibration box needs to be reinstalled by itself. After that, the blogger will update the corresponding installation tutorial.
- Read more books, read more newspapers, eat less snacks and sleep more.
If you have any questions, please correct them. Reprint is welcome, but please indicate the source.