Chinese official documents
Official documents in English
| Step 1: 1 Create and add ons |
| Unreal Engine 4 (UE4). It is recommended to read the programming quick start tutorial first. In this tutorial, it is assumed that you are familiar with creating projects, adding C + + code to them, and configuring input in the Unreal Editor. If you are not familiar with creating Pawn classes or configuring input, it is recommended to learn player input and Pawn tutorial first |
Programming quick start tutorial
Player input and Pawn tutorial
Programming Quick Start tutorial
Player Input and Pawns tutorial
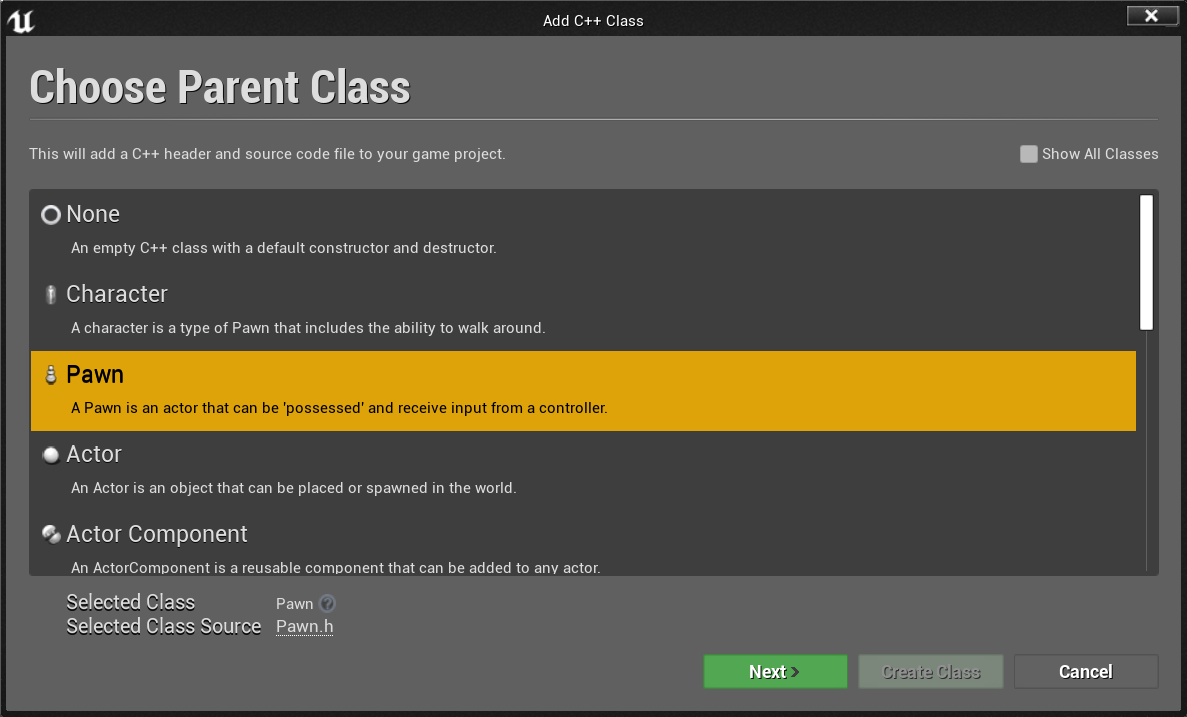
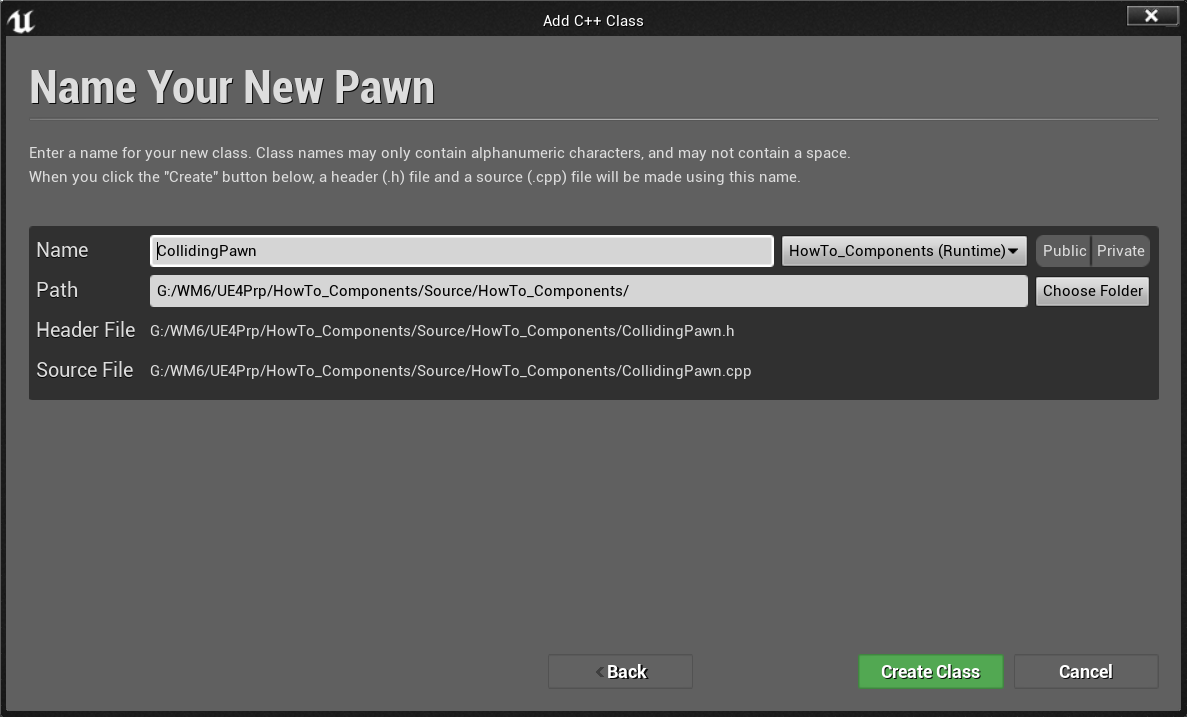
| 1.1 [another new C + + project] first, create a new C + + project with the beginner's content package and name it HowTo_Components. The first item to add to this item is a custom Pawn, which will contain components that move through the level and collide with solid objects. This tutorial will name it CollidingPawn. |
| 1.2 in your code editor (usually Visual Studio or Xcode), open CollidingPawn.h, and then add the following code at the bottom of the declaration section of the class: |
UPROPERTY()
class UParticleSystemComponent* OurParticleSystem;
| Use this variable to track the particle system component that will be created after. Components can be created directly without setting variables that track components, but to use such components in code, they should be stored in similar class member variables. |
| 1.3 you can now open collidingpawn CPP and edit the constructor ACollidingPawn::ACollidingPawn to add code that will generate various useful components and arrange them in a hierarchy. It will create a sphere component that interacts with the physical scene, a static mesh component that visually displays the collision shape, a particle system component that can be switched on and off at will, and a spring arm component that can be used to add a camera component to control the game perspective. Before that, we should add the header file that will eventually be used. Below the line where the header file information is located, we want to add: |
#include "UObject/ConstructorHelpers.h"
#include "Particles/ParticleSystemComponent.h"
#include "Components/SphereComponent.h"
#include "Camera/CameraComponent.h"
#include "GameFramework/SpringArmComponent.h"
| 1.4 determine the components to be used as the root node of the hierarchy. The sphere component is a physical entity that can interact and collide with the game scene. This tutorial will use the sphere component. Note: there can be multiple physical enabled components in the Actor hierarchy, but only one is required in this tutorial. |
// Our root component will be a sphere that reacts to physics
    USphereComponent* SphereComponent = CreateDefaultSubobject<USphereComponent>(TEXT("RootComponent"));
    RootComponent = SphereComponent;
    SphereComponent->InitSphereRadius(40.0f);
    SphereComponent->SetCollisionProfileName(TEXT("Pawn"));
| Added to ACollidingPawn::ACollidingPawn. |
| 1.5 next, you will create and attach a visible sphere with a radius of 50 from the static mesh volume resource. It doesn't fit perfectly with the sphere component of radius 40 just created, so it needs to be reduced by 80%. It also needs to be moved down 40 units so that its center is aligned with the center of the sphere assembly. |
// Create and position a mesh component so we can see where our sphere is
    UStaticMeshComponent* SphereVisual = CreateDefaultSubobject<UStaticMeshComponent>(TEXT("VisualRepresentation"));
    SphereVisual->SetupAttachment(RootComponent);
    static ConstructorHelpers::FObjectFinder<UStaticMesh> SphereVisualAsset(TEXT("/Game/StarterContent/Shapes/Shape_Sphere.Shape_Sphere"));
    if (SphereVisualAsset.Succeeded())
    {
        SphereVisual->SetStaticMesh(SphereVisualAsset.Object);
        SphereVisual->SetRelativeLocation(FVector(0.0f, 0.0f, -40.0f));
        SphereVisual->SetWorldScale3D(FVector(0.8f));
    }
| Hard coded asset paths are generally not recommended, for example, the path of a sphere static mesh in this example; We usually create a component in the constructor to make it editable, and then create a blueprint asset in the phantom editor and set the static grid body asset there. But you can also do this directly in the code. For programmers, it can also make debugging or developing new functions faster. |
| 1.6 inactive particle system components can now be attached to the hierarchy. You can manipulate this component in code and then set the input to switch. Note: particle system components are attached directly to static mesh body components, not to the root. At the same time, it deviates slightly from the center of the bottom of the grid body for clear display during operation. |
// Create a particle system that we can activate or deactivate
    OurParticleSystem = CreateDefaultSubobject<UParticleSystemComponent>(TEXT("MovementParticles"));
    OurParticleSystem->SetupAttachment(SphereVisual);
    OurParticleSystem->bAutoActivate = false;
    OurParticleSystem->SetRelativeLocation(FVector(-20.0f, 0.0f, 20.0f));
    static ConstructorHelpers::FObjectFinder<UParticleSystem> ParticleAsset(TEXT("/Game/StarterContent/Particles/P_Fire.P_Fire"));
    if (ParticleAsset.Succeeded())
    {
        OurParticleSystem->SetTemplate(ParticleAsset.Object);
    }
| 1.7 using the spring arm assembly, the camera can be accelerated and decelerated at a speed lower than its tracking Pawn, so as to obtain a smoother camera attachment point. It also has a built-in function to prevent the camera from passing through solid objects and is used to deal with situations such as players retreating to a corner in a third person game. Although the spring arm assembly is not a necessary component, it can easily make the camera smoother when moving in the game. |
// Use a spring arm to give the camera smooth, natural-feeling motion.
    USpringArmComponent* SpringArm = CreateDefaultSubobject<USpringArmComponent>(TEXT("CameraAttachmentArm"));
    SpringArm->SetupAttachment(RootComponent);
    SpringArm->SetRelativeRotation(FRotator(-45.f, 0.f, 0.f));
    SpringArm->TargetArmLength = 400.0f;
    SpringArm->bEnableCameraLag = true;
    SpringArm->CameraLagSpeed = 3.0f;
| 1.8 the component has been created and attached. This Pawn should now be set to be controlled by the default player. Just use the following code: |
// Create a camera and attach to our spring arm
    UCameraComponent* Camera = CreateDefaultSubobject<UCameraComponent>(TEXT("ActualCamera"));
    Camera->SetupAttachment(SpringArm, USpringArmComponent::SocketName);
| The new Pawn has attached a series of useful components to start user control configuration. Now back to the Unreal Editor. |
| Step 2: 2 Configure input and create Pawn mobile components |
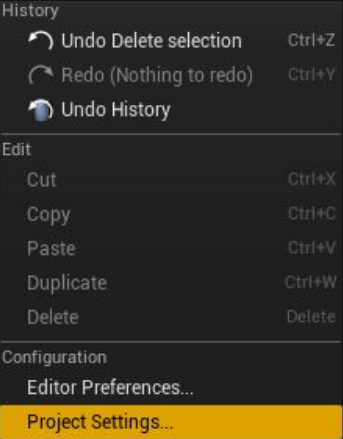
| 2.1 return to Unreal Editor and start configuring item input settings. Relevant settings can be found under project settings in the edit drop-down menu. |
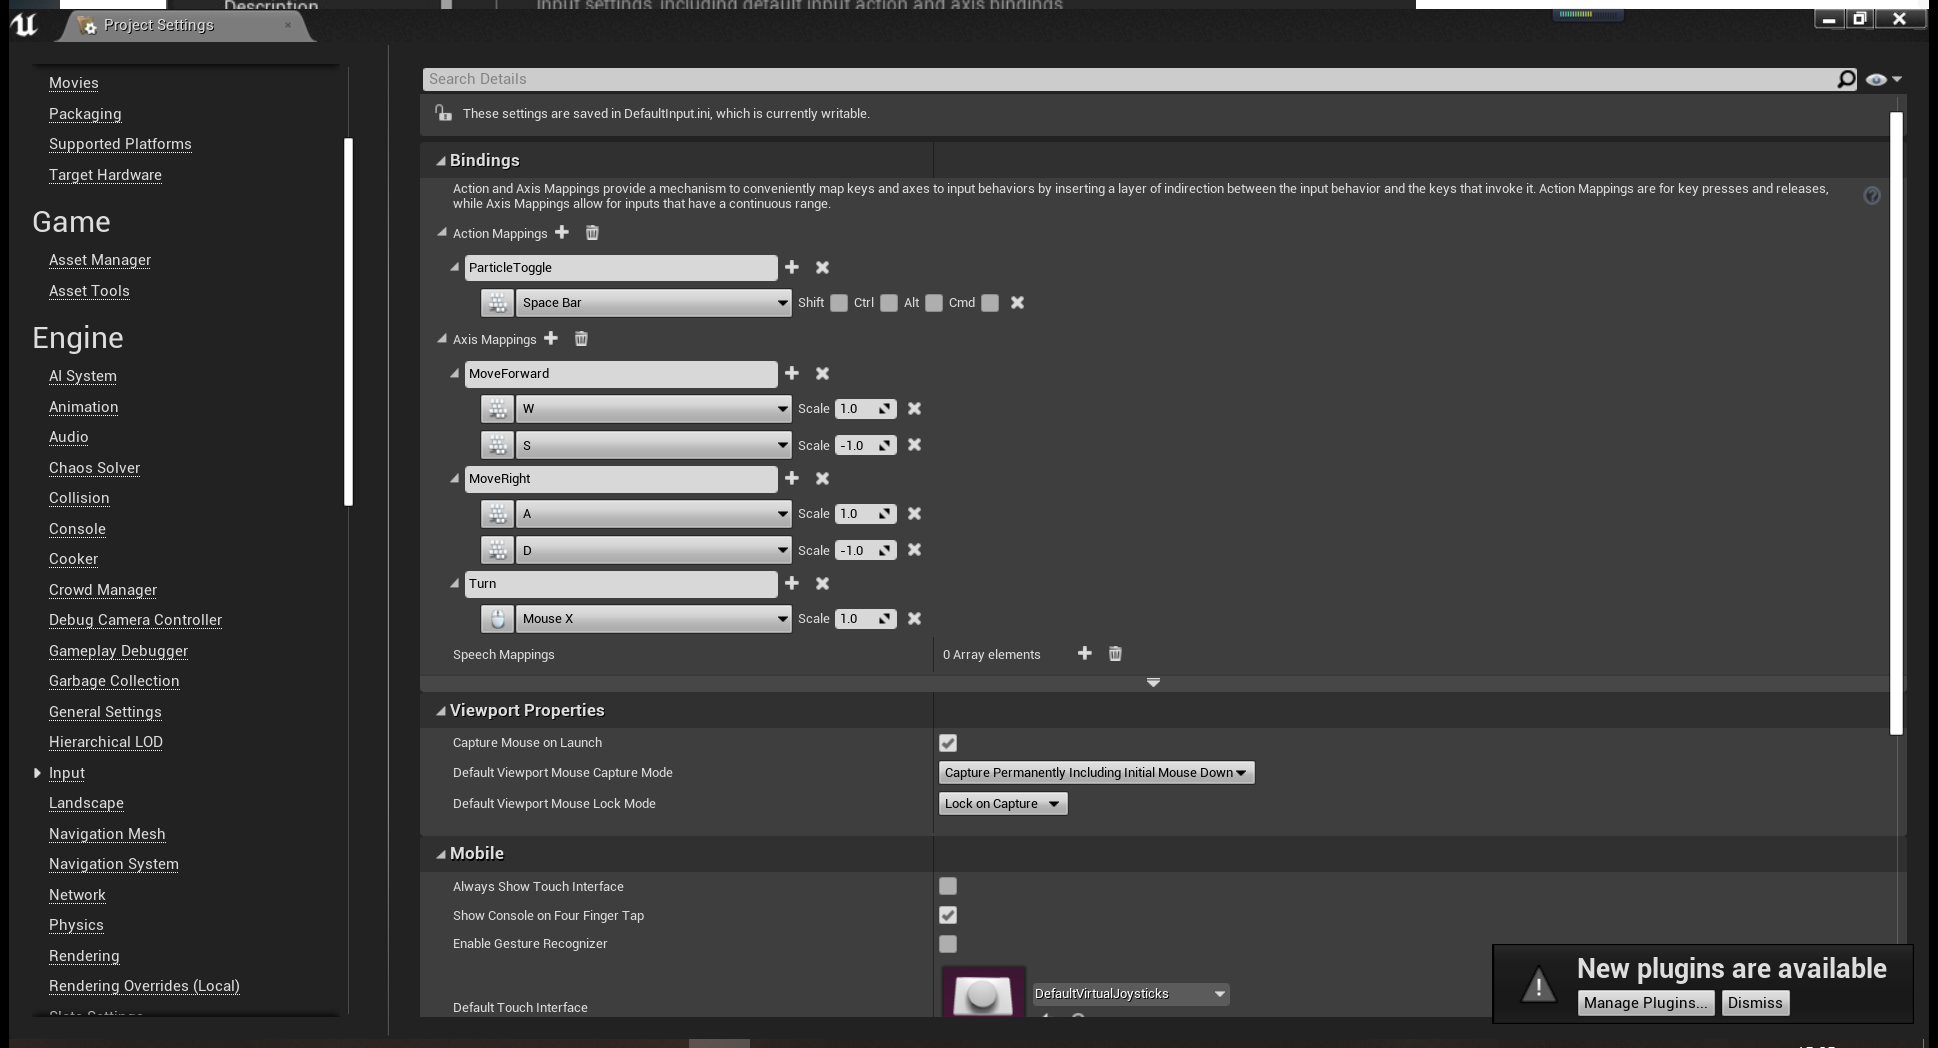
| After entering this menu, you can select input in the engine section in the left panel. At the same time, you need to set Action Mapping for particle system switching, two Axis Mapping for moving Pawn, and one Axis Mapping for rotating Pawn. |
| Action Mapping | |
|---|
| ParticleToggle | Space Bar |
| Axis Mapping | | |
|---|
| MoveForward | W | 1.0 |
| S | -1.0 |
| MoveRight | A | -1.0 |
| D | 1.0 |
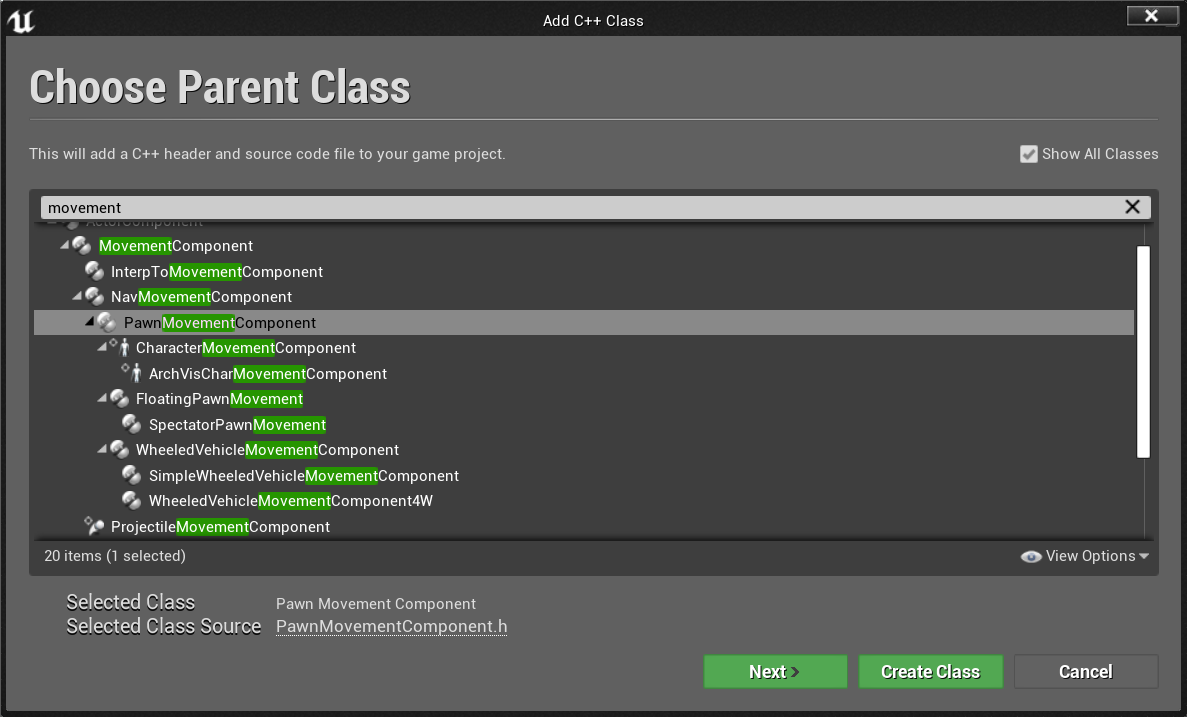
| 2.2 a movement component will be created to manage the movement instead of directly handling all movements in the Pawn class. The Pawn Movement Component class will be extended in this tutorial. First, select the Add Code to Project command from the file drop-down menu. Unlike the Pawn class, the Pawn mobile component class is invisible by default. To find the component, select the Show All Classes option. Enter "movement" in the search bar to quickly narrow the list. |
| Pawn mobile components have some powerful built-in functions to use common physical functions and facilitate the sharing of mobile code among a large number of pawn types. Using components to separate different functions is a good way to reduce clutter when the project increases and pawn becomes more complex. |
| Since the Pawn class has been named CollidingPawn, name it CollidingPawnMovementComponent. The input configuration has just been defined and a custom Pawn mobile component has been created. Now let's go back to the code editor and continue to write code to define how Pawn moves when Pawn mobile components are used. |
| Step 3: 3 Write code for the behavior of Pawn mobile components |
| 3.1 now go back to the code editor and write code for the custom Pawn mobile component. Just write the TickComponent function (similar to the Actor's tickfunction) to tell you how to move frame by frame. In CollidingPawnMovementComponent.h, you need to override the TickComponent in the class definition: |
public:
    virtual void TickComponent(float DeltaTime, enum ELevelTick TickType, FActorComponentTickFunction *ThisTickFunction) override;
| In collidingpawnmovementcomponent This function is defined in CPP: |
void UCollidingPawnMovementComponent::TickComponent(float DeltaTime, enum ELevelTick TickType, FActorComponentTickFunction *ThisTickFunction)
{
    Super::TickComponent(DeltaTime, TickType, ThisTickFunction);

    // Make sure that everything is still valid, and that we are allowed to move.
    if (!PawnOwner || !UpdatedComponent || ShouldSkipUpdate(DeltaTime))
    {
        return;
    }

    // Get (and then clear) the movement vector that we set in ACollidingPawn::Tick
    FVector DesiredMovementThisFrame = ConsumeInputVector().GetClampedToMaxSize(1.0f) * DeltaTime * 150.0f;
    if (!DesiredMovementThisFrame.IsNearlyZero())
    {
        FHitResult Hit;
        SafeMoveUpdatedComponent(DesiredMovementThisFrame, UpdatedComponent->GetComponentRotation(), true, Hit);

        // If we bumped into something, try to slide along it
        if (Hit.IsValidBlockingHit())
        {
            SlideAlongSurface(DesiredMovementThisFrame, 1.f - Hit.Time, Hit.Normal, Hit);
        }
    }
};
| This code will move Pawn smoothly in the scene and slide on the surface as appropriate. Gravity is not applied to Pawn, and its maximum speed is hard coded to 150 illusory units per second. |
| This TickComponent function uses several powerful features provided by the UPawnMovementComponent class. ConsumeInputVector reports and clears the built-in variable values used to store mobile input. SafeMoveUpdatedComponent uses the unreal engine to physically move pawn mobile components while considering solid obstacles. When the movement causes a collision, the SlideAlongSurface handles the calculation and physics involved in sliding smoothly along the collision surface such as walls and slopes, rather than staying in place and sticking to the walls or slopes. Pawn mobile component also contains many functions worth exploring, but they are not needed for the time being in the scope of this tutorial. You can view other classes such as floating pawn movement, bystander pawn movement or * * role movement component * * to understand additional usage examples and methods. |
After defining the behavior of Pawn mobile components, you can write code to associate them all.
| Step 4: 4 Using both Pawn and components |
| 4.1 to use custom Pawn mobile components, first add variables to Pawn class for tracking. At collidingpawn At the bottom of the class definition in H, next to the location where the "OurParticleSystem" variable is added, add: |
UPROPERTY()
class UCollidingPawnMovementComponent* OurMovementComponent;
| 4.2 once you have a location that can be used to track it, you need to create a collision Pawn moving component stored in a new variable. So open collidingpawn CPP, add the following line below the line of "CollidingPawn.h" at the top of the file so that the code can reference the new class: |
#include "CollidingPawnMovementComponent.h"
| The method of creating a Pawn mobile component and associating it with Pawn is very simple. At the bottom of ACollidingPawn::ACollidingPawn, add this Code: |
| Different components do not need to be attached to their own component level. This is because other components belong to the scene component type and need physical location. But motion controller |
| 4.3 once you have a location that can be used to track it, you need to create a collision Pawn moving component stored in a new variable. So open collidingpawn CPP, add the following line below the line of "CollidingPawn.h" at the top of the file so that the code can reference the new class: |
virtual UPawnMovementComponent* GetMovementComponent() const override;
| And in collidingpawn In CPP, you need to add the definition of the override function as follows: |
UPawnMovementComponent* ACollidingPawn::GetMovementComponent() const
{
    return OurMovementComponent;
}
| 4.4 after setting up a new Pawn mobile component, you can create code to process the input that Pawn will receive. First at collidingpawn The following functions are declared within the class definition in H: |
void MoveForward(float AxisValue);
void MoveRight(float AxisValue);
void Turn(float AxisValue);
void ParticleToggle();
| At collidingpawn CPP, add the definition of such functions as follows: |
void ACollidingPawn::MoveForward(float AxisValue)
    {
        if (OurMovementComponent && (OurMovementComponent->UpdatedComponent == RootComponent))
        {
            OurMovementComponent->AddInputVector(GetActorForwardVector() * AxisValue);
        }
    }

    void ACollidingPawn::MoveRight(float AxisValue)
    {
        if (OurMovementComponent && (OurMovementComponent->UpdatedComponent == RootComponent))
        {
            OurMovementComponent->AddInputVector(GetActorRightVector() * AxisValue);
        }
    }

    void ACollidingPawn::Turn(float AxisValue)
    {
        FRotator NewRotation = GetActorRotation();
        NewRotation.Yaw += AxisValue;
        SetActorRotation(NewRotation);
    }

    void ACollidingPawn::ParticleToggle()
    {
        if (OurParticleSystem && OurParticleSystem->Template)
        {
            OurParticleSystem->ToggleActive();
        }
    }
| 4.5 now just bind the function to the input event. Add the following code to ACollidingPawn::SetupPlayerInputComponent: |
InInputComponent->BindAction("ParticleToggle", IE_Pressed, this, &ACollidingPawn::ParticleToggle);

InInputComponent->BindAxis("MoveForward", this, &ACollidingPawn::MoveForward);
InInputComponent->BindAxis("MoveRight", this, &ACollidingPawn::MoveRight);
InInputComponent->BindAxis("Turn", this, &ACollidingPawn::Turn);
| 4.6 now that the programming is complete, you can return to the illusory editor and press the compile button to load the changes. |
| 5.1 in the phantom editor, you can press the compile button to load code changes. |
| 5.2 the CollidingPawn instance needs to be put into the scene. This class can be found in the content browser under "C++ Classes/HowTo_Components/CollidingPawn". |
| 5.3 press run, the sphere will move with WASD, rotate with the mouse, and collide and slide on the objects in the scene (such as tables and chairs), or any physical objects that need to be put into the scene. You can also use the spacebar to ignite (or extinguish) yourself! |