Chapter 1 implementation of indexCateList
1, Implementation of background data
-
Home page paging list data to achieve simple cors processing
// Home navigation page data let indexCateList = require('./datas/indexCateList.json') router.get('/getindexCateList', async (ctx, next) => { // The generated H5 application has cross domain problems. Set cross domain configuration through CORS ctx.set('Access-Control-Allow-Origin', '*') await new Promise(resolve => setTimeout(() => resolve(),2000)) // Analog delay ctx.body = indexCateList; }); -
The server-side cros can also be implemented using the CORS plug-in of KOA https://www.npmjs.com/package/koa2-cors
2, Front desk index Vue not only needs to determine the navIndex subscript, but also needs to obtain the navigation id, that is, the navId, so that it can obtain the data of the specified classification through the navId
-
Setting and obtaining of classification id
<scroll-view scroll-x="true" class="navScroll" v-if="indexData.kingKongModule">
    <!-- changeNav The initial value is set for the first recommendation -->
    <view class="navItem" :class="{activeClass:navIndex === 0 }" @click="changeNav(0,0)">recommend</view>
   <!-- changeNav Pass subscript and navigation id value -->
    <view  @click="changeNav(index+1, navItem.L1Id)" ...>
        {{navItem.text}}
    </view>
</scroll-view>
<script> ... export default { components:{ Recommend, }, data() { return { navIndex:0, // subscript navId: 0, // navId navigation id }; }, ... methods:{ ... // Need to pass subscript and navigation id changeNav(navIndex,navId){ // If the navId passed in is not equal to the current navId, set the navId and navIndex (navId !== this.navId) && (this.navId = navId, this.navIndex = navIndex) } } }; </script> -
Introduce classification list component and usage component (you need to create classification list component)
<script> ... // Category list component needs to be created import CateList from '../../components/cateList/cateList.vue' export default { components:{ Recommend, CateList }, ... } -
Judge whether to display recommendations or specific classification list contents through conditions
<scroll-view scroll-y="true">
    <!-- navId 0 is recommended, and the recommended components are displayed -->
    <Recommend v-if='navId===0'></Recommend>
     <!-- navId Not 0, display classification list group component -->
    <CateList v-if='navId !== 0' :navId='navId'></CateList>
</scroll-view>
3, Creation of classification list component
- Processing of rendered display content
<template>
	<div class='cateListContainer' v-if="cateList.length > 0">
        <!-- Classified rotation -->
		<swiper :indicator-dots="true" :autoplay="true" indicator-color='green' indicator-active-color='pink'>
			<swiper-item v-for="(swiperItem, index) in cateObj.category.bannerUrlList" :key='index'>
				<image :src="swiperItem" mode=""></image>
			</swiper-item>
		</swiper>
         <!-- Classification name and description -->
		<text class="title">{{cateObj.category.name}}</text>
		<text class="desc">{{cateObj.category.frontDesc}}</text>
		<!-- Splitting of item list components -->
        <ShopList :shopList='cateObj.itemList'></ShopList>
	</div>
</template>
-
Processing of classification styles
<style lang="stylus">
	.cateListContainer
		swiper
			width 100%
			height 370rpx
			image
				width 100%
				height 100%
		.title
			display block
			text-align center
			font-size 34rpx
			color #333
			line-height 70rpx
		.desc
			display block
			text-align center
			font-size 24rpx
			color #999
			line-height 40rpx
</style>
-
Logical operations such as data request
- Receive properties
- Set initial value cateList
- Data requests are made in the mounted phase
- Filter the current classified content
- Import item list subcomponent
<script> import ShopList from '../shopList/shopList.vue' import request from '../../utils/request.js' export default { props: ['navId'], components: { ShopList }, data() { return { cateList: [] } }, async mounted(){ wx.showLoading({ title: 'Loading' }) this.cateList = await request('/getindexCateList') wx.hideLoading(); }, computed: { cateObj(){ return this.cateList.find(item => item.category.parentId === this.navId) } } } </script> -
Creation of product list component
-
Processing of rendered display content
<div class="listContainer"> <div class="listItem" v-for='(item, index) in shopList' :key='index'> <image :src="item.listPicUrl"></image> <p>{{item.name}}</p> <p style='color: red;font-weight: bold;'>$ {{item.retailPrice}}</p> </div> </div> -
Processing of list styles
<style lang="stylus">
	.listContainer
		display flex
		flex-wrap wrap
		justify-content space-around
		/* When there is only one element in the last row, the layout cannot be left */
		&:after
			content ''
			width 345rpx
			height 0
		.listItem
			width 345rpx
			display flex
			flex-direction column
			image
				width 345rpx
				height 345rpx
			p
				white-space pre-wrap
				font-size 28rpx
				line-height 50rpx
				text-align left
</style>
-
Receipt of item list properties
export default {
	props: ['shopList'],
}
-
Chapter 2 dynamic display of data on the left side of category
1, tabbar tab processing
-
Quickly copy tab configuration information to pages JSON configuration file
{ ... "tabBar": { "color":"#555", "selectedColor":"#D43C33", "list": [ { "pagePath": "pages/index/index", "text": "home page", "iconPath":"/static/images/tabBar/tab-home.png", "selectedIconPath": "/static/images/tabBar/tab-home-current.png" }, { "pagePath": "pages/categorys/categorys", "text": "classification", "iconPath":"/static/images/tabBar/tab-cate.png", "selectedIconPath": "/static/images/tabBar/tab-cate-current.png" }, { "pagePath": "pages/cart/cart", "text": "Shopping Cart", "iconPath":"/static/images/tabBar/tab-cart.png", "selectedIconPath": "/static/images/tabBar/tab-cart-current.png" }, { "pagePath": "pages/personal/personal", "text": "Personal Center", "iconPath":"/static/images/tabBar/tab-my.png", "selectedIconPath": "/static/images/tabBar/tab-my-current.png" } ] } } -
Quickly create page content such as classification, personal center, shopping cart, etc
-
Modify pages JSON, modify the value of the navigationBarTitleText property, otherwise it will be null
2, Implementation of classification page
-
The basic structure of the classification page, including header search, left and right
<template>
	<view class="categoryContainer">
		<!-- head -->
		<view class="searchHeader">
			<view class="search">Search for products</view>
		</view>
		<view class="contentContainer">
			<!-- left -->
			<view class="leftContainer"></view>
			<!-- right -->
			<view class="rightContainer"></view>
		</view>
	</view>
</template>
-
Basic structure style processing
.categoryContainer
		.searchHeader
			width 100%
			height 56rpx
			padding 10rpx 0
			.search
				width 94%
				height 56rpx
				line-height 56rpx
				background #EDEDED
				margin 0 auto
				text-align center
				font-size 28rpx
				border-radius 10rpx
		.contentContainer
			display flex
			height calc(100vh - 76rpx) /* Height calculation */
			.leftContainer
				width 20%
				background red
			.rightContainer
				width 80%
				background #007AFF
3, Select the active style on the left
-
The scroll view component also needs to be applied on the left, because there may be many classified contents
<view class="leftContainer"> <scroll-view scroll-y="true" class="navScroll"> <view class="navItem activeClass">Menu content</view> ... </scroll-view> </view> -
Scroll left and activate style
.leftContainer
			width 20%
			.navScroll
				height 100%
				.navItem
					position relative /* Relative position of parent class */
					font-size 26rpx
					text-align center
					line-height 80rpx
					&.activeClass:after
						content ''
						width 2rpx
						height 80%
						background #BB2C08
						position absolute  /* Subclass absolute position */
						top 10% /* top Why 10%? Because the overall height is 80%, the top is 10%, leaving 10% for the bottom */
						left 6rpx
		.rightContainer
			width 80%
			background #007AFF
4, Classification backend interface processing
// Classification page data
let cateGoryData = require('./datas/categoryDatas.json');
router.get('/getCateGoryData', async (ctx, next) => {
	ctx.body = cateGoryData
});
5, Where do classified data requests operate
-
Create category under store/modules js
import request from '../../utils/request.js' const state = { categoryList: [], } const mutations = { changeCategoryMutation(state,payload){ state.categoryList = payload } } const actions = { async getCategoryDataAction({commit}){ let result = await request('/getCateGoryData'); console.log(result) commit('changeCategoryMutation',result) } } const getters = {} export default { namespaced:true, state, mutations, actions, getters } -
Modify the content of the store and add the classification part to the store
import Vue from 'vue' import Vuex from 'vuex' import indexModule from './modules/index' import categoryModule from './modules/category' Vue.use(Vuex) export default new Vuex.Store({ modules: { indexModule, categoryModule }, }) -
The classification page uses mapState and mapActions to obtain vuex data
<script> import {mapState,mapActions} from 'vuex' export default { data(){ return { navId:0 } }, async mounted(){ await this.getCategoryDataAction() /* You need to use async await for processing, otherwise the following assignment code may not find the object */ this.navId = this.categoryList[0].id }, computed:{ ...mapState('categoryModule',['categoryList']) }, methods:{ ...mapActions('categoryModule',['getCategoryDataAction']) } }; </script> -
The navigation item of the left scroll view is iterated
<scroll-view scroll-y="true" class="navScroll">
    <view class="navItem"
          v-for='(navItem, index) in categoryList'
          :key='index'
          :class="{activeClass: navId === navItem.id }">{{navItem.name}}</view>
</scroll-view>
6, Click the left and right classification menus to display more classification contents on the right
-
Click event handling
<scroll-view scroll-y="true" class="navScroll"> <!-- Click event delivery id --> <view @click="changeNav(navItem.id)"...>{{navItem.name}}</view> </scroll-view> -
Add callback function for click event
methods:{ ...mapActions('categoryModule',['getCategoryDataAction']), changeNav(navId){ this.navId = navId // Set the current navId as the navId passed in } } -
Filter secondary classification data
computed:{ ...mapState('categoryModule',['categoryList']), // Filter the qualified secondary classification data with filter categoryObj(){ return (this.categoryList.filter(item => item.id === this.navId))[0] } }, -
The right classification loop traversal requires v-if condition judgment and v-for loop traversal
<scroll-view scroll-y="true" class="contentScroll" v-if="categoryObj"> <view> <image class="contentImg" :src="categoryObj.imgUrl"></image> <view class="contentItem" v-for='(contentItem, index) in categoryObj.subCateList' :key='contentItem.id'> <image :src="contentItem.wapBannerUrl"></image> <text>{{contentItem.name}}</text> </view> </view> </scroll-view> -
Right classification style control
.rightContainer
			width 80%
			.contentScroll
				height 100% /* Height 100% */
				.contentContainer
					display flex
					flex-wrap wrap /* Auto wrap */
					.contentImg
						width 560rpx
						height 190rpx
						margin 10rpx
					.contentItem
						width 33.333% /* 3 Permutations */
						display flex /* Sub element elastic box layout */
						flex-direction column
						align-items center
						image
							width 90%
							height 144rpx
						text
							font-size 24upx
							text-align center
Chapter 3 personal center page completed
1, Copy the personal center page code,, pages / personal / personal vue
In uniApp, it is not necessary to use the tag form of applet. You can also use the traditional html tag structure, such as div, p, h2, etc
<template>
	<div>
		<div class="header">
			<image class="userImg" src="../../static/images/personal/personal.png"></image>
			<div class='userInfo'>
				<p>Not logged in</p>
			</div>
		</div>
		<div class="content">
			<h2>My assets</h2>
			<p class='line'></p>
			<div class="myAssetList">
				<div class='assetItem'>
					<span>¥0</span>
					<span>Return money</span>
				</div>
				<div class='assetItem'>
					<span>¥0</span>
					<span>Red envelopes</span>
				</div>
				<div class='assetItem'>
					<span>¥0</span>
					<span>coupon</span>
				</div>
				<div class='assetItem'>
					<span>¥0</span>
					<span>allowance</span>
				</div>
				<div class='assetItem'>
					<span>¥0</span>
					<span>Gift card</span>
				</div>
			</div>
			<!-- List Options -->
			<div class="personalList">
				<div class="navItem" v-for='(item, index) in personalList' :key='index'>
					<i class='iconfont ' :class='item.icon'></i>
					<p>{{item.name}}</p>
				</div>
			</div>
		</div>
	</div>
</template>

<script>
	module.exports = {
		data(){
			return {
				userInfo: {

				},
				personalList: [
					{
						name: 'My order',
						icon: 'icon-dingdan11'
					},
					{
						name: 'My puzzle',
						icon: 'icon-pintuandingdan'
					},
					{
						name: 'Receive a red envelope',
						icon: 'icon-tubiaolunkuo-1'
					},
					{
						name: 'My points',
						icon: 'icon-jifen3'
					},
					{
						name: 'Address management',
						icon: 'icon-dizhiguanli'
					},
					{
						name: 'Account security',
						icon: 'icon-dingdan11'
					},
					{
						name: 'Contact customer service',
						icon: 'icon-zhanghaoanquan'
					},
					{
						name: 'User feedback',
						icon: 'icon-tubiaolunkuo-'
					},
					{
						name: 'Help center',
						icon: 'icon-bangzhuzhongxin'
					},
					{
						name: 'return/After sale',
						icon: 'icon-shouhou'
					}
				]
			}
		},
	}
</script>

<style lang="stylus">
	.header
		display flex
		background #EED7B5
		padding 40upx 0
		.userImg
			width 100upx
			height 100upx
			margin 0 50upx 0 30upx
			background #FFFFFF
			border-radius 50upx
		.userInfo
			p
				height 50upx
				line-height 50upx
				&:first-child
					font-size 28upx
				&:last-child
					font-size 24upx
	.content
		h2
			font-size 26upx
			line-height 100upx
			margin-left 5%
		.line
			width 90%
			height 2upx
			background #eee
			margin 0 auto
		.myAssetList
			width 90%
			margin 20upx auto
			display flex

			.assetItem
				width 25%
				display flex
				flex-direction column
				align-items center
				font-size 24upx
				color #333333
				line-height 40upx
		.personalList
			display flex
			flex-wrap wrap
			border-top 1upx solid #EEEEEE
			.navItem
				width 33.3333%
				text-align center
				border-bottom 1upx solid #EEEEEE
				border-right 1upx solid #EEEEEE
				box-sizing border-box
				padding 30upx 0
				&:nth-child(3n)
					border-right none
				.iconfont
					font-size 60upx
				p
					font-size 24upx
					line-height 40upx

</style>
2, Create a new login page and copy the login page code, pages / login / login vue
<template>
	<view class="loginContainer">
		<image class="logo" src="http://yanxuan.nosdn.127.net/39c5e4583753d4c3cb868a64c2c109ea.png" mode=""></image>
		<p class='text'>Netease self operated, high-quality living home brand</p>
		<div class="loginMethods">
			<button class="login wechatLogin" >
				Wechat login
			</button>
			<button class="login emailLogin">
				Mailbox login
			</button>
		</div>
	</view>
</template>

<script>
	export default {
		data() {
			return {

			}
		},
		methods: {

		}
	}
</script>

<style lang="stylus">
	.loginContainer
		width 100%
		height 100%
		background #F8F8F8
		display flex
		align-items center
		flex-direction column
		.logo
			width 300upx
			height 100upx
			margin-top 200upx
		.text
			font-size 26upx
			color #666
		.loginMethods
			width 80%
			margin 150upx auto
			display flex
			justify-content space-around
			.login
				width 240upx
				height 80upx
				background #41A863
				color #FFFFFF
				text-align center
				line-height 80upx
				font-size 26upx


</style>
3, Personal center business logic
-
The introduction of personal center iconfont style content, using iconfont Cn, click to view the code content of the online address, copy it, and then paste it into a static / iconfont / iconfont For the content of the style file, because the fonts in the code use cdn, there is no need to worry that the font content will not be found. The purpose of this can reduce the packaging amount of the font file, or use cdn to speed up the request
-
In global app Introduce iconfont. Into Vue file Style file, so that all pages can use font icons. It is necessary to set the applet to set the face height to 100%
... <style> /*Public css per page */ @import url("./static/iconfont/iconfont.styl"); /* Applet setting page height 100% */ page{ height: 100%; } </style> -
Set events for non login to jump to the login page
<div class='userInfo' @click="toLogin">
	<p>Not logged in</p>
</div>
methods:{ toLogin(){ uni.navigateTo({ url:'/pages/login/login' }) } } -
The login page is in wechat login operation mode, and the corresponding event binding is required. It is in uniApp @getuserinfo In native applets bindgetuserinfo (you can clear the data to test wechat login)
<!-- open-type Type settings,@getuserinfo Event binding -->
<button class="login wechatLogin" open-type="getUserInfo" @getuserinfo="handleGetUserInfo">
    Wechat login
</button>
methods: { handleGetUserInfo(event){ console.log(event) } } -
Get the user information and reopen the user center page. You can try switchTab and reLaunch,
- The following is the data transfer operation with local cache
handleGetUserInfo(event){
    if(event.detail.userInfo){
        uni.setStorageSync('userInfo', event.detail.userInfo);
        uni.reLaunch({
            url:'/pages/personal/personal'
        })
    }
}
On the user center page, you can get user information by reading the local cache
mounted(){ let userInfo = uni.getStorageSync('userInfo') // There is no userInfo when you are not logged in console.log(userInfo) // Read object content directly }- The following is passed through the address parameter. The object needs to be converted into a string, which needs to be parsed when receiving
// login.vue
handleGetUserInfo(event){
				if(event.detail.userInfo){
					uni.reLaunch({
						url:'/pages/personal/personal?userInfo=' + JSON.stringify(event.detail.userInfo)
					})
				}
			}
// personal.vue onLoad(options){ // If the user does not log in, an error will be reported because of options Userinfo is a parameter passed from the login page. If it is not parsed, an error will occur // Therefore, the assignment operation needs to be performed after condition judgment options.userInfo && (this.userInfo = JSON.parse(options.userInfo)) } -
Rendering page content using userInfo
<div class='userInfo' @click="toLogin"> <!-- Show nicknames --> <p>{{userInfo.nickName?userInfo.nickName:'Not logged in'}}</p> <p>Wechat users</p> </div> -
Because the data is passed through the parameters of the login page, the parameters will not be retained after refreshing the page. Therefore, the method of getUserInfo needs to be used to obtain the data again
mounted(){ // 1. Use the local cache to obtain data (because the local cache is not used now, use method 2) // 2. Use getUserInfo to obtain data uni.getUserInfo({ success: (res) => { this.userInfo = res.userInfo },fail: (err) => { console.log(err); } }) } -
In personal Set a console in mounted of Vue Log ('mounted '), and then compare login For the login jump in Vue, mount will only be executed once by using switchTab, while reLaunch is to close all pages and open them again, so mounted will be executed many times, so you need to pay attention to the number of code executions in mounted
Chapter 4 dynamic display of shopping cart data
1, Realization mode and principle of shopping cart function
- Operation mode with id as parameter mode
- Users view product details and add products to the shopping cart, which generates a single array, similar to [1,2,1,1,3,4,4]
- 1, 2, 3 and 4 are product IDS, and the number of occurrences is the quantity purchased
- You need to make another data request and query on the shopping cart list page
- Selecting shopping cart products and other operations will increase the complexity of the program
- Operation mode with object as parameter
- The user can view the product details and add the product to the shopping cart. What is generated in the shopping cart is an object array, which will transfer and store the overall object of the product in the array
- You can add attribute values such as count and selected to the array object
- In the shopping cart list page, data request and query operations are no longer required to reduce performance overhead
- Select shopping cart products and other operations to simplify the complexity of the program
- All operations are processed in the form of interfaces (multi terminal information synchronization)
2, Realization of shopping cart function based on object parameter transfer
-
Where is the shopping cart data stored? vuex! Why?
-
The shopping cart data is stored in vuex, so that the number of shopping cart products you collect can be obtained and displayed at other locations such as the home page
-
In order to store the shopping cart data in the local cache more conveniently
-
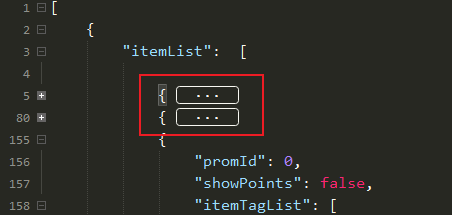
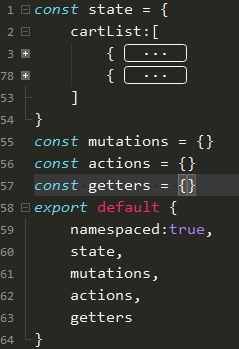
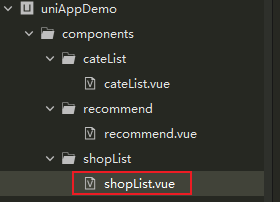
Create a new store / modules / cart JS Shopping Cart module, and the indexcatelist in the background interface data The two products in JSON are copied and put into the default array of cartList
-
cart.js only sets the state value for the time being
-
-
In store / index JS introducing and setting Shopping Cart module
//store/index.js ... import cartModule from './modules/cart' ... export default new Vuex.Store({ modules: { ... cartModule }, }) -
Put cart Initialize the code content of Vue and directly copy the project structure code
<template> <view class="cartContainer"> <view class="title">Shopping Cart</view> <!-- <view class="header"> <text>30 Tianwuyou return</text> <text>48 Hour quick return</text> <text>Postage free for over 99 yuan</text> </view> <view class="contentContainer"> <image class="cartImg" src="http://yanxuan-static.nosdn.127.net/hxm/yanxuan-wap/p/20161201/style/img/icon-normal/noCart-d6193bd6e4.png?imageView&type=webp" mode=""></image> <button @click="toLogin">Sign in</button> <view class="addMore">Go and add something</view> </view> --> <!-- Shopping cart list --> <view class="cartList"> <view class="cartItem"> <text class='iconfont icon-xuanzhong selected'></text> <view class="shopItem"> <image class="shopImg" src="https://yanxuan-item.nosdn.127.net/c2eeb1b872af1b8efc179a7515aacdaa.png" mode=""></image> <view class="shopInfo"> <text>Men's Salam Underwear Set</text> <text class="price">¥55</text> </view> </view> <!-- Control quantity --> <view class="countCtrl"> <text class="add" > + </text> <text class="count"> 1 </text> <text class="del"> - </text> </view> </view> </view> <!-- Bottom order --> <view class="cartFooter"> <text class='iconfont icon-xuanzhong selected'></text> <text class="allSelected">1 Selected</text> <view class="right"> <text class="totalPrice">total: ¥111</text> <text class="preOrder">place an order</text> </view> </view> <!-- <image class="cartImg" src="http://yanxuan-static.nosdn.127.net/hxm/yanxuan-wap/p/20161201/style/img/icon-normal/noCart-d6193bd6e4.png?imageView&type=webp" mode=""></image> <view class="hint">The shopping cart is still empty. Go shopping quickly</view> --> </view> </template> <script> export default { data() { return { }; } } </script> <style lang="stylus"> /* iconfont Common style */ .cartImg display block width 248upx height 248upx margin 300upx auto 50upx .cartContainer position relative background #f4f4f4 height 100% .title font-size 32upx line-height 80upx margin-left 30upx .header display flex background #eee text width 33.333% height 80upx line-height 80upx text-align center font-size 26upx .contentContainer button width 480upx height 92upx background #DD1A21 color #fff font-size 32upx line-height 92upx .addMore text-align center font-size 26upx color #7f7f7f line-height 60rpx .cartList .cartItem position relative display flex height 172upx background #fff margin-top 20upx padding 20upx .iconfont font-size 40upx line-height 172upx margin 0 40upx color #999 &.selected color: #BB2C08 .shopItem display flex .shopImg width 172upx height 172upx background #eee .shopInfo font-size 28upx display flex flex-direction column margin-left 20upx text line-height 60upx .price color: #BB2C08 .countCtrl position absolute right 20upx bottom 30upx text display inline-block width 60upx height 50upx text-align center line-height 50upx border 1upx solid #EEEEEE &:nth-child(2) border none border-top 1upx solid #EEEEEE border-bottom 1upx solid #EEEEEE .cartFooter position absolute display flex bottom 2rpx height 96upx line-height 96upx width 100% background #fff font-size 30upx .iconfont font-size 40upx margin 0 20upx color: #999 &.selected color: #BB2C08 .right height 96upx position absolute right 0 .totalPrice display inline-block height 96upx line-height 96upx .preOrder display inline-block background #DD1A21 width 225upx height 96upx line-height 96upx text-align center font-size 28upx color #fff margin-left 30upx .hint text-align center font-size 28upx </style> -
Introduce the vuex status value of cartList, and cycle through the shopping cart list
import {mapState} from 'vuex'
export default {
    ...
    computed:{
        ...mapState('cartModule',['cartList'])
    }
}
<view class="cartList"> <view class="cartItem" v-for="(cartItem,index) in cartList" :key="cartItem.id"> <text class='iconfont icon-xuanzhong selected'></text> <view class="shopItem"> <image class="shopImg" :src="cartItem.primaryPicUrl"></image> <view class="shopInfo"> <text>{{cartItem.name}}</text> <text class="price">¥{{cartItem.retailPrice}}</text> </view> </view> ... </view> </view> -
To process the purchase quantity and shopping cart selection status, you can add the product attribute values of count and selected to the status data of cartList
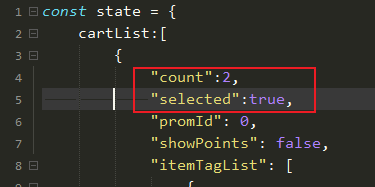
<view class="cartList">
			<view class="cartItem" v-for="(cartItem,index) in cartList" :key="cartItem.id">
				<!-- Dynamic style addition selected Select-->
                <text class='iconfont icon-xuanzhong' :class="{selected:cartItem.selected}"></text>
				...
				<view class="countCtrl">
					<text class="add" > + </text>
                      <!-- Dynamic quantity -->
					<text class="count"> {{cartItem.count}} </text>
					<text class="del"> - </text>
				</view>
			</view>
		</view>
Chapter 5 dynamic display of data in detail page
1, Dynamic display of detail page data
-
Jump to the source of the details page. The source is the product list after the second menu item in the navigation of the home page. The corresponding file is in components / shoplist / shoplist Vue component
-
The detailed page routing jump and parameter transfer operations are carried out in the commodity list component
<template> <div class="listContainer"> <!-- toDetail Pass parameter product item Data content --> <div @click="toDetail(item)" class="listItem" v-for='(item, index) in shopList' :key='index'> ... </div> </div> </template> <script> export default { props: ['shopList'], methods:{ toDetail(shopItem){ // Parameters need to be converted // The url has a length limit. If the string is too long, it will fail to pass. You can use form communication, global variables, encodeURIComponent and other methods to solve it uni.navigateTo({ url:"/pages/detail/detail?shopItem=" + JSON.stringify(shopItem) }) } } } </script> -
Create a new detail Vue page, and copy and paste the initial structure code
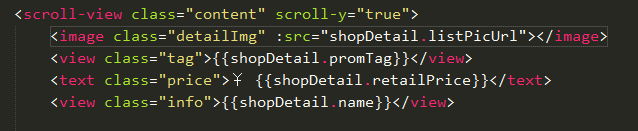
<template> <view class="detailContainer"> <view class="header"> <icon class="iconfont icon-shouye2"></icon> <text>Netease strict selection </text> <view class="shopCart" > <icon class="iconfont icon-gouwuche2"></icon> <text class="count">1</text> </view> </view> <!-- Content area --> <scroll-view class="content" scroll-y="true"> <!-- <image class="detailImg" :src="shopDetail.listPicUrl"></image> <view class="tag">{{shopDetail.promTag}}</view> <text class="price">¥ {{shopDetail.retailPrice}}</text> <view class="info">{{shopDetail.name}}</view> --> <!-- Preparation content --> <view class="list" style="margin-left: 5%;font-size: 28upx;line-height: 50upx;"> <view>1) 100%Filled with mulberry silk, the essence of silk is not doped</view> <view>2) Innovative zigzag wire drawing technology, mulberry silk is not easy to stick and agglomerate</view> <view>3) Two kinds of fabrics are available. The satin feels delicate and the bamboo cotton is fresh and breathable</view> <view>4) AB Double sided design, a variety of active prints are not easy to fade</view> </view> </scroll-view> <!-- Bottom navigation --> <view class="detailFooter"> <image class="service" src="http://yanxuan-static.nosdn.127.net/hxm/yanxuan-wap/p/20161201/style/img/icon-normal/detail-kefu-d10f0489d2.png?imageView&type=webp" mode=""></image> <view class="btn buyNow">Buy now</view> <view class="btn addShopCart">add to cart</view> </view> </view> </template> <script> export default { data() { return { shopDetail: {} } } } </script> <style lang="stylus"> .detailContainer width 100% display flex flex-direction column .header height 90upx line-height 90upx background #FFFFFF display flex text-align center .iconfont width 90upx height 90upx font-size 50upx text flex 1 .shopCart position relative .count color red position absolute top -25upx right 5upx font-size 26upx .content height calc(100vh - 190upx) .detailImg width 100% height 750upx .tag width 90% height 100upx line-height 100upx text-align center font-size 32upx color #FFFFFF margin 20upx auto background #BB2C08 border-radius 10upx .price font-size 50upx color #DD1A21 line-height 70upx margin-left 5% .info font-size 28upx color #333 margin-left 5% .detailFooter position fixed bottom 0 left 0 height 100upx line-height 100upx border-top 1upx solid #EEEEEE display flex background #fff .service width 60upx height 60upx margin 20upx 40upx .btn width 305upx height 100% text-align center font-size 28upx &.buyNow color #333 border-left 1upx solid #eee &.addShopCart background #DD1A21 color #fff </style> -
Get parameter data
onLoad(options){ this.shopDetail = JSON.parse(decodeURIComponent(options.shopItem)); } -
Turn on data rendering in the content area
Chapter 6 adding to shopping cart
1, Add to cart
-
store/modules/cart. If the JS Shopping Cart module needs to be modified, it should process changes. Because there is no asynchronous request, it only needs to be modified synchronously
const mutations = { addShopMutation(state,payload){ state.cartList.push(payload) // Add the entire item data to the array } } -
Add shopping cart button on details page add addShopCart event
<view class="detailFooter">
   ...
   <view  class="btn addShopCart" @click="addShopCart">add to cart</view>
</view>
-
Map the mutation function, and call and pass parameters when adding to the shopping cart
import { mapMutations } from 'vuex' export default { data() { return { shopDetail: {} } }, onLoad(options){ this.shopDetail = JSON.parse(decodeURIComponent(options.shopItem)); }, methods:{ ...mapMutations('cartModule',['addShopMutation']), // mapping addShopCart(){ this.addShopMutation(this.shopDetail) // Call and pass parameters } } } -
Click "add to shopping cart" multiple times to generate multiple pieces of product data. What should be modified is the quantity, not the number of new arrays
const mutations = { addShopMutation(state,payload){ /* To add a shopping cart, you need to judge whether the item has been added to the shopping cart array 1)If you haven't added it before, push it directly 2)If it has been added before, modify the quantity of goods that have been added before and carry out accumulation operation */ let oldShopItem = state.cartList.find(item=> item.id === payload.id); if(oldShopItem){ oldShopItem.count += 1; console.log(oldShopItem.count) console.log(state.cartList[2].count) }else{ payload.count = 1; state.cartList.push(payload) } } } -
Modifying the item quantity directly will not render to the shopping cart list, which involves the difference and difference between responsive and non responsive attributes
Chapter 7 responsive vs nonresponsive attributes
1, Responsive attribute VS non responsive attribute
-
Responsive
- When the instance of Vue component is initialized, the existing data is responsive data
- Through object Defineproperty proxy instance this
- A change in the value of a responsive property triggers a view update
-
Non responsive
- When an instance of a Vue component is initialized, there are no properties added later
- Failed to pass object Defineproperty proxy instance this
- A change in the value of a non responsive property does not trigger a view update
-
How to set responsive properties
- this.$set(target, propertyName/index, value)
- Vue.set(target, propertyName/index, value)
-
Data hijacking agent code implementation, online js operation: https://www.sojson.com/runjs.html
- The proxy operation of a single data object only monitors the age value
let data = { username: "Vane", }; let age = 42; Object.defineProperty(data, "age", { get() { console.log("get()"); return age; }, }); console.log(data.age); data.age = 12; console.log(data.age); // age value or original value console.log(data); // Only get has no set value- Setting or modifying the original object value will cause an endless loop
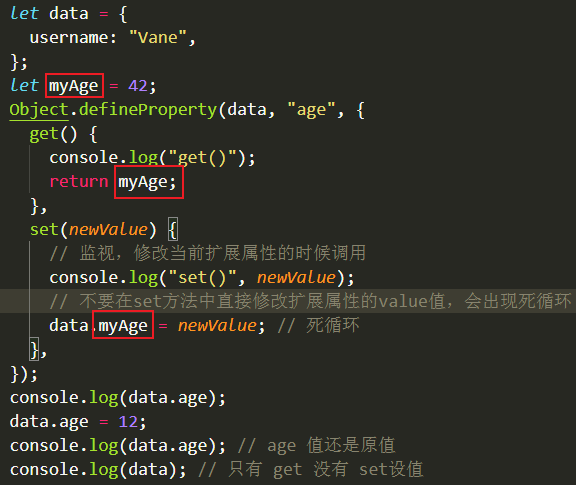
let data = { username: "Vane", }; let age = 42; Object.defineProperty(data, "age", { get() { console.log("get()"); return age; }, set(newValue) { console.log("set()", newValue); data.age = newValue; // Dead cycle }, }); console.log(data.age); data.age = 12; console.log(data.age); // age value or original value console.log(data); // Only get has no set value- Set a new intermediate value for operation, so that the modified value is not the original value to deal with the dead cycle state
- The printed object content contains the set/get method, but it should be noted that myAge is no longer age
console.log(data.age);
data.age = 12;
console.log(data); // age value or original value
console.log(data.myAge); // The printed value is no longer data Age is age myAge
- Cycle multiple values to monitor the dynamic value, and use brackets to obtain the dynamic value, but modifying the original value will still cause dead cycle
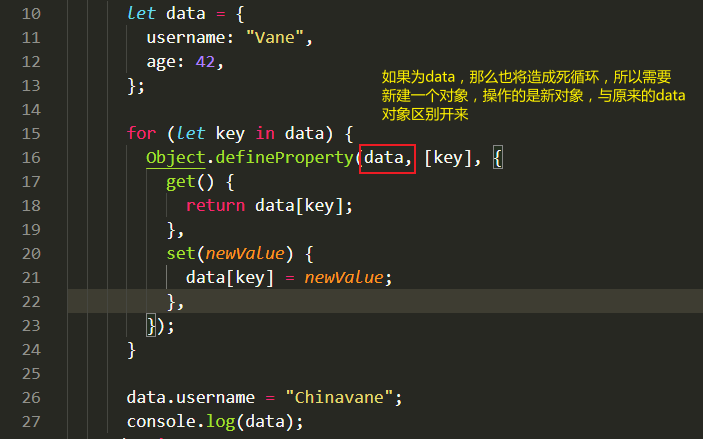
- Declare an intermediate empty object for transfer. The first parameter is the intermediate empty object parameter, and the subsequent operations deal with the new transfer object
let data = {
	username: 'Vane',
	age: 42
}
// Component instance
let myThis = {}
// myThis.xxx = 123
// myThis.xxx = 234

for(let key in data){
	// console.log(key, data[key])
	// Object.defineProperty(target, newKey, {}) adds an extended property to the specified object
	Object.defineProperty(myThis, [key], {
		get(){
			return data[key]
		},
		// Monitor extended properties
		set(newValue){
			// Update data in data
			data[key] = newValue
		// Call update to update the view
		}
	})
}
console.log(myThis)
myThis.username = 'chinavane'
console.log(myThis.username)
2, Operation and handling of shopping cart
-
In cart Introducing Vue objects into. JS
-
Modify addShopMutation of mutation
 addShopMutation(state, payload) {
    ...
    if (oldShopItem) {
      ... // Because the initial operation has been set to the responsive attribute, you can modify the shopping cart directly
    } else {
	  Vue.set(payload,'count',1) // Leverage Vue Set to perform responsive attribute operations
	  Vue.set(payload,'selected',true)
      state.cartList.push(payload);
    }
  },
Chapter 8 modify shopping cart purchase quantity
1, Addition and subtraction of shopping cart quantity
-
The operation of the number of shopping carts needs to confirm whether to add or subtract. Because there are only two kinds of states: add or subtract, Boolean values can be used to judge
-
In addition to knowing the addition and subtraction status, you also need to know which shopping cart product the operation is, so you need to pass the shopping cart product subscript or product id value
-
Add corresponding events to addition and subtraction
<!-- Control quantity -->
<view class="countCtrl">
    <text class="add" @click="changeCount(true,index)"> + </text>
    <text class="count"> {{cartItem.count}} </text>
    <text class="del" @click="changeCount(false,index)"> - </text>
</view>
methods:{ changeCount(isAdd,index){ console.log(isAdd,index) // For the time being, only print test will be conducted } } -
The data is stored in the store, so the real place to modify the data should be cart JS module, you can add the contents of changeCountMutation function, then in cart Vue can be mapped and called
import {mapState,mapMutations} from 'vuex' export default { data() { return { }; }, computed:{ ...mapState('cartModule',['cartList']) }, methods:{ ...mapMutations('cartModule',['changeCountMutation']), // Mapping method changeCount(isAdd,index){ this.changeCountMutation({isAdd,index}) // The object needs to be passed when calling parameters, because changes has only two parameters } } } -
The operation of modifying the number of shopping carts is relatively simple. By judging whether to add or subtract, you can modify the attribute value of the array object with the specified subscript
changeCountMutation(state, payload) { let {isAdd,index } = payload; if (isAdd) { state.cartList[index].count++ } else { state.cartList[index].count-- } } -
The boundary of shopping cart quantity needs to be processed. If the purchase quantity is less than 1, condition judgment needs to be processed
changeCountMutation(state, payload) {
		let {isAdd,index } = payload;
		if (isAdd) {
			state.cartList[index].count++
		} else {
            // Dealing with boundary problems
			if(state.cartList[index].count <=1){
                // Confirm with modal box
				uni.showModal({
				    title: 'Tips',
				    content: 'Are you sure to delete this item from the shopping cart?',
				    success: function (res) {
				        if (res.confirm) {
				            state.cartList.splice(index,1) // Delete purchased items
				        }
				    }
				});
			}else{
				state.cartList[index].count--
			}
		}
	}
Chapter 9 check, select all and deselect all
1, Single check and cancel
-
To select or cancel a single commodity, you need to add an event to the checked object
<view class="cartItem" v-for="(cartItem,index) in cartList" :key="cartItem.id"> <!-- changeSelected The first parameter is the inverse of the current selected status, and the second parameter is still the subscript --> <text class='iconfont icon-xuanzhong' :class="{selected:cartItem.selected}" @click="changeSelected(!cartItem.selected,index)"></text> ... </view> -
Add corresponding events to addition and subtraction
methods:{ ... changeSelected(selected,index){ console.log(selected,index) // Print test only for the time being } } -
The data is stored in the store, so the real place to modify the data should be cart JS module, you can add the contents of changeSelectedMutation function, then in cart Vue can be mapped and called
methods:{ ...mapMutations('cartModule',['changeCountMutation','changeSelectedMutation']), changeCount(isAdd,index){ this.changeCountMutation({isAdd,index}) }, changeSelected(selected,index){ this.changeSelectedMutation({selected,index}) } } -
Modifying the selected status of the shopping cart is relatively simple. You only need to modify the selected value of the product with the specified subscript
changeSelectedMutation(state,payload){
    let {selected,index} = payload
    state.cartList[index].selected = selected
}
2, Select all and deselect all
-
When you select all or none, the style of the check box at the bottom needs to be processed dynamically. You can set the content of an isAllSelected variable to judge
<view class="cartFooter"> <text class='iconfont icon-xuanzhong' :class="{selected:isAllSelected}" ></text> ... </view> -
In cart JS getters, use the calculation to confirm whether all of them have been selected
const getters = { isAllSelected(state){ // every object content must meet the conditions // some is one or more conditions // item.selected is a Boolean value, that is, all objects must be true return state.cartList.every(item=> item.selected) } }; -
To use cart The isAllSelected calculation result value of JS module needs to be in cart Mapping in Vue and mapGetters
import {mapState,mapGetters,mapMutations} from 'vuex' export default { ... computed:{ ...mapState('cartModule',['cartList']), ...mapGetters('cartModule',['isAllSelected']) }, ... } -
Select all and deselect all check boxes to add events
<view class="cartFooter"> <text class='iconfont icon-xuanzhong' :class="{selected:isAllSelected}" @click="changeAllSelected"></text> ... </view> -
Add a mutation to modify the selected state of the array
changeAllSelectedMutation(state,payload){ // Do not use map, because map is to generate a new array // We need to use forEach because we need to modify the original array state.cartList.forEach(item=> item.selected = payload) } -
In the shopping cart Mapping and calling the mutation method in Vue
methods:{
    ...mapMutations('cartModule',['changeCountMutation','changeSelectedMutation','changeAllSelectedMutation']),
        ...
    changeAllSelected(){
        // Note the operation of inverting isAllSelected
        this.changeAllSelectedMutation(!this.isAllSelected)
    }
}