After concluding the animation overview above, let's take a look at another part of Core Animation, Layer. As one of the core contents of the framework, CALayer and its subclasses, as the cornerstone of the view interface, are not only powerful in drawing, but also functional. Of course, the content of the Layer section is very complicated. It is neither realistic nor efficient to explain each type. This article will select several layers which are closely related to the animation as the cut-off point, leaving the rest for you to explore (don't stay in the imagination stage).
CAGradientLayer
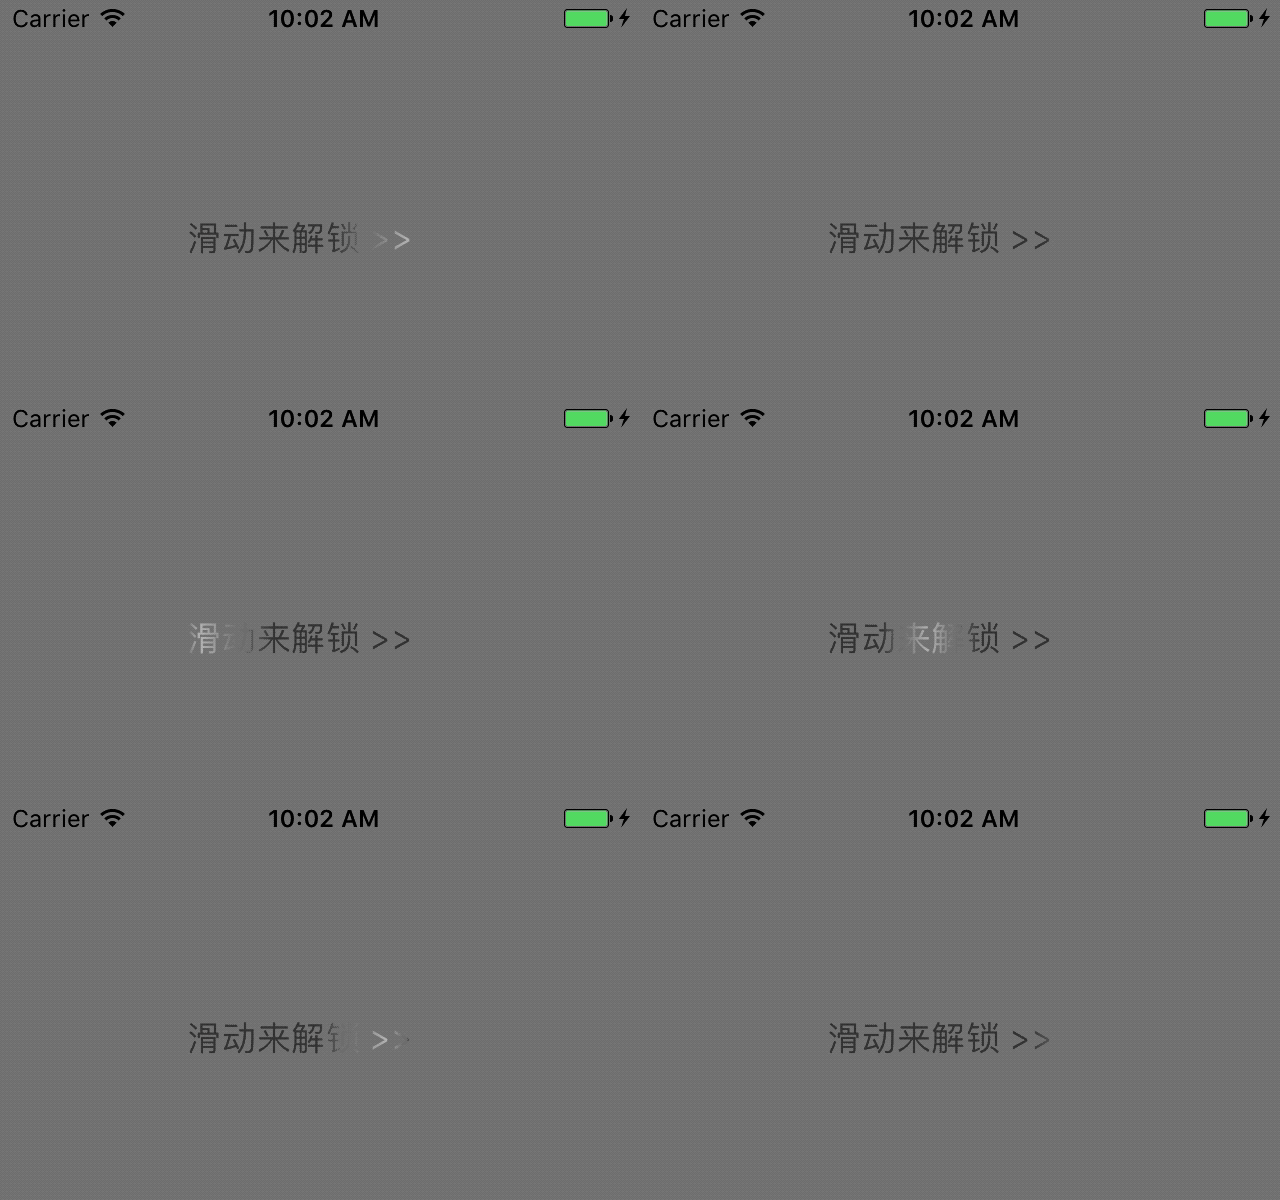
CAGradient Layer is used to generate two or more color smooth gradients. Although the layer itself has no animation effect, we can use gradient colors to construct implicit animation. A typical example is the sliding unlock of the iPhone.
To achieve the gradient effect, we need to set the following property values:
startPoint: Gradient starting point, default (0, 0) for the upper left corner.
endPoint: Gradient endPoint, default (1, 1) for the lower right corner.
colors: Gradient color array.
locations: Optional value, default to nil, which means even gradient. Note that when setting manually, the number of them should be consistent with colors.
The following is directly coded:
override func viewDidLoad() {
    super.viewDidLoad()
    view.backgroundColor = UIColor.gray

    let gradientLayer = CAGradientLayer()
    gradientLayer.frame = CGRect.init(x: 50, y: 100, width: 200, height: 40)

    gradientLayer.colors = [
        UIColor.black.cgColor,
        UIColor.white.cgColor,
        UIColor.black.cgColor
    ]
    gradientLayer.startPoint = CGPoint.init(x: 0, y: 0.5)
    gradientLayer.endPoint = CGPoint.init(x: 1, y: 0.5)
    gradientLayer.locations = [0.25,0.5,0.75];

    view.layer.addSublayer(gradientLayer)

    let gradientAnimation = CABasicAnimation(keyPath: "locations")
    gradientAnimation.fromValue = [0.0, 0.0, 0.25]
    gradientAnimation.toValue = [0.75, 1.0, 1.0]
    gradientAnimation.duration = 3.0
    gradientAnimation.repeatCount = 100
    unlock = UILabel.init(frame: gradientLayer.bounds)
    unlock?.alpha = 0.5;
    unlock?.text = "slide to unlock >>"
    unlock?.textAlignment = .center;
    gradientLayer.mask = unlock?.layer;
    gradientLayer.add(gradientAnimation, forKey: nil)

}

In the above code, the gradient color set is set after the new layer is created, then the startPoint and endPoint attributes are set to specify the gradient path, and finally the gradient position of the color set is specified. After completing the layer settings, we added a simple displacement animation to move the gradient ribbon, and added the text Label.
CAShapeLayer
CAShapeLayer is a subclass of layers drawn by vector graphics rather than bitmap. You specify attributes such as color and line width, use CGPath to define the graph you want to draw, and finally CAShape Layer automatically renders it. Of course, you can also use Core Graphics to draw a path directly to the original content of CALyer. Compared with straight down, using CAShapeLayer has the following advantages:
Fast rendering. CAShapeLayer uses hardware acceleration to draw the same graph much faster than Core Graphics.
Use memory efficiently. A CAShapeLayer doesn't need to create a boarding graph like a normal CALayer, so no matter how big it is, it won't take up too much memory.
It won't be clipped off by layer boundaries. A CAShapeLayer can be drawn outside the boundary.
CAShapeLayer is commonly used in drop-down refresh animation and various curve drawing animation. Common attributes are:
Path: The outer box path of the layer.
Fill Color: Fill in color.
lineWidth: lineWidth.
lineCap: Side line style.
lineDashPattern: Optional type to set the virtual and real height of the border. For example, [2,3] means that the edges are virtual and real, and the height of the solid line is 3 and the height of the dotted line is 2.
StrkeStart: The effective value range is 0.0 to 1.0 at the beginning of the edge, but sometimes it is set to negative in order to form a specific effect with StrkeEnd.
StrkeEnd: At the end of the line, the range of valid values is 0.0 to 1.0.
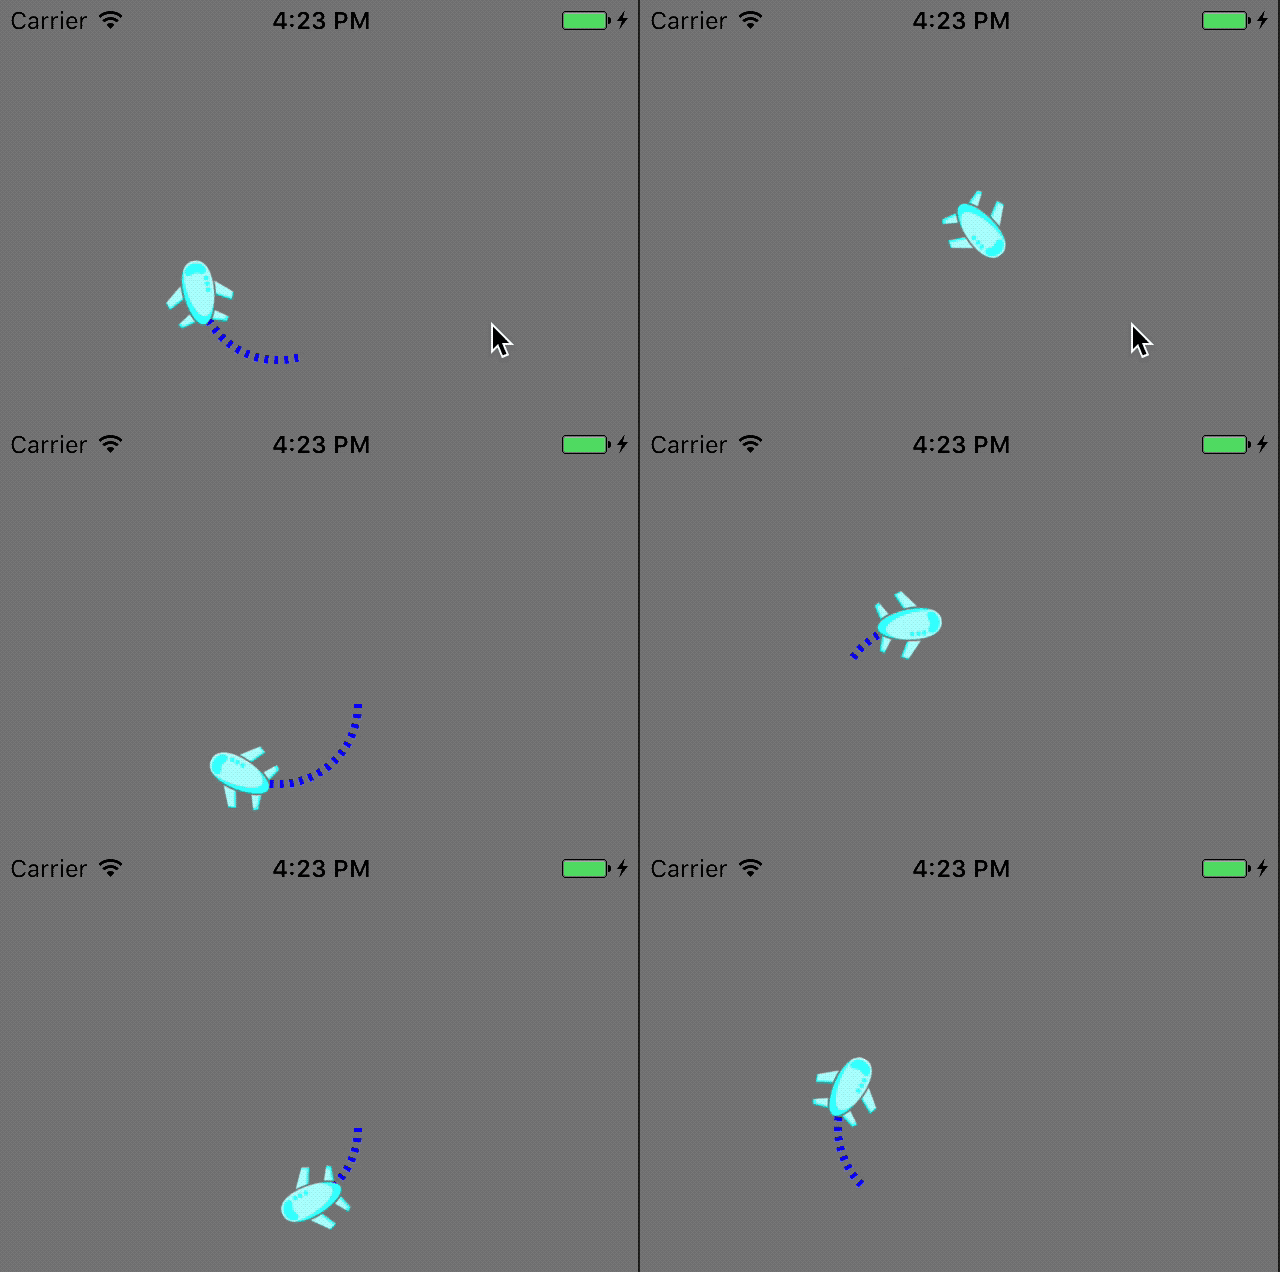
Now let's look at the CAShapeLayer implementation of the pull-down refresh style animation:
override func viewDidLoad() {
    super.viewDidLoad()

    let ovalShapeLayer: CAShapeLayer = CAShapeLayer()
    ovalShapeLayer.path = UIBezierPath.init(ovalIn: CGRect.init(x: 100, y: 100, width: 80, height: 80)).cgPath
    ovalShapeLayer.fillColor = UIColor.clear.cgColor
    ovalShapeLayer.strokeColor = UIColor.blue.cgColor
    ovalShapeLayer.lineWidth = 4
    ovalShapeLayer.lineDashPattern = [2,3]
    view.layer.addSublayer(ovalShapeLayer)

    let airplaneLayer = CALayer()
    let airplaneImage = UIImage(named: "airplane.png")!
    airplaneLayer.contents = airplaneImage.cgImage
    airplaneLayer.bounds = CGRect(x: 0.0, y: 0.0, width: airplaneImage.size.width, height: airplaneImage.size.height)
    airplaneLayer.position = CGPoint(x: 180, y: 140)
    view.layer.addSublayer(airplaneLayer)

    let strokeStartAnimation = CABasicAnimation(keyPath: "strokeStart")
    strokeStartAnimation.fromValue = -1.0
    strokeStartAnimation.toValue = 1.0

    let strokeEndAnimation = CABasicAnimation(keyPath: "strokeEnd")
    strokeEndAnimation.fromValue = 0.0
    strokeEndAnimation.toValue = 1.0

    let strokeAnimationGroup = CAAnimationGroup()
    strokeAnimationGroup.duration = 1.5
    strokeAnimationGroup.repeatDuration = 5.0
    strokeAnimationGroup.animations = [strokeStartAnimation, strokeEndAnimation]
    ovalShapeLayer.add(strokeAnimationGroup, forKey: nil)

    let flightAnimation = CAKeyframeAnimation(keyPath: "position")
    flightAnimation.path = ovalShapeLayer.path
    flightAnimation.calculationMode = kCAAnimationPaced

    let airplaneOrientationAnimation = CABasicAnimation(keyPath: "transform.rotation")
    airplaneOrientationAnimation.fromValue = 0
    airplaneOrientationAnimation.toValue = 2 * M_PI

    let flightAnimationGroup = CAAnimationGroup()
    flightAnimationGroup.duration = 1.5
    flightAnimationGroup.repeatDuration = 5.0
    flightAnimationGroup.animations = [flightAnimation, airplaneOrientationAnimation]
    airplaneLayer.add(flightAnimationGroup, forKey: nil)

    view.backgroundColor = UIColor.gray
}
In the above code, we first create two Layer objects and set the attributes, boarding map and starting position respectively. Then we add animation groups to the two layers respectively. The details to be noted are that the starting and ending points of oval Shape Layer animation group are set differently, with strokeStart from - 1 to 1 and strokeEnd from 0 to 1. After the starting position of strokeStart, the moving speed will increase, thus forming the animation effect of strokeStart chasing strokeEnd on the time line. For airplane Layer, we set its starting position on the right vertical tangent of oval Shape Layer to achieve the desired effect.

CAReplicatorLayer
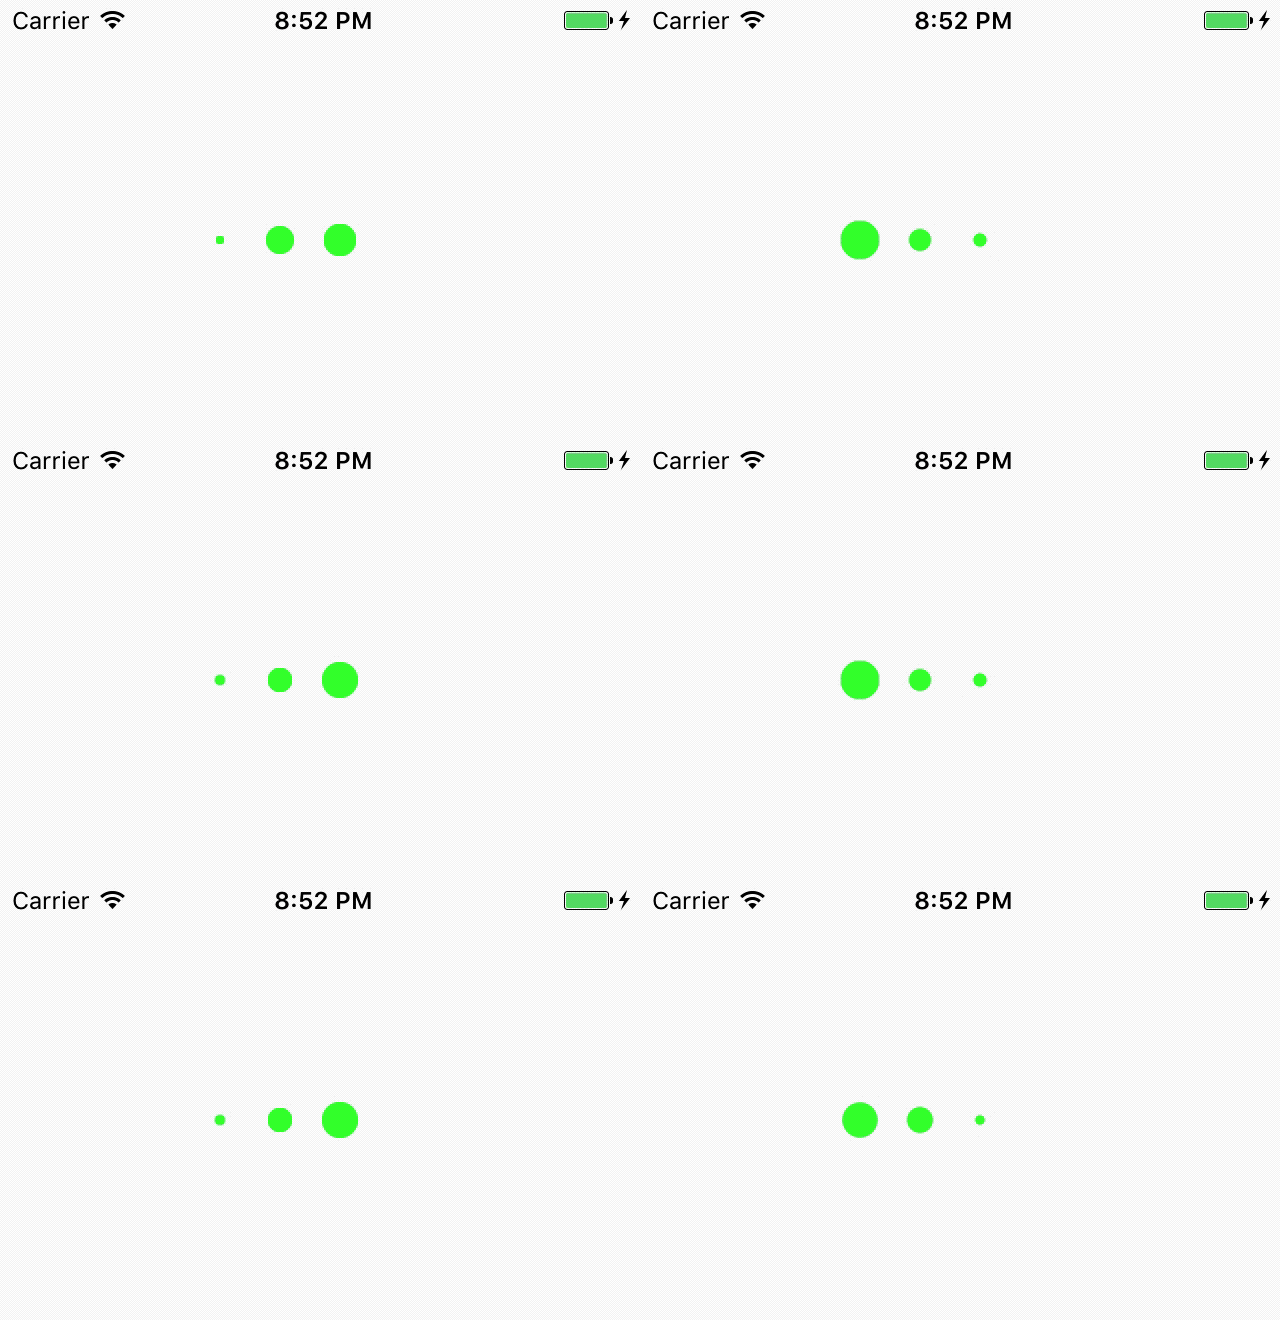
Careplicator Layer is mainly for efficient generation of many similar layers, which can copy the layers of its own sub-layers, and the layers duplicated have the same attributes, location, deformation and animation as the primary layer. A picture is worth a thousand words. Let's first look at the effect picture.

We duplicate the CALayer on the left through CAReplicator Layer, and then delay the animation in turn.
override func viewDidLoad() {
    super.viewDidLoad()

    let replicatorLayer = CAReplicatorLayer()
    replicatorLayer.frame = CGRect.init(x: 100, y: 100, width: 90, height: 40)
    replicatorLayer.backgroundColor = UIColor.white.cgColor

    view.layer.addSublayer(replicatorLayer)

    let crcleBallLayer = CALayer()
    crcleBallLayer.backgroundColor = UIColor.green.cgColor
    crcleBallLayer.frame = CGRect.init(x: 0, y: 10, width: 20, height: 20)
    crcleBallLayer.cornerRadius = 10

    let basicAniamtion = CABasicAnimation.init(keyPath: "transform.scale")
    basicAniamtion.fromValue = 1.0
    basicAniamtion.toValue = 0.2
    basicAniamtion.duration = 0.5
    basicAniamtion.autoreverses = true
    basicAniamtion.repeatCount = 100
    crcleBallLayer.add(basicAniamtion, forKey: nil)

    replicatorLayer.addSublayer(crcleBallLayer)

    replicatorLayer.instanceCount = 3       // Number of replicates
    replicatorLayer.instanceDelay = 0.3     // Animation Delay
    // Each CALayer has a displacement difference of 30 from the front
    replicatorLayer.instanceTransform = CATransform3DTranslate(CATransform3DIdentity, 30, 0, 0 )

}
summary
This article gives a brief introduction to several layers with code examples, and concludes with a summary of the Core Animation section. Of course, the depth of the Core Animation section is far from being summarized in a few simple articles, but I hope that my learning summary can bring some help to the readers. This is the worst time and the best time. Everything depends on us.