In the java field, SpringBoot is a very useful framework that can quickly build web projects. Here is a record of using SpringBoot to upload, download and preview files online.
1. Create database and database tables
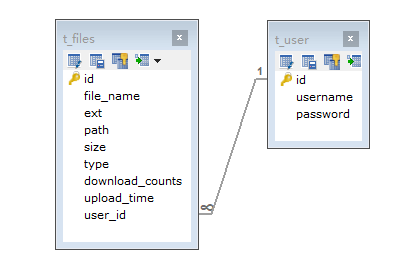
This paper mainly uses the user and the files to which the user belongs, so we only need to design the user table and file table.
User table t_user
CREATE TABLE `t_user` (
`id` int(11) NOT NULL AUTO_INCREMENT,
`username` varchar(80) DEFAULT NULL,
`password` varchar(80) DEFAULT NULL,
PRIMARY KEY (`id`) USING BTREE
) ENGINE=InnoDB DEFAULT CHARSET=utf8 ROW_FORMAT=DYNAMIC
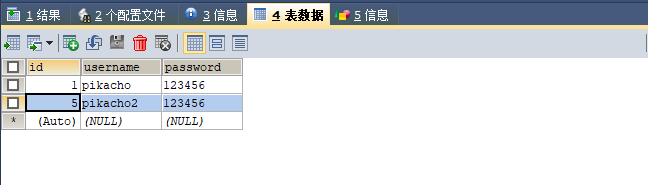
insert into t_user(username, password) values("pikacho", "123456");File table t_files
CREATE TABLE `t_files` (
  `id` int(11) NOT NULL AUTO_INCREMENT,
  `file_name` varchar(200) DEFAULT NULL,
  `ext` varchar(20) DEFAULT NULL,
  `path` varchar(300) DEFAULT NULL,
  `size` bigint(64) DEFAULT NULL,
  `type` varchar(120) DEFAULT NULL,
  `download_counts` int(6) DEFAULT NULL,
  `upload_time` datetime DEFAULT NULL,
  `user_id` int(11) NOT NULL,
  PRIMARY KEY (`id`),
  KEY `user_id` (`user_id`),
  CONSTRAINT `t_files_ibfk_1` FOREIGN KEY (`user_id`) REFERENCES `t_user` (`id`)
) ENGINE=InnoDB DEFAULT CHARSET=utf8
2. Create a SpringBoot project
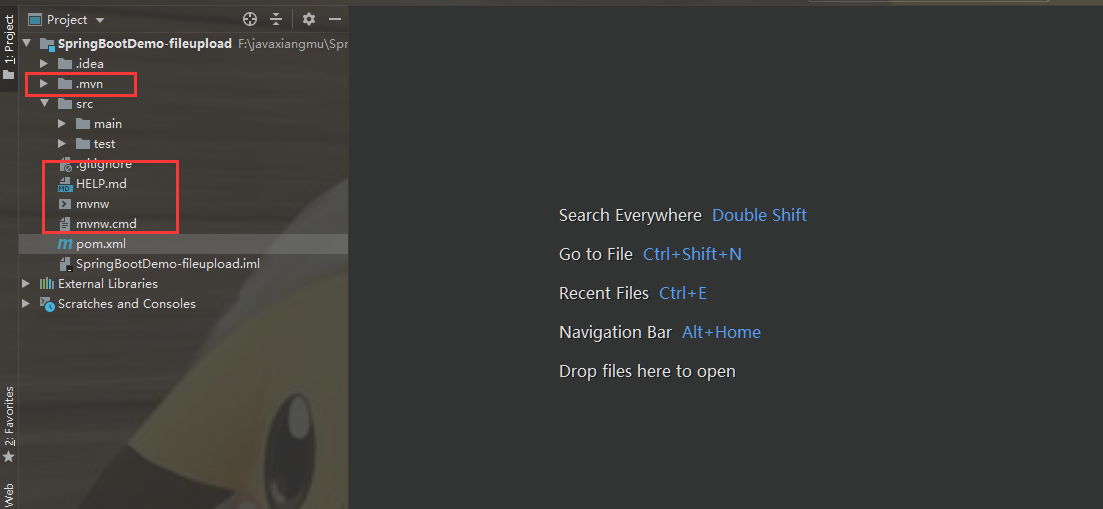
Needless to say here, use IDEA to create a SpringBoot project, delete redundant and useless files, and keep the project structure simple.
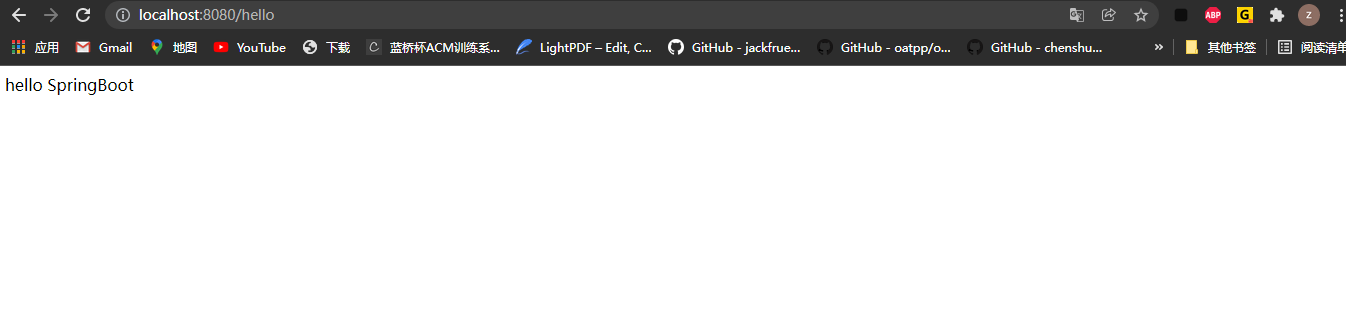
Simply create a controller and start the project to test whether the SpringBoot project is built successfully.
@Controller
public class HelloController {

    @RequestMapping("hello")
    @ResponseBody
    public String hello(){
        return "hello SpringBoot";
    }
}
Access project: http://localhost:8080/hello , the following screen appears, indicating that the project can run successfully; Ensure the successful operation of the project before considering the development function.
3. Add the dependencies required by the project and configure the basic environment
pom.xml dependency
       <dependencies>
        <!-- thymeleaf Dependency of template engine-->
        <dependency>
            <groupId>org.springframework.boot</groupId>
            <artifactId>spring-boot-starter-thymeleaf</artifactId>
        </dependency>

        <!-- SpringBoot of web Project dependency-->
        <dependency>
            <groupId>org.springframework.boot</groupId>
            <artifactId>spring-boot-starter-web</artifactId>
        </dependency>

        <!-- lombok Dependency is used to create entity classes without adding constructors manually, setter Other methods-->
        <dependency>
            <groupId>org.projectlombok</groupId>
            <artifactId>lombok</artifactId>
            <optional>true</optional>
        </dependency>

        <!--mybatis rely on-->
        <dependency>
            <groupId>org.mybatis.spring.boot</groupId>
            <artifactId>mybatis-spring-boot-starter</artifactId>
            <version>2.2.0</version>
        </dependency>

        <!--Database connection-->
        <dependency>
            <groupId>mysql</groupId>
            <artifactId>mysql-connector-java</artifactId>
            <scope>runtime</scope>
        </dependency>

        <!--shiro-->
        <dependency>
            <groupId>org.apache.shiro</groupId>
            <artifactId>shiro-spring</artifactId>
            <version>1.4.1</version>
        </dependency>

        <!-- File upload dependency-->
        <dependency>
            <groupId>commons-fileupload</groupId>
            <artifactId>commons-fileupload</artifactId>
            <version>1.4</version>
        </dependency>

         <!-- druid Database connection pool dependency-->
        <dependency>
            <groupId>com.alibaba</groupId>
            <artifactId>druid</artifactId>
            <version>1.1.19</version>
        </dependency>

        <dependency>
            <groupId>org.springframework.boot</groupId>
            <artifactId>spring-boot-starter-test</artifactId>
            <scope>test</scope>
        </dependency>
    </dependencies>
application.yml master profile
spring:
  application:
    name: fileStorage
  thymeleaf:
    cache: false
  datasource:
    type: com.alibaba.druid.pool.DruidDataSource
    driver-class-name: com.mysql.cj.jdbc.Driver
    url: jdbc:mysql://localhost:3306/fileservice?serverTimezone=Asia/Shanghai&userUnicode=true&characterEncoding=utf-8
    username: root
    password: root

  server:
    port: 8080


  mybatis:
    mapper-locations: classpath:mybatis/mapper/*.xml
    type-aliases-package: com.pikacho.entity
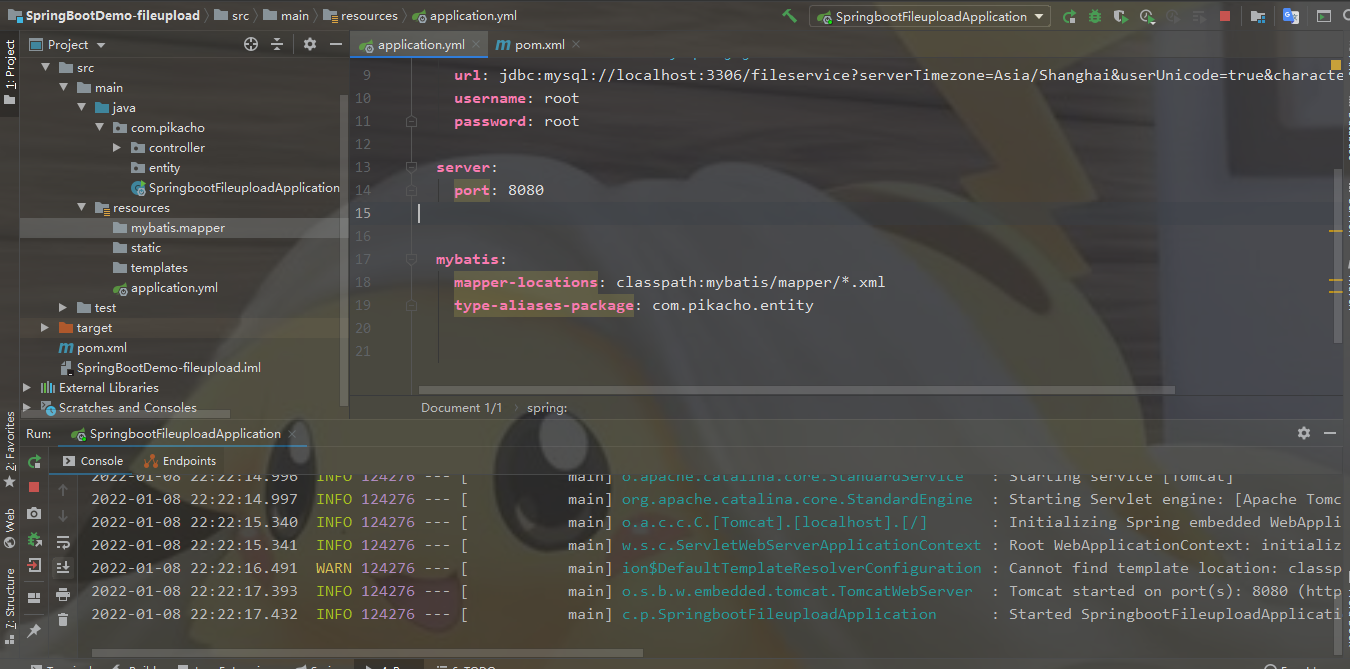
After adding dependencies and configuring the main configuration file, the basic environment required to complete the functions of the project has been built. Start the project to test whether the project can run normally; The following screen shows that the basic environment of the project is successfully built.
4. User login, logout and registration functions
4.1. Complete login function
Even a very simple demo project needs a front-end page. For a back-end developer, it is very painful and difficult to write the front-end page layout and style by himself (I really can't write it!). Therefore, the layui framework is used here to quickly build front-end pages. Of course, this is just a simple use of the framework. You want to use it skillfully. Further study is needed.
1. Introducing layui
Add the files required by layui to the static folder
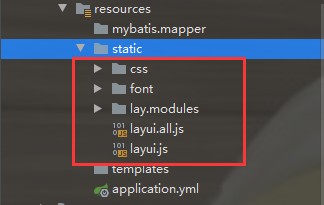
2. Create login page
login.html
<!DOCTYPE html>
<html lang="en" xmlns:th="http://www.thymeleaf.org">
<head>
    <meta charset="utf-8">
    <meta name="viewport" content="width=device-width, initial-scale=1, maximum-scale=1">
    <title>login</title>
    <link rel="stylesheet" th:href="@{/css/layui.css}">
</head>
<body>

<div class="layui-container">
    <div class="layui-row" style="margin-top: 80px;">
        <div class="layui-col-lg4 layui-col-lg-offset4">
            <h1 style="margin:20px; text-align: center"> Please login </h1>
            <form class="layui-form" th:action="@{/user/login}" , method="post">
                <div class="layui-form-item">
                    <p style="color: red; text-align: center" th:text="${msg}" th:if="${not #strings.isEmpty(msg)}"></p>
                </div>
                <div class="layui-form-item">
                    <label class="layui-form-label">user name</label>
                    <div class="layui-input-block">
                        <input class="layui-input" type="text" name="username" required autocomplete="false">
                    </div>
                </div>
                <div class="layui-form-item">
                    <label class="layui-form-label">password</label>
                    <div class="layui-input-block">
                        <input class="layui-input" type="password" name="password" required autocomplete="false">
                    </div>
                </div>
                <div class="layui-form-item">
                    <div class="layui-input-block">
                        <button class="layui-btn" lay-submit lay-filter="formDemo">Log in now</button>
                        <button type="reset" class="layui-btn layui-btn-primary">Reset</button>
                    </div>
                </div>
            </form>
            <div style="float:right">
                <a th:href="@{/user/toRegister}">To register</a>
            </div>
        </div>
    </div>
</div>

<script th:src="@{/layui.js}"></script>
<script>
    //Generally, it is written directly in a js file
    layui.use(['layer', 'form'], function(){
        var layer = layui.layer
            ,form = layui.form;
    });
</script>
</body>
</html>
UserController.java
    /**
     * Go to the login page
     * @return
     */
    @RequestMapping("toLogin")
    public String toLogin(){
        return "login";
    }
In this way, we can easily create the front-end page, and we don't have to design the style and layout by ourselves. I still want to mention that it's enough to use it simply, but if you want to use it skillfully, you need to study more deeply.
3. Complete the login function
- Create User entity class -- User java
@Data
@NoArgsConstructor
@AllArgsConstructor
@ToString
public class User {

    private Integer id;
    private String username;
    private String password;
}
- Create UserDao and its mapper mapping file -- UserDao java & UserDaoMapper. xml
@Mapper
@Repository
public interface UserDao {

    /**
     * User login function
     * @return
     */
    public User login(User user);


}
<?xml version = '1.0' encoding = 'UTF-8' ?>
<!DOCTYPE mapper
PUBLIC "-//mybatis.org//DTD Mapper 3.0//EN"
"http://mybatis.org/dtd/mybatis-3-mapper.dtd">
<mapper namespace="com.pikacho.dao.UserDao">
<!-- public User login(User user)-->
<select id="login" parameterType="User" resultType="User">
select id, username, password
from t_user
where username = #{username} and password = #{password};
</select>
- Create UserService class and its implementation class -- UserService java & UserServiceImpl. java
public interface UserService {
    public User login(User user);
}
@Service
public class UserServiceImpl implements UserService {

    @Autowired
    public UserDao userDao;

    @Override
    public User login(User user){
        return userDao.login(user);
    }
}
- Using Shiro framework to realize login authentication function
Shiro framework can quickly realize login authentication and other security permission functions. Here is also a simple use. If you want to deeply understand the use, you need to consult its official documents.
UserRealm.java
public class UserRealm extends AuthorizingRealm {

    @Autowired
    private UserService userService;


    // to grant authorization
    @Override
    protected AuthorizationInfo doGetAuthorizationInfo(PrincipalCollection principalCollection){
        return null;
    }

    // authentication
    @Override
    protected AuthenticationInfo doGetAuthenticationInfo(AuthenticationToken token) {
        UsernamePasswordToken usernamePasswordToken = (UsernamePasswordToken)token;

        User user = new User();
        user.setUsername(usernamePasswordToken.getUsername());
        user.setPassword(String.valueOf(usernamePasswordToken.getPassword()));
        // Query from database
        User userDB = userService.login(user);
        if(userDB == null){
            return null;
        }

        return new SimpleAuthenticationInfo(userDB, user.getPassword(), "");

    }
}
ShiroConfig.java
@Configuration
public class ShiroConfig {

    // Step 1: create UserRealm object
    @Bean
    public UserRealm userRealm(){
        return new UserRealm();
    }

    // Step 2: create the default security manager DefaultWebSecurityManager
    @Bean(name = "securityManager")
    public DefaultWebSecurityManager getDefaultWebSecurityManager(
            @Qualifier("userRealm") UserRealm userRealm ){
        DefaultWebSecurityManager securityManager = new DefaultWebSecurityManager();
        securityManager.setRealm(userRealm);
        return securityManager;
    }

    // Step 3: create ShiroFilterFactoryBean
    @Bean
    public ShiroFilterFactoryBean getShiroFilterFactoryBean(
            @Qualifier("securityManager") DefaultWebSecurityManager securityManager){
        ShiroFilterFactoryBean bean = new ShiroFilterFactoryBean();
        // Set up security manager
        bean.setSecurityManager(securityManager);
        /*
        *   anon: Access without authentication
            authc: You must authenticate before you can access
            user: You must have the remember me function to use
            perms: You must have permission on a resource to access it
            role: You must have a role permission to access
         */

        // Intercept / file / *, which can only be viewed when logging in
        Map<String, String> filterMap = new LinkedHashMap<>();
        filterMap.put("/file/*", "authc");
        bean.setFilterChainDefinitionMap(filterMap);

        // Jump to the page when no access permission is set
        bean.setLoginUrl("/login");
        return bean;
    }
}
- Add login method in UserController class
    @PostMapping("login")
    public String login(User user, Model model){
        Subject subject = SecurityUtils.getSubject();
        // Encapsulate user information
        UsernamePasswordToken token = new UsernamePasswordToken(user.getUsername(), user.getPassword());
        try{
            subject.login(token);
            Session session = subject.getSession();
            session.setAttribute("user", (User)subject.getPrincipal());
            // Go to file list page
            return "list";
        }catch (UnknownAccountException e){
            model.addAttribute("msg", "Wrong user name or password");
            return "login";
        }catch (IncorrectCredentialsException e){
            model.addAttribute("msg", "Wrong user name or password");
            return "login";
        }
}- Finally, add the package scanning annotation on the SpringbootFileuploadApplication class, otherwise mybatis cannot bind the interface to the xml configuration file
@SpringBootApplication
@MapperScan(basePackages = "com.pikacho.dao")
public class SpringbootFileuploadApplication {
public static void main(String[] args) {
SpringApplication.run(SpringbootFileuploadApplication.class, args);
}
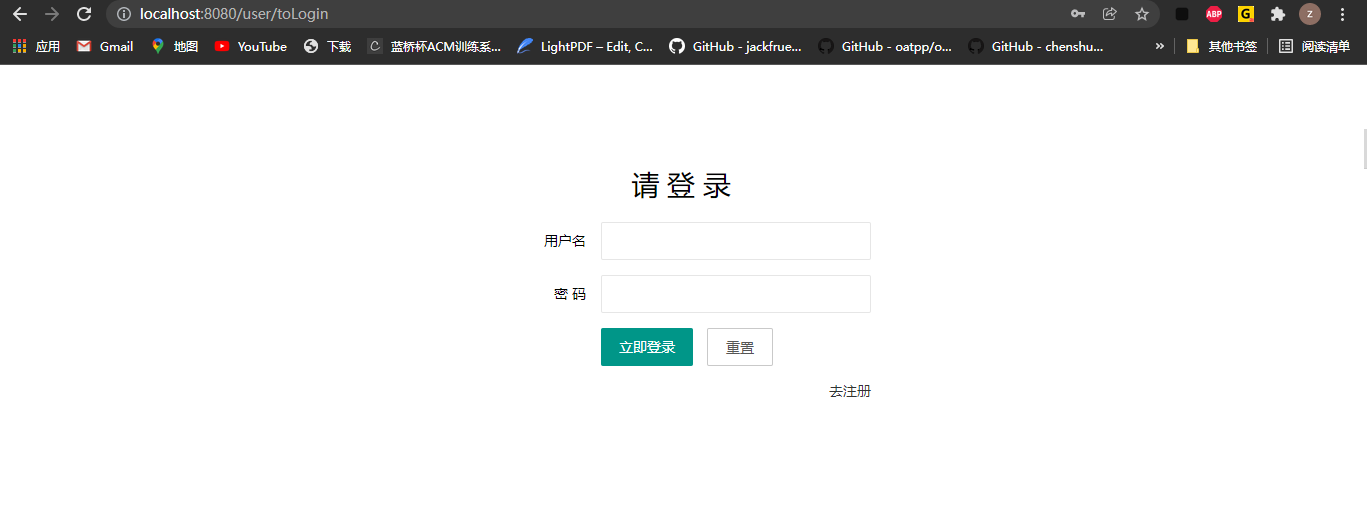
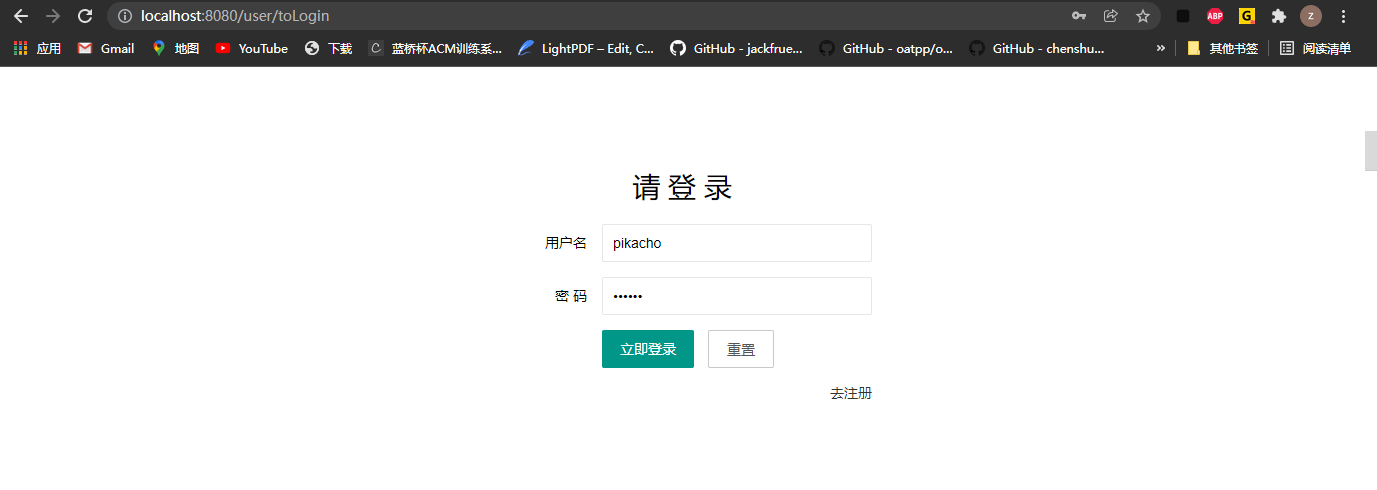
}The login function code has been developed. Now test whether the function is normal.
Access project: http://localhost:8080/user/toLogin , a user was already created when the user table was created. User name: pikacho# password: 123456.

4.2. Complete the registration function
1. Create a registration page
register.html
<!DOCTYPE html>
<html lang="zh-CN" xmlns:th="http://www.thymeleaf.org">
<head>
    <meta charset="UTF-8">
    <meta name="viewport" content="width=device-width, initial-scale=1, maximum-scale=1">
    <title>register</title>
    <link rel="stylesheet" th:href="@{/css/layui.css}">

</head>
<body>
<div class="layui-container">
    <div class="layui-row" style="margin-top: 80px;">
        <div class="layui-col-lg4 layui-col-lg-offset4">
            <h1 style="margin:20px; text-align: center"> Please register </h1>
            <div class="layui-form-item">
                <p style="color: red; text-align: center" th:text="${msg}" th:if="${not #strings.isEmpty(msg)}"></p>
            </div>
            <form class="layui-form" th:action="@{/user/register}" method="post">
                <div class="layui-form-item">
                    <label class="layui-form-label">user name</label>
                    <div class="layui-input-block">
                        <input  class="layui-input" type="text" name="username" required>
                    </div>
                </div>
                <div class="layui-form-item">
                    <label class="layui-form-label">password</label>
                    <div class="layui-input-block">
                        <input class="layui-input" type="password" name="password" required autocomplete="false">
                    </div>
                </div>
                <div class="layui-form-item">
                    <div class="layui-input-block">
                        <button class="layui-btn" lay-submit lay-filter="formDemo">Register now</button>
                        <button type="reset" class="layui-btn layui-btn-primary">Reset</button>
                    </div>
                </div>
            </form>
            <div style="float:right">
                <a th:href="@{/user/toLogin}">Go login</a>
            </div>
        </div>
    </div>
</div>
<script th:src="@{/layui.js}"></script>
<script>
    //Generally, it is written directly in a js file
    layui.use(['layer', 'form'], function(){
        var layer = layui.layer
            ,form = layui.form;
    });

</script>


</body>
</html>
2. Complete the registration function
- Add register() in UserDao class and write mapper mapping file
    /**
     *
     * @param user
     */
    public void register(User user);
<!-- register-->
<insert id="register" parameterType="User">
insert into t_user (username, password)
values(#{username}, #{password});
</insert>- Add a registration method in UserService class and implementation class
    /**
     *
     * @param user
     */
    public void register(User user);
/**
*
* @param user
*/
@Override
public void register(User user){
userDao.register(user);
}- Add registration logic to the UserController class
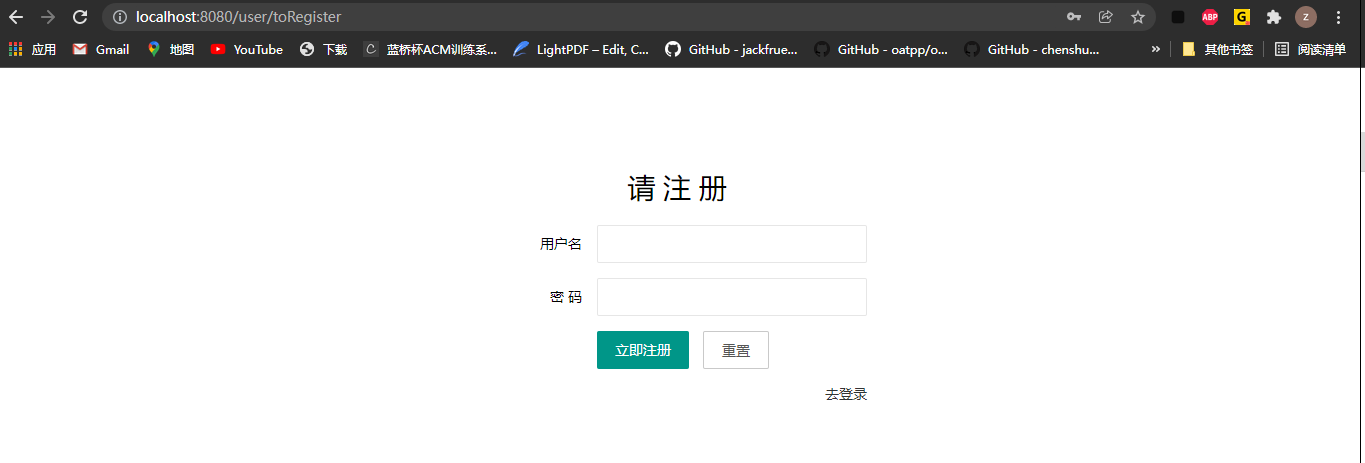
Test the registration function and access the project: http://localhost:8080/user/toRegister ; Add user pikacho2: 123456
4.3. Create a list page
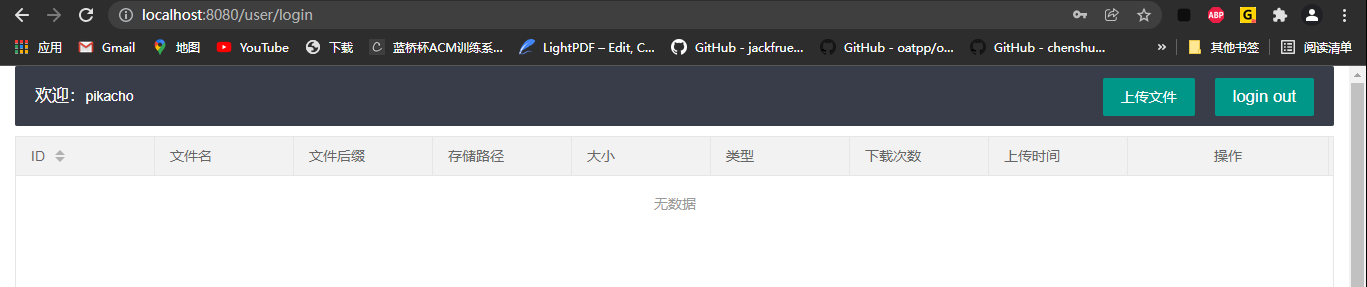
Just create a list page to verify the login function. Now complete the list page.
list.html
<!DOCTYPE html>
<html lang="en" xmlns:th="http://www.thymeleaf.org">
<head>
    <meta charset="utf-8">
    <meta name="viewport" content="width=device-width, initial-scale=1, maximum-scale=1">
    <title>FileList</title>
    <link rel="stylesheet" th:href="@{/css/layui.css}">
</head>

<body>
<div class="layui-fluid">
    <nav class="layui-nav">
        <div class="layui-nav-item">
            <p class="layui-nav-title" style="font-size: larger">
                welcome:<span th:if="${session.user!=null}" th:text="${session.user.username}"/>
            </p>
        </div>
        <div class="layui-nav-item" style="float: right;">
            <button class="layui-btn">
                <a th:href="@{/user/logout}" style="font-size: larger; padding: 0px; color: white">login out</a>
            </button>
        </div>
        <div class="layui-nav-item" style="float: right; padding-right: 20px">
            <button type="button" class="layui-btn" id="fileUpload">
                Upload file
            </button>
        </div>
    </nav>

    <!-- File list-->
    <table id="fileList" lay-filter="fileTable"></table>

    <script type="text/html" id="optBar">
        <a class="layui-btn layui-btn-primary layui-btn-xs" lay-event="download">download</a>
        <a class="layui-btn layui-btn-xs" lay-event="preview">preview</a>
        <a class="layui-btn layui-btn-danger layui-btn-xs" lay-event="delete">delete</a>
    </script>

</div>
<script th:src="@{/layui.js}" charset="utf-8"></script>

</body>
</html>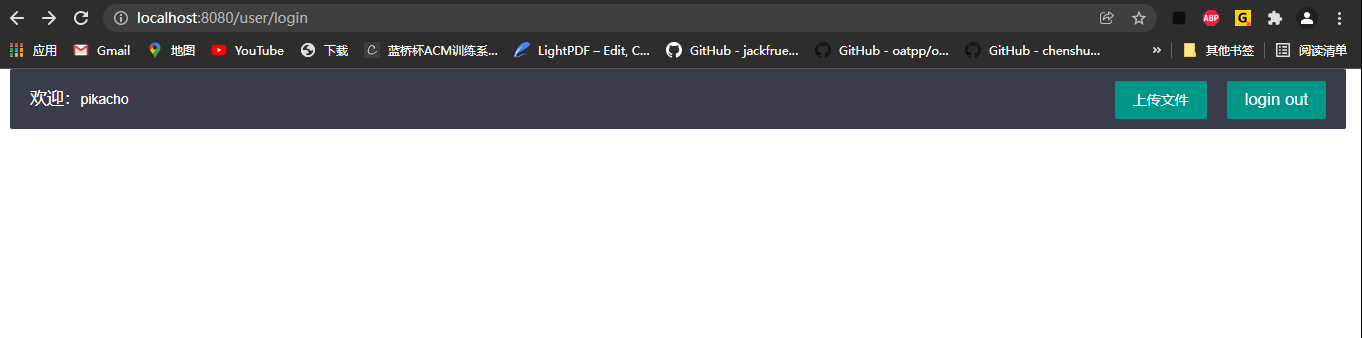
4.4. Complete logout function
- Add a logoff method in the UserController class
    /**
     * Registration function
     * @return
     */
    @GetMapping("logout")
    public String logout(){
        Subject subject = SecurityUtils.getSubject();
        subject.logout();
        // Note here: redirect: the actual request path of user / tologin http://localhost:8080/user/user/toLogin
        // So you need to use redirect:toLogin
        return "redirect:toLogin";
    }
5. Display, upload, delete and download of documents
5.1. Presentation of documents
- Create file instance class -- userfile java
@Data
@NoArgsConstructor
@AllArgsConstructor
@ToString
@Accessors(chain = true)
public class UserFile {
    private Integer id;
    private String fileName;
    private String ext;
    private String path;
    private long size;
    private String type;
    private Integer downloadCounts;
    private Date uploadTime;
    private Integer userId;
}
- Create UserFileDao and its mapper mapping file
@Mapper
@Repository
public interface UserFileDao {

    /**
     * Obtain the user file list according to the user id
     * @param id
     * @param begin
     * @param offset
     * @return
     */
    public List<UserFile> queryByUserId(Integer id, Integer begin, int offset);


    /**
     * Obtain the total number of user files according to the user id
     * @param id
     * @return
     */
    public int queryFileCount(Integer id);
}
<?xml version="1.0" encoding="UTF-8" ?>
<!DOCTYPE mapper
        PUBLIC "-//mybatis.org//DTD Mapper 3.0//EN"
        "http://mybatis.org/dtd/mybatis-3-mapper.dtd">
<mapper namespace="com.pikacho.dao.UserFileDao">
    <resultMap id="UserFileMap" type="UserFile">
        <!-- Only those whose column names and attribute names are inconsistent need to be mapped-->
        <id column="id" property="id"></id>
        <result column="file_name" property="fileName"></result>
        <result column="download_counts" property="downloadCounts"></result>
        <result column="upload_time" property="uploadTime"></result>
        <result column="user_id" property="userId"></result>
    </resultMap>

    <!-- According to user id Query file list-->
    <select id="queryByUserId" parameterType="Integer" resultMap="UserFileMap">
        select * from t_files
        where user_id = #{id}
        order by id
        limit #{begin}, #{offset};
    </select>
     <!-- According to user id Number of query files-->
    <select id="queryFileCount" parameterType="Integer" resultType="Integer">
        select count(*) from t_files
        where user_id = #{id};
    </select>
</mapper>- Create UserFileService class and its implementation class
public interface UserFileService {

    /**
     * Get the file list according to the user id
     * @param id
     * @param page
     * @param limit
     * @return
     */
    public List<UserFile> queryByUserId(Integer id, Integer page, Integer limit);

    /**
     * Get the number of files according to the user id
     * @param id
     * @return
     */
    public int queryFileCounts(Integer id);
}
@Service
public class UserFileServiceImpl implements UserFileService {
    @Autowired
    private UserFileDao userFileDao;

    /**
     * Get the file list according to the user id
     * @param id
     * @param page
     * @param limit
     * @return
     */
    @Override
    public List<UserFile> queryByUserId(Integer id, Integer page, Integer limit){
        // Page indicates the page number, and limit indicates how many rows of data are displayed on each page
        int begin = (page-1)*limit;   // This calculation method obtains the starting position
        int offset = limit;
        return userFileDao.queryByUserId(id, begin, limit);
    }

    /**
     * Get the number of files according to the user id
     * @param id
     * @return
     */
    @Override
    public int queryFileCounts(Integer id){
        return userFileDao.queryFileCounts(id);
    }
}
- Create UserFileController class
@Controller
@RequestMapping("file")
public class UserFileController {
    @Autowired
    private UserFileService userFileService;

    /**
     * Return to file list
     * @param session
     * @param request
     * @return
     */
    @PostMapping("all")
    @ResponseBody
    public Map<String, Object> queryAllFile(HttpSession session, HttpServletRequest request){
        int page = Integer.parseInt(request.getParameter("page"));
        int limit = Integer.parseInt(request.getParameter("limit"));
        User user = (User) session.getAttribute("user");
        List<UserFile> files = userFileService.queryByUserId(user.getId(), page, limit);

        Map<String, Object> res = new HashMap<>();
        res.put("code", 0);
        res.put("count", userFileService.queryFileCounts(user.getId()));
        res.put("data", files);
        return res;
    }

}
- Then on the list Add script to render table in HTML
        // Render table
        table.render({
            elem: '#fileList',
            height: 600,
            minWidth: 80,
            url: '/file/all',    // This must be / file/all. Before, file/all kept reporting errors and failed to access successfully
            parseData: function (res) {
                            return {
                                "code": res.code,
                                "msg": "",
                                "count": res.count,
                                "data": res.data
                            };
            },
            method: 'post',
            limit: 10,
            page: true,
            cols: [[
                {field:'id', title:'ID', sort:true, fixed:'left'},
                {field:'fileName', title:'file name'},
                {field:'ext', title:'file extension'},
                {field:'path', title:"Storage path"},
                {field:'size', title:'size'},
                {field:'type', title:"type"},
                {field:'downloadCounts', title:'amount of downloads'},
                {field:'uploadTime', title:'Upload time'},
                {tilte:'operation',align:'center', toolbar:'optBar', width:200, fixed:'right'}
            ]]
        });
5.2. File upload
- Add the upload file method and mapper mapping file in the UserFileDao class
    /**
     * Upload file
     * @param userFile
     */
    public void save(UserFile userFile);
<!-- Upload file-->
<insert id="save" parameterType="UserFile" useGeneratedKeys="true" keyProperty="id">
insert into t_files(file_name, ext, path, size, type, download_counts, upload_time, user_id)
values(#{fileName}, #{ext}, #{path}, #{size}, #{type}, #{downloadCounts}, #{uploadTime}, #{userId});
</insert>
- Add methods in UserFileService class and UserFileServiceImpl class
    /**
     * Upload file
     * @param userFile
     */
    public void save(UserFile userFile);


    /**
     * Upload file
     * @param userFile
     */
    @Override
    public void save(UserFile userFile){
        userFile.setDownloadCounts(0).setUploadTime(new Date());
        userFileDao.save(userFile);
    }
- Add the upload file interface in the UserFileController class
    @GetMapping("index")
    public String fileIndex(){
        return "list";
    }


    /**
     * Upload file
     * @param file
     * @param session
     * @return
     */
    @PostMapping("upload")
    @ResponseBody
    public Map<String, String> uploadFile(@RequestParam("file")MultipartFile file, HttpSession session){
        Map<String, String> res = new HashMap<>();
        try{
            User user = (User) session.getAttribute("user");
            String fileName = file.getOriginalFilename();
            String extension = FilenameUtils.getExtension(fileName);
            long size = file.getSize();
            String type = file.getContentType();
            // Generate directory based on date
            String localContainer = "/fileContainer";
            String uploadPath = ResourceUtils.getURL("classpath").getPath()+localContainer;
            String dateFormat = new SimpleDateFormat("yyyy-MM-dd").format(new Date());
            File dateDirPath = new File(uploadPath+File.separator+dateFormat);
            if(!dateDirPath.exists()){
                dateDirPath.mkdirs();
            }

            file.transferTo(new File(dateDirPath, fileName));
            // Store file information in database
            UserFile userFile = new UserFile();
            userFile.setFileName(fileName)
                    .setExt('.'+extension)
                    .setPath(Paths.get(localContainer, dateFormat, fileName).toString())
                    .setSize(size)
                    .setType(type)
                    .setUserId(user.getId());

            userFileService.save(userFile);

            res.put("code", "0");
            res.put("msg", "Upload succeeded");
            res.put("url", "/file/index");

        }catch(IOException e){
            res.put("code", "-1");
            res.put("msg", "Upload failed");
            res.put("url", "/file/index");
        }
        return res;
    }


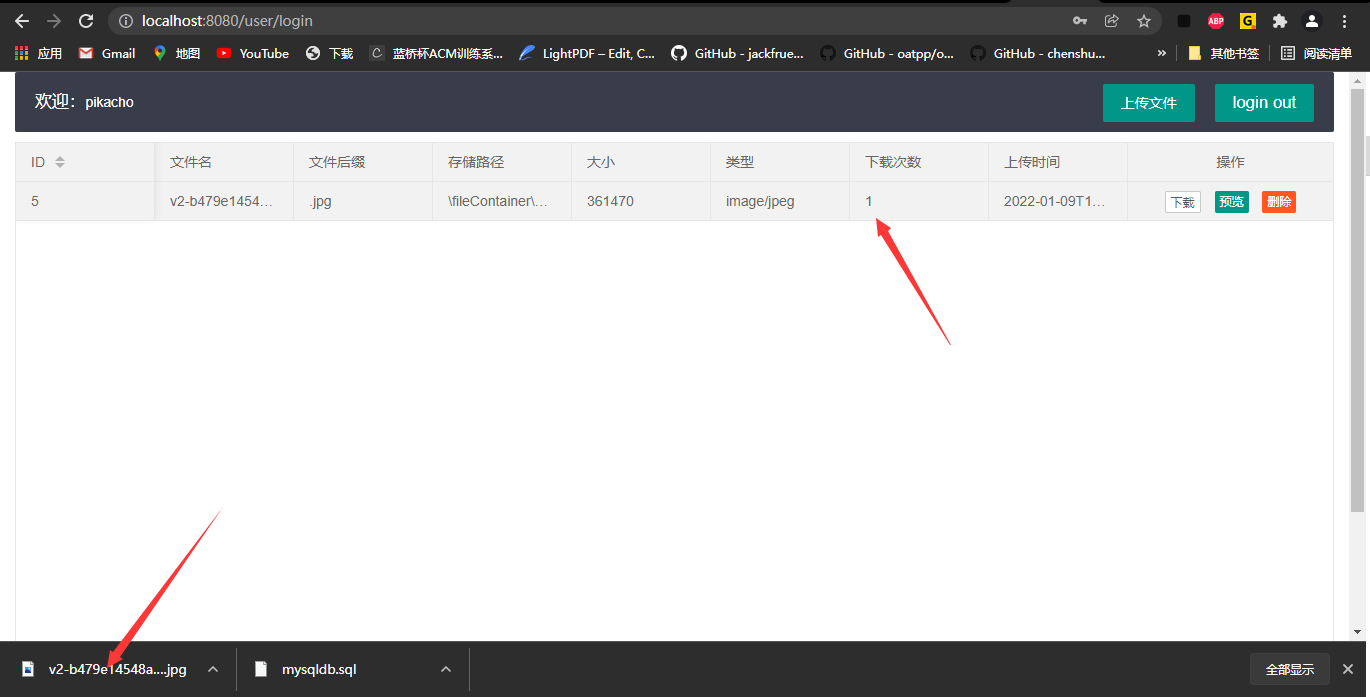
Here, the file is stored on my local disk, and the file table stores the storage path of the file on my disk.
5.3. File download
The development process is basically the same as above.
 // UserFiledao
   /**
     * Download File
     * @param id
     * @return
     */
    public UserFile queryByUserFileId(Integer id);

    /**
     * Update file downloads
     * @param userFile
     */
    public void update(UserFile userFile);


// UserFileService
    /**
     * Download File
     * @param id
     * @return
     */
    public UserFile queryByUserFileId(Integer id);

    /**
     * Download times of new files
     * @param userFile
     */
    public void update(UserFile userFile);

// UserFileServiceImpl
    /**
     * Download File
     * @param id
     * @return
     */
    @Override
    public UserFile queryByUserFileId(Integer id) {
        return userFileDao.queryByUserFileId(id);
    }

    /**
     * Download times of new files
     * @param userFile
     */
    @Override
    public void update(UserFile userFile) {
        userFileDao.update(userFile);
    }
<!-- Download File-->
<select id="queryByUserFileId" parameterType="Integer" resultMap="UserFileMap">
select * from t_files where id = #{id};
</select>
<!-- Update file downloads-->
<update id="update" parameterType="UserFile">
update t_files set download_counts = #{downloadCounts} where id = #{id};
</update> /**
* Download File
* @param id
* @param response
*/
@GetMapping("download/{id}")
public void download(@PathVariable("id") Integer id, HttpServletResponse response){
String openStyle = "attachment";
try{
getFile(openStyle, id, response);
}catch (Exception e){
e.printStackTrace();
}
}
/**
* Update file downloads
* @param openStyle
* @param id
* @param response
* @throws Exception
*/
public void getFile(String openStyle, Integer id, HttpServletResponse response) throws Exception {
UserFile userFile = userFileService.queryByUserFileId(id);
String realPath = ResourceUtils.getURL("classpath").getPath()+userFile.getPath();
FileInputStream is = new FileInputStream(new File(realPath));
// Attachment Download
response.setHeader("content-disposition", openStyle+";filename=" + URLEncoder.encode(userFile.getFileName(), "UTF-8"));
// Get the response output stream
ServletOutputStream os = response.getOutputStream();
// File copy
IOUtils.copy(is, os);
IOUtils.closeQuietly(is);
IOUtils.closeQuietly(os);
if(openStyle.equals("attachment")){
userFile.setDownloadCounts(userFile.getDownloadCounts()+1);
userFileService.update(userFile);
}
}
list.html
        //Listening toolbar
        table.on('tool(fileTable)', function (obj) {
            var data = obj.data;
            if (obj.event === 'download') {
                window.open("/file/download/" + data.id);
                obj.update({
                    "downloadCounts": data.downloadCounts + 1
                });
            } else if (obj.event === 'delete') {
                layer.confirm('Are you sure you want to delete the file?', function (index) {
                    $.ajax({
                        url: "/file/delete/" + data.id,
                        type: "Get",
                        success: function (res) {
                            layer.msg(res.msg);
                            obj.del();
                        },
                        error: function (res) {
                            $.message.alert('msg', res.msg);
                        }
                    });
                    layer.close(index);
                });
            } else if (obj.event === 'preview') {

                layer.open({
                    type: 2,
                    skin: 'layui-layer-demo', //Style class name
                    title: 'File Preview',
                    closeBtn: 1, //Show close button
                    anim: 2,
                    area: ['893px', '600px'],
                    shadeClose: true, //Open mask close
                    content: '/file/preview/' + data.id
                });
            }
        });
5.4. File deletion
The development process of file deletion is the same as above.
6. Complete the file preview function
- Add preview method
    /**
     * File Preview
     * @param id
     * @param response
     * @throws IOException
     */
    @GetMapping("preview/{id}")
    public void preview(@PathVariable("id") Integer id, HttpServletResponse response) throws Exception {
        String openStyle = "inline";
        getFile(openStyle,id,response);
    }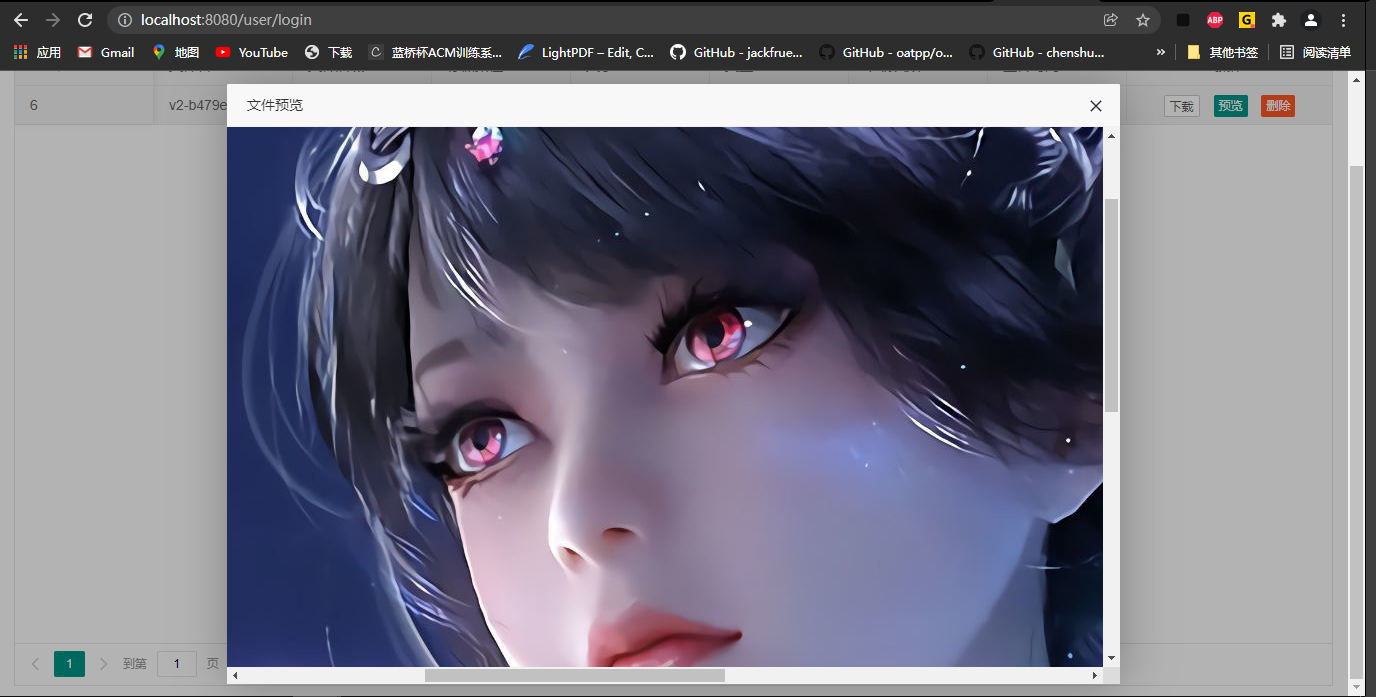
At this point, this small project will be basically completed.
demo source address https://github.com/picacho-pkq/SpringBoot-demo
demo download addresshttps://download.csdn.net/download/pikcacho_pkq/75146243