1. Demand analysis
Personal websites are mainly used to record personal things and present the content to everyone in the most direct way, in which words and pictures account for the most, and there is basically no registration scene of other users.
For personal websites, we mainly have the following thoughts:
- Website system: write from scratch? Make an open source change yourself? Pay for it?
- Website maintenance: I don't understand the construction and maintenance of websites. After all, the maintenance of a regular website itself is a knowledge. For individuals, even if ability allows, energy is certainly not allowed.
- Server: to build a personal website, you have to bear the cost of the server every year. Over time, you may not be willing to spend money on it. (I did this 10 years ago and ended in failure.)
Therefore, is there a personal site building method that does not have high technical requirements, does not cost money, and can be maintained for a long time?
The answer is yes. Next, I'll explore along this idea to make it easy for you to create a personal free site.
2. Site planning
In the face of the above needs, someone did it a long time ago. Take the static site as the best choice, so that you can easily do it without mastering too much front-end technology.
By referring to many excellent personal websites, I finally chose to build my own personal website in the way of Github Pages + Hugo.
- Hugo: a static website generator implemented by Go language, which is simple, easy to use, efficient, easy to expand and rapid deployment. Just write the markdown file locally to complete the maintenance of daily articles.
- Github Pages: a static site hosting service that directly hosts individual, organization or project pages in the GitHub repository. (the key is not to spend money to store personal site resources here.)
3. Start building station
Next, take a look at how to build a personal website for yourself step by step!
3.1 Hugo construction
3.1. 1 install Hugo
Refer to Hugo's official installation guide.
Select the corresponding installation method according to your operating system. For example, if I am a Mac OS, I can quickly install it with the brew command:
If you are a Windows or other operating system, you can choose binary file installation. Download the corresponding Hugo binary file from Hugo Releases and install it directly.
Hugo confirmed.
hugo version
3.1. 2. New Hugo website
This step is to create a personal site Project locally (i.e. hugo website source file).
Create a new Hugo site.
("Hugo site demo" is a demo created for this example, not https://xcbeyond.cn Actual site.)
Hugo site directory view.
│-config.toml
├─archetypes
├─content
├─data
├─layouts
├─static
└─themes
config.toml: the configuration file of the website, which can configure the website name, keywords, plug-ins, etc.
content: article storage directory.
themes: site theme storage directory.
Static: static resource storage directory, such as pictures, style files, script files, etc.
3.1. 3 select Hugo theme
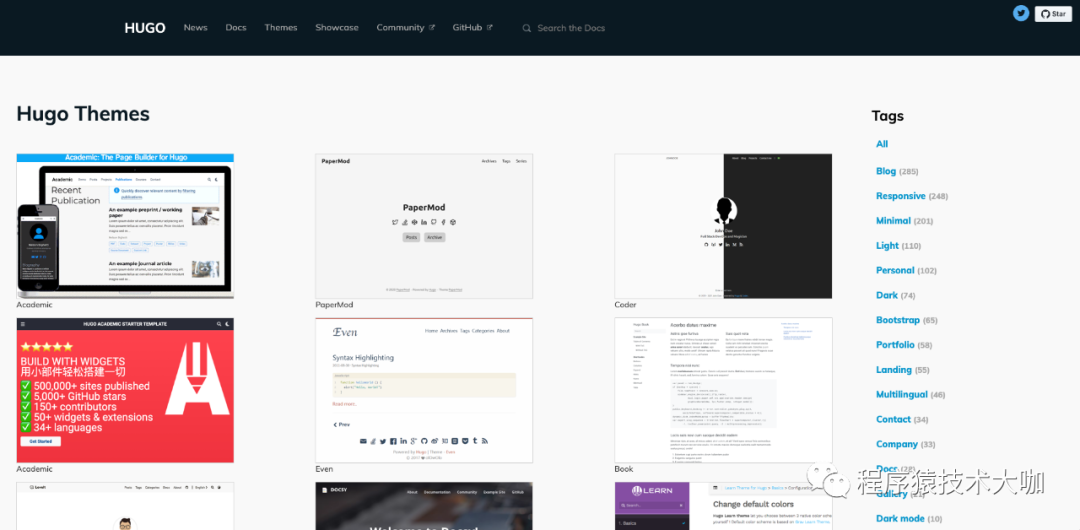
In order to make your site more beautiful, you can choose your favorite theme according to your personal preference.
- You can choose your favorite theme in Hugo Themes.
2. Download the selected topic to the topic directory of the local hugo site.
Take Universal as an example.
Switch to the theme directory themes of the local hugo site and download the theme.
xcbeyond@xcbeyonddeMacBook-Pro hugo-site-demo % cd themes
xcbeyond@xcbeyonddeMacBook-Pro themes % git clone https://github.com/devcows/hugo-universal-theme.git
Cloning into 'hugo-universal-theme'...
remote: Enumerating objects: 2386, done.
remote: Counting objects: 100% (1108/1108), done.
remote: Compressing objects: 100% (474/474), done.
remote: Total 2386 (delta 516), reused 930 (delta 393), pack-reused 1278
Receiving objects: 100% (2386/2386), 10.76 MiB | 3.52 MiB/s, done.
Resolving deltas: 100% (1270/1270), done.
3.1. 4 configure site
Configure according to the instructions in the topic. Generally, there are site examples in the topic.
(the configurations of different topics are slightly different, and the details shall be subject to the description in the topic.)
Take the topic Universal as an example.
Copy the contents of the exampleSite folder of the sample site in the theme Hugo universal theme to the root directory of your site.
Modify the site configuration file config toml
Modify the baseurl of the site to your Github Pages address, such as: https://xcbeyond.github.io .
More config For the description of toml configuration, refer to the Configure Hugo and Universal configuration topics.
3.1. 5 local Preview
Start Hugo server.
xcbeyond@xcbeyonddeMacBook-Pro hugo-site-demo % hugo serve
Start building sites ...
hugo v0.85.0+extended darwin/arm64 BuildDate=unknown

                  | EN
-------------------+------
Pages            |  43
Paginator pages  |   0
Non-page files   |   0
Static files     | 105
Processed images |   0
Aliases          |  17
Sitemaps         |   1
Cleaned          |   0

Built in 40 ms
Watching for changes in /Users/xcbeyond/github/hugo-site-demo/{archetypes,content,data,layouts,static,themes}
Watching for config changes in /Users/xcbeyond/github/hugo-site-demo/config.toml
Environment: "development"
Serving pages from memory
Running in Fast Render Mode. For full rebuilds on change: hugo server --disableFastRender
Web Server is available at http://localhost:1313/ (bind address 127.0.0.1)
Press Ctrl+C to stop
Open in browser http://localhost:1313 Preview.
Congratulations on the success of the local construction of your personal site!
3.1. 6 create articles
Daily site files are maintained using markdown files. For example, create a new file.
Switch to the Hugo site demo directory of the site.
Execute the command Hugo new < XXX MD > to create an about page.
about.md automatically generates content / about MD, open about md:
This is the markdown format, --- the content between is used to set the attribute content of the article, --- the following is the body.
3.2 site deployment
The local has been set up. How to release it?
Github is absolutely the best choice.
In order to ensure the relative security of personal site articles (markdown files), separate the site source code warehouse from the site, that is, set the site source code warehouse as private and the site GitHub Pages warehouse as public.
3.2. 1 push site source code warehouse
Push the local site Hugo site demo to your github.
- Register a GitHub account. If you already have an account, log in directly. If you don't have an account, register and log in.
- Create a new warehouse, such as Hugo site demo. Note: Hugo site demo is an example warehouse, so it is set as a public warehouse. In practice, it is recommended to set it as a private warehouse.
- Download the Hugo site demo locally from github. You can select a directory different from the local Hugo site demo to clone the new warehouse on github to the local.
git clone https://github.com/xcbeyond/hugo-site-demo.git
4. Copy the source code of the local site to the local github library, submit and push it to github.
3.2. 2 create GitHub Pages
Use GitHub Pages as a personal external site.
- Open the GitHub Pages official website, browse and understand the corresponding operation steps in the User or organization site section. GitHub Pages: https://pages.github.com
- Create a GitHub repository named < username > github. IO, where username is your GitHub account. For example: xcbeyond github. io.
3.2. 3 Automated Deployment
Use Github Actions to automatically deploy site source files (such as Hugo site demo) to GitHub Pages (such as xcbeyond.github.io).
Create Github Actions file.
In the root directory of the site source file, create the github/workflows/deploy.yml file:
# This is a basic workflow to help you get started with Actions

name: hugo-deploy-CI

# Controls when the action will run.
on: push

# A workflow run is made up of one or more jobs that can run sequentially or in parallel
jobs:
  # docs: https://github.com/peaceiris/actions-gh-pages
  deploy:
    runs-on: ubuntu-18.04
    steps:
      - name: Git checkout
        uses: actions/checkout@v2

      - name: Setup hugo
        uses: peaceiris/actions-hugo@v2
        with:
          hugo-version: '0.81.0'
          extended: true

      - name: Build
        run: hugo
      - name: Deploy
        uses: peaceiris/actions-gh-pages@v3
        with:
          personal_token: ${{ secrets.PERSONAL_TOKEN }}
          external_repository: xcbeyond/xcbeyond.github.io # Change to your own address
          publish_dir: ./public
        #   keep_files: true
          publish_branch: master
          cname: xcbeyond.cn # If there is an independent domain name, modify it to your own domain name
Where, on: push means that an Action is triggered when submitting, which is automatically compiled and deployed to GitHub Pages.
Each time you submit personal site content in the future, it will be compiled and deployed automatically.
4. Summary
The creation, deployment and launch of the personal website have been completed. In order to ensure the continuous operation of the site, you need your careful maintenance and optimization. The perfection and beauty of the site's functions need to be continuously optimized, which can be completed by adding Hugo plug-ins, modifying theme styles and a series of methods.