As we know, there are two main ways to integrate native Android with fluent. One is to create a fluent module and then rely on it as a native module; Another way is to package the fluent module into aar, and then rely on the aar package in the native project. The official recommends aar access.
You can refer to my previous article on how to access fluent in the native Android project by aar: Native Android project access to fluent AAR . What I want to share with you today is the use of FlutterFragment.
1, Android native project
In Android native development, there are usually three ways to implement the bottom Tab navigation, namely:
- RadioGroup + ViewPager + Fragment: it can preload adjacent fragments
- FragmentTabHost + Fragment: loads the selected Fragment
- BottomNavigationView: with selected animation effect
Here, we use BottomNavigationView to implement bottom Tab navigation. First, we will create a new Android native project, and then create three fragments. activity_ main. The XML layout code is as follows:
<androidx.constraintlayout.widget.ConstraintLayout xmlns:android="http://schemas.android.com/apk/res/android"
    xmlns:app="http://schemas.android.com/apk/res-auto"
    android:layout_width="match_parent"
    android:layout_height="match_parent"
    android:paddingTop="?attr/actionBarSize">


    <FrameLayout
        android:id="@+id/fl_container"
        android:layout_width="match_parent"
        android:layout_height="0dp"
        app:layout_constraintBottom_toTopOf="@id/bottom_navigation"
        app:layout_constraintLeft_toLeftOf="parent"
        app:layout_constraintTop_toTopOf="parent" />

    <com.google.android.material.bottomnavigation.BottomNavigationView
        android:id="@+id/bottom_navigation"
        android:layout_width="0dp"
        android:layout_height="wrap_content"
        android:layout_marginStart="0dp"
        android:layout_marginEnd="0dp"
        android:background="?android:attr/windowBackground"
        app:itemTextColor="@color/tab_text_color"
        app:layout_constraintBottom_toBottomOf="parent"
        app:layout_constraintLeft_toLeftOf="parent"
        app:layout_constraintRight_toRightOf="parent"
        app:menu="@menu/bottom_nav_menu" />

</androidx.constraintlayout.widget.ConstraintLayout>
A bottom is introduced into the code_ nav_ menu. XML layout, the code is as follows:
<menu xmlns:android="http://schemas.android.com/apk/res/android">
    <item
        android:id="@+id/nav_home"
        android:icon="@drawable/tab_home"
        android:title="@string/tab_home" />

    <item
        android:id="@+id/nav_car"
        android:icon="@drawable/tab_car"
        android:title="@string/tab_car" />

    <item
        android:id="@+id/nav_me"
        android:icon="@drawable/tab_mine"
        android:title="@string/tab_me" />
</menu>
The common properties of BottomNavigationView are as follows:
- App: itembackground: refers to the background color of the bottom navigation bar. The default is the theme color
- app:menu: refers to the bottom menu (text and pictures are written in this, and vector pictures are recommended)
- app:itemTextColor: refers to the color of the navigation bar text
- App: itemicon: refers to the color of the picture in the navigation bar
Finally, in mainactivity Java to switch tabs. The code is as follows:
class MainActivity : AppCompatActivity() {

    private var fragments = mutableListOf<Fragment>()
    private var lastfragment = 0

    override fun onCreate(savedInstanceState: Bundle?) {
        super.onCreate(savedInstanceState)
        setContentView(R.layout.activity_main)

        initFragment()
        initNavigationSelectedListener()
    }


    private fun initFragment() {
        val homeFragment = HomeFragment()
        val carFragment = CarFragment()
        val mineFragment = MineFragment()
        fragments.add(homeFragment)
        fragments.add(carFragment)
        fragments.add(mineFragment)

        supportFragmentManager.beginTransaction()
            .replace(R.id.fl_container, homeFragment)
            .show(homeFragment)
            .commit()
    }

    private fun switchFragment(index: Int) {
        if (lastfragment != index) {
            val transaction = supportFragmentManager.beginTransaction()
            //Hide previous Fragment
            transaction.hide(fragments[lastfragment])
            if (!fragments[index].isAdded) {
                transaction.add(R.id.fl_container, fragments[index])
            }
            transaction.show(fragments[index]).commitAllowingStateLoss()
            lastfragment = index
        }
    }


    private fun initNavigationSelectedListener() {
        findViewById<BottomNavigationView>(R.id.bottom_navigation).setOnNavigationItemSelectedListener { item ->
            when (item.itemId) {
                R.id.nav_home -> {
                    switchFragment(0)
                    return@setOnNavigationItemSelectedListener true
                }
                R.id.nav_car -> {
                    switchFragment(1)
                    return@setOnNavigationItemSelectedListener true
                }
                R.id.nav_me -> {
                    switchFragment(2)
                    return@setOnNavigationItemSelectedListener true
                }
            }
            false
        }
    }
}
2, Introducing the shutter module
First, create a fluent module project. There are two ways to create a fluent module: one is to use Android Studio for generation, and the other is to use the command line directly. To create a fluent module using the command line:
flutter create -t module flutter_module
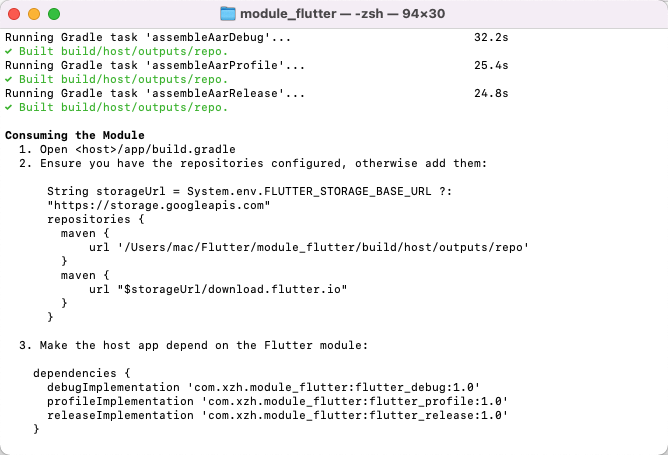
Then, go to the shutter_ Module, execute the fluent build aar command to generate the aar package. If there is no error, it will be displayed in / fluent_ module/. Generate the corresponding aar package in the Android / fluent / build / outputs directory, as shown in the following figure.
Next, we copy the generated aar package to libs of the Android project, and then open app / build Grade adds a local dependency.
repositories {
    flatDir {
        dirs 'libs'
    }
}

dependencies {
    ...
    //Add local dependency
    implementation fileTree(dir: 'libs', include: ['*.jar'])
    implementation(name: 'flutter_relaese-1.0', ext: 'aar')
    implementation 'io.flutter:flutter_embedding_debug:1.0.0-f0826da7ef2d301eb8f4ead91aaf026aa2b52881'
    implementation 'io.flutter:armeabi_v7a_debug:1.0.0-f0826da7ef2d301eb8f4ead91aaf026aa2b52881'
    implementation 'io.flutter:arm64_v8a_debug:1.0.0-f0826da7ef2d301eb8f4ead91aaf026aa2b52881'
    implementation 'io.flutter:x86_64_debug:1.0.0-f0826da7ef2d301eb8f4ead91aaf026aa2b52881'
}
Then in the outer layer of build Gradle is declared as a local dependency, and the code is as follows:
buildscript {
repositories {
   ...
    maven {
        url "http://download. flutter. IO "/ / fluent dependency
    }
  }

dependencies {
    classpath 'com.android.tools.build:gradle:4.0.0'
  }
}
3, Using the fluent module
By default, Android provides fluteractivity, Fragment and fluterview views. In this example, we are talking about the use of Fragment.
First, we create a FlutterEngineGroup object. The FlutterEngineGroup can be used to manage multiple FlutterEngine objects, and multiple flutterengines can share resources to reduce the resource occupation of FlutterEngine. The code of MyApplication is as follows:
class MyApplication : Application() {

    lateinit var engineGroup: FlutterEngineGroup

    override fun onCreate() {
        super.onCreate()
        // Create a FlutterEngineGroup object
        engineGroup = FlutterEngineGroup(this)
    }
}
Next, create a FlutterEngineManager cache management class, and create a static method FlutterEngine in FlutterEngineManager to cache FlutterEngine.
object FlutterEngineManager {

    fun flutterEngine(context: Context, engineId: String, entryPoint: String): FlutterEngine {
        // 1. Get the FlutterEngine from the cache
        var engine = FlutterEngineCache.getInstance().get(engineId)
        if (engine == null) {
            // If there is no FlutterEngine in the cache
            // 1. Create a new FlutterEngine, and the entry function executed is entryPoint
            val app = context.applicationContext as MyApplication
            val dartEntrypoint = DartExecutor.DartEntrypoint(
                FlutterInjector.instance().flutterLoader().findAppBundlePath(), entryPoint
            )
            engine = app.engineGroup.createAndRunEngine(context, dartEntrypoint)
            // 2. Store in cache
            FlutterEngineCache.getInstance().put(engineId, engine)
        }
        return engine!!
    }

}
In the above code, we will first get the cached FlutterEngine from it, if not, create a new FlutterEngine, and then cache it.
Next, we bind the FlutterEngine and FlutterFragment. If no route is provided by default, the route home page of the flutter module will be opened. If you want to specify the first page of the shuttle module, you can use the setInitialRoute() method.
class HomeFragment : Fragment() {

    // 1. FlutterEngine object
    private lateinit var engine: FlutterEngine
    private var engineId="home_fra"

    override fun onCreate(savedInstanceState: Bundle?) {
        super.onCreate(savedInstanceState)
        // 2. Get the FlutterEngine object through FBFlutterEngineManager
        engine = FlutterEngineManager.flutterEngine(requireActivity(), engineId, "main")
        // 3. Use the FlutterEngine object to build a FlutterFragment
        val flutterFragment = FlutterFragment.withCachedEngine(engineId).build<FlutterFragment>()
        // 4. Display the FlutterFragment
        parentFragmentManager.beginTransaction().replace(R.id.home_fl, flutterFragment).commit()
    }

    override fun onCreateView(
        inflater: LayoutInflater,
        container: ViewGroup?,
        savedInstanceState: Bundle?
    ): View? {
        return inflater.inflate(R.layout.fragment_home, container, false)
    }
}
We use the cached FlutterEngine here to save more resources, because when the fragments of the Bottom Navigation Activity are switched back and forth, the fragments will be re created and destroyed, which will consume more resources.
If we enter the secondary page and return, we also need to change the activity_ main. The BottomNavigationView in XML is hidden, and the code involved is as follows.
class MainActivity : AppCompatActivity() {

   ...//Omit other codes

    fun switchBottomView(show: Boolean) {
        val navView: BottomNavigationView = findViewById(R.id.nav_view)
        if (show) {
            navView.visibility = View.VISIBLE
        } else {
            navView.visibility = View.GONE
        }
    }

}
If you want to interact with Flutter, you can use MethodChannel and setMethodCallHandler to call back Android data to Fluter. The code is as follows.
class HomeFragment : Fragment() {

    // 1. FlutterEngine object
    private lateinit var engine: FlutterEngine
    private var engineId="home_fra"
    private lateinit var channel: MethodChannel


    override fun onCreate(savedInstanceState: Bundle?) {
        super.onCreate(savedInstanceState)

        initEngine()
        initChannel()
    }

    private fun initEngine() {
        // 2. Get the FlutterEngine object through FBFlutterEngineManager
        engine = FlutterEngineManager.flutterEngine(requireActivity(), engineId, "main")
        // 3. Use the FlutterEngine object to build a FlutterFragment
        val flutterFragment = FlutterFragment.withCachedEngine(engineId).build<FlutterFragment>()
        // 4. Display the FlutterFragment
        parentFragmentManager.beginTransaction().replace(R.id.home_fl, flutterFragment).commit()
    }

    private fun initChannel() {
        channel = MethodChannel(engine.dartExecutor.binaryMessenger, "tab_switch")
        channel.setMethodCallHandler { call, result ->
            when (call.method) {
                "showTab" -> {
                    val activity = requireActivity() as MainActivity
                    activity.switchBottomView(true)
                    result.success(null)
                }
                "hideTab" -> {
                    val activity = requireActivity() as MainActivity
                    activity.switchBottomView(false)
                    result.success(null)
                }
                else -> {
                    result.notImplemented()
                }
            }
        }
    }

    override fun onCreateView(
        inflater: LayoutInflater,
        container: ViewGroup?,
        savedInstanceState: Bundle?
    ): View? {
        return inflater.inflate(R.layout.fragment_home, container, false)
    }

}
Then, there is an invokeMethod method injection in the fluent.
class PluginManager {
  static const MethodChannel _channel = MethodChannel('tab_switch');

  static Future<String> showTab(Map params) async {
    String resultStr = await _channel.invokeMethod('showTab', params);
    return resultStr;
  }

}
At present, the native mobile APP can integrate multiple fluent modules in the application, which makes it convenient for us to carry out modular development of multiple services. In addition to FlutterActivity and Fragment, it is slightly more complicated to use FlutterView in Android. To use a FlutterView, you need to bind the life cycle, and developers need to manage the FlutterView life cycle themselves.