Statement: the pictures and model materials involved in this article are only used for personal learning, research and appreciation. Please do not modify, illegally spread, reprint, publish, commercialize or engage in other profitable activities.
background
In three JS journey course Examples In, a method is provided to use three JS built-in method to achieve the example of 3D text suspension effect, this paper uses react + three JS technology stack, refer to the example to achieve a similar effect. The knowledge points involved in this paper mainly include: CSS mesh background, MeshNormalMaterial normal material, FontLoader font loader, TextGeometry text buffer geometry, TorusBufferGeometry ring buffer geometry, cone buffer geometry cone buffer geometry, octahedron buffer geometry, three JS post rendering, GlitchPass channel, element requestFullscreen,Document.exitFullscreen et al.
effect
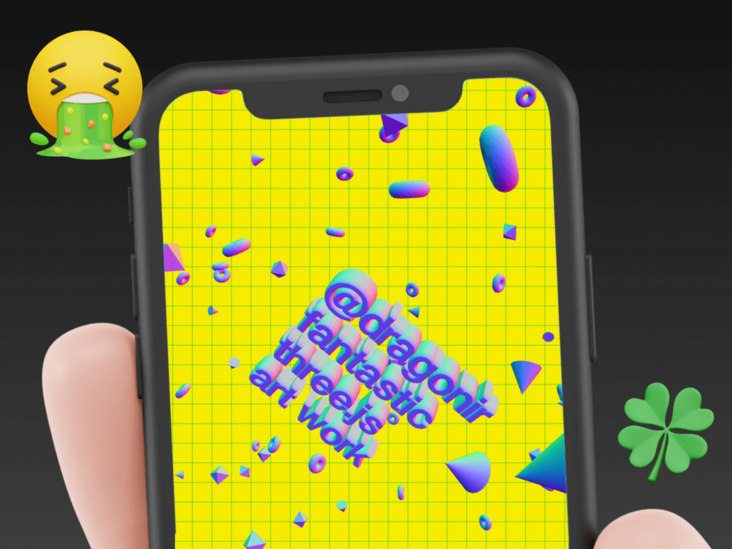
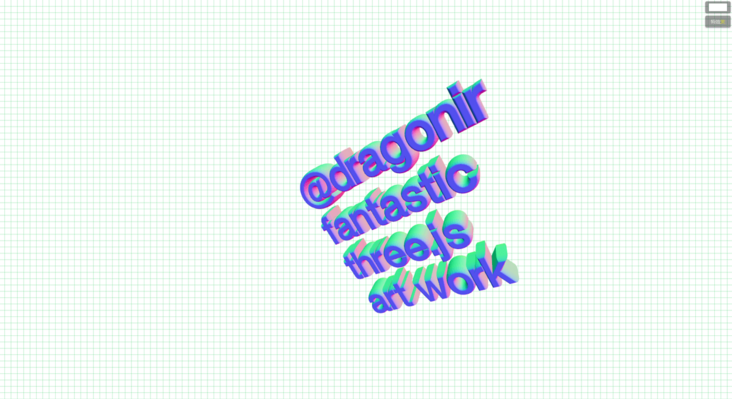
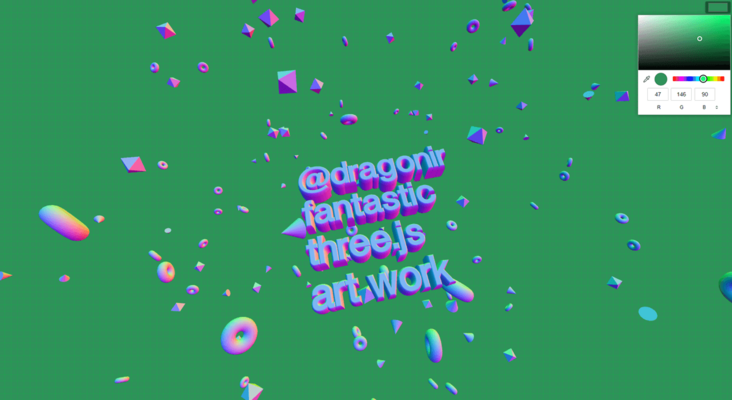
The effect is as follows: 👆 As shown in the banner diagram, the main body of the page is composed of a text grid model in the center and circular torus, cone and octahedron around it. Follow 🖱 When the mouse moves or clicks on the page, the model also moves. Two buttons are provided in the upper right corner of the page, which can switch the background color of the page and switch the post fault style special effects. Double click the screen to enter or exit the full screen.
👀 Online preview: https://3d-dragonir.vercel.ap...
👀 or https://dragonir.github.io/3d...
Adapted:
- 💻 PC end
- 📱 Mobile terminal
realization
Resource introduction
Firstly, the module resources required for development are introduced, in which FontLoader is used to load font files, TextGeometry is used to create 3D font grid, and EffectComposer, RenderPass and GlitchPass are used for post effect rendering.
import * as THREE from "three";
import { FontLoader } from "three/examples/jsm/loaders/FontLoader";
import { TextGeometry } from 'three/examples/jsm/geometries/TextGeometry';
import { EffectComposer } from 'three/examples/jsm/postprocessing/EffectComposer.js';
import { RenderPass } from 'three/examples/jsm/postprocessing/RenderPass.js';
import { GlitchPass } from 'three/examples/jsm/postprocessing/GlitchPass.js';
DOM structure
The DOM structure of the page is very simple. The container #canvas is used for scene rendering color_pick is used to switch the background color of the page pass_button is used for post failover rendering.
<div className='floating_page' style={{ backgroundColor: this.state.backgroundColor }}>
  <div id="canvas"></div>
  <input className='color_pick' type="color" onChange={this.handleInputChange} value={this.state.backgroundColor} />
  <button className='pass_button' onClick={this.handleRenderChange}>Special effects<span className='highlight'>{this.state.renderGlithPass ? 'open' : 'shut'}</span></button>
</div>
Set status
backgroundColor indicates the background color of the current page, and renderGlithPass indicates whether to turn on the post status. The self-test found that in iOS Safari browser, the post rendering of fault style will lead to the problem of model threading 😱, Therefore, use this parameter to control the mobile terminal to turn off the post effect by default and the pc terminal to turn on by default.
state = {
  backgroundColor: '#164CCA',
  renderGlithPass: !(window.navigator.userAgent.toLowerCase().indexOf('mobile') > 0)
}
Grid background
Use the pure CSS attribute linear gradient to realize the grid background to beautify the page 🎏.
background-image: linear-gradient(rgba(3, 192, 60, .3) 1px, transparent 1px), linear-gradient(90deg, rgba(3, 192, 60, .3) 1px, transparent 1px);
background-size: 1em 1em;
Scene initialization
Initialize the rendering container, scene and camera. The position of the camera can be adjusted according to its own needs. render starts alpha and sets it setClearAlpha(0) sets the background color to transparent.
canvas = document.getElementById('canvas');
renderer = new THREE.WebGLRenderer({ antialias: true, alpha: true });
renderer.setPixelRatio(Math.min(2, window.devicePixelRatio));
renderer.setSize(window.innerWidth, window.innerHeight);
renderer.setClearAlpha(0);
canvas.appendChild(renderer.domElement);
scene = new THREE.Scene();
camera = new THREE.PerspectiveCamera(70, window.innerWidth / window.innerHeight, .1, 10000);
camera.position.set(-2 * 10000, 0, 780);
Create material
In this paper, all mesh models will use the same material meshnormal material. Applying its properties can make the mesh model produce color gradient. The global creation is once, and subsequent development does not need to create repeatedly, which is conducive to the improvement of page performance.
const material = new THREE.MeshNormalMaterial();
💡 MeshNormalMaterial normal material
It is a material that maps the normal vector to RGB color. You can detect whether the model surface is flat by observing whether the gradient color of the model surface is continuous.
Constructor:
MeshNormalMaterial(parameters : Object)
- parameters: optional, an object that defines the appearance of a material, with one or more attributes.
Special properties:
- . normalMap[Texture]: used to create a normal map texture. RGB values affect the surface normals of each pixel fragment and change the way the color is illuminated.
- . normalMapType[Integer]: the type of normal map, with the option of three Tangentspacenormalmap (default) and tree ObjectSpaceNormalMap.
- . normalScale[Vector2]: the degree to which the normal map affects the material. The range is 0-1, and the default value is Vector2 set to (1, 1).
- . flatShading[Boolean]: defines whether the material is rendered using plane shading. The default value is false.
- . morphNormals[Boolean]: defines whether to use morphNormals. Set to true to pass the morphNormal property from geometry to the shader. The default value is false.
- . morphTargets[Boolean]: defines whether the material uses morphTargets. The default value is false.
Create text model
Use FontLoader to load fontface font JSON file and create text geometry model with TextGeometry.
const loader = new FontLoader();
loader.load('./fonts/helvetiker_regular.typeface.json', font => {
  textMesh.geometry = new TextGeometry('@dragonir\nfantastic\nthree.js\nart work', {
    font: font,
    size: 100,
    height: 40,
    curveSegments: 12,
    bevelEnabled: true,
    bevelThickness: 30,
    bevelSize: 8,
    bevelOffset: 1,
    bevelSegments: 12
  });
  textMesh.material = material;
  scene.add(textMesh);
});
💡 FontLoader font loader
Use a class that loads fonts in JSON format and returns Font. The return value is an array of Shape types representing fonts, which uses FileLoader to load files internally.
Constructor:
FontLoader(manager: LoadingManager)
- manager: the loadingManager used by the loader. The default value is three DefaultLoadingManager.
method:
. load loads from the URL and passes the loaded texture to onLoad.
- .load(url: String, onLoad: Function, onProgress: Function, onError: Function): null.
- URL: the URL or path of the file. It can also be a Data URI.
- onLoad: called when the load is complete. The callback parameter is the texture to be loaded.
- onProgress: will be called during loading. The parameter is the XMLHttpRequest instance, which contains total and loaded bytes.
- onError: called when loading error.
. parse parses in JSON format and returns a Font.
- .parse (json: Object ): Font.
- JSON: JSON structure for parsing.
💡 TextGeometry text geometry
A class used to generate text into a single geometry. It is constructed from a given string of text and parameters composed of the loaded Font and the settings in the geometry's ExtrudeGeometry parent class.
Constructor:
TextGeometry(text: String, parameters: Object)
- Text: the text to be displayed.
parameters:
- font[Font]: THREE.Font instance.
- size[Float]: font size. The default value is 100.
- height[Float]: the thickness of extruded text. The default value is 50.
- curveSegments[Integer]: indicates the number of points on the curve of the text. The default value is 12.
- bevelEnabled[Boolean]: whether to enable bevel angle. The default value is false.
- bevelThickness[Float]: the depth of the text bevel. The default value is 20.
- bevelSize[Float]: the extension distance between the bevel and the outline of the original text. The default value is 8.
- bevelSegments[Integer]: the number of segments in the bevel angle. The default value is 3.
🔗 have access to facetype.js Online conversion three JS supported fonts.
Create geometry model
Decorate the page with three other built-in geometry models: torus, cone and octahedron. There are a large number of decorative geometry. In order to effectively improve page performance, the following two points need to be paid attention to:
- ⭐ Use three Group manages all geometry.
- ⭐ Use BufferAttribute when creating geometry, such as ConeBufferGeometry instead of coneometry, which can transfer data to GPU more effectively.
// Batch model creation method
generateRandomMesh = (geometry, material, count) => {
  for (let i = 0; i < count; i++) {
    let mesh = new THREE.Mesh(geometry, material);
    let dist = farDist / 3;
    let distDouble = dist * 2;
    // Set random position and rotation angle
    mesh.position.x = Math.random() * distDouble - dist;
    mesh.position.y = Math.random() * distDouble - dist;
    mesh.position.z = Math.random() * distDouble - dist;
    mesh.rotation.x = Math.random() * 2 * Math.PI;
    mesh.rotation.y = Math.random() * 2 * Math.PI;
    mesh.rotation.z = Math.random() * 2 * Math.PI;
    // Manually control when 3D transforms are recalculated for better performance
    mesh.matrixAutoUpdate = false;
    mesh.updateMatrix();
    group.add(mesh);
  }
}
// Create 100 octahedrons
const octahedronGeometry = new THREE.OctahedronBufferGeometry(80);
generateRandomMesh(octahedronGeometry, material, 100);
// Create 200 torus
const torusGeometry = new THREE.TorusBufferGeometry(40, 25, 16, 40);
generateRandomMesh(torusGeometry, material, 200);
// Create 100 cones
const coneGeometry = new THREE.ConeBufferGeometry(40, 80, 80);
generateRandomMesh(coneGeometry, material, 100);
scene.add(group);
💡 TorusBufferGeometry torus buffer geometry
Class used to generate torus geometry.
Constructor:
TorusBufferGeometry(radius: Float, tube: Float, radialSegments: Integer, tubularSegments: Integer, arc: Float)
- Radius: radius of the ring, from the center of the ring to the center of the pipe cross section. The default value is 1.
- tube: the radius of the pipe. The default value is 0.4.
- radialSegments: the number of segments of the torus. The default value is 8.
- tubularSegments: the number of pipe segments. The default value is 6.
- arc: the center angle of the ring, in radians. The default value is math PI * 2.
💡 Cone buffer geometry
Class used to generate conical geometry.
Constructor:
ConeBufferGeometry(radius: Float, height: Float, radialSegments: Integer, heightSegments: Integer, openEnded: Boolean, thetaStart: Float, thetaLength: Float)
- Radius: the radius at the bottom of the cone. The default value is 1.
- Height: the height of the cone. The default value is 1.
- radialSegments: the number of segments around the side of the cone. The default is 8.
- Height segments: the number of segments along the height of the side of the cone. The default value is 1.
- openEnded: indicates whether the bottom of the cone is open or capped. The default value is false, that is, its bottom surface is capped by default.
- thetaStart: the starting angle of the first segment, which is 0 by default.
- Thetalongth: the central angle of the circular sector at the bottom of the cone, usually referred to as θ. The default value is 2*PI, making it a complete cone.
💡 Octahedral geometry buffer
The class used to create an octahedron.
Constructor:
OctahedronBufferGeometry(radius: Float, detail: Integer)
- Radius: the radius of the octahedron. The default value is 1.
- detail: the default value is 0. Setting this value to a number greater than 0 will add some vertices to it so that it is no longer an octahedron.
Mouse event monitoring
Pass on 🖱 The mutual conversion of mouse movement coordinates and model coordinates is used to add the monitoring method of mouse movement and touch movement events.
const mouseFX = {
  windowHalfX: window.innerWidth / 2,
  windowHalfY: window.innerHeight / 2,
  coordinates: (coordX, coordY) => {
    mouseX = (coordX - mouseFX.windowHalfX) * 5;
    mouseY = (coordY - mouseFX.windowHalfY) * 5;
  },
  onMouseMove: e => { mouseFX.coordinates(e.clientX, e.clientY) },
  onTouchMove: e => { mouseFX.coordinates(e.changedTouches[0].clientX, e.changedTouches[0].clientY)}
};
document.addEventListener('mousemove', mouseFX.onMouseMove, false);
document.addEventListener('touchmove', mouseFX.onTouchMove, false);
Background color switching
Use an input[type='color '] tag to switch the background color.
handleInputChange = e => {
  this.setState({ backgroundColor: e.target.value });
}
Render Back-Ends
For more impact visual effect 💥, I added a fault style post rendering effect and used a button switch ⚙ To control the opening and closing of the effect.
composer = new EffectComposer(renderer);
composer.addPass( new RenderPass(scene, camera));
glitchPass = new GlitchPass();
composer.addPass(glitchPass);
handleRenderChange = () => {
  this.setState({ renderGlithPass: !this.state.renderGlithPass });
}
💡 Render Back-Ends
Three.js post rendering processing is the process of achieving the desired visual effect by superimposing rendering channels. The implementation process is as follows:
- Create effect combiner: the effect combiner is the entrance of various processing channels. Use the EffectComposer object to create an effect combiner.
- Add channel: add a RenderPass channel, which will render a new scene based on the specified scene and camera.
- Combiner update: in the animation cycle, call the render method of the effect combiner, and the channel generation effect will be output in the scene.
💡 GlitchPass fault style channel
GlitchPass channel produces the effect of simulating fault style. It has only one optional configuration parameter:
- goWild this property receives a Boolean value that specifies whether the electromagnetic storm effect continues to occur.
📌 Three.js provides many post-processing channels, which can be used directly. At the same time, ShaderPass channel is provided, which supports the use of custom shaders and can create advanced custom post-processing channels.
animation
Update the scene, camera, and post render channels in requestAnimationFrame.
function animate() {
  requestAnimationFrame(animate);
  camera.position.x += (mouseX - camera.position.x) * 0.05;
  camera.position.y += (mouseY * -1 - camera.position.y) * 0.05;
  camera.lookAt(scene.position);
  // Add rotation animation to the cube grid and font grid in the scene
  const t = Date.now() * 0.001;
  const rx = Math.sin(t * 0.7) * 0.5;
  const ry = Math.sin(t * 0.3) * 0.5;
  const rz = Math.sin(t * 0.2) * 0.5;
  group.rotation.x = rx;
  group.rotation.y = ry;
  group.rotation.z = rz;
  textMesh.rotation.x = rx;
  textMesh.rotation.y = ry;
  textMesh.rotation.z = rx;
  renderer.render(scene, camera);
  // Update post render channels
  composer.render();
}
Zoom fit
The size of renderer and composer should be adjusted at the same time.
window.addEventListener('resize', () => {
  camera.aspect = window.innerWidth / window.innerHeight;
  camera.updateProjectionMatrix();
  renderer.setSize(window.innerWidth, window.innerHeight);
  composer.setSize( window.innerWidth, window.innerHeight );
}, false);
Double click full screen
Listening page 🖱 Double click the dblclick event to enter or exit the full screen state by calling requestFullscreen and exitFullscreen.
window.addEventListener('dblclick', () => {
  let fullscreenElement = document.fullscreenElement || document.webkitFullscreenElement;
  if (!fullscreenElement) {
    if (canvas.requestFullscreen) {
      canvas.requestFullscreen();
    } else if (canvas.webkitRequestFullscreen) {
      canvas.webkitRequestFullscreen();
    }
    console.log('Enter full screen')
  } else {
    if (document.exitFullscreen) {
      document.exitFullscreen();
    } else if (document.webkitExitFullscreen) {
      document.webkitExitFullscreen();
    }
    console.log('Exit full screen')
  }
})
💡 Element.requestFullscreen
Element. The requestfullscreen method is used to make an asynchronous request to put the element into full screen mode. Calling this API does not guarantee that elements will be able to enter full screen mode. If the element is allowed to enter full screen mode, the returned promise will resolve, and the element will receive a fullscreenchange event to notify it that it has entered full screen mode. If the full screen request is rejected, the returned project will become rejected and the element will receive a fullscreenerror event. If the element has been detached from the original document, the document will receive these events.
Syntax:
var Promise = Element.requestFullscreen(options);
- Options: optional. A FullscreenOptions object provides control options for switching to full screen mode.
📌 This method can only be called when the user interacts or the device direction changes, otherwise it will fail. At present, the only option of FullscreenOptions is navigationUI, which controls whether to display the navigation bar UI when the element is in full screen mode. The default value is auto, indicating that it is up to the browser to decide whether to display the navigation bar.
💡 Document.exitFullscreen
Document. The exitfullscreen method is used to exit the current document from full screen mode. Calling this method will cause the document to fall back to the previous element The state before the requestfullscreen method enters full screen mode.
Syntax:
document.exitFullscreen();
At this point, all functions of the sample page are completed. You can visit the following link to view the complete code 😀.
🔗 Full code: https://github.com/dragonir/3...
summary
The knowledge points in this paper mainly include the following new knowledge:
- CSS grid background
- MeshNormalMaterial normal material
- FontLoader font loader
- TextGeometry text buffer geometry
- TorusBufferGeometry torus buffer geometry
- Cone buffer geometry
- Octahedron buffergeometry
- Three.js post rendering
- GlitchPass channel
- Element.requestFullscreen
- Document.exitFullscreen
Want to know about scene initialization, lighting, shadows, base geometry, meshes, materials and other three JS related knowledge, you can read my previous articles. For reprint, please indicate the original address and author. If you think the article is helpful to you, don't forget to click three times 👍.
appendix
- [1]. Three.js implementation makes 2D pictures have 3D effect
- [2]. Three.js Bing dwen dwen 2022 Winter Olympic theme 3D fun page, ice pier 🐼
- [3]. Three.js make an exclusive 3D Medal
- [4]. Three.js to realize the 3D creative page of the Spring Festival in the year of the tiger
- [5]. Three.js to realize the 3D dynamic Logo of Facebook metauniverse
- [6]. Three.js to achieve 3D panoramic detective games
- [7]. Three.js to achieve cool acid style 3D pages
- [8]. www.ilithya.rocks
- [9]. MDN requestFullScreen
- [10]. MDN exitFullscreen