2, QQ login
2.1 QQ login development document
QQ login: the so-called third-party login means that the user can successfully log in to the project without entering a password in the project.
1. Application steps for QQ Internet developers
If you want to realize QQ login, you need to become a developer of QQ Internet and pass the audit.
- Related connections: http://wiki.connect.qq.com/%E6%88%90%E4%B8%BA%E5%BC%80%E5%8F%91%E8%80%85
2. Application steps of QQ Internet application
After becoming a QQ Internet developer, you also need to create an application, that is, obtain the application ID corresponding to QQ Internet of this project.
- Related connections: http://wiki.connect.qq.com/__trashed-2
3. Website docking QQ login steps
QQ Internet provides development documents to help developers realize QQ login.
- Related connections: http://wiki.connect.qq.com/%E5%87%86%E5%A4%87%E5%B7%A5%E4%BD%9C_oauth2-0
4. QQ login process analysis

5. Key points of knowledge
- When interfacing with the third-party platform, we must carefully read the documents provided by the third-party platform. There must be instructions for the interface in the document to facilitate our development.
2.2 define QQ login model class
After QQ login is successful, we need to associate QQ users with Mido mall users to facilitate the next QQ login, so we choose to use MySQL database for storage.
1. Define model class base class
In order to supplement the two fields of creation time and update time of model class data in the project, we need to define the base class of model class. In Meiduo_ mall. utils/models. Create a model class base class in the. Py file.
from django.db import models

class BaseModel(models.Model):
    """Supplementary fields for model classes"""

    create_time = models.DateTimeField(auto_now_add=True, verbose_name="Creation time")
    update_time = models.DateTimeField(auto_now=True, verbose_name="Update time")

    class Meta:
        abstract = True  # Description is an abstract model class, which is used for inheritance and use. BaseModel tables will not be created during database migration
2. Define QQ login model class
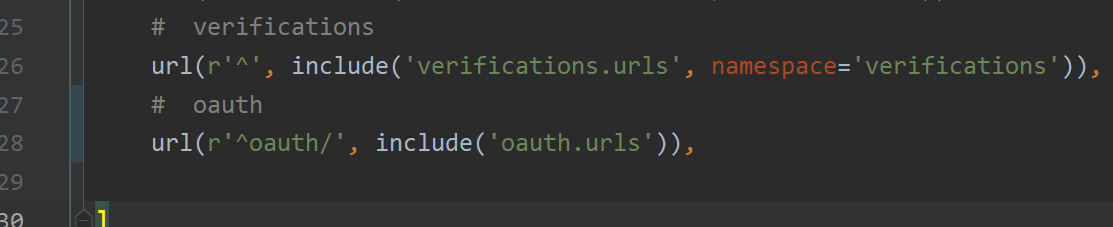
Create a new application oauth to realize QQ third-party authentication login. [a new sub application]
# oauth
url(r'^oauth/', include('oauth.urls')),

In OAuth / models Py defines the association relationship between QQ identity (openid) and User model class User
from django.db import models
from meiduo_mall.utils.models import BaseModel
# Create your models here.
class OAuthQQUser(BaseModel):
"""QQ Login user data"""
user = models.ForeignKey('users.User', on_delete=models.CASCADE, verbose_name='user')
openid = models.CharField(max_length=64, verbose_name='openid', db_index=True)
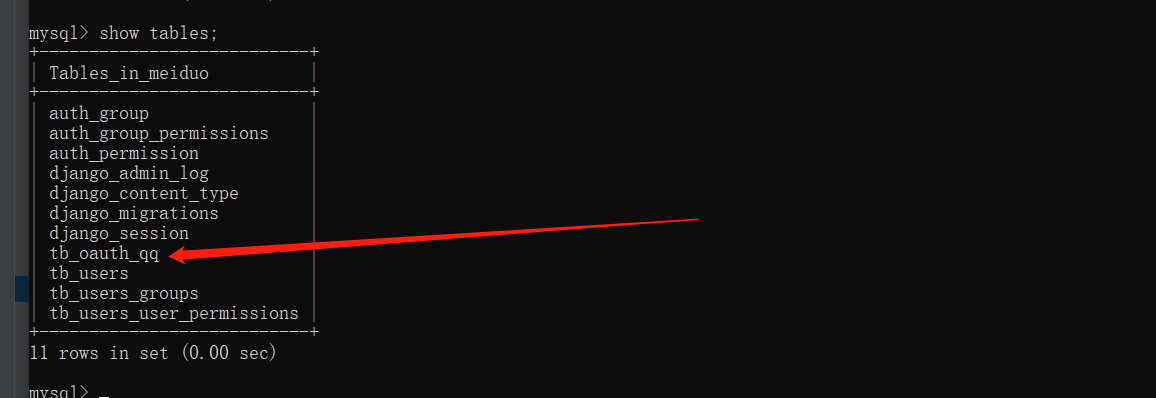
class Meta:
db_table = 'tb_oauth_qq'
verbose_name = 'QQ Login user data'
verbose_name_plural = verbose_name
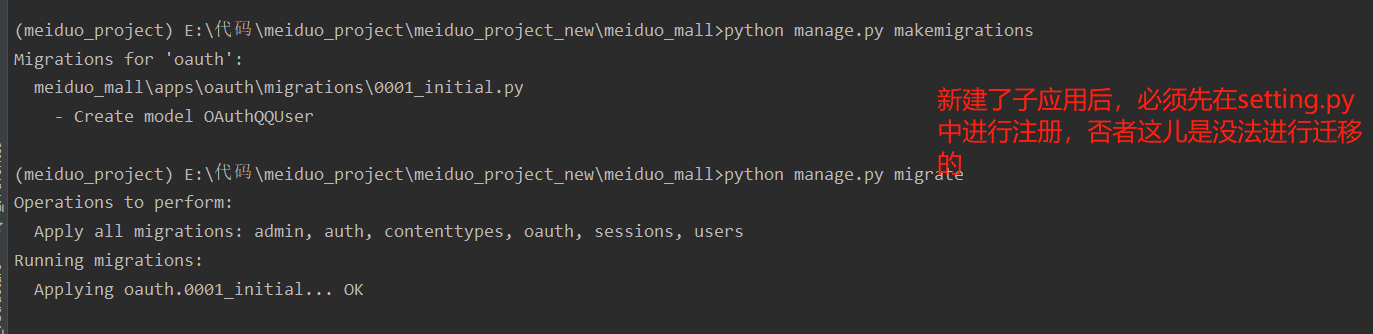
3. Migrate QQ login model class
$ python manage.py makemigrations
$ python manage.py migrate

2.3 QQLoginTool
1. Introduction to qqlogintool
- The tool encapsulates the request operation of connecting to QQ interconnection interface during QQ login. It can be used to quickly realize QQ login.
2. QQLoginTool installation
pip install QQLoginTool
3. QQLoginTool instructions
1. Import
from QQLoginTool.QQtool import OAuthQQ
2. Initialize OAuthQQ object
oauth = OAuthQQ(client_id=settings.QQ_CLIENT_ID, client_secret=settings.QQ_CLIENT_SECRET, redirect_uri=settings.QQ_REDIRECT_URI, state=next)
3. Get the QQ login code scanning page, and get the Authorization Code after scanning the code
login_url = oauth.get_qq_url()
4. Obtain Access Token through Authorization Code
access_token = oauth.get_access_token(code)
5. Obtain OpenID through Access Token
openid = oauth.get_open_id(access_token)
2.4 OAuth2.0 authentication get openid
Pending business logic
# Extract code request parameters
# Use code to request access from QQ server_ token
# Using access_token requests openid from QQ server
# Use openid to query whether the QQ user has bound a user in Meiduo mall
# If openid has been bound to the user of Mido mall, the JWT token is directly generated and returned
# If openid is not bound to Mido mall users, create users and bind to openid
1. Get QQ login code scanning page
1. Request method
| option | programme |
|---|---|
| Request method | GET |
| Request address | /qq/login/ |
Total route:

Sub route:
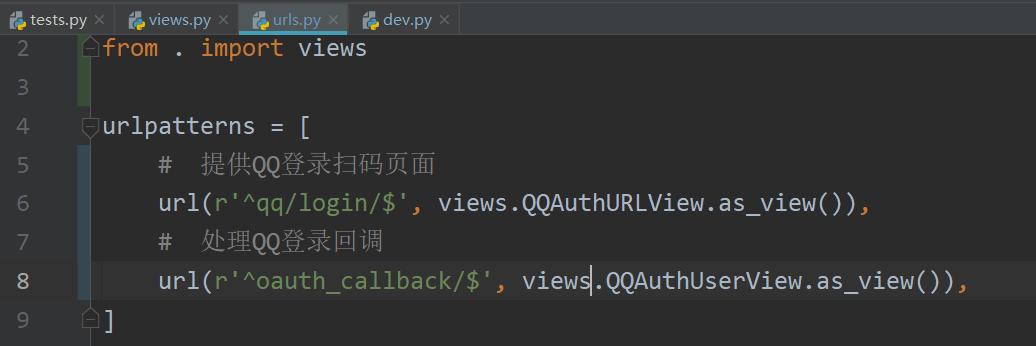
from django.conf.urls import url
from . import views

urlpatterns = [
    #  Provide QQ login code scanning page
    url(r'^qq/login/$', views.QQAuthURLView.as_view()),

]
2. Request parameters: query parameters
| Parameter name | type | Is it necessary to pass | explain |
|---|---|---|---|
| next | string | no | It is used to record the web address entered after QQ login is successful |
3. Response result: JSON
| field | explain |
|---|---|
| code | Status code |
| errmsg | error message |
| login_url | QQ login code scanning page link |
4. Back end logic implementation
from django.shortcuts import render
from django.views import View
from QQLoginTool.QQtool import OAuthQQ
from django import http
from django.conf import settings
from meiduo_mall.utils.response_code import RETCODE
# Create your views here.
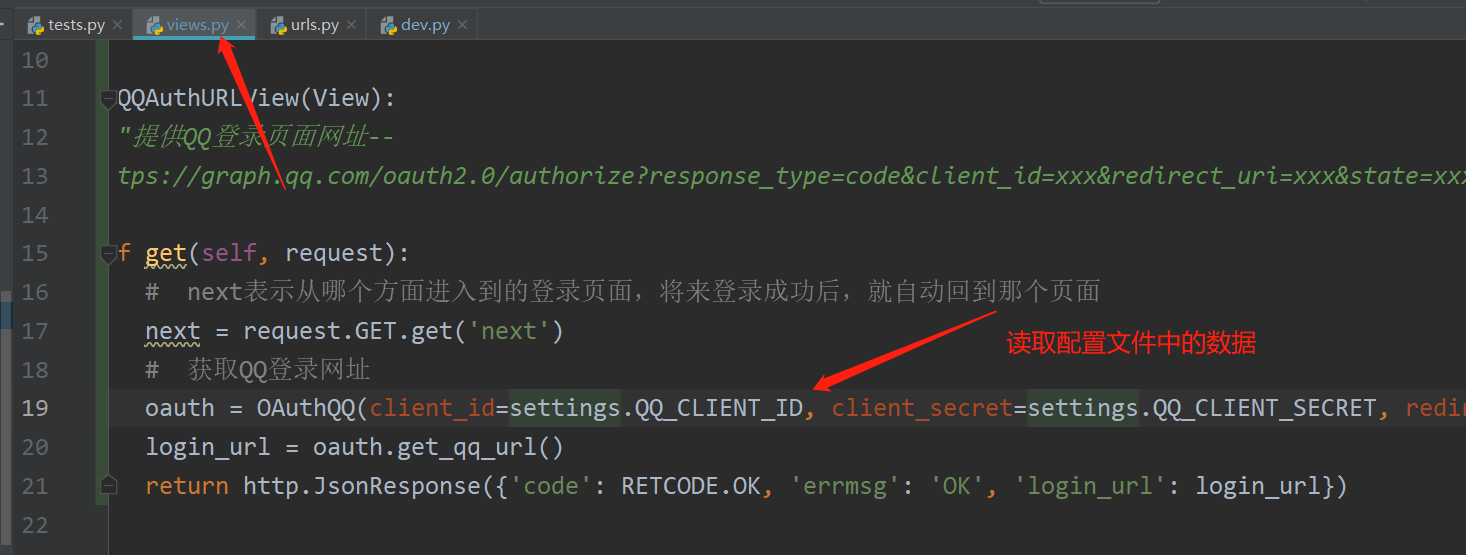
class QQAuthURLView(View):
"""provide QQ Login page URL--
https://graph.qq.com/oauth2.0/authorize?response_type=code&client_id=xxx&redirect_uri=xxx&state=xxx"""
def get(self, request):
# next indicates where to enter the login page. After successful login in the future, you will automatically return to that page
next = request.GET.get('next')
# Get QQ login URL
oauth = OAuthQQ(client_id=settings.QQ_CLIENT_ID, client_secret=settings.QQ_CLIENT_SECRET, redirect_uri=settings.QQ_REDIRECT_URI, state=next)
login_url = oauth.get_qq_url()
return http.JsonResponse({'code': RETCODE.OK, 'errmsg': 'OK', 'login_url': login_url})
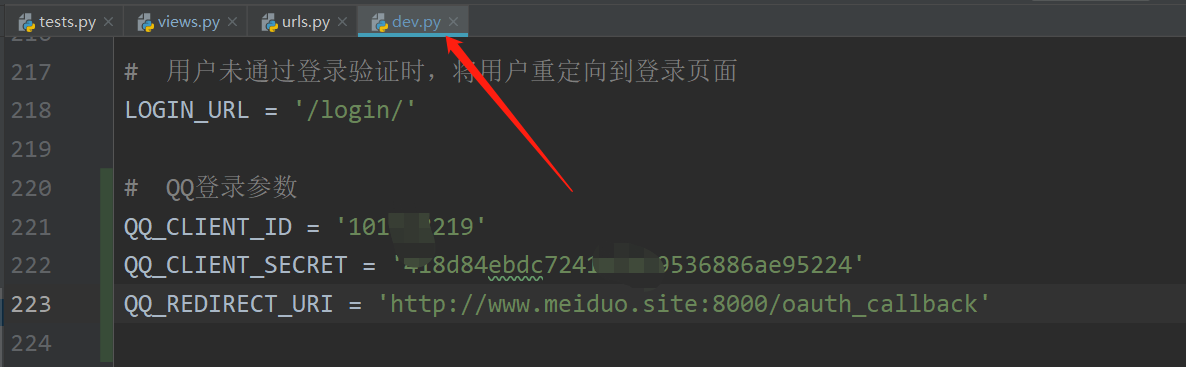
5.QQ login parameters
QQ_CLIENT_ID = '101518219'
QQ_CLIENT_SECRET = '418d84ebdc7241efb79536886ae95224'
QQ_REDIRECT_URI = 'http://www.meiduo.site:8000/oauth_callback'
2. Receive Authorization Code
Tips:
- After the user logs in successfully on QQ, QQ will redirect the user to the callback URL configured by us.
- When QQ redirects to the callback URL, it will pass us an Authorization Code.
- We need to get the Authorization Code and complete oauth2 Get openid for 0 authentication.
- In this project, the callback website configured when we apply for QQ login development qualification is:
- http://www.meiduo.site:8000/oauth_callback
- The complete website of QQ Internet redirection is:
- http://www.meiduo.site:8000/oauth_callback/?code=AE263F12675FA79185B54870D79730A7&state=%2F [%2f refers to the root path of]
class QQAuthUserView(View):
    """Callback processing of user code scanning login"""

    def get(self, request):
        """Oauth2.0 authentication"""
        # Receive Authorization Code
        code = request.GET.get('code')
        if not code:
            return http.HttpResponseForbidden('lack code')
        pass
url(r'^oauth_callback/$', views.QQAuthUserView.as_view()),
3. OAuth2.0 authentication get openid
- Use code to request access from QQ server_ token
- Using access_token requests openid from QQ server
class QQAuthUserView(View):
    """Callback processing of user code scanning login"""

    def get(self, request):
        """Oauth2.0 authentication"""
        # Extract code request parameters
        code = request.GET.get('code')
        if not code:
            return http.HttpResponseForbidden('lack code')

        # Create tool object
        oauth = OAuthQQ(client_id=settings.QQ_CLIENT_ID, client_secret=settings.QQ_CLIENT_SECRET, redirect_uri=settings.QQ_REDIRECT_URI)

        try:
            # Use code to request access from QQ server_ token
            access_token = oauth.get_access_token(code)

            # Using access_token requests openid from QQ server
            openid = oauth.get_open_id(access_token)
        except Exception as e:
            logger.error(e)
            return http.HttpResponseServerError('OAuth2.0 Authentication failed')
        pass

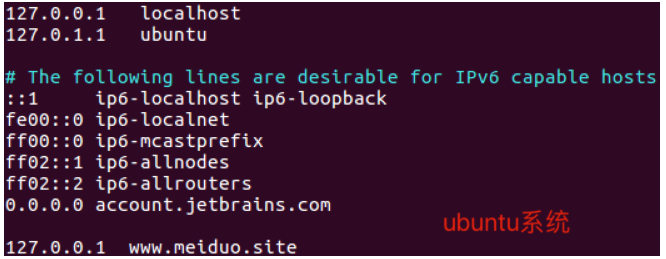
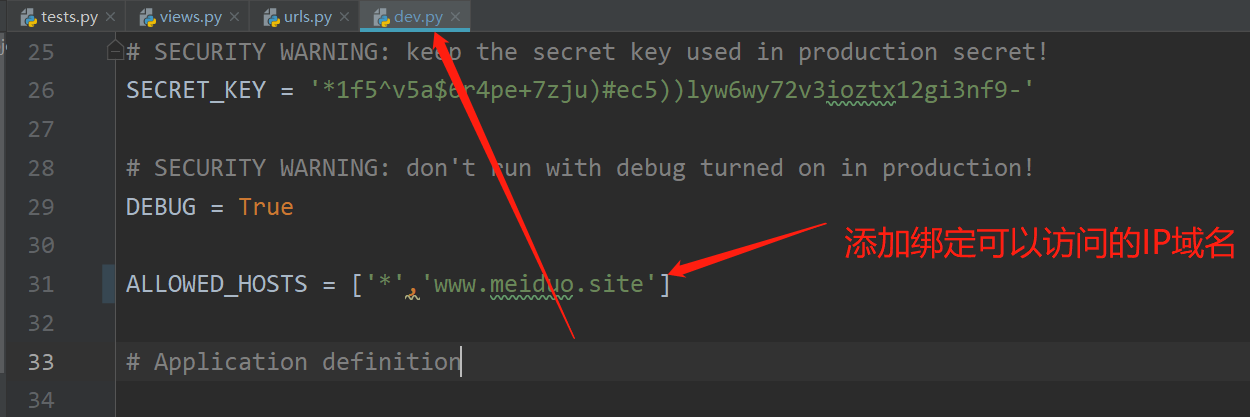
4. Native binding www.meiduo.com Site domain name
1.ubuntu system or Mac system
edit /etc/hosts

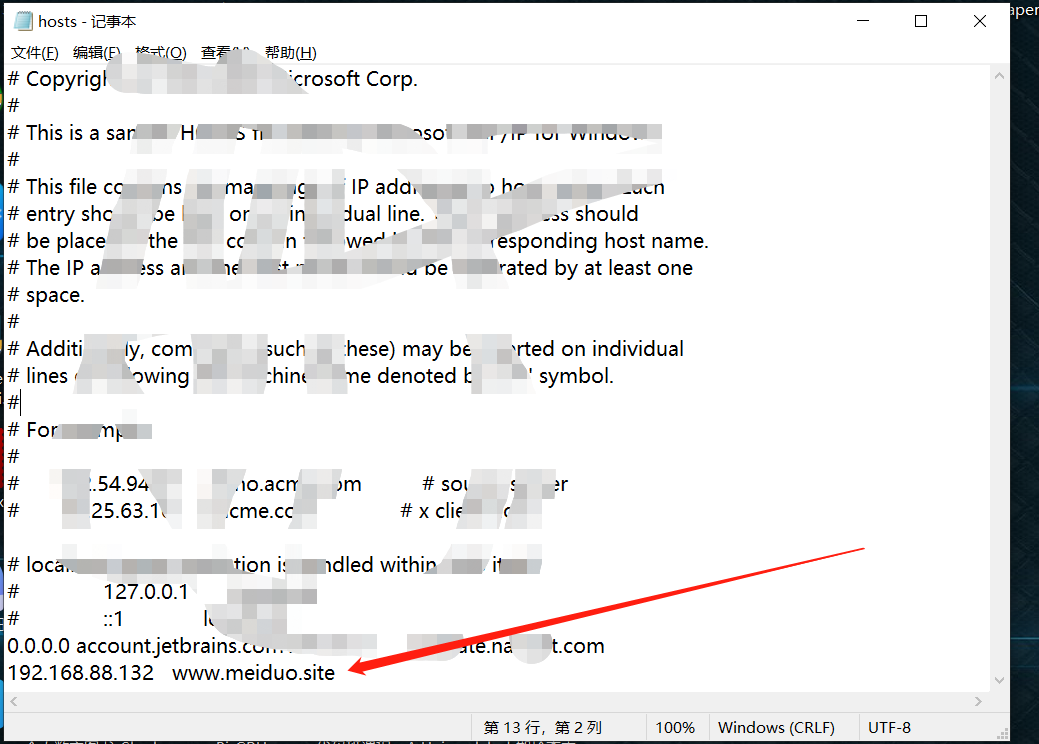
2.Windows system
edit C:\Windows\System32\drivers\etc\hosts


2.5 processing of whether openid is bound to the user
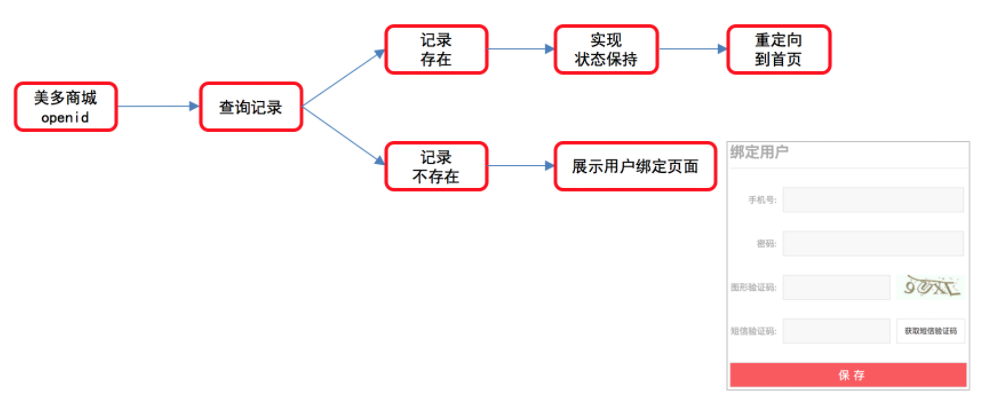
1. Judge whether openid is bound to the user
Use openid to query whether the QQ user has bound a user in Meiduo mall.
from .models import OAuthQQUser

......
try:
    oauth_user = OAuthQQUser.objects.get(openid=openid)
except OAuthQQUser.DoesNotExist:
    # If openid is not bound to Mido mall users
    pass
else:
    # If openid is bound to Mido mall user
    pass
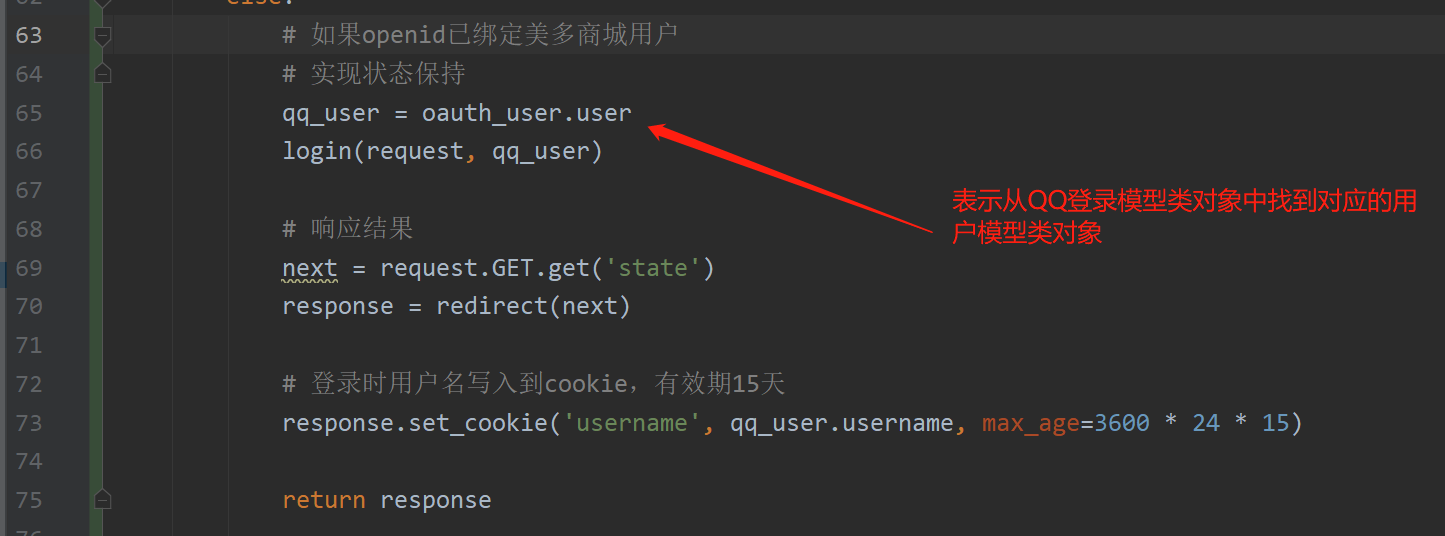
2. Processing of openid bound user
If openid has been bound to the user of Mido mall, the status maintenance information is directly generated, the login is successful, and the user is redirected to the home page.
from django.contrib.auth import login
from django.shortcuts import redirect
from django.urls import reverse


......
try:
    oauth_user = OAuthQQUser.objects.get(openid=openid)
except OAuthQQUser.DoesNotExist:
    # If openid is not bound to Mido mall users
    pass
else:
    # If openid is bound to Mido mall user
    # Implementation state retention
    qq_user = oauth_user.user
    login(request, qq_user)

    # Response results
    next = request.GET.get('state')
    response = redirect(next)

    # When logging in, the user name is written into the cookie, which is valid for 15 days
    response.set_cookie('username', qq_user.username, max_age=3600 * 24 * 15)

    return response
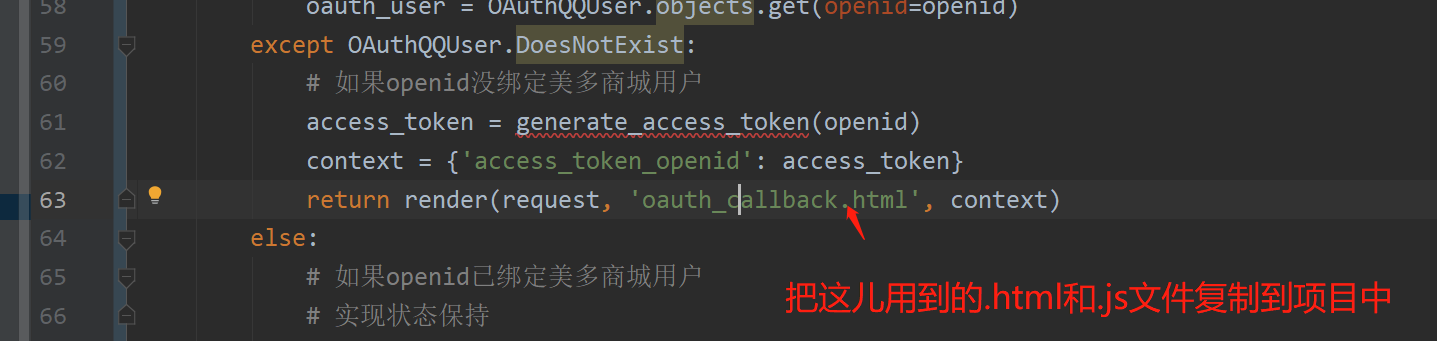
3. Processing of openid unbound user
- To enable the front end to use openid in subsequent binding user operations, the openid is signed and responded to the front end.
- openid belongs to the user's private information, so it needs to be signed to avoid exposure.
try:
    oauth_user = OAuthQQUser.objects.get(openid=openid)
except OAuthQQUser.DoesNotExist:
    # If openid is not bound to Mido mall users
    access_token = generate_eccess_token(openid)
    context = {'access_token': access_token}
    return render(request, 'oauth_callback.html', context)
else:
    # If openid is bound to Mido mall user
    # Implementation state retention
    qq_user = oauth_user.user
    login(request, qq_user)

    # Redirect to home page
    response = redirect(reverse('contents:index'))

    # When logging in, the user name is written to the cookie, which is valid for 15 days
    response.set_cookie('username', qq_user.username, max_age=3600 * 24 * 15)

    return response
oauth_ callback. Rendering access in HTML_ token
<input v-model="access_token" type="hidden" name="access_token" value="{{ access_token }}">

4. Supplement the use of itsdangerous [the encryption here is reversible, and the encryption of password is irreversible]
-
Resources link for its dangerous module http://itsdangerous.readthedocs.io/en/latest/
-
Installation: pip install itsdangerous
-
Use of TimedJSONWebSignatureSerializer
- The TimedJSONWebSignatureSerializer can be used to generate a token with a valid period
Example code:
from itsdangerous import TimedJSONWebSignatureSerializer as Serializer
from django.conf import settings

# Serializer = serializer (secret key, valid for seconds)
serializer = Serializer(settings.SECRET_KEY, 300)
# serializer. Dumps (data), which returns the type of bytes
token = serializer.dumps({'mobile': '18512345678'})
token = token.decode()

# Check token
# If the verification fails, an itsdangerous. Error will be thrown Baddata exception
serializer = Serializer(settings.SECRET_KEY, 300)
try:
    data = serializer.loads(token)
except BadData:
    return None
Supplement: openid signature processing
- oauth.utils.py new utils py
from itsdangerous import TimedJSONWebSignatureSerializer as Serializer
from django.conf import settings
from . import constants_oauth
from itsdangerous import BadData


def generate_access_token(openid):
    """
    autograph openid
    :param openid: User's openid
    :return: access_token
    """
    #  Create serializer object
    serializer = Serializer(settings.SECRET_KEY, expires_in=constants_oauth.ACCESS_TOKEN_EXPIRES)
    #  Prepare dictionary to be serialized
    data = {'openid': openid}
    #  Call dumps method for serialization
    token = serializer.dumps(data)
    return token.decode()
New tool file constants_oauth.py:
# access_ Valid period of token, in seconds
ACCESS_TOKEN_EXPIRES = 600
2.6 openid binding user implementation
Business logic similar to user registration
- When the user enters the mobile phone number, the corresponding user already exists
- Bind the existing user to openid directly
- When the mobile phone number entered by the user does not exist
- Create a new user and bind it with openid
from .utils import generate_access_token
import re
from django_redis import get_redis_connection
from meiduo_mall.apps.users.models import User
from .utils import check_access_token


class QQAuthUserView(View):
    """Callback processing of user code scanning login"""

    def get(self, request):
        """Oauth2.0 authentication"""
        ......

    def post(self, request):
        """Mido mall users bound to openid"""
        # Receive parameters
        mobile = request.POST.get('mobile')
        pwd = request.POST.get('password')
        sms_code_client = request.POST.get('sms_code')
        access_token = request.POST.get('access_token')

        # Calibration parameters
        # Judge whether the parameters are complete
        if not all([mobile, pwd, sms_code_client]):
            return http.HttpResponseForbidden('Missing required parameters')
        # Judge whether the mobile phone number is legal
        if not re.match(r'^1[3-9]\d{9}$', mobile):
            return http.HttpResponseForbidden('Please enter the correct mobile phone number')
        # Judge whether the password is qualified
        if not re.match(r'^[0-9A-Za-z]{8,20}$', pwd):
            return http.HttpResponseForbidden('Please enter 8-20 Bit password')
        # Judge whether the SMS verification code is consistent
        redis_conn = get_redis_connection('verify_code')
        sms_code_server = redis_conn.get('sms_%s' % mobile)
        if sms_code_server is None:
            return render(request, 'oauth_callback.html', {'sms_code_errmsg':'Invalid SMS verification code'})
        if sms_code_client != sms_code_server.decode():
            return render(request, 'oauth_callback.html', {'sms_code_errmsg': 'Error in entering SMS verification code'})
        # Judge whether openid is valid: put the error prompt in sms_code_errmsg location
        openid = check_access_token(access_token)
        if not openid:
            return render(request, 'oauth_callback.html', {'openid_errmsg': 'invalid openid'})

        # Save registration data
        try:
            user = User.objects.get(mobile=mobile)
        except User.DoesNotExist:
            # User does not exist, create a new user
            user = User.objects.create_user(username=mobile, password=pwd, mobile=mobile)
        else:
            # If the user exists, check the user password
            if not user.check_password(pwd):
                return render(request, 'oauth_callback.html', {'account_errmsg': 'Wrong user name or password'})

        # Bind user to openid
        try:
            OAuthQQUser.objects.create(openid=openid, user=user)
        except DatabaseError:
            return render(request, 'oauth_callback.html', {'qq_login_errmsg': 'QQ Login failed'})

        # Implementation state retention
        login(request, user)

        # Response binding result
        next = request.GET.get('state')
        response = redirect(next)

        # When logging in, the user name is written to the cookie, which is valid for 15 days
        response.set_cookie('username', user.username, max_age=3600 * 24 * 15)

        return response
utils.py
def check_access_token(access_token_openid):
    """Deserialization access_token_openid"""
    #  Create serialized object
    serializer = Serializer(settings.SECRET_KEY, expires_in=constants_oauth.ACCESS_TOKEN_EXPIRES)
    #  Deserialize openid ciphertext
    try:
        data = serializer.loads(access_token_openid)
    except BadData:  # openid expired
        return None
    else:
        #  Return openid plaintext
        return data.get('openid')