Questions from a small partner on WeChat:
When he saw this, Songge suddenly thought that I had written Spring Boot+Swagger before:
Uses of OAuth2 + Jwt have also been written:
But they haven't been written together yet, so little buddies have questions about this, and think about it as a very common problem because there are more and more scenarios where token logins are used. In this case, if Swagger is used to test the interface, how do you carry Token in the request header?Today Song Ge will come and have a chat with you.
1. Project Planning
If younger partners have not read the previous series of OAuth2 articles published by Songgo, we recommend that they read them first (public number Jiangnan a little rain backstage reply to OAuth2), and then look at the content of this article again, otherwise the next content may be confused.
Here Songgo sets up an environment of OAuth2+JWT for demonstration.Build two services together:
| service name | port | Remarks |
|---|---|---|
| auth-server | 8080 | Authorization Server |
| user-server | 8081 | Resource Server |
Let me explain a little:
- Auh-server is my resource server for issuing JWT tokens.
- User-server is a resource server. To access resources on user-server, you need to carry a token to access them.
- swagger is used to generate documentation for interfaces on user-server.
OK, this is a general plan for our project.
2. Environment Building
Next, let's set up the OAuth2 test environment.
2.1 Authorization Server Setup
First, we build an authorization service named auth-server. When we build it, we choose the following three dependencies:
- Web
- Spring Cloud Security
- Spirng Cloud OAuth2
After the project is created, first provide a basic configuration for Spring Security:
@Configuration
public class SecurityConfig extends WebSecurityConfigurerAdapter {
    @Bean
    PasswordEncoder passwordEncoder() {
        return new BCryptPasswordEncoder();
    }

    @Override
    @Bean
    public AuthenticationManager authenticationManagerBean() throws Exception {
        return super.authenticationManagerBean();
    }

    @Override
    protected void configure(AuthenticationManagerBuilder auth) throws Exception {
        auth.inMemoryAuthentication()
                .withUser("sang")
                .password(passwordEncoder().encode("123"))
                .roles("admin")
                .and()
                .withUser("javaboy")
                .password(passwordEncoder().encode("123"))
                .roles("user");
    }

    @Override
    protected void configure(HttpSecurity http) throws Exception {
        http.csrf().disable().formLogin();
    }
}
In this code, for the sake of simplicity, I don't save the Spring Security user in the database; I just store it in memory.
Here I created a user named sang with password 123 and role admin.I also configured a form login.
The purpose of this configuration is actually to configure the user.For example, if you want to use WeChat to log on to a third-party website, in this process, you have to log on to WeChat first. Logging on to WeChat requires your username/password information. So what we configure here is actually the user's username/password/role information.
It is important to note that in the current case, I will be logging in using the password mode in OAuth2, so I also need to explicitly provide a Bean for Authentication Manager.
Now that the basic user information configuration is complete, let's configure the authorization server.
First, configure TokenStore:
@Configuration
public class AccessTokenConfig {
    @Bean
    TokenStore tokenStore() {
        return new JwtTokenStore(jwtAccessTokenConverter());
    }

    @Bean
    JwtAccessTokenConverter jwtAccessTokenConverter() {
        JwtAccessTokenConverter converter = new JwtAccessTokenConverter();
        converter.setSigningKey("javaboy");
        return converter;
    }
}
- TokenStore We use this instance of JwtTokenStore.Using JWT, access_token does not actually need to be stored (stateless login, server side doesn't need to save information), since all user information is inside jwt, the JwtTokenStore configured here is not essentially a store.
- We also provide a JwtAccessTokenConverter, which can convert user information to and from JWT (converting user information to a JWT string or extracting user information from a JWT string).
- In addition, when a JWT string is generated, we need a signature that needs to be saved by ourselves.
Next, configure the authorization server in detail:
@EnableAuthorizationServer
@Configuration
public class AuthorizationServer extends AuthorizationServerConfigurerAdapter {
    @Autowired
    TokenStore tokenStore;
    @Autowired
    ClientDetailsService clientDetailsService;
    @Autowired
    AuthenticationManager authenticationManager;
    @Autowired
    PasswordEncoder passwordEncoder;
    @Autowired
    JwtAccessTokenConverter jwtAccessTokenConverter;

    @Bean
    AuthorizationServerTokenServices tokenServices() {
        DefaultTokenServices services = new DefaultTokenServices();
        services.setClientDetailsService(clientDetailsService);
        services.setSupportRefreshToken(true);
        services.setTokenStore(tokenStore);
        services.setAccessTokenValiditySeconds(60 * 60 * 24 * 2);
        services.setRefreshTokenValiditySeconds(60 * 60 * 24 * 7);
        TokenEnhancerChain tokenEnhancerChain = new TokenEnhancerChain();
        tokenEnhancerChain.setTokenEnhancers(Arrays.asList(jwtAccessTokenConverter));
        services.setTokenEnhancer(tokenEnhancerChain);
        return services;
    }

    @Override
    public void configure(AuthorizationServerSecurityConfigurer security) throws Exception {
        security.allowFormAuthenticationForClients();
    }

    @Override
    public void configure(ClientDetailsServiceConfigurer clients) throws Exception {
        clients.inMemory()
                .withClient("javaboy")
                .secret(passwordEncoder.encode("123"))
                .resourceIds("res1")
                .authorizedGrantTypes("password", "refresh_token")
                .scopes("all")
                .redirectUris("http://localhost:8082/index.html");
    }

    @Override
    public void configure(AuthorizationServerEndpointsConfigurer endpoints) throws Exception {
        endpoints
                .authenticationManager(authenticationManager)
                .tokenServices(tokenServices());
    }
}
This code is a bit long. Let me explain it one by one:
- Creating the AuthorizationServer class inherits from the AuthorizationServerConfigurerAdapter to further configure the authorization server in detail. The AuthorizationServer class remembers to add the @EnableAuthorizationServer annotation to open the automated configuration of the authorization server.
- In the AuthorizationServer class, we actually override three configure methods.
- AuthorizationServerSecurityConfigurer is used to configure the security constraints of the token endpoint, that is, who can and cannot access it.
- ClientDetailsServiceConfigurer configures client details in Previous Articles In Songge and you have said, authorized servers need to do two kinds of checks, one is to check the client, the other is to check the user, check the user, we have configured before, here is to configure the check client.Client information can be stored in the database, which is easy as saving user information in the database, but to simplify the code, I also store client information in memory, where we configure the client's id, secret, resource id, authorization type, authorization scope, and redirection uri.Authorization Type I am in Previous Articles Neutralize tells you four things, none of which contains refresh_token, but in practice, refresh_token is also counted as one.
- AuthorizationServerEndpointsConfigurer Here is used to configure the access endpoint of the token and the token service.
- The tokenServices Bean is used to configure some basic information about Token, such as whether Token supports refresh, where Token is stored, how long Token is valid, and how long Token is valid to refresh.Token validity period is a good understanding. Refresh Token validity period I said, when Token is about to expire, we need to get a new Token, when we get a new Token, we need a credential information, this credential information is not the old Token, but another refresh_token, this refresh_token is also valid.
Okay, after that, even if our authorization server is configured, then we start the authorization server.
If your little buddies are confused about the above configuration, you can reply to OAuth2 in the background of Public Number and start by learning the Pingo OAuth2 tutorial systematically.
2.2 Resource Server Setup
Next, we set up a resource server.As you can see on the Internet, most resource servers are placed with authorization servers. If the project is small, this is OK, but if it is a large project, this is not appropriate.
A resource server is a resource used to store users'information, such as your images on WeChat, openid, etc. Users get access_from an authorized serverAfter token, you can use access_token comes to the resource server to request data.
We create a new Spring Boot project called user-server, which acts as our resource server by adding the following dependencies:
After the project is created successfully, copy the previous Accs TokenConfig to the resource server and add the following configuration:
@Configuration
@EnableResourceServer
public class ResourceServerConfig extends ResourceServerConfigurerAdapter {
    @Autowired
    TokenStore tokenStore;

    @Override
    public void configure(ResourceServerSecurityConfigurer resources) throws Exception {
        resources.resourceId("res1").tokenStore(tokenStore);
    }

    @Override
    public void configure(HttpSecurity http) throws Exception {
        http.authorizeRequests()
                .antMatchers("/admin/**").hasRole("admin")
                .anyRequest().authenticated();
    }
}
This configuration code is simple, let me just say:
- First configure the resource ID and TokenStore in the configure method. Once configured, JwtAccessTokenConverter is automatically called to parse out the jwt. The JWT contains the user's basic information, so access_remote verification is not required.Token.
- Finally, configure the interception rules for resources, which are the Basic Writings in Spring Security, and I won't go into any further details.
Next, let's configure two more test interfaces:
@RestController
public class HelloController {
    @GetMapping("/hello")
    public String hello() {
        return "hello";
    }
    @GetMapping("/admin/hello")
    public String admin() {
        return "admin";
    }
}
After that, our resource server is configured successfully.
2.3 Test
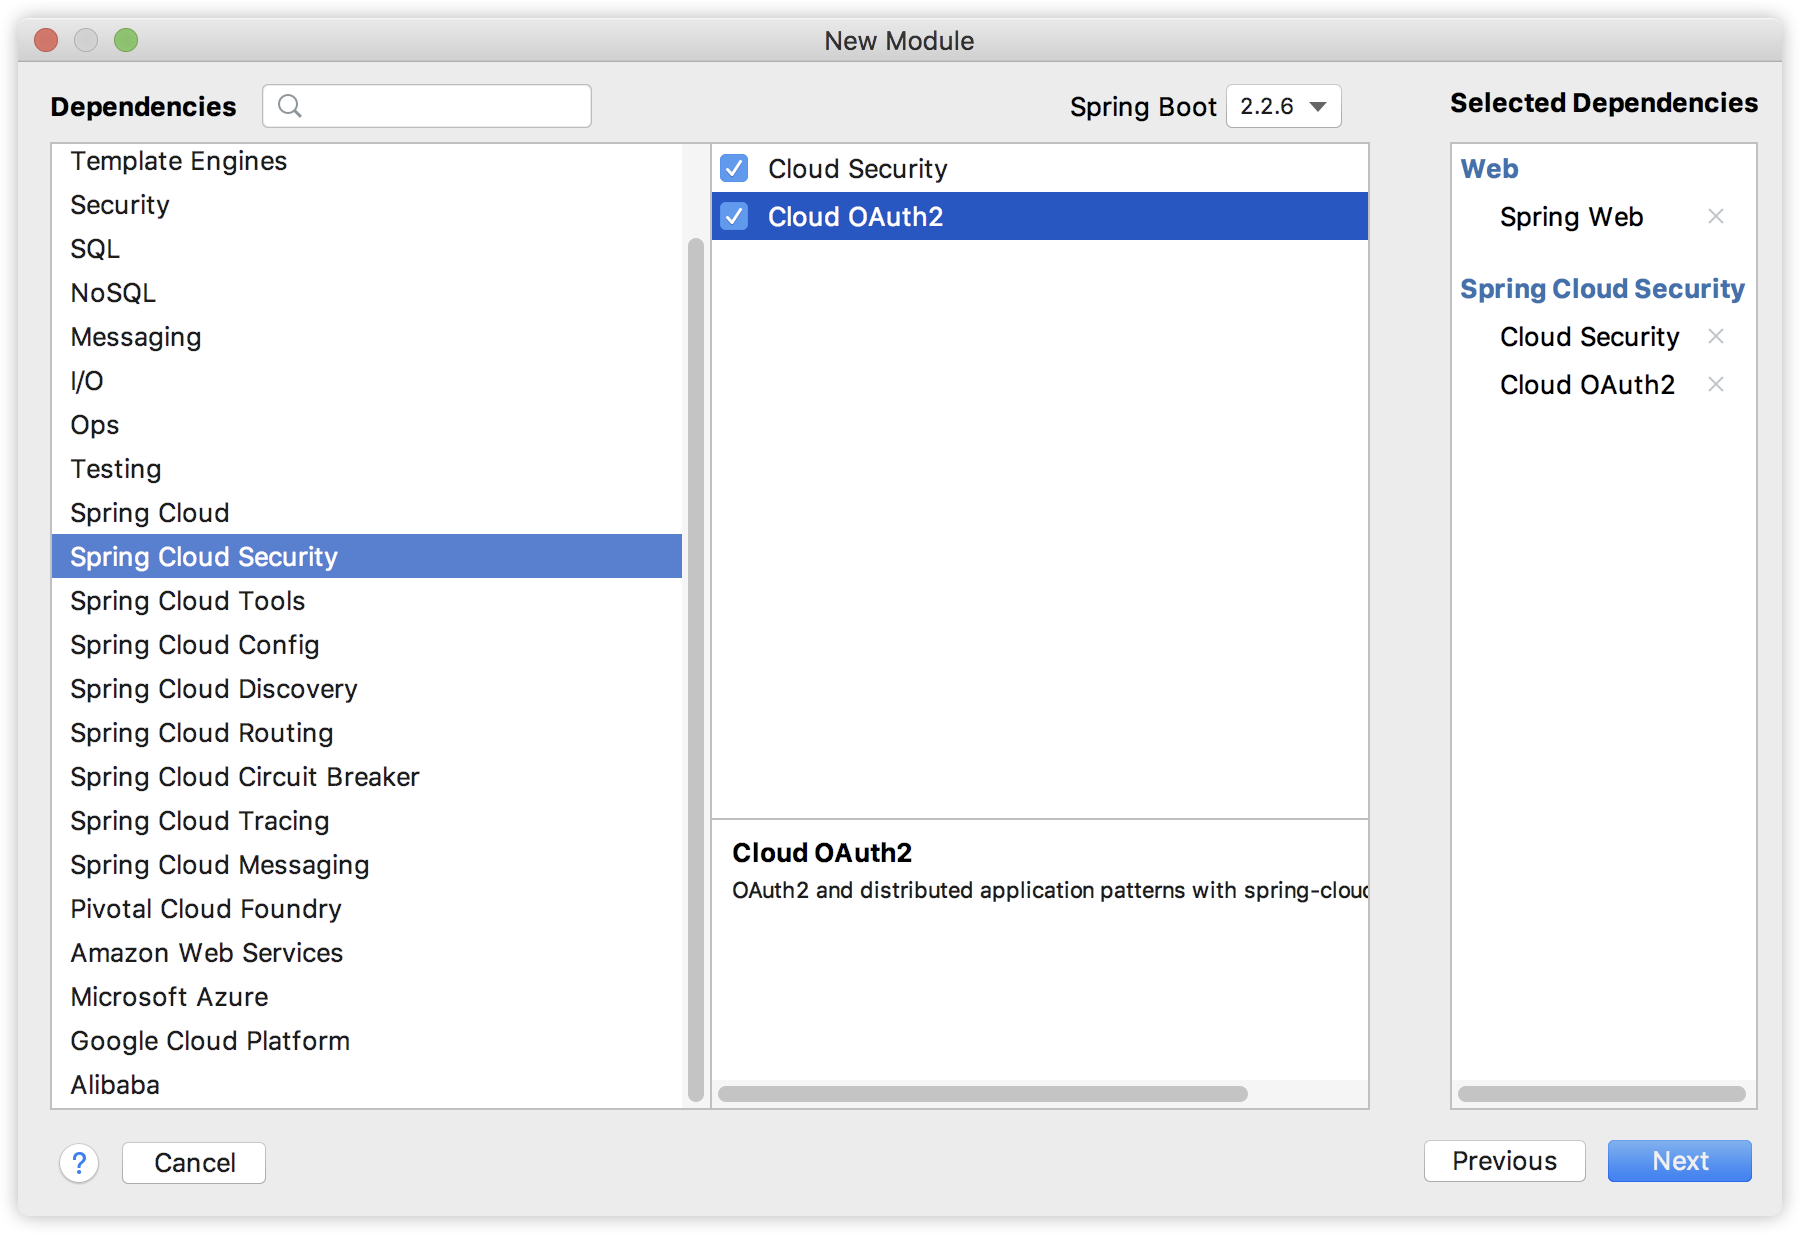
Start the authorization server and the resource server separately, access the authorization server first to get access_token:
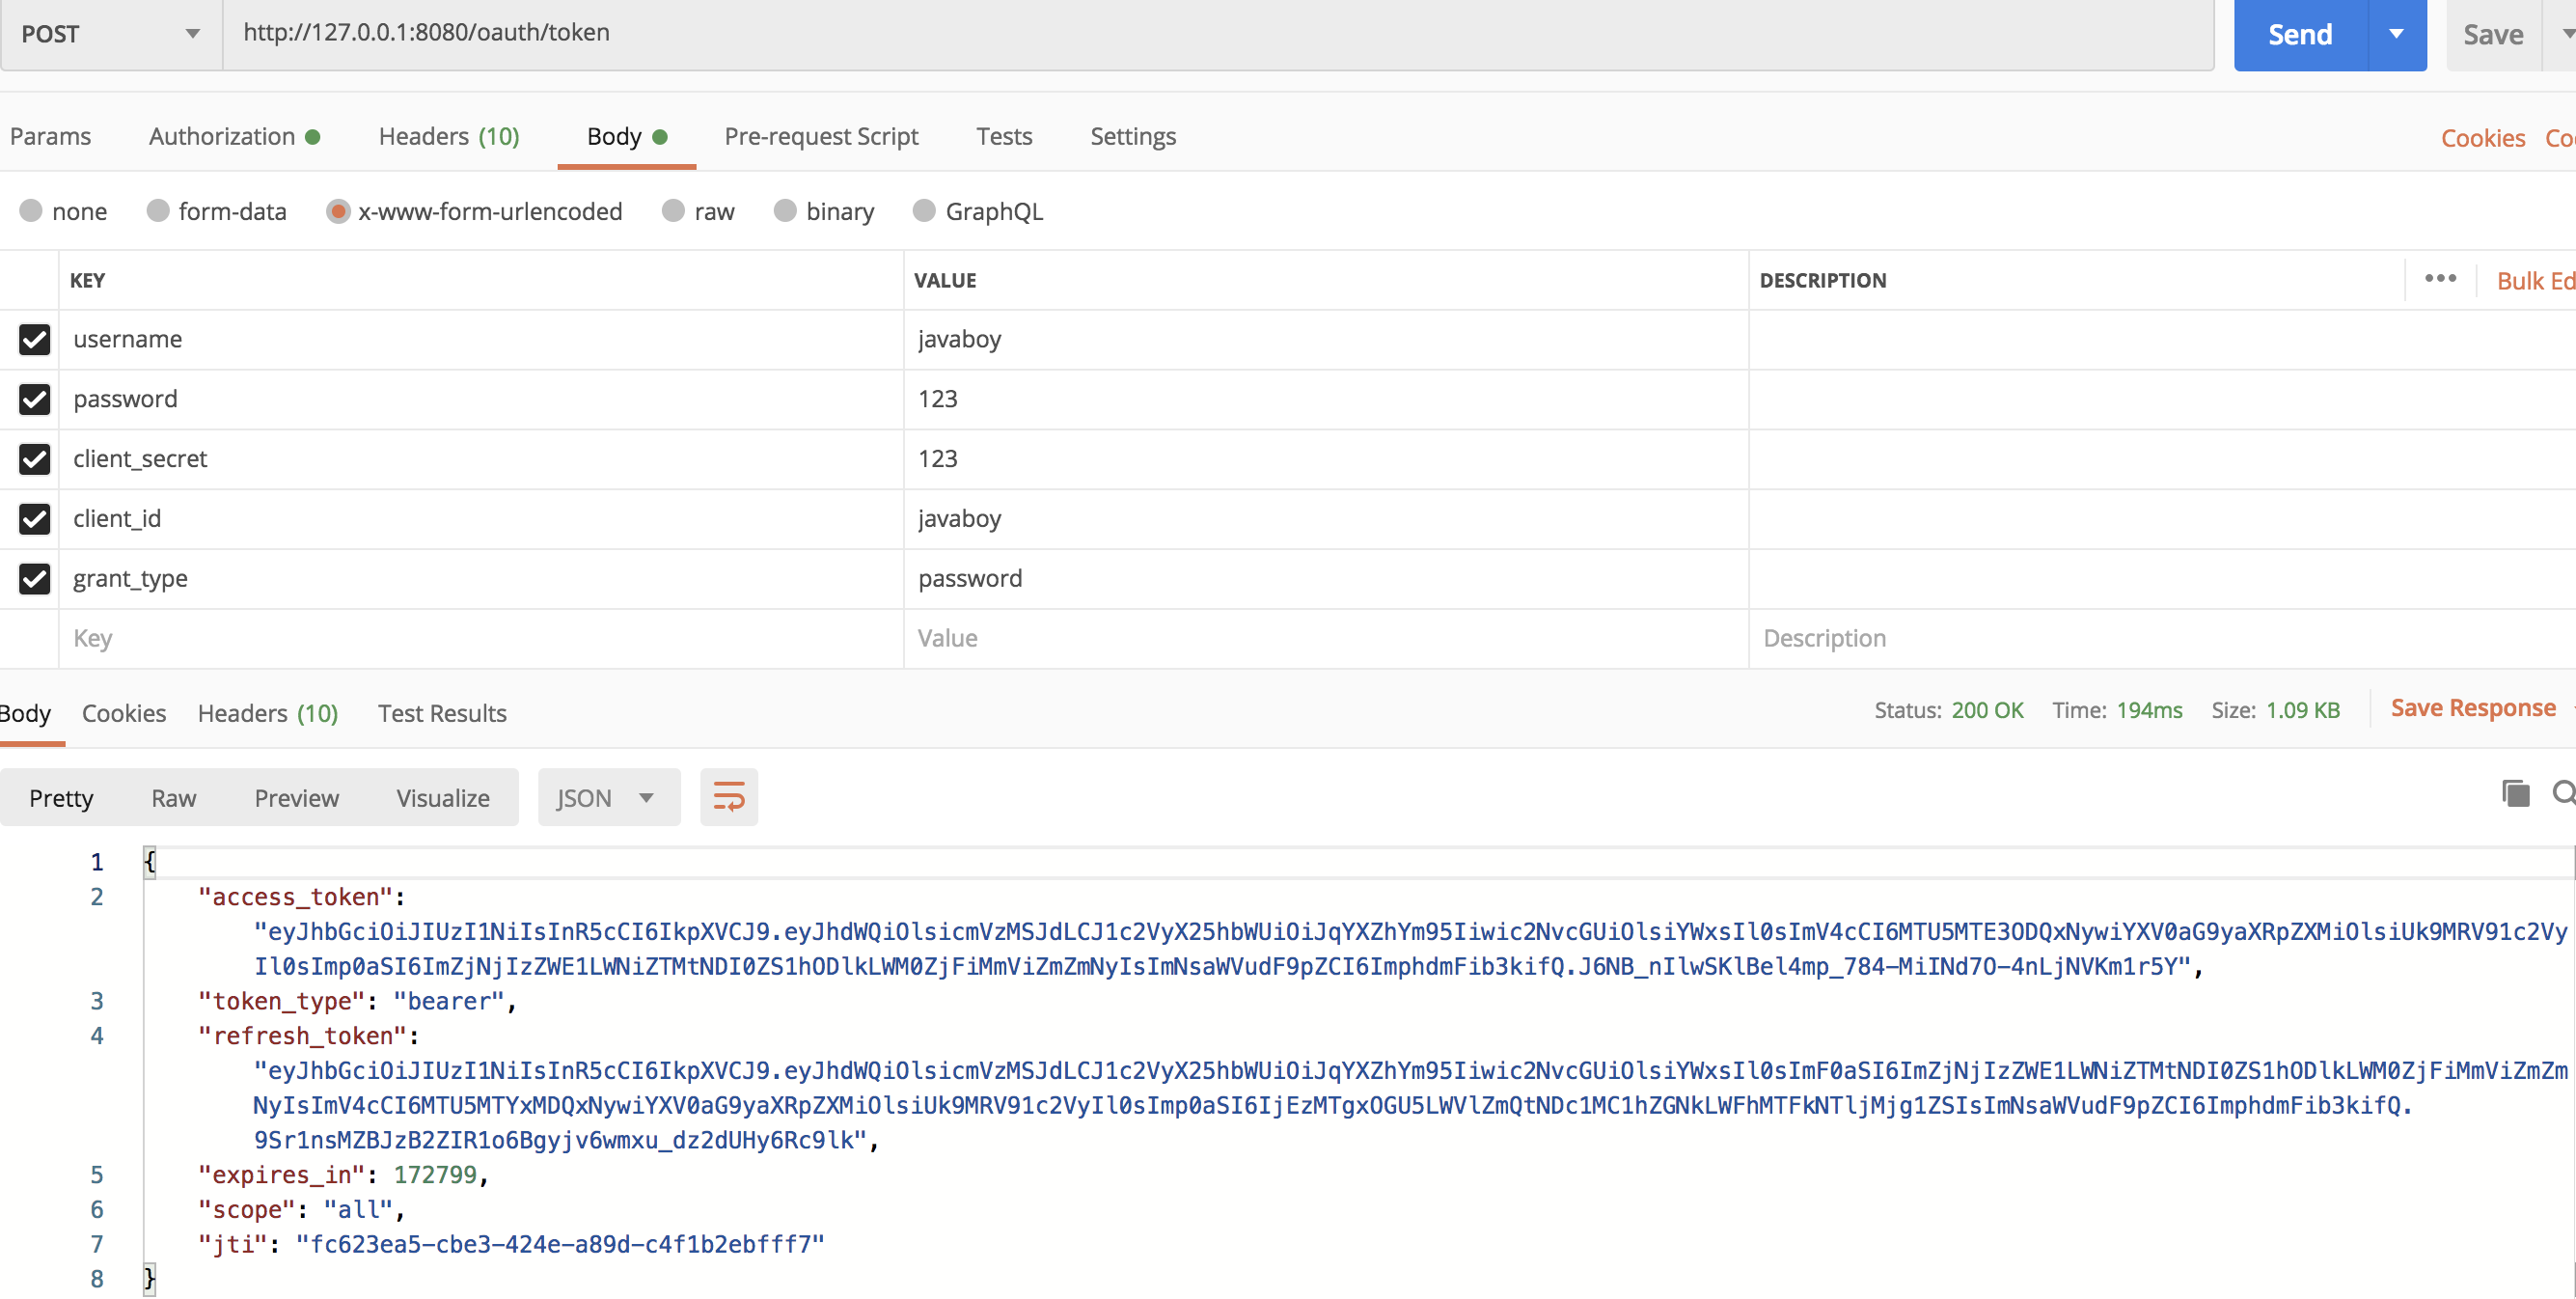
Reuse the access_you getToken to access the resource server:
OK, the test is OK.
3. Integrate Swagger
Next, we add the swagger function to the user-server. First, we add the swagger dependency:
 <dependency>
     <groupid>io.springfox</groupid>
     <artifactid>springfox-swagger2</artifactid>
     <version>2.9.2</version>
 </dependency>
 <dependency>
     <groupid>io.springfox</groupid>
     <artifactid>springfox-swagger-ui</artifactid>
     <version>2.9.2</version>
 </dependency>
There are two dependencies added here, one to generate interface data and the other to swagger-ui for data presentation.
3.1 Authentication Method 1
Request header plus parameters, here we introduce two, let's first look at the first.
Configure a Docket instance first, as follows:
@Configuration
@EnableSwagger2
public class Swagger2Config {
    @Bean
    Docket docket() {
        return new Docket(DocumentationType.SWAGGER_2)
                .select()
                .apis(RequestHandlerSelectors.basePackage("org.javaboy.oauth2.res.controller"))
                .paths(PathSelectors.any())
                .build()
                .securityContexts(Arrays.asList(securityContexts()))
                .securitySchemes(Arrays.asList(securitySchemes()))
                .apiInfo(new ApiInfoBuilder()
                        .description("Description information for interface documents")
                        .title("Micro project interface document")
                        .contact(new Contact("javaboy","http://www.javaboy.org","wangsong0210@gmail.com"))
                        .version("v1.0")
                        .license("Apache2.0")
                        .build());
    }
    private SecurityScheme securitySchemes() {
        return new ApiKey("Authorization", "Authorization", "header");
    }

    private SecurityContext securityContexts() {
        return SecurityContext.builder()
                        .securityReferences(defaultAuth())
                        .forPaths(PathSelectors.any())
                        .build();
    }

    private List<securityreference> defaultAuth() {
        AuthorizationScope authorizationScope = new AuthorizationScope("xxx", "Descriptive Information");
        AuthorizationScope[] authorizationScopes = new AuthorizationScope[1];
        authorizationScopes[0] = authorizationScope;
        return Arrays.asList(new SecurityReference("Authorization", authorizationScopes));
    }
}
The configuration here is slightly longer. Let me explain:
- Start by enabling Swagger2 with the @EnableSwagger2 annotation.
- Configure a Docket Bean that configures the mapping path and the location of the interface to be scanned.
- In apiInfo, we mainly configure the information of Swagger2 Document Web site, such as the title of the site, description of the site, contact information, protocol used, and so on.
- Global parameters are configured through securitySchemes, where the configuration is a request header named Authorization (the request header that needs to be carried in OAuth2).
- SecityContexts is used to configure which requests need to carry a Token, where we have configured all requests.
After configuring, we still need to release swagger-ui, otherwise static swagger-ui related resources will be intercepted by Spring Security:
@Configuration
public class SecurityConfig extends WebSecurityConfigurerAdapter {

    @Override
    public void configure(WebSecurity web) throws Exception {
        web.ignoring().antMatchers("/swagger-ui.html")
                .antMatchers("/webjars/**")
                .antMatchers("/v2/**")
                .antMatchers("/swagger-resources/**");
    }
}
When configuration is complete, restart user-server, browser input Http://localhost: 8081/swagger-Ui.htmlThe results are as follows:
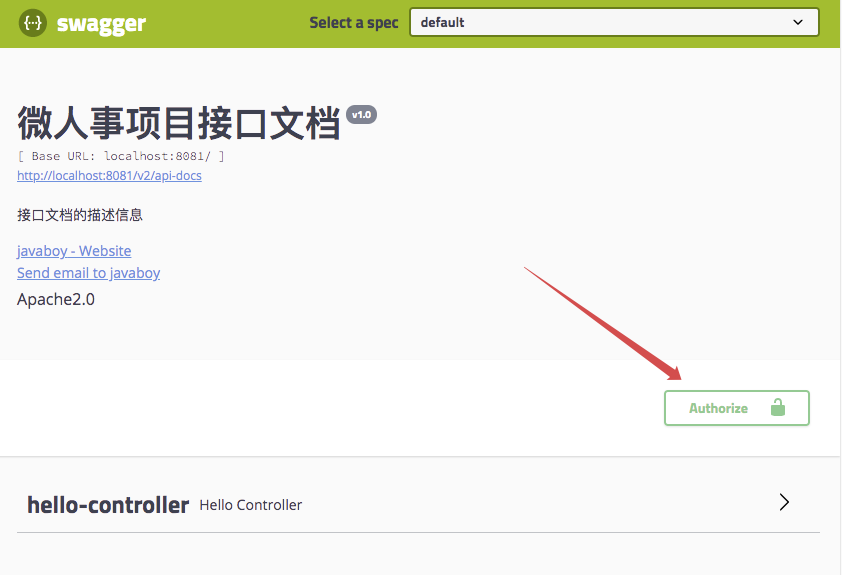
As you can see, there is an Authorize button on the page. Click on it and enter Bearer ${token}, as follows:
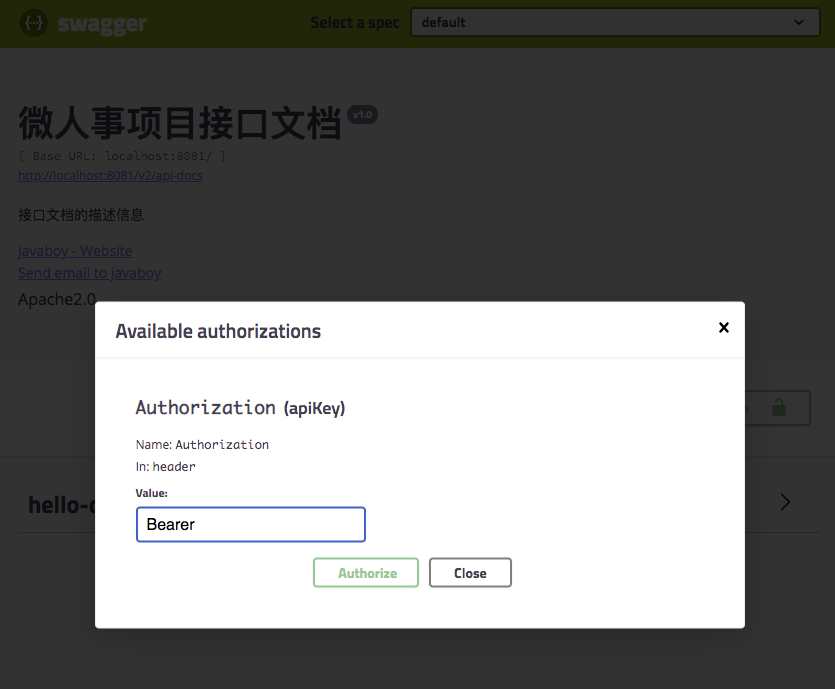
Once the input is complete, click the Authorize button to complete the authentication, and then the various interfaces in user-server can call the test directly.
This is a more general approach, not only for OAuth2, but also for some other custom token logins.
However, this approach requires developers to obtain access_through other means firstToken, some people will find it a little troublesome, so is there a better way?See mode two.
3.2 Authentication Method 2
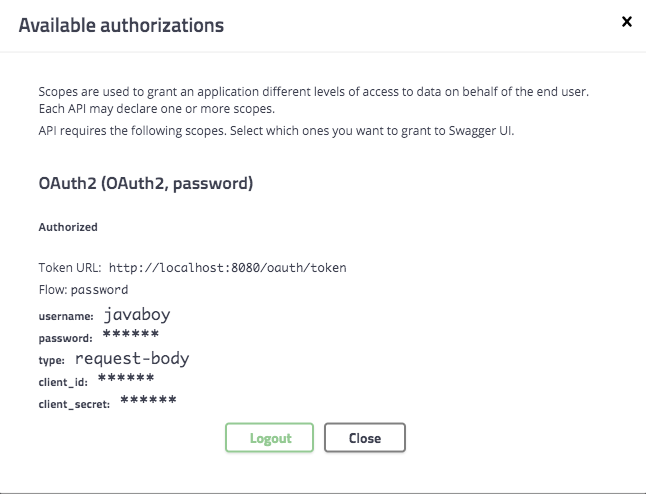
The second way to authenticate is to fill in the authentication information directly in Wagger so that access_does not have to be obtained from outsideToken, the effect is as follows:

Let's see how this is configured.
Since the swagger request/oauth/token interface is cross-domain, we first need to modify the auth-server to support cross-domain:
There are two main modifications, the first one is to configure CorsFilter to allow cross-domain, as follows:
@Configuration
public class GlobalCorsConfiguration {
    @Bean
    public CorsFilter corsFilter() {
        CorsConfiguration corsConfiguration = new CorsConfiguration();
        corsConfiguration.setAllowCredentials(true);
        corsConfiguration.addAllowedOrigin("*");
        corsConfiguration.addAllowedHeader("*");
        corsConfiguration.addAllowedMethod("*");
        UrlBasedCorsConfigurationSource urlBasedCorsConfigurationSource = new UrlBasedCorsConfigurationSource();
        urlBasedCorsConfigurationSource.registerCorsConfiguration("/**", corsConfiguration);
        return new CorsFilter(urlBasedCorsConfigurationSource);
    }
}
Then turn on cross-domain support in SecurityConfig:
@Configuration
@Order(Ordered.HIGHEST_PRECEDENCE)
public class SecurityConfig extends WebSecurityConfigurerAdapter {
    ...
    ...
    @Override
    protected void configure(HttpSecurity http) throws Exception {
        http
                .requestMatchers().antMatchers(HttpMethod.OPTIONS, "/oauth/**")
                .and()
                .csrf().disable().formLogin()
                .and()
                .cors();
    }
}
After these two steps of configuration, cross-domain support on the server side is turned on.
Next we modify the definition of a Docket bean in user-server:
@Configuration
@EnableSwagger2
public class Swagger2Config {
    @Bean
    Docket docket() {
        return new Docket(DocumentationType.SWAGGER_2)
                .select()
                .apis(RequestHandlerSelectors.basePackage("org.javaboy.oauth2.res.controller"))
                .paths(PathSelectors.any())
                .build()
                .securityContexts(Arrays.asList(securityContext()))
                .securitySchemes(Arrays.asList(securityScheme()))
                .apiInfo(new ApiInfoBuilder()
                        .description("Description information for interface documents")
                        .title("Micro project interface document")
                        .contact(new Contact("javaboy","http://www.javaboy.org","wangsong0210@gmail.com"))
                        .version("v1.0")
                        .license("Apache2.0")
                        .build());
    }

    private AuthorizationScope[] scopes() {
        return new AuthorizationScope[]{
                new AuthorizationScope("all", "all scope")
        };
    }

    private SecurityScheme securityScheme() {
        GrantType grant = new ResourceOwnerPasswordCredentialsGrant("http://localhost:8080/oauth/token");
        return new OAuthBuilder().name("OAuth2")
                .grantTypes(Arrays.asList(grant))
                .scopes(Arrays.asList(scopes()))
                .build();
    }

    private SecurityContext securityContext() {
        return SecurityContext.builder()
                .securityReferences(Arrays.asList(new SecurityReference("OAuth2", scopes())))
                .forPaths(PathSelectors.any())
                .build();
    }
}
This configuration is similar to the previous one, mainly because the SecurityScheme s are different.This is built using OAuthBuilder, which configures the acquisition address of token.
Okay, the configuration is complete, restart auth-server and user-server for testing.The test results are the pictures given by Song Ge, let's not go into details.
The best benefit of this approach is that access_is not acquired through other meansToken, enter the authentication parameters of password mode directly on the swagger-ui page.Very convenient, limited to OAuth2 mode.
4. Summary
Okay, today we talked to our partners about how to modify the request header in Wagger requests. Interested partners can come down and try it.
Download address for this case: https://github.com/lenve/spring-security-samples
Okay, if your little buddies feel there's something to gain, remember to click one after the other to encourage Panasonic to </securityreference>