introduce
- vue Chinese network
- vue github
- Vue.js is a progressive JavaScript framework for building user interfaces (UIS)
Differences between libraries and frameworks
Library
Library is essentially a collection of functions. Each time the function is called, a specific function is implemented, and then the control is handed over to the user
- Representative: jQuery
- The core of jQuery Library: DOM operation, that is, encapsulating DOM operation and simplifying DOM operation.
Framework
Framework is a complete solution. When using the framework, you need to put your code in the right place of the framework, and the framework will call your code at the right time
- The framework defines its own programming mode and is a complete solution.
- When using a framework, the framework controls everything. We just need to write code according to the rules.
Main differences
- You call Library, Framework calls you
- Core point: who plays a leading role (control reversal)
- The framework that controls the whole process is the framework
- Using the library, it is up to the developer to decide how to call the methods provided in the library (auxiliary)
- Hollywood principle: Don't call us, we'll call you
- The framework is highly intrusive (from beginning to end)
Introduction to MVVM
- MVVM, a better UI mode solution
- From Script to Code Blocks, Code Behind to MVC, MVP, MVVM - Popular Science
MVC
-
M: Model data model (CRUD specially used to operate data)
-
5: V iew View (for the front end, it is the page)
-
C: Controller (a bridge between view and data model, used to process business logic)
MVVM composition
-
MVVM ===> M / V / VM
-
M: Model data model
-
5: V iew view
-
VM: ViewModel view model
Advantage comparison
-
MVC mode divides the application into three parts to realize the separation of responsibilities
-
In the front end, some logical operations are often carried out through JS code, and finally the results of these logical operations are displayed on the page. That is, you need to operate the DOM frequently
-
MVVM enables automatic two-way data synchronization through two-way data binding
- V (modify data) - > m
- M (modify data) - > V
- Data is the core
-
Vue, a framework of MVVM mode, does not recommend developers to manually operate DOM
MVVM in Vue
Although it does not fully follow the MVVM model, Vue's design is undoubtedly inspired by it. Therefore, the variable name VM (short for ViewModel) is often used in documents to represent Vue instances.
To learn Vue, we should transform our thoughts
- Instead of thinking about how to manipulate DOM, think about how to manipulate data
Get started - Hello Vue
<!-- introduce vue.js -->
<script src="vue.js"></script>

<!-- appoint vue Manage content areas through vue The contents of the display should be put into finding an element. Usually, we also call it boundary data, which is only parsed inside the boundary-->
<div id="app">{{ msg }}</div>

<!-- use vue -->
<script>
  var vm = new Vue({
    // el: provide a DOM element that already exists on the page as the mount target of the Vue instance
    el: '#app',
    // The data object of the Vue instance, which is used to provide data to the View
    data: {
      msg: 'Hello Vue'
    }
  })
</script>
Vue instance
- Note 1: first declare the data in data, and then use the data
- Note 2: you can access all the attributes in data through vm.$data, or vm.msg
var vm = new Vue({
  data: {
    msg: 'hello everyone,...'
  }
})

vm.$data.msg === vm.msg // true
Data binding
- The most commonly used method: mustache (interpolation syntax), that is, {}} syntax.
- Explanation: {}} get data from the data object data;
- Note: when the attribute value of the data object changes, the content of the interpolation will be updated;
- Note: only JavaScript expressions can appear in {}} and js statements cannot be parsed;
- Note: Mustache syntax cannot act on attributes of HTML elements;
<h1>Hello, {{ msg }}.</h1>
<p>{{ 1 + 2 }}</p>
<p>{{ isOk ? 'yes': 'no' }}</p>

<!-- !!!Error demonstration!!! -->
<h1 title="{{ err }}"></h1>
Two way data binding
-
Bidirectional data binding: bind the data of DOM and Vue instance together and influence each other;
- The change of data will cause the change of DOM;
- The change of DOM will also cause the change of data;
-
Principle: get and set methods in Object.defineProperty;
- getter and setter: accessors
- Function: Specifies the operation to be performed when reading or setting object attribute values
/*  defineProperty Grammar introduction */
var obj = {}
Object.defineProperty(obj, 'msg', {
  // When obj.msg = "1" is set, the set method will be called by the system. The parameters are the values after setting and before setting
  set: function (newVal, oldVal) {  },
  // When reading obj.msg, the get method will be called by the system
  get: function ( newVal, oldVal ) {}
})
Minimalist implementation of Vue bidirectional binding
<!-- Example -->
<input type="text" id="txt" />
<span id="sp"></span>

<script>
var txt = document.getElementById('txt'),
    sp = document.getElementById('sp'),
    obj = {}

// Add msg attribute to obj object and set setter accessor
Object.defineProperty(obj, 'msg', {
  // Set obj.msg. When obj.msg is changed, the set method will be called
  set: function (newVal) {
    // When obj.msg is assigned, it is also set to input/span
    txt.value = newVal
    sp.innerText = newVal
  }
})

// Listen for changes in the text box. Change obj.msg when entering content in the text box
txt.addEventListener('keyup', function (event) {
  obj.msg = event.target.value
})
</script>

After entering the content in the text box

Considerations for dynamically adding data
-
Note: only the data in data is responsive, and the data added dynamically is non responsive by default
-
You can realize the response mode of dynamically adding data in the following ways
- 1 Vue.set(object, key, value) - applicable to adding a single attribute
- 2 Object.assign() - applicable to adding multiple attributes
var vm = new Vue({
  data: {
    stu: {
      name: 'jack',
      age: 19
    }
  }
})

/* Vue.set */
Vue.set(vm.stu, 'gender', 'male')

/* Object.assign Merge all object properties and values in the parameter into the first parameter and return the merged object*/
vm.stu = Object.assign({}, vm.stu, { gender: 'female', height: 180 })
Asynchronous DOM update
-
Note: Vue updates the DOM asynchronously, monitors all data changes, and updates the DOM at one time
-
Advantages: it can remove duplicate data, which is very important to avoid unnecessary calculations and duplicate DOM operations
-
If you need the data in the updated DOM, you need to use Vue.nextTick(callback): after the DOM is updated, perform an operation (belonging to the DOM operation)
- Instance calls vm.$nextTick(function() {})
methods: {
  fn() {
    this.msg = 'change'
    this.$nextTick(function () {
      console.log('$nextTick Print in:', this.$el.children[0].innerText);
    })
    console.log('Direct printing:', this.$el.children[0].innerText);
  }
}
instructions
- Explanation: directives are special attributes with a v-prefix
- Function: when the value of the expression changes, the associated effect will be applied to the DOM responsively
v-text
- Explanation: updates the textcontent of the DOM object
<h1 v-text="msg"></h1>
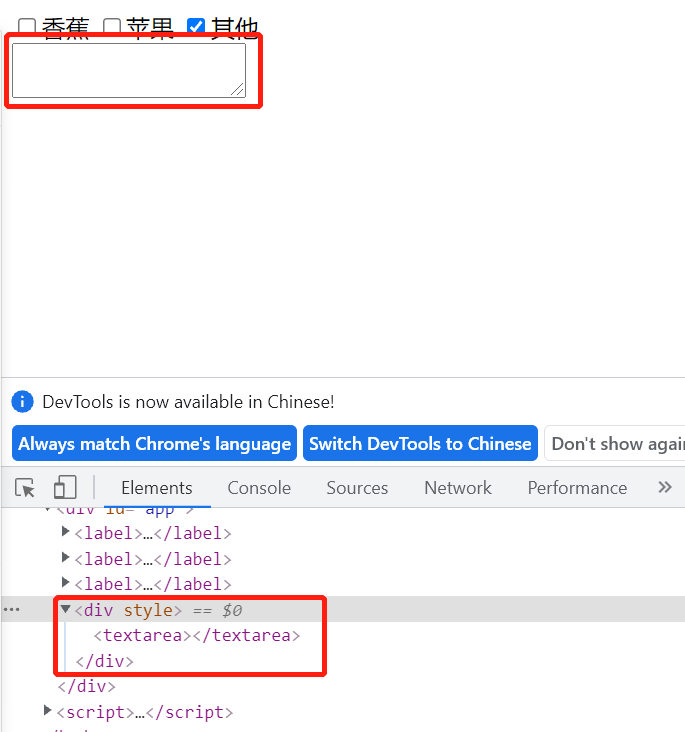
v-html
- Explanation: update innerHTML of DOM object (insert tag)
<div id="app">
    <label>
        <input type="checkbox" >Banana
    </label>
    <label>
        <input type="checkbox">Apple
    </label>
    <label>
        <input type="checkbox" @click="qita">other
    </label>
    <div v-html="htmlStr" v-show='test'></div>
    </label>
</div>
<script>
    new Vue({
        el:'#app',
        data:{
            htmlStr:'<textarea></textarea>',  //Insert label into div
            test:false //The default is hidden
        },
        methods:{  //Is the property of the Vue object: the definition of the method
            qita:function(){
                this.test = !this.test
            }
        }
    })
</script>
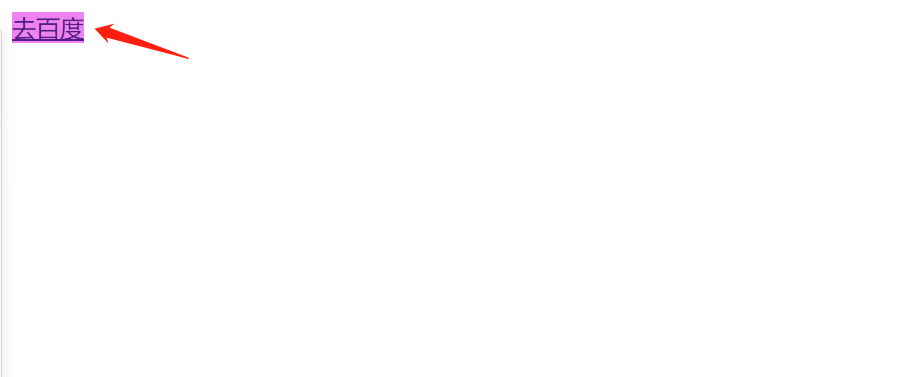
v-bind
- Function: when the value of the expression changes, the associated effect will be applied to the DOM responsively (binding the tag's attributes and variables)
- Syntax: v-bind:title="msg"
- Abbreviation: title="msg"
<!-- Complete grammar -->
<a v-bind:href="url"></a>
<!-- abbreviation -->
<a :href="url"></a>
<style>
 	.active{
     	background-color: violet;
 }
</style>
<body>
	 <div id="app">
	     <a v-bind:href="link" v-bind:class="{active:isActive}">
	         Go to Baidu
	     </a>
	 </div>
     <script>
         var vm = new Vue({
	             el:'#app',
	             data:{
	                 link:'https://www.baidu.com',
	                 isActive:true
             }
         })
 	</script>
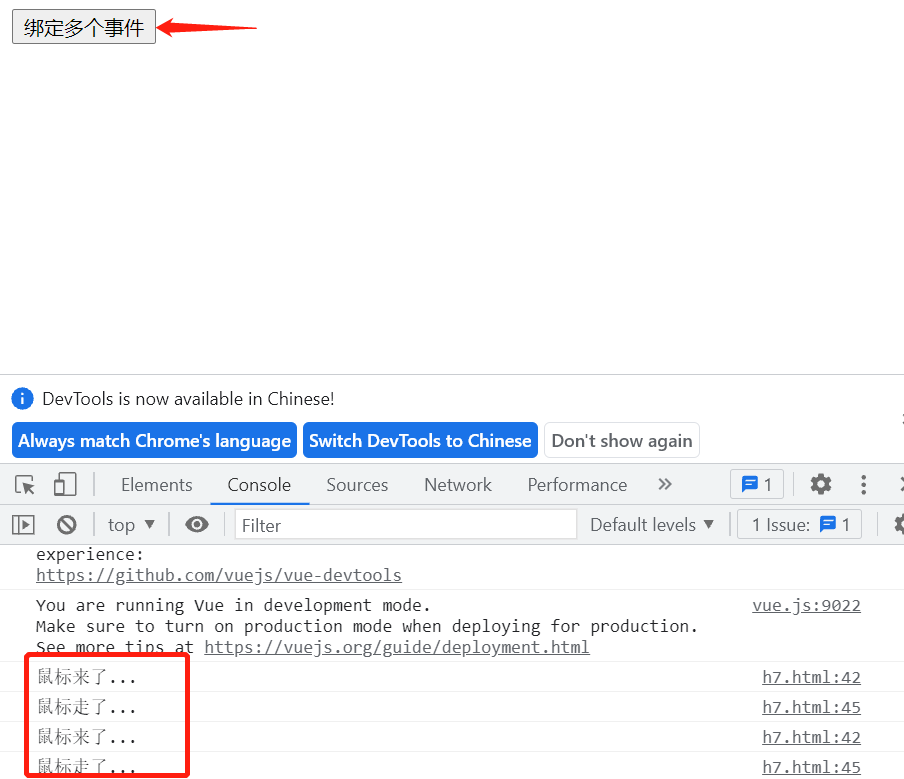
v-on
- Role: bind events
- Syntax: v-on:click = "say" or v-on:click = "say('parameter ', $event)"
- Abbreviation: @ click = "say"
- Note: the bound event is defined in methods
<!-- Complete grammar -->
<a v-on:click="doSomething"></a>
<!-- abbreviation -->
<a @click="doSomething"></a>
  <div id="app">
        <button v-on="{
            click:myClick,
            mouseenter:mouseEnter,
            mouseleave:mouseLeave
        }">
            Bind multiple events</button>
   </div>
   <script>
        var vm = new Vue({
            el:'#app',
            data:{
                isActive:true
            },
            methods:{
                myClick:function(){
                    console.log('Lazy sheep defecate on their head');
                },
                mouseEnter:function(){
                    console.log("Here comes the mouse...")
                },
                mouseLeave:function(){
                    console.log("The mouse is gone...")
                }
            }
        })
  </script>
v-model
- Function: create two-way data binding on form elements
- Note: listen for user input events to update data
Chestnuts:
<div id="app">
    <label>
          <input type="radio" value="1" name='sex' v-model="gender">male
      </label>
      <label>
          <input type="radio" value="0" name='sex' v-model="gender">female
      </label>
      <br><br>
      <p>Gender is:{{ gender }}</p>
      <hr>
      <label>
          <input type="checkbox" value="swim" name="hobby" v-model="hobby">Swimming
      </label>
      <label>
          <input type="checkbox" value="basketball" name="hobby" v-model="hobby">Basketball
      </label>
      <label>
          <input type="checkbox" value="game" name="hobby" v-model="hobby">game
      </label>
      <label>
          <input type="checkbox" value="read" name="hobby" v-model="hobby">read a book
      </label>
      <br>
      <p>
          Your hobbies:{{ hobby }}
      </p>
      <hr>
      <p>Please choose your school</p>
       <select v-model="school" multiple> <!--multiple:Indicates that multiple selections can be made in the drop-down list box -->
          <option value="Tsinghua University">Tsinghua University</option>
          <option value="Peking University">Peking University</option>
          <option value="Fudan University">Fudan University</option>
      </select>
      <p>
          Your school is:{{ school }}
      </p>
      <p>introduce oneself to:</p>
      <textarea cols="30" rows="10" v-model="info"></textarea>
      <br>
      <p>
          Information:{{ info }}
      </p>
</div>
<script>
    new Vue({
        el:'#app',
        data:{
            gender:'',
            hobby:[],  //It is multiple choice, so it is defined as an array
            school:[],
            info:''
        }
    })
</script>

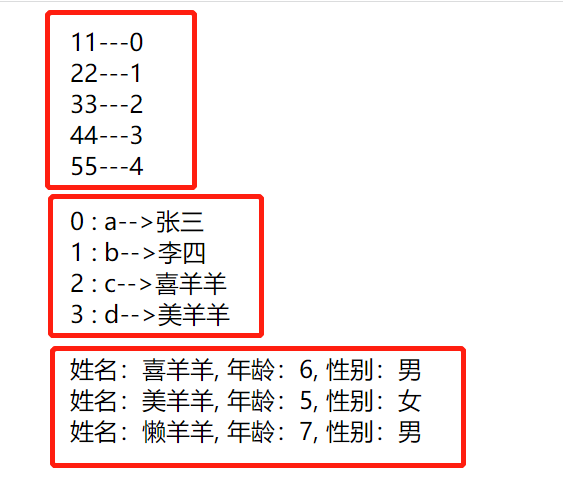
v-for
- Purpose: render elements or template blocks multiple times based on source data
Chestnuts:
<style>
    ul li{
        list-style: none;
    }
</style>
<body>
    <div class="app">
        <ul>
            <!-- arr Is the array name, item Is a temporary variable index The index of each element is stored -->
            <li v-for="(item,index) in arr">{{ item }}---{{ index }}</li>
        </ul>
        <ul>
            <!--Loop through objects  -->
            <li v-for="(item,key,index) in obj">
                {{ index }} : {{ key }}-->{{ item }}
            </li>
        </ul>
        <ul>
            <li v-for="item in obj2">
                full name:{{item.usename}},
                Age:{{item.age}},
                Gender:{{item.gender}}
            </li>
        </ul>
 </div>
 <script>
     var vm = new Vue({
         el:'.app',
         data:{
             arr:[11,22,33,44,55],
             obj:{
                 a:"Zhang San",
                 b:"Li Si",
                 c:"Pleasant Sheep",
                 d:'Beautiful sheep'
             },
             obj2:[
                 {
                     usename:'Pleasant Sheep',
                     age:6,
                     gender:'male'
                 },
                 {
                     usename:'Beautiful sheep',
                     age:5,
                     gender:'female'
                 },
                 {
                     usename:'lazy sheep',
                     age:7,
                     gender:'male'
                 }
             ]
         }
     })
 </script>
Note: the difference between v-bind and v-on: v-bind is to bind the attributes and variables of the tag, and v-on is to bind events.
key attribute
- Recommendation: provide the key attribute when using v-for to improve performance.
- Note: using key, Vue will rearrange the order of elements based on the change of key, and remove elements that do not exist in key.
- vue key
- Description of vue key attribute
<div v-for="item in items" :key="item.id">
  <!-- content -->
</div>
Style handling - class and style
- Usage: v-bind: class = "expression" or: class = "expression"
- Type of expression: string, array, object (emphasis)
- Syntax:
<!-- 1 -->
<div v-bind:class="{ active: true }"></div> ===> After analysis
<div class="active"></div>

<!-- 2 -->
<div :class="['active', 'text-danger']"></div> ===>After analysis
<div class="active text-danger"></div>

<!-- 3 -->
<div v-bind:class="[{ active: true }, errorClass]"></div> ===>After analysis
<div class="active text-danger"></div>


--- style ---
<!-- 1 -->
<div v-bind:style="{ color: activeColor, 'font-size': fontSize + 'px' }"></div>
<!-- 2 Apply multiple style objects to an element-->
<!-- baseStyles and overridingStyles All data Objects defined in -->
<div v-bind:style="[baseStyles, overridingStyles]"></div>
v-if and v-show
- conditional rendering
- v-if: destroy or rebuild the element according to the true or false condition of the value of the expression
- v-show: switch the display CSS attribute of the element according to the true or false value of the expression
<p v-show="isShow">Is this element displayed???</p>
<p v-if="isShow">This element, in HTML Is it in the structure???</p>
v-show:
// v-show
<div id="app">
        <p>I'm a lazy pig</p>
        <p v-show="temp">Pleasant Sheep</p>
        <p v-show="ok">Hutu</p>
</div>
<script>
    var vm = new Vue({
            el:'#app',
            data:{
                temp:false, //hide
                ok:true
            }
    })
    window.setInterval(function(){
        vm.ok = !vm.ok
    },1000);
</script>
v-if:
// v-if
<div id="app">
        <div v-if="rule=='lyy'">I'm a lazy sheep</div>
        <div v-else-if="rule=='nyy'">I am a warm sheep</div>
        <div v-else>I'm grey wolf</div>
</div>
<script>
    new Vue({
        el:'#app',
        data:{
            rule:'lyy'
        }
    })
</script>

Because it is lyy, only lazy sheep are displayed

Improving performance: v-pre
- Note: vue will skip the compilation of this element and its child elements. Can be used to display the original Mustache tag. Skipping a large number of nodes without instructions speeds up compilation.
<span v-pre>{{ this will not be compiled }}</span>
Improving performance: v-once
- Description: vue renders elements and components only once. For subsequent re rendering, the element / component and all its child nodes are treated as static content and skipped. This can be used to optimize update performance.
<span v-once>This will never change: {{msg}}</span>
Monitoring data changes - watch
- Overview: watch is an object, the key is the expression to be observed, and the value is the corresponding callback function
- Function: when the value of the expression changes, the corresponding callback function will be called to complete the response monitoring operation
- VUE $watch
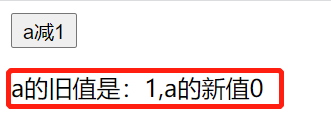
<div id="app">
        <button @click='a--'>a Minus 1</button>
        <p>{{ message }}</p>
</div>
<script>
    var vm = new Vue({
        el:'#app',
        data:{
            a:2,
            message:''
        },
        watch:{
            a:function(val,oldVal){
                this.message = "a The old value of is:"+oldVal+",a New value for"+val
            }
        }
    })
</script>
<div id="app">
    <button @click='a--'>a Minus 1</button>
    <p>{{ message }}</p>
</div>
<script>
    var vm = new Vue({
        el:'#app',
        data:{
            a:10,
            message:''
        }
    })
    var unwatch = vm.$watch('a',function(val,oldVal){
        if(val === 1){
            unwatch(); //Cancel observation
        }
        this.message = "a The old value of is:"+oldVal+",a The new values for are:"+val
    })
</script>
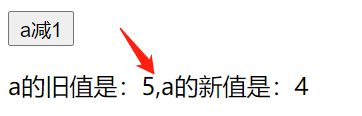
When the old value is reduced to 2, a is actually decreasing, but the view is no longer changed because the observation is cancelled.
Calculation properties
-
Note: calculated attributes are cached based on their dependencies. They will be re evaluated only when their dependencies change
-
Note: don't put too much logic into the Mustache syntax ({}}), otherwise the template will be too heavy, difficult to understand and maintain
-
Note: the attribute in calculated cannot have the same name as the attribute in data, otherwise an error will be reported
Vue computed attribute principle
Chestnut 1
<div id="box">
        <table border="1">
            <tr>
                <td width="100">birthday</td>
                <td width="200">{{ getBirthday }}</td>
            </tr>
            <tr>
                <td width="100">Gender</td>
                <td width="200">{{ gender }}</td>
            </tr>
            <tr>
                <td width="100">address</td>
                <td width="200">{{ address }}</td>
            </tr>
        </table>
</div>
<script>
   var vm = new Vue({
       el:'#box',
       data:{
           birthday:1074228510514,
           gender:'male',
           address:'Yanta District, Xi'an City'
       },
       computed:{
           getBirthday:function(){
               var m = new Date(this.birthday);
               var str = m.getFullYear()+'year'+(m.getMonth()+1)+'month'+m.getDate()+'day'
               return str;
           }
       }
   })
</script>


Using computational dynamics to transfer data
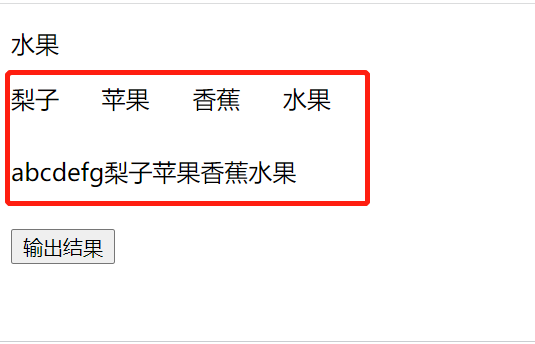
Chestnut 2
<div id="app">
<p>Fruits</p>
<span>{{ pear }}</span>
<span>{{ apple }}</span>
<span>{{ banana }}</span>
<span>{{ number }}</span>
<p style="padding: 12px 0;">{{ result }}</p>
<button @click='btn'>Output results</button>
</div>
<script>
new Vue({
el:'#app',
data:{ //Generally do initialization
pear:'Pear',
apple:'Apple',
banana:'Banana',
number:'Fruits'
},
computed:{
result:{
// cache:true,
// Automatic call
get: function(){
return 'abcdefg'+this.pear+this.apple+this.banana+this.number
},
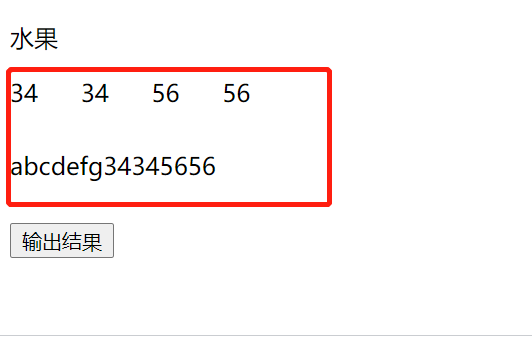
// Call it automatically when it changes
set: function(newVal){
this.pear = newVal.substr(2,2);
this.apple = newVal.substr(2,2);
this.banana = newVal.substr(4);
this.number = newVal.substr(4)
}
}
},
methods:{
btn(){
this.result = '123456';
}
}
})
</script>
To be continued