12, Axios
1. General
Axios is a component used by vue to send AJAX requests, but it is not provided by vue
2. Related websites
- github: https://github.com/axios/axios
3. Installation and import
- install
cnpm install --save axios vue-axios
- Import
#Import vue and axios components
import Vue from 'vue'
import axios from 'axios'
import VueAxios from 'vue-axios'

Vue.use(VueAxios, axios);
4. Quick start
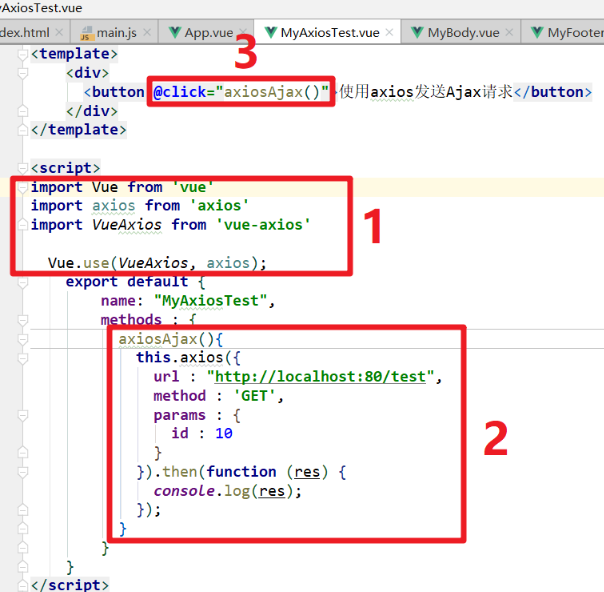
4.1 create a component myaxiostest Vue, where ajax is sent
<template>
    <div>
      <button @click="axiosAjax()">use axios send out Ajax request</button>
    </div>
</template>

<script>
import Vue from 'vue'
import axios from 'axios'
import VueAxios from 'vue-axios'

  Vue.use(VueAxios, axios);
    export default {
        name: "MyAxiosTest",
        methods : {
          axiosAjax(){
            this.axios({
              url : "http://localhost:80/test",
              method : 'GET',
              params : {
                id : 10
              }
            }).then(function (res) {
              console.log(res);
            });
          }
        }
    }
</script>

<style scoped>

</style>
Create a component myaxiostest Vue, where ajax is sent
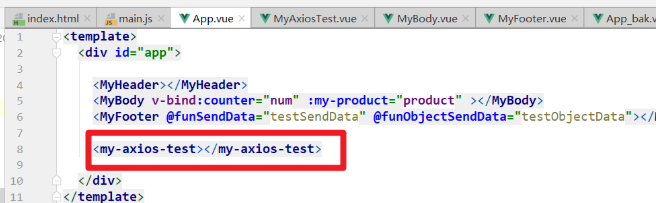
4.2 use the child component MyA.test on the parent component vue
5. Implementation of registration function
5.1 design a registration page [ App.vue ]
<template>
  <div id="app">

    <center>
      <h2>
        Welcome to Java2107 Registration page
      </h2>
      <form method="post">
        <label for="username">user name:</label><input id="username" v-model="user.username"/><br/>
        <label for="password">password:</label><input id="password" v-model="user.password"/><br/>
        <label>Gender:</label><input value="1" type="radio" v-model="user.gender"/>male
          <input value="0" type="radio" v-model="user.gender"/>female<br/>
        <label for="birth">birthday:</label><input id="birth" type="date" v-model="user.birth"/><br/>
        <input type="button" @click="regist()" value="register">
      </form>
    </center>

  </div>
</template>
<script>
import Vue from 'vue'
import axios from 'axios'
import VueAxios from 'vue-axios'

Vue.use(VueAxios, axios);
export default {
  name: 'App',
  components: {

  },
  data(){
    return {
      user : {
        gender : 1
      }
    }
  },
  methods : {
    regist(){
      this.axios.post('http://localhost:80/user/regist', this.user).then( (response) => {
        console.log(response);

        let resultVO = response.data;
        if(resultVO.success) {
          alert("login was successful" + resultVO.data.id);

          this.user = resultVO.data;
          console.log(this.user);
        }

      }).catch(function (error) {
        console.log(error);
      });
    }
  }
}
</script>

<style>

</style>
5.2 background [ cross domain ]
@RestController
// Cross domain annotation
@CrossOrigin("http://localhost:8080")
public class UserController {
    @PostMapping("/user/regist")
    public ResultVO regist(@RequestBody User user){
        System.out.println(user);
        user.setId(1111);
        return ResultVO.ok("login was successful",user);
    }
   }
13, Routing
1. Routing in reality
Function: assign a line that can access the Internet to a computer
2. Routing in Vue
- Jump between components
- Component name: Vue router
- To use, you must install
3. Quick start
3.1 steps
- Create vue project and install routing module
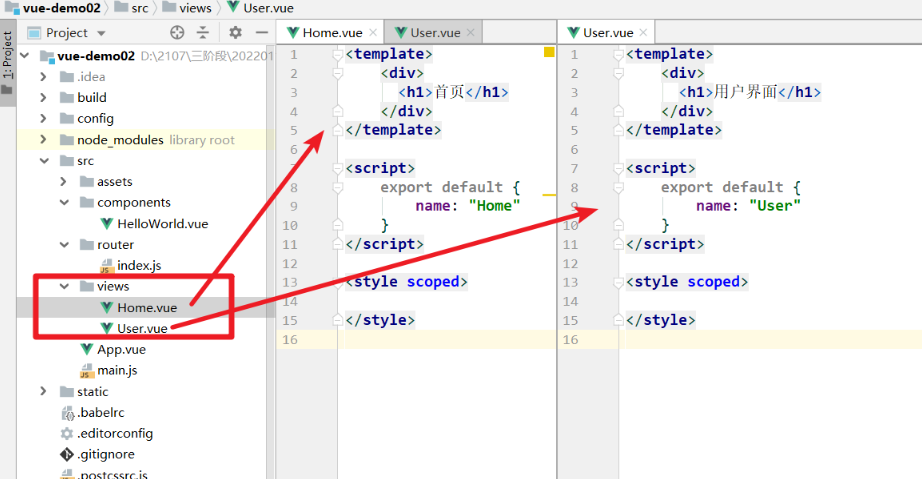
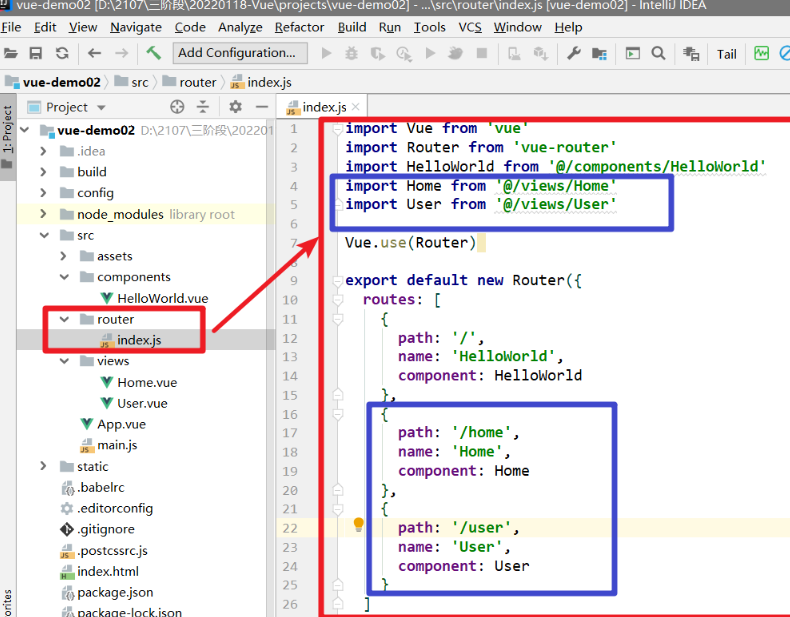
- Components to be prepared for jump [home page, user page]
- Register routing information in routing table [router/index.js]
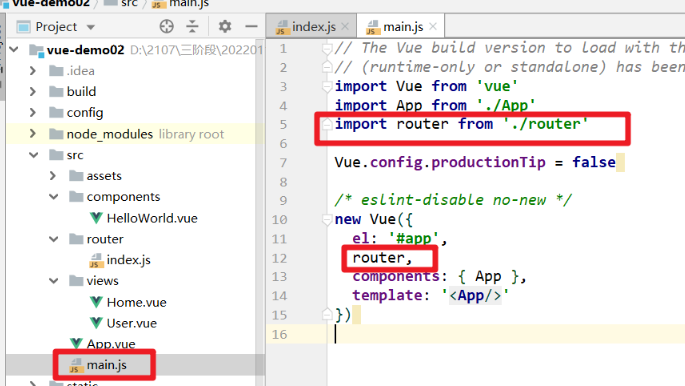
- In main Using routing in JS
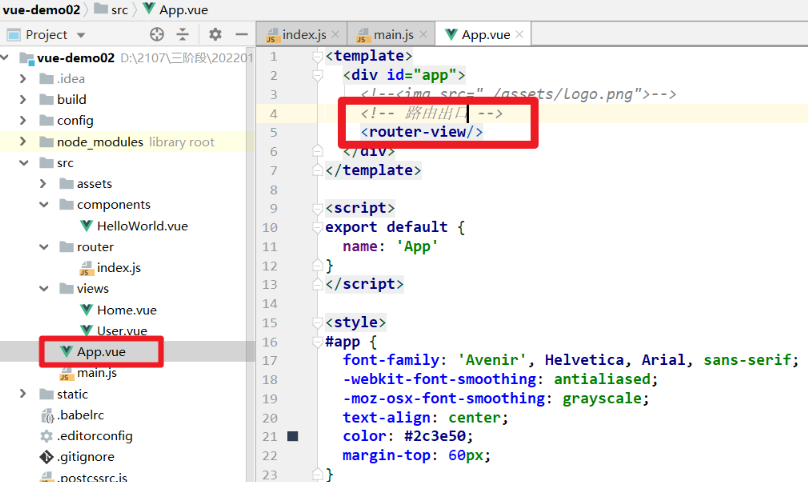
- Define route exit
3.2 details are as follows:
-
Components that need to be prepared for jump [home page, user page]
-
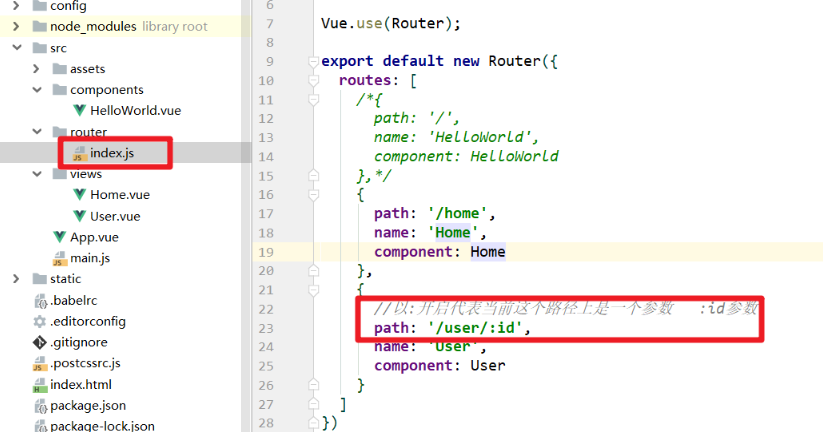
Register routing information in routing table [router/index.js]
-
In main Route used in JS [default]
-
App.vue define route exit
-
test
- http://localhost:8080/#/user -->User interface
- http://localhost:8080/#/home -->Front page
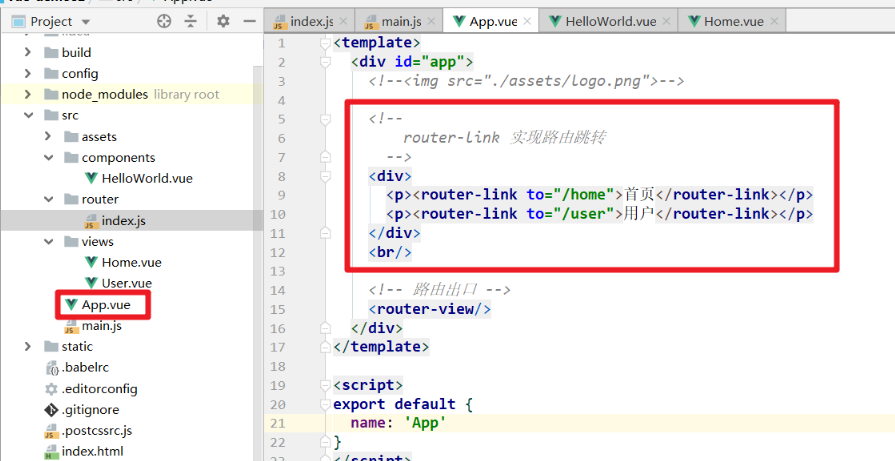
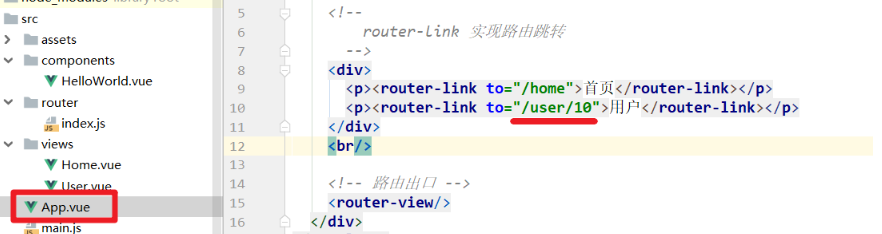
4. router-link
It can realize the jump mode like a link
4.1 basic use
Use of router link
4.2 routing parameters
-
Modify routing table
-
Modify app vue
-
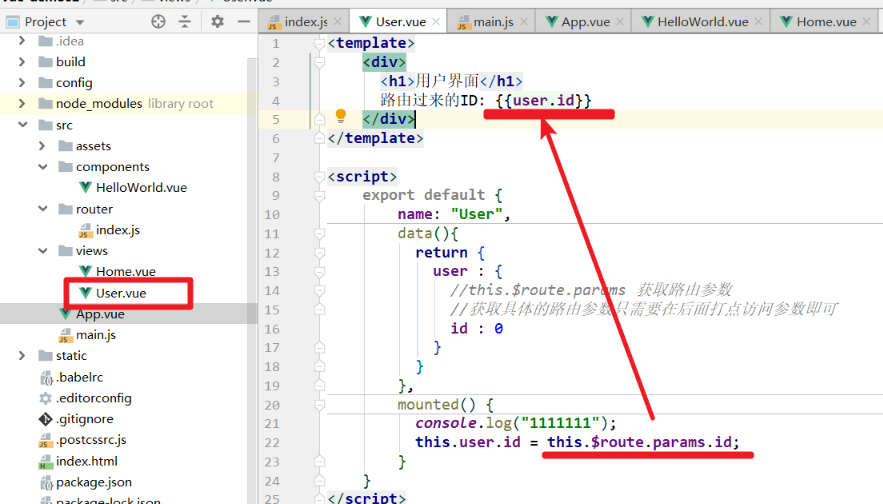
Modify user vue
14, ElementUI
1. General
A hungry development UI library has very rich effects
Official website: https://element.eleme.io/#/zh-CN
- A set of desktop component library based on Vue 2.0 for developers, designers and product managers
2. Installation
npm i element-ui -S
3. Use
In main JS
import Vue from 'vue';
import ElementUI from 'element-ui';  //1
import 'element-ui/lib/theme-chalk/index.css';  //2
import App from './App.vue';

Vue.use(ElementUI);  //3

new Vue({
  el: '#app',
  render: h => h(App)  //4
});
4. Login case
4.1 login component
<template>
    <div>

      <el-row>
        <el-col :span="8"><div class="grid-content bg-purple"></div></el-col>
        <el-col :span="8"><div class="grid-content bg-purple-light">
          <el-form :model="user" label-width="80px">
            <el-form-item label="user name">
              <el-input v-model="user.username" placeholder="enter one user name"></el-input>
            </el-form-item>
            <el-form-item label="password">
              <el-input v-model="user.password" placeholder="Please input a password" show-password></el-input>
            </el-form-item>
            <el-form-item>
              <el-button type="primary" @click="login()">Sign in</el-button>
            </el-form-item>
          </el-form>
        </div></el-col>
        <el-col :span="8"><div class="grid-content bg-purple"></div></el-col>
      </el-row>

    </div>
</template>

<script>
    export default {
        name: "Login",
        data() {
          return {
            user: {}
          }
        },
        methods: {
          login() {
            console.log(this.user);
          }
        }
    }
</script>

<style scoped>
  .el-row {
    margin-bottom: 20px;
  }
  .el-col {
    border-radius: 4px;
  }
  .grid-content {
    border-radius: 4px;
    min-height: 36px;
  }
  .row-bg {
    padding: 10px 0;
  }
</style>
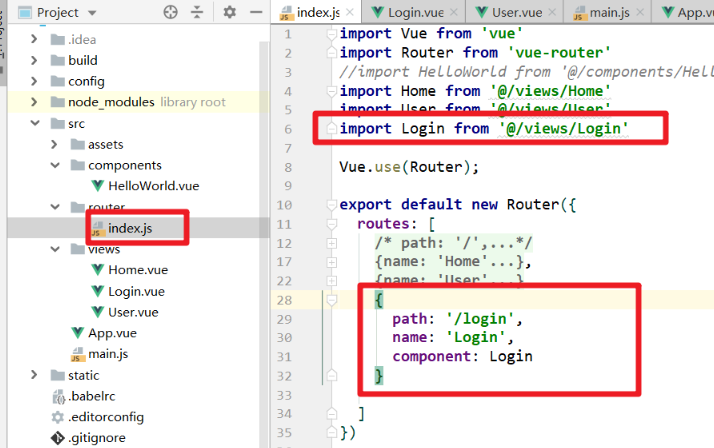
4.2 registered routing information
Login.vue
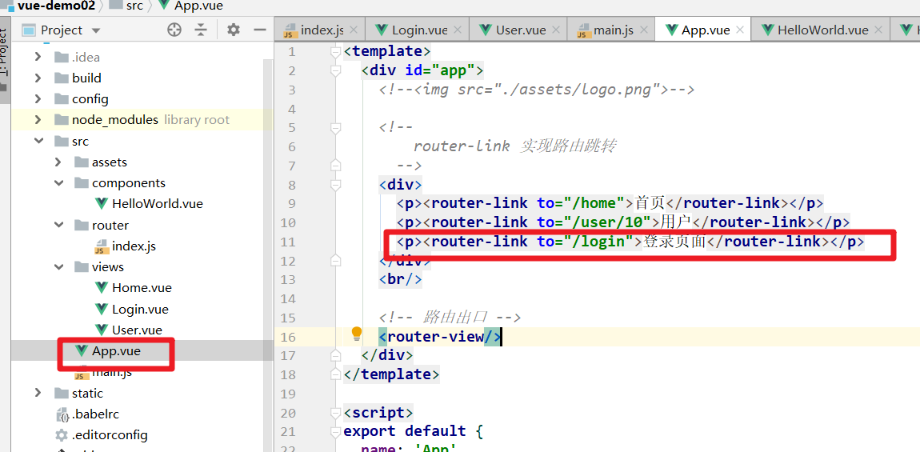
4.3 route jump
App.vue
5. mock false data
Official website: https://www.fastmock.site/
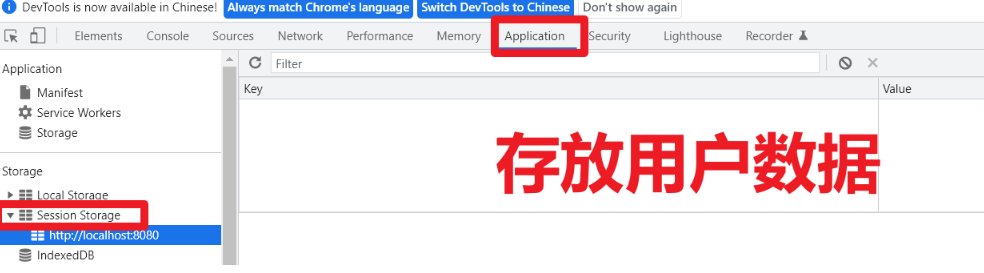
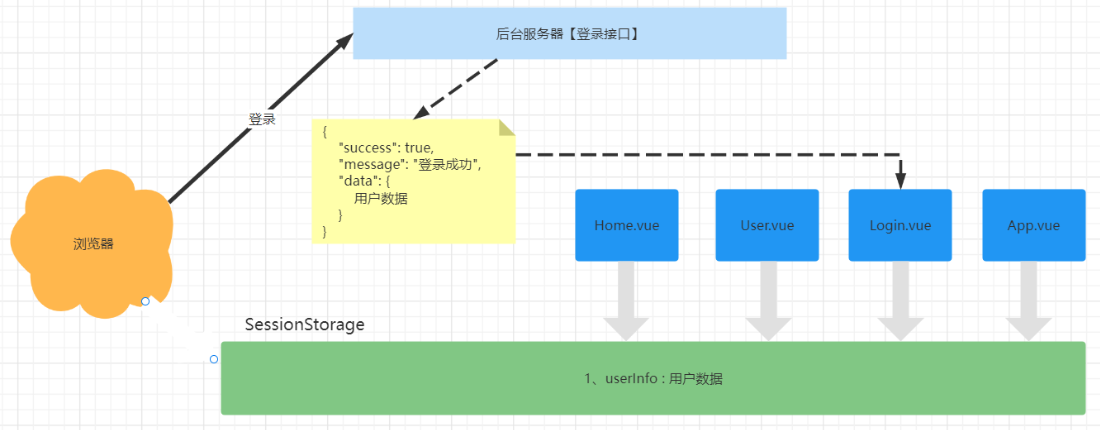
15, Solve the problem of saving front-end permissions and login information
1. Use SessionStorage to save user data
-
SessionStorage
-
principle
2. Implement permission control
Use SessionStorage to store the login ID, which is implemented in conjunction with vue's filter
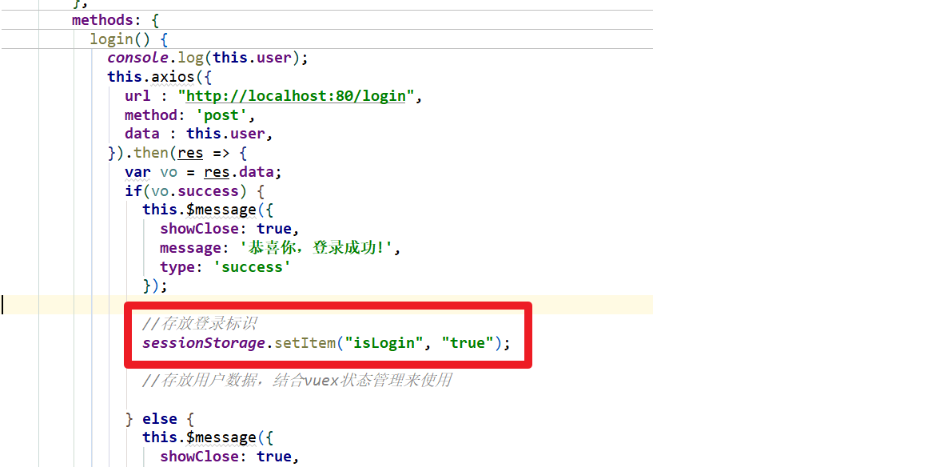
2.1 implementation steps
-
Store the login ID in SessionStorage
-
main.js plus a routing filter
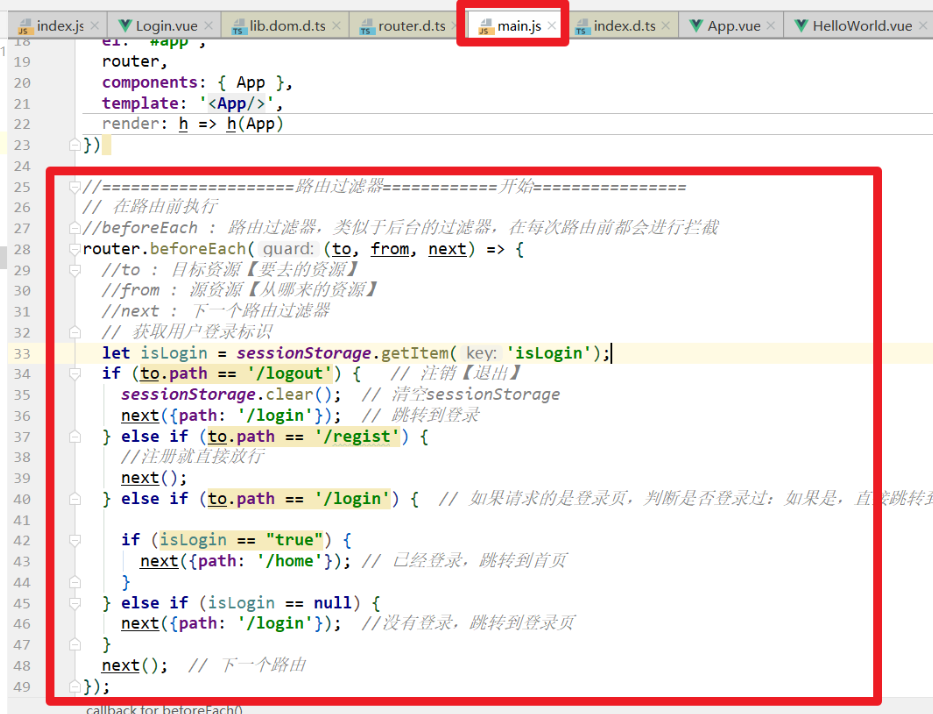
//====================Route filter ============= start================
// Execute before routing
//Before each: a routing filter, similar to the background filter, is intercepted before each route
router.beforeEach((to, from, next) => {
  //To: target resources [resources to go]
  //From: source resource [from where]
  //Next: next routing filter
  // Get user login ID
  let isLogin = sessionStorage.getItem('isLogin');
  if (to.path == '/logout') {   // Cancel [exit]
    sessionStorage.clear();  // Empty sessionStorage
    next({path: '/login'});  // Jump to login
  } else if (to.path == '/regist') {
    //Direct release upon registration
    next();
  } else if (to.path == '/login') {  // If the requested page is a login page, judge whether you have logged in: If yes, directly jump to the home page
    if (isLogin == "true") {
      next({path: '/home'}); // Already logged in, jump to the home page
    }
  } else if (isLogin == null) {
    next({path: '/login'});  //No login, jump to login page
  }
  next();  // Next route
});
3. Display user data
3.1 state management using Vuex
- Vuex is designed for Vue JS application development state management mode. It uses centralized storage to manage the state of all components of the application, and uses corresponding rules to ensure that the state changes in a predictable way.
3.2 implementation steps
- Install Vuex
npm install vuex --save
#perhaps
cnpm install vuex --save
- Create a store / index. In src js
import Vue from 'vue'
import Vuex from 'vuex'
Vue.use(Vuex);

// The global state object is used to save the public data of all components
const state = {
  // Define a user object
  // In the vue component, it is through this$ store. state. User to get
  user: {
    id:0,
    username: ''
  }
};

//Analogy to get method of property in Java class
// Monitor the latest state of the state value in real time. Note that getters here can be understood as calculating attributes
const getters = {
  // In the component, it is through this$ store. getters. Getuser to get
  getUser(state) {
    return state.user;
  }
};

//Analogy to the set method of attributes in Java classes
// Define the method to change the initial value of state. This is the only place where state can be changed. The disadvantage is that it can only be executed synchronously
const mutations = {
  // In the component, it is through this$ store. commit('updateUser', user);  Method to call mutations
  updateUser(state, user) {
    state.user = user;
  }
};

//When actions is called, the functions in mutations are executed asynchronously
// Define the method to trigger the function in changes. You can execute the function in changes asynchronously
const actions = {
  // In the component, it is through this$ store. dispatch('asyncUpdateUser', user);  To call actions
  asyncUpdateUser(context, user) {
    context.commit('updateUser', user);
  }
};

export default new Vuex.Store({
  state,
  getters,
  mutations,
  actions
});
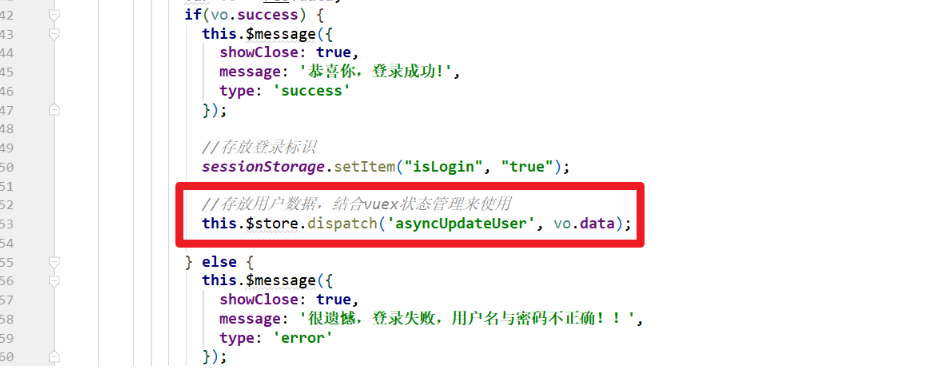
-
Login. The user data is stored in Vue. After successful login, the user data is stored in the state of the store
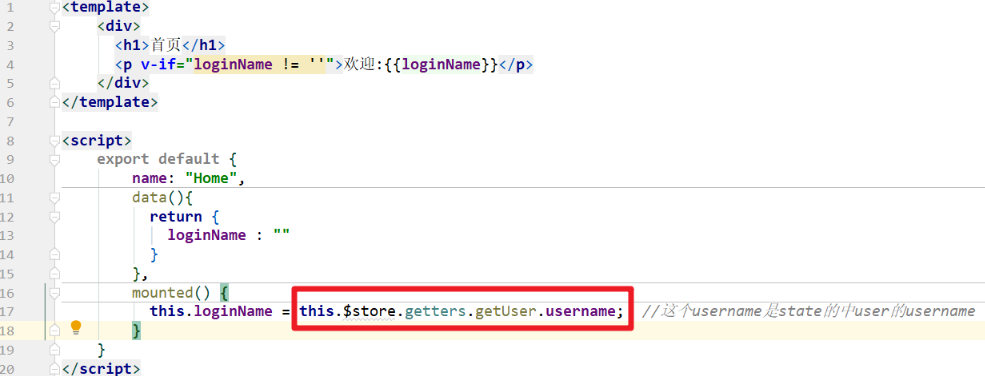
-
Obtain the user data of the state in the store in each component [Home.vue]
4. Solve the loss of user data after refresh
4.1 implementation steps
- App.vue add listening event
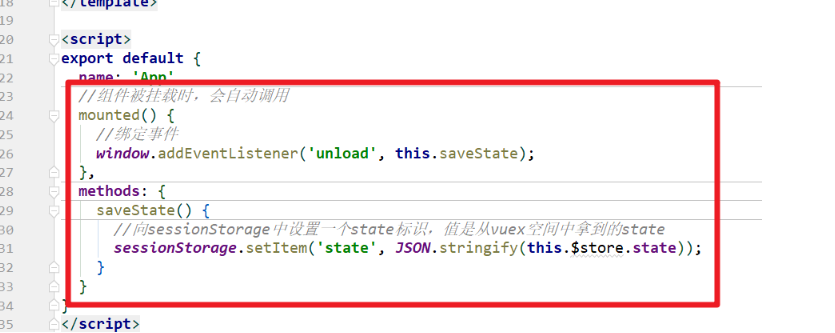
//When the component is mounted, it will be called automatically
mounted() {
  //Binding event
  window.addEventListener('unload', this.saveState);
},
methods: {
  saveState() {
    //Set a state ID in sessionStorage. The value is the state obtained from vuex space
    sessionStorage.setItem('state', JSON.stringify(this.$store.state));
  }
}
- store/index.js modify state

// The global state object is used to save the public data of all components
const state = sessionStorage.getItem('state') ? JSON.parse(sessionStorage.getItem('state')) : {
  // Define a user object
  // In the vue component, it is through this$ store. state. User to get
  user: {
    id:0,
    username: ''
  }
};
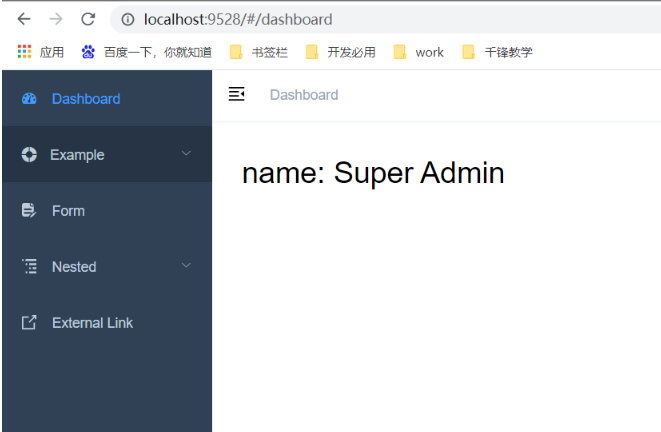
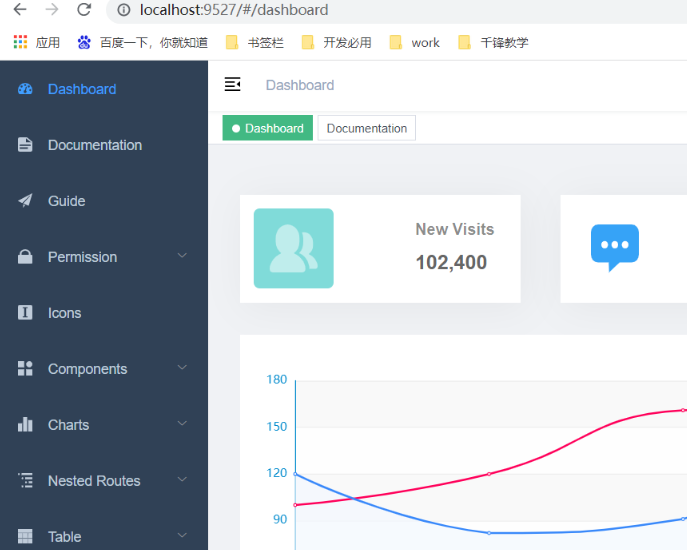
16, Vue element admin
1. Problems
Can we quickly layout a background management system page
- Yes: the element UI can use the components provided in it for layout, but it is still too cumbersome
2. General
vue element admin is a front-end layout solution corresponding to the background management system. It is implemented based on vue and element UI. It uses the latest front-end technology stack, built-in i18 internationalization solution, dynamic routing and permission verification, refines typical business models, and provides rich functional components. It can help you quickly build enterprise level middle and back-end product prototypes.
- Can help us quickly layout the front-end prototype page of the background management system
3. Quick start
- Download finished item
- Vue element admin: fully functional
- Vue admin template: basic functions
- Run the project - it is officially recommended not to use cnpm
# Clone project
git clone https://github.com/PanJiaChen/vue-element-admin.git

# Enter project directory
cd vue-element-admin

# Installation dependency
npm install

# It is recommended not to install with cnpm. There will be various strange bug s. You can solve the problem of slow npm download speed through the following operations
npm install --registry=https://registry.npm.taobao.org

# Local development launch project
npm run dev
-
Start Vue element admin
-
Start Vue admin template