Vue common feature learning
- 1, Learning overview
- 2, Form operation
- 3, Custom command
- 4, Calculated attribute
- 5, Listener (watch)
- 6, filters
- 7, Vue life cycle explanation
As a college student, my dream is to be an independent developer with full stack thinking ability. My technology stack is SpringBoot + Vue learning record
1, Learning overview
- Form operation
- Custom instruction
- Calculation properties
- monitor
- Filter
- life cycle
2, Form operation
2.1 overview of Vue based form operations
- input single line text
- textarea multiline text
- select drop-down multiple selection
- Radio radio box
- checkbox check box
2.2 input processing
When we click the form, by default, we need to click the submit button to submit, and then the action will jump to the corresponding page. However, if we want to disable the action jump, we have to use js to handle the click event, and call ajax in the background to request the back-end data.
However, in vue, we can use v-model to bind our stored data, and then use @ Click to solve the click event
		<div id="app">
			<form action="">
				<span>full name: span>
				<input type="text" v-model="uname" />


				<input type="submit" value="Submit" @click.prevent="handleClick">
			form>
		div>
		<script src="../vue.js" type="text/javascript" charset="utf-8">script>
		<script type="text/javascript">
			// Form operation
			var app = new Vue({
				el: "#app",
				data: {
					uname: "abc"
				},methods:{
					handleClick:function() {
						// Using ajax to call methods in the background
						console.log(this.uname);
					}
				}
			})
		script>
2.3 radio radio box processing
The radio box also displays the specified data through v-model
	<div id="app">
		<span>Gender: span>
		<span>
			<input type="radio" id="male" value="1" v-model="gender">
			<label for="male">male label>
			<input type="radio" id="female" value="2" v-model="gender"/>
			<labe for="female">female label>
		span>
		<input type="submit" value="Submit" @click.prevent="handleClick">
	div>

	<script type="text/javascript">
		// Form operation
		var app = new Vue({
			el: "#app",
			data: {
				gender:1 // Specifies the value of the default radio
			},methods:{
				handleClick:function() {
					// Using ajax to call methods in the background
					console.log(this.gender);
				}
			}
		})
	script>
2.4 checkbox processing
Checkbox can select multiple values at a time, so the value of checkbox is saved by array, and data binding is also completed by v-model
	<div id="app">
			<span>Hobbies: span>
			<input type="checkbox" id="ball" value="1" v-model="hobby">
			<label for="ball">Basketball label>
			<input type="checkbox" id="sing" value="2" v-model="hobby">
			<label for="sing">sing label>
			<input type="checkbox" id="code" value="3" v-model="hobby">
			<label for="code">Write code label>
			<input type="submit" value="Submit" @click.prevent="handleClick">
	div>
		<script type="text/javascript">
		// Form operation
		var app = new Vue({
			el: "#app",
			data: {
				hobby:['2','3'] // Default selected value
			},methods:{
				handleClick:function() {
					// Using ajax to call methods in the background
					console.log(this.hobby);
				}
			}
		})
	script>
2.5 select drop-down box processing
2.5.1 select a piece of data
When a value is selected from the drop-down box, it is the same as that of the radio box. v-model is used for binding
		<div id="app">
			<span>Major: span>
			<select v-model="project">
				<option value="0">Please select a major..option>
				<option value="1">computer option>
				<option value="2">software engineering option>
				<option value="3">communication engineering option>
				<option value="4">Internet of things project option>
			select>
			<input type="submit" value="Submit" @click.prevent="handleClick">
		div>
		<script type="text/javascript">
		// Form operation
		var app = new Vue({
			el: "#app",
			data: {
				project:3 // Select individual content

			},
			methods: {
				handleClick: function() {
					// Using ajax to call methods in the background
					console.log(this.project);
				}
			}
		})
	script>
2.5.2 select multiple pieces of data
We add an attribute in select, multiple, and then it is the same as in the case of multiple selection boxes. The option s of 2 and 4 will be selected by default
	<div>
		<span>Major: span>
		<select v-model="project" multiple="multiple">
			<option value="0">Please select a major..option>
			<option value="1">computer option>
			<option value="2">software engineering option>
			<option value="3">communication engineering option>
			<option value="4">Internet of things project option>
		select>
	div>
		<script type="text/javascript">
			// Form operation
			var app = new Vue({
				el: "#app",
				data: {
					project:['2','4']
				},
				methods: {
					handleClick: function() {
						// Using ajax to call methods in the background
						console.log(this.project);
					}
				}
			})
		script>
2.6 textarea text box processing
The method used is the same as that of input, but it should be noted that content cannot be added to textarea in vue. If the tag is processed by v-model, it will be displayed as data in data
	<div id="app">
		<span>Introduction: span>
		<textarea v-model="desc">textarea>
	div>
		<script type="text/javascript">
			// Form operation
			var app = new Vue({
				el: "#app",
				data: {
					desc:"haha"
				},
				methods: {
					handleClick: function() {
						// Using ajax to call methods in the background
						console.log(this.project);
					}
				}
			})
		script>
2.7 form field modifiers
- number to numeric
- trim: remove the spaces at the beginning and end
- lazy: convert input event to change event
2.7.1 number type
Generally, string splicing is calculated in JavaScript. If we want to calculate numerical types, we need to use type conversion
<html>
	<head>
		<meta charset="utf-8">
		<title>Form modifier title>
	head>
	<body>
		<div id="app">
			<div>
				<h3>numberh3>
				<input type="text" v-model="num"/>
				<button @click="calc">calculation button>
			div>
		div>
		<script src="../vue.js">script>
		<script type="text/javascript">
			var app = new Vue({
				el:"#app",
				data:{
					num: ''
				},methods:{
					calc: function() {
						console.log(this.num + 12)
					}
				}
			})
		script>
	body>
html>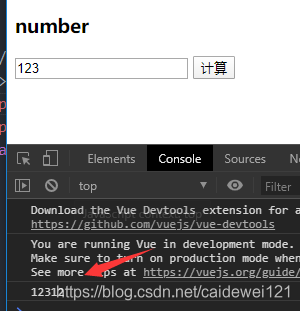
To calculate integers, we just need to do this: just add the. number attribute to v-model

2.7.2 trim remove spaces on both sides

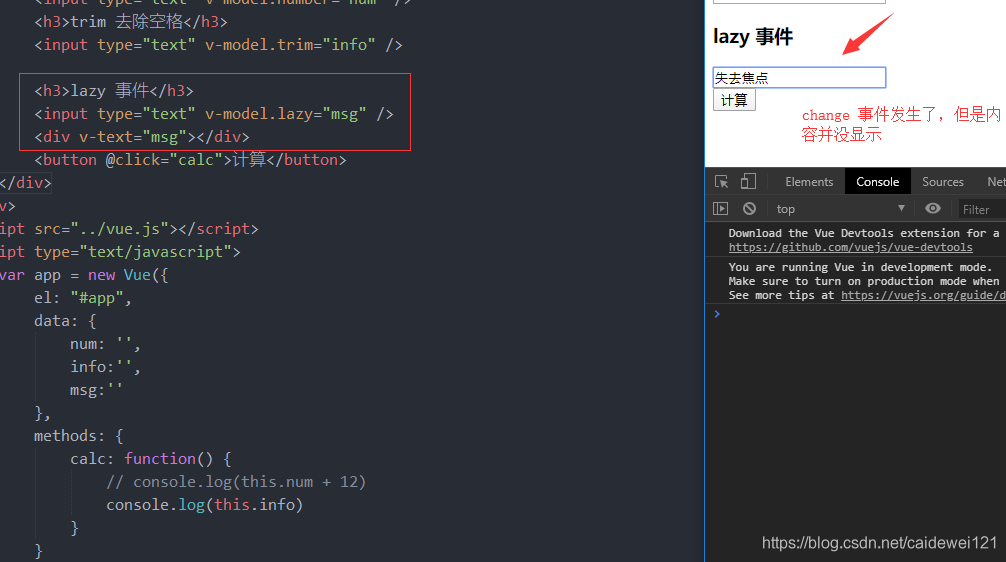
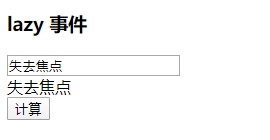
2.7.3 lazy event
The default v-model uses the input event. We can add an interpolation expression to the input content and find that the value changes with the input content. However, when we add the lazy event, it will become a change event. In short, it will become a focus loss event, which will be triggered when the focus is lost
This lazy event is very suitable for verifying whether the account meets the conditions. Collecting ajax here will be very simple
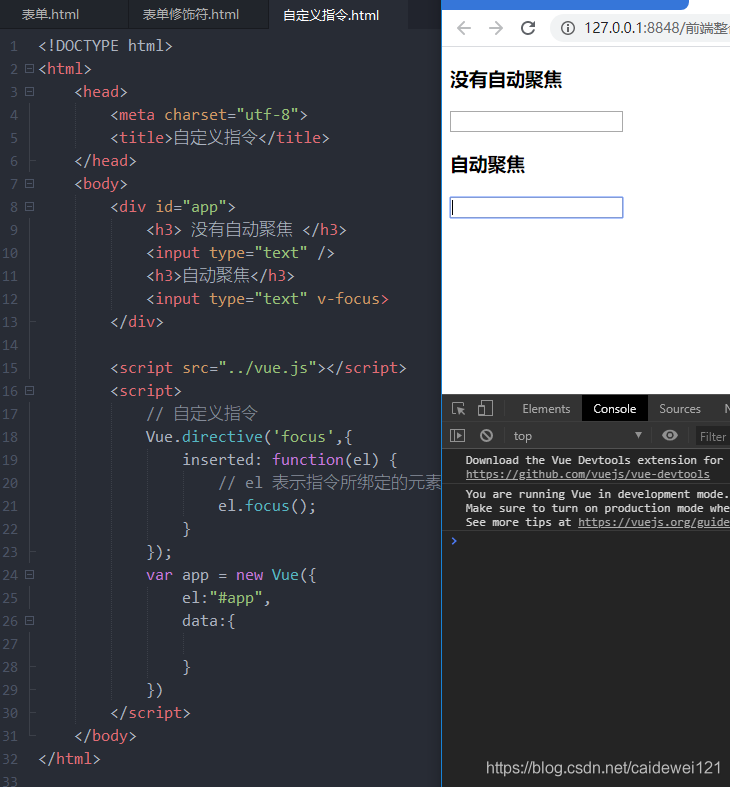
3, Custom command
The previously used v-xxx are built-in instructions in vue, but the built-in instructions do not meet the use functions of some scenarios, so we can use custom components. Next, write a simple auto focusing method
3.1 user defined instructions without parameters
3.2 user defined instructions with parameters
Change the color according to custom instructions
<html>
	<head>
		<meta charset="utf-8">
		<title>Custom instruction title>
	head>
	<body>
		<div id="app">

			<input type="text" v-color="msg" />
		div>

		<script src="../vue.js">script>
		<script>
			// Custom instruction with parameters
			Vue.directive('color',{
				bind: function(el, binding) {
					// Set the background color according to the parameters of the command
					console.log(binding.value.color);
					el.style.backgroundColor = binding.value.color;
				}
			});
			var app = new Vue({
				el:"#app",
				data:{
					msg: {
						color: 'orange'
					}
				},
			})

		script>
	body>
html>
3.3 local customization commands
The previously defined appearance is equivalent to a global custom command. Therefore, if there is a global definition, there is a corresponding definition of local user-defined commands.
We can directly define the directives attribute in a vue instance.
So I defined two methods, focusing and color changing
<html>
	<head>
		<meta charset="utf-8">
		<title>Custom instruction title>
	head>
	<body>
		<div id="app1">
			<input type="text" v-color="msg" />
			<input type="text" v-focus />
		div>
		<script src="../vue.js">script>
		<script>
			// The role of local instructions is the same.
			var app1 = new Vue({
				el: "#app1",
				data: {
					msg: {
						color: 'rgba(0,0,0,0.3)'
					}
				},
				// Set local instruction
				directives: {
					color: {
						bind: function(el, binding) {
							// Set the background color according to the parameters of the command
							console.log(binding.value.color);
							el.style.backgroundColor = binding.value.color;
						}
					},
					// Auto focus function
					focus: {
						inserted: function(el) {
							el.focus();
						}
					}
				}
			})
		script>
	body>
html>
4, Calculated attribute
4.1 calculate attribute function
First of all, the use of computational attributes and methods is basically the same, but computational attributes also have their unique characteristics
- For complex operation logic, using calculation attributes can improve operation efficiency (because it also provides a caching mechanism)
- The calculation attribute depends on the data in data
- Calculation attribute: the first calculation will cache the results, and the second calculation will directly take out the calculated demerit
4.2 basic use of calculation attributes
Let's take an inverted string as an example to see the comprehensive operation.
<html>
	<head>
		<meta charset="utf-8">
		<title>Custom instruction title>
	head>
	<body>
		<div id="app">

			<div>Native string:{{msg}}div>
			<div>Reverse string:{{msg.split('').reverse().join('')}}div>
			<h2>Calculation attribute test h2>
			<div>Calculation attribute method implementation:{{reverseMessage}}div>
			<div>Calculation attribute method implementation:{{reverseMessage}}div>
			<div>Calculation attribute method implementation:{{reverseMessage}}div>
			<h2>Method test h2>
			<div>Method to implement the reverse string:{{reverseMsg()}}div>
			<div>Method to implement the reverse string:{{reverseMsg()}}div>
			<div>Method to implement the reverse string:{{reverseMsg()}}div>
		div>

		<script src="../vue.js">script>
		<script>
			var app = new Vue({
				el: "#app",
				data: {
					msg: "Hello World"
				},
				// The calculation attribute is used based on the change of data in data. Extracting complex data and using calculation attributes is simpler in the template
				// Difference between calculation attribute and method: calculation attribute has cache, which is more efficient
				// Calculated properties are based on their dependencies, which depend on the data in data.
				// Calculation properties will save the results after the first calculation. During the second calculation, the results will be accessed directly without operation
				methods: {
					reverseMsg: function() {
						console.log("Method is executed")
						return this.msg.split('').reverse().join('')
					}
				},
				computed: {
					reverseMessage: function() {
						console.log("The calculated attribute is executed");
						return this.msg.split('').reverse().join('')
					}
				}
			})
		script>
	body>
html>
4.3 demonstration effect
Let's see how many times the two methods were printed
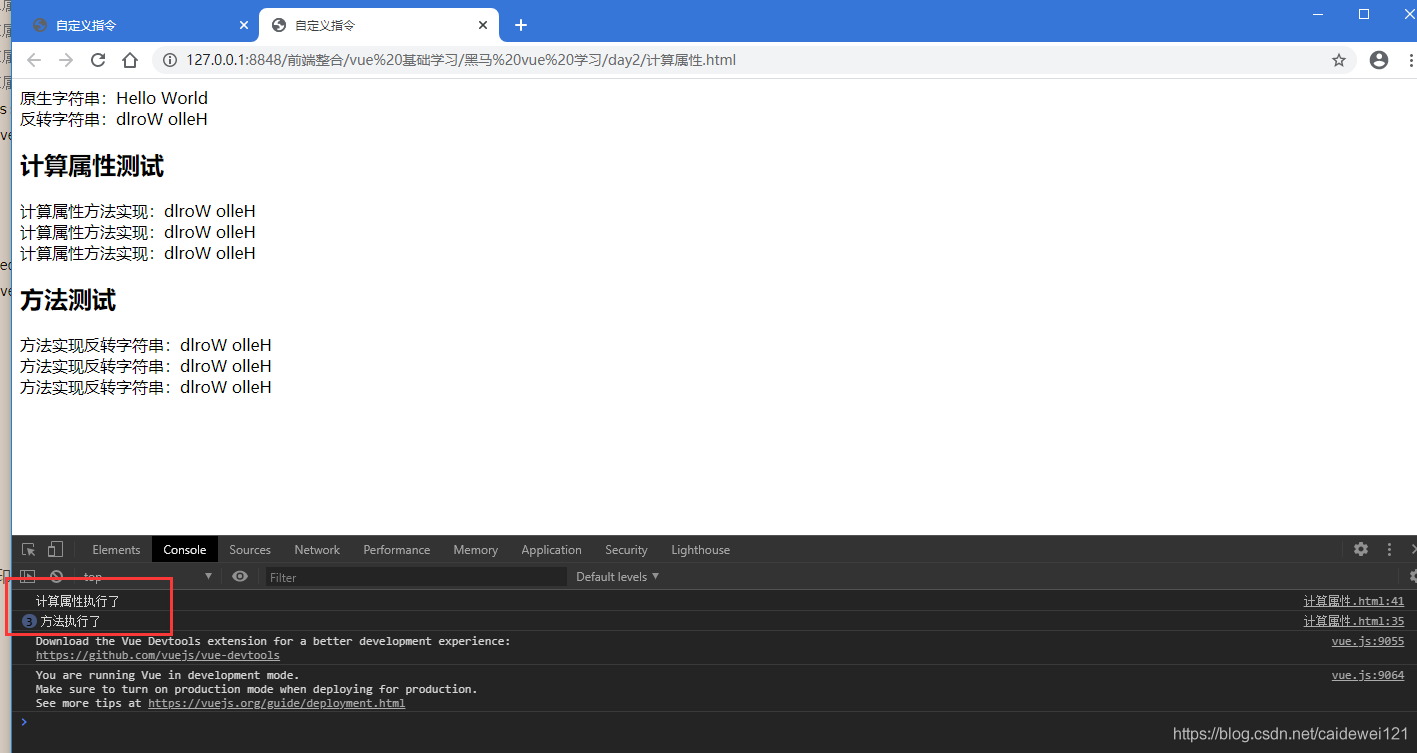
The calculated attribute is printed only once and only when it is called for the first time. This also proves that the performance of computational attributes is much better than that of methods in some aspects
5, Listener (watch)
A listener is simply a method that notifies the listener of changes in data.
Listeners are mainly used to listen for properties
The key word of the listener is watch, which is similar to calculating properties
5.1 basic use of listener
Next, we use a small case of stitching a user's last name and first name to demonstrate the use of the listener
<html>
<head>
<meta charset="utf-8">
<title>Listener title>
head>
<body>
<div id="app">
<div>Name: div>
<span>
<input type="text" v-model="firstName" />
span>
<div>Last name: div>
<span>
<input type="text" v-model="lastName" />
span>
<div>
{{fullname}}
div>
<div>
Calculation properties:{{fullName}}
div>
div>
<script src="../vue.js">script>
<script>
var app = new Vue({
el:"#app",
data:{
firstName: 'Gorit',
lastName: 'Smith',
fullname: 'Gorit Smith'
},
computed: {
fullName: function () {
return this.firstName + ' ' + this.lastName;
}
},
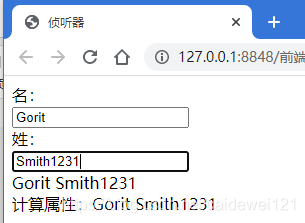
watch: {
// Attribute listening, corresponding to the attributes in data one by one
firstName: function(val) {
this.fullname = val + ' ' + this.lastName;
},
lastName: function(val) {
this.fullname = this.firstName + ' ' + val;
}
}
})
script>
body>
html>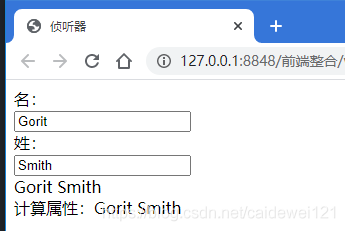
5.2 listener small instance, user authentication small demo
The usage scenarios of listeners are generally used in ajax authentication. Next, we will take a simple user authentication as an example to demonstrate the usage scenario of watch.
Basic verification process
- We use v-modal to implement two-way binding of users
- The listener is used to listen for changes in the user name entered by the user
- After user input, call the background interface to realize verification. Here, simplify the operation and use the timer to simulate the operation of "verification".
- Then return the verification results to the foreground.
<html>
<head>
<meta charset="utf-8">
<title>Account verification title>
head>
<body>
<div id="app">
<div>
<span>user name: span>
<span>
<input type="text" v-model="username">
span>
<span v-html="tip">span>
div>
div>
<script src="../vue.js">script>
<script>
var app = new Vue({
el:"#app",
data:{
username: '',
tip: ''
},
methods: {
checkName: function(username) {
let that = this;
// Interface calls, but timed tasks can be used to simulate interface calls
setTimeout(function() {
// Simulate the interface call. You need to use this to get the tip value, but this in setTimeout is windows, so you need to cache this outside
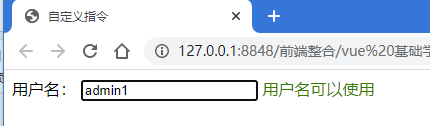
if (username === 'admin') {
that.tip = 'The account name already exists, please replace it'
} else {
that.tip = 'User name can be used'
}
},2000);
}
},
watch: {
// Listening properties are handled by functions
username: function(val) {
// Call the background interface to verify the legitimacy of the user name
this.checkName(val);
// Modify prompt information
this.tip = 'Validating...';
}
}
})
script>
body>
html>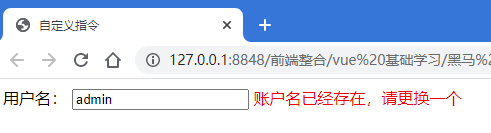
6, filters
6.1 basic use of filter
First, we need to customize a filter rule, and then add a filter rule to the interpolation expression to complete the basic use of the filter. We will introduce the basic definition of the filter below
Usage scenario:
- Interpolation expression
- Property binding
There are basically three ways to use filters
			<div>
				General filtration{{msg | upper}}
			div>
			<div>
				Cascade operation:{{msg | lower | upper}}
			div>
			<h3> Global attributes: attribute binding h3>
			<div :abc="msg | upper">
				test data
			div>
On the right of the vertical bar is the filter rule we defined
6.2 global filter
We take the case of the first letter size conversion as an example to demonstrate the use of the global filter by converting the first letter to uppercase and lowercase through the filter
<html>
	<head>
		<meta charset="utf-8">
		<title>filter title>
	head>
	<body>
		<div id="app">

			<input type="text" v-model="msg" />
			<h2>Global data h2>
			<div>
				title case {{msg | upper}}
			div>
			<div>
				Initial lowercase: {{msg | lower}}
			div>
			<div>
				Cascade operation:{{msg | lower | upper}}
			div>
			<h3> Global attributes: attribute binding h3>
			<div :abc="msg | upper">
				test data
			div>
		div>

		<script src="../vue.js">script>
		<script>
			// 1. Custom filter
			Vue.filter('upper', (val) => {
				// Filter initial capitalization business, handled by native js API
				return val.charAt(0).toUpperCase() + val.slice(1);
			})
			Vue.filter('lower', (val) => {
				// Filter initial lowercase business, processed by native js API
				return val.charAt(0).toLowerCase() + val.slice(1);
			})
			var app = new Vue({
				el:"#app",
				data:{
					msg: ''
				}
			})
		script>
	body>
html>
Cascade operation: explain that the cascade operation will be subject to the final one. Here, I convert the initial letter to lowercase first and then to uppercase, so I see the effect of uppercase.

Global attribute binding:

6.3 local filter
The object used by the local filter is filters. Like other objects, the results need to be returned
<html>
	<head>
		<meta charset="utf-8">
		<title>filter title>
	head>
	<body>
		<div id="app">
			<h3>Local instructions: inverting strings h3>
			<div>
				{{msg | reversed}}
			div>
		div>

		<script src="../vue.js">script>
		<script>
			var app = new Vue({
				el:"#app",
				data:{
					msg: ''
				},
				// Local filter instruction
				filters: {
					reversed: function(val) {
						return val.split('').reverse('').join('');
					}
				}
			})
		script>
	body>
html>
6.4 parameter filtering (small case, time format)
Let's use the case of time formatting to explain the parameters carried by the filter
<html>
	<head>
		<meta charset="utf-8">
		<title>filter title>
	head>
	<body>
		<div id="app">
			<div>
				Filter with parameters:{{date | format('yyyy-MM-dd')}}
			div>
		div>

		<script src="../vue.js">script>
		<script>

			Vue.filter('format', (value, arg1) => {
				// value is the date passed from the filter, and arg1 is the parameter (format) we want to pass in
				if (arg1 == 'yyyy-MM-dd') {
					var ret = '';
					ret = value.getFullYear() + '-' + (value.getMonth() + 1) + '-' + value.getDate();
					return ret;
				}
				return value;
			})
			var app = new Vue({
				el:"#app",
				data:{
					date: new Date()
				},
			})
		script>
	body>
html>
Of course, there are better schemes on the Internet. Here is just a demonstration of basic use

7, Vue life cycle explanation
7.1 life cycle phase
- Mount (initialize related properties)
- beforeCreate
- created
- beforeMount
- mounted
- Update (change operation of element or component)
- beforeUpdate
- updated
- Destroy (destroy related attributes)
- beforeDestory
- destroyed
7.2 usage scenarios
① beforeCreate is called after instance initialization and before data observation and event configuration. ② Created is called immediately after the instance is created. ③ beforeMount is called before the mount starts. (4) mountgd e| is replaced by the newly created vm.el, and the hook is invoked after mounting it to an instance. ⑤ Called when beforeUpdate data is updated, which occurs before the virtual DOM is patched. ⑥ Updated the virtual DOM is re rendered and patched due to data changes, after which the hook will be called. Before the beforeDestroy instance is destroyed, it is called. After the destroyed instance is destroyed, it is called. Use this. Destroy() when destroying
7.3 real cases
When developing Vue projects, for example, to load list data, we usually call the method to obtain the data list in the created method.