1. Calculation attribute
Calculation properties can be configured in options, so let's take a look at its introduction on the official website
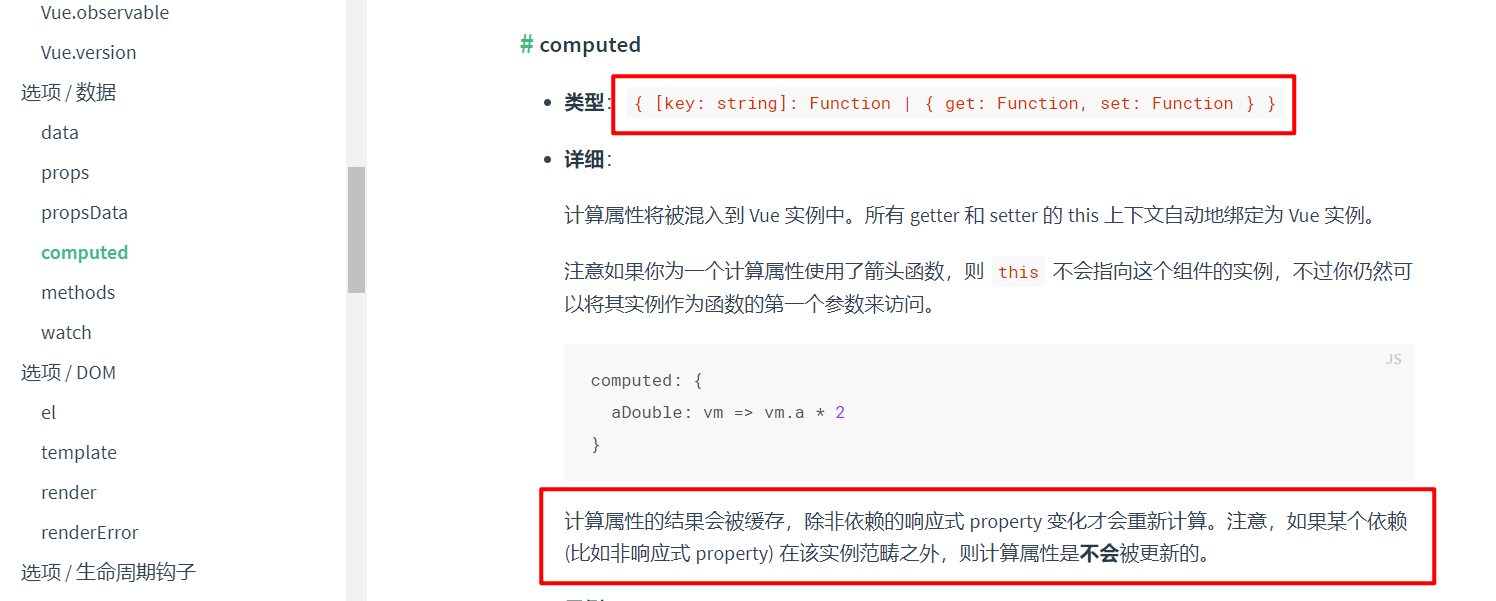
According to the document, its structure is calculated: {}, in which the object can be key: function or key: {get: function, set: function}
Its this execution is directed to the vue instance rather than inside the function, so the attributes in the vue can be accessed directly through this Property
Its results are cached
To sum up, the function of calculated attributes is the same as that of ordinary attributes, but it has more functions than ordinary attributes. Where ordinary attributes can be used, they can be replaced by calculated attributes
For example, when interpolating, you want to add the finished string after the value of each attribute. If it is written in the normal way
<div id="app">
  {{msg}} finished
</div>

 let app = new Vue({
    el: '#app',
    data: {
      msg: 'hello world!'
    }
  })
If the calculation of this expression is simple, it will have no impact, but if the calculation logic is complex, it will affect the readability. Replace it with calculation attributes
<div id="app">
  {{msg}}
</div>

let app = new Vue({
  el: '#app',
  data: {

  },
  computed: {
    msg: function(){
      return 'hello world!' + ' finished'
    }
  }
})
The effect is the same, but it has better readability and efficiency than ordinary attributes. It can also use the methods of get and set. When assigning a value to this attribute, the set function will be executed, and when using this attribute, the get function will be called
2.v-bind binding
This instruction can dynamically bind attribute values, style values and class values to html tags, and can realize responsive functions through it
Property binding
The most basic usage is to bind the attribute of the tag, such as the value attribute of the input tag. In the program, you can dynamically switch the value of the input box
<div id="app">
  <input v-bind:value="value">
</div>

let app = new Vue({
  el: '#app',
  data: {
    value: 'aaa'
  },
})

After using the program to modify the value variable, the value on the interface will also change in real time

If you do not use v-bind to modify an attribute, its value is value. After adding this instruction, vue will parse the value of the attribute as a variable. When the value of the variable changes, the value of the tag will also change
Class binding
In addition to binding attribute values, the v-bind instruction can also dynamically bind classes. It has two binding methods
The first method is to directly pass in an object. The key of the object will be treated as the class name, and the value of the object will be resolved as a variable. This class will be added to the specified label only when the variable is true
<div id="app">
  <input v-bind:value="value" v-bind:class="{active: isactive}">
</div>

let app = new Vue({
  el: '#app',
  data: {
    value: 'aaa',
    isactive: true
  },
})
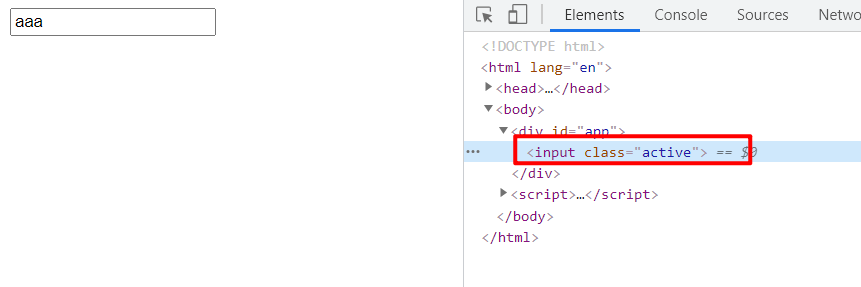
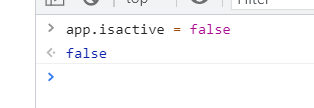
After dynamically modifying the value of isactive variable through the console, the class on the corresponding label is removed

The second way to bind class is to pass in an array. The values in the array will be parsed as variables. The final value of class is the value of variables in the array
<div id="app">
  <input v-bind:value="value" v-bind:class="[class1, class2]">
</div>

let app = new Vue({
  el: '#app',
  data: {
    value: 'aaa',
    isactive: true,
    class1: 'class1val',
    class2: 'class2val',
  },
})

The two methods can also be mixed, and the object method can also be used directly in the array
Style binding
The binding style of v-bind instruction is the same as that of class. There are two methods: object and array
When a single quotation mark is added to an object, it will be treated as an ordinary string
<div id="app">
  <input v-bind:value="value" v-bind:style="{fontSize: fontSize + 'px'}">
</div>

let app = new Vue({
  el: '#app',
  data: {
    value: 'aaa',
    fontSize: 20
  },
})
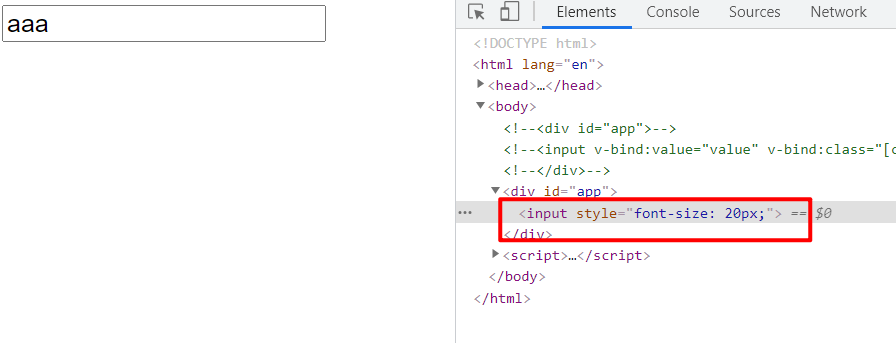
Array binding is the same as class binding
Abbreviation
Because attribute binding is too common, vue provides an abbreviation for it and directly uses: instead of v-bind:, for example, when binding the value, it does not need to be written as v-bind:value, but directly as: value
3.v-on listening events
The v-on instruction can listen to all events that occur on the tag. You only need to specify the event name to listen to a specific event and process it
<div id="app">
  <span v-on:click="handleClk">aaa</span>
</div>

let app = new Vue({
  el: '#app',
  methods: {
    handleClk(){
      console.log('clicked...')
    }
  }
})

By default, when no parameters are passed, the first parameter is the event object
let app = new Vue({
  el: '#app',
  methods: {
    handleClk(event){
      console.log(event)
      console.log('clicked...')
    }
  }
})

If you want to pass in multiple objects and also want to use event objects, the writing method of the first parameter during listening is $event
<div id="app">
  <span v-on:click="handleClk($event, 'p1')">aaa</span>
</div>

let app = new Vue({
  el: '#app',
  methods: {
    handleClk(event, p){
      console.log(event)
      console.log(p)
      console.log('clicked...')
    }
  }
  })

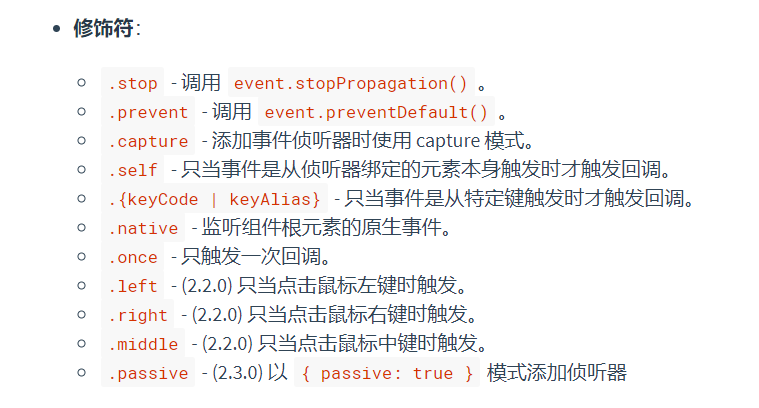
For events, the instruction also provides event modifiers for finer control of event processing. The usage is v-on:click Event modifiers. All currently supported modifiers can be found in the api
Abbreviation
Similar to v-bind, event listening is also a very frequent operation. Therefore, vue provides an abbreviation. The abbreviation of v-on:click is @ click
4.v-if, v-else and v-else-if judgment
In order to dynamically display or hide the elements on the page according to the conditions, vue provides the v-if instruction. Its function is the same as that of ordinary control statement blocks. When the conditions are met, it renders the specified label
<div id="app">
  <span v-if="name == 'zhangsan'">zhangsan</span>
  <span v-else-if="name == 'lisi'">lisi</span>
  <span v-else="">wangwu</span>
</div>

let app = new Vue({
  el: '#app',
  data:{
    name: 'zhangsan'
  }
})

After changing the name value

Only when the expression of the instruction is true, the label of the instruction or all labels contained by the instruction will be displayed
The difference between v-show and v-if
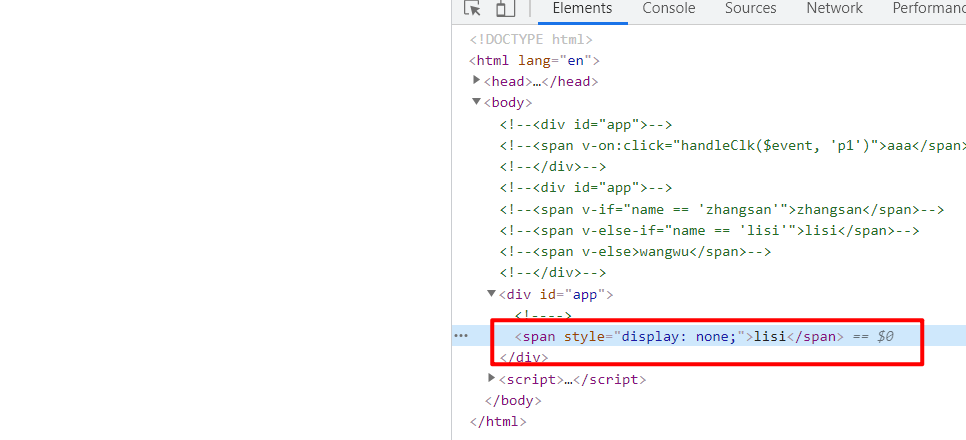
The functions of the v-show instruction and the v-if instruction are the same. They both judge whether to display the specified label through an expression. The only difference is that the hiding of the v-show instruction is based on the style, and the element will not disappear, while the hiding of the v-if instruction will delete the element
<div id="app">
  <span v-if="show">zhangsan</span>
  <span v-show="show">lisi</span>
</div>

let app = new Vue({
  el: '#app',
  data:{
    show: false
  }
})
5.v-for traversal
The three basic structures of the language are sequence, selection and loop. v-if implements selection and v-for implements loop. Using v-for can traverse arrays or objects, and all labels surrounded by v-for instructions will be generated by loop
Traversal array
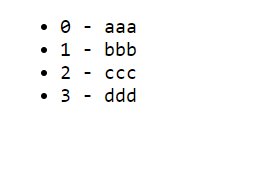
The v-for instruction can traverse each element in the array in turn. It supports a single parameter or two parameters. The first represents the element currently being traversed in the array and the other represents the current index value
  let app = new Vue({
    el: '#app',
    data:{
      items: ['aaa', 'bbb', 'ccc', 'ddd']
    }
  })

 <div id="app">
  <ul>
    <li v-for="(item, index) in items">{{index}} - {{item}}</li>
  </ul>
</div>
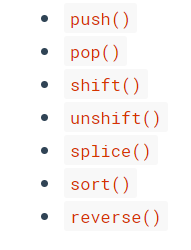
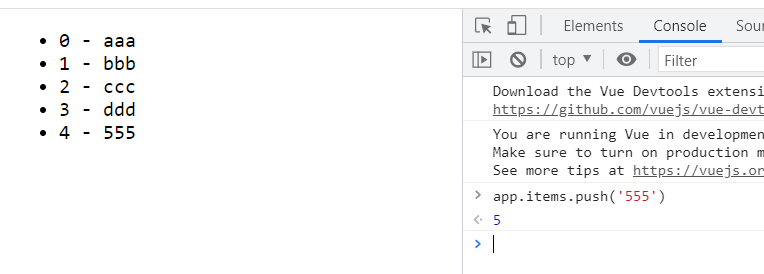
When some methods in the array are used to add, delete and modify the array, the data on the page will also change in real time. The specific methods are as follows
Traversal object
The method of traversing an object is basically similar to that of an array. It supports three parameters: the first is the value value, the second is the key value, and the third is the index value
  let app = new Vue({
    el: '#app',
    data:{
      items: ['aaa', 'bbb', 'ccc', 'ddd'],
      obj: {
        name: 'zhangsan',
        age: 18,
        addr: 'china'
      }
    }
  })

  <div id="app">
  <ul>
    <li v-for="(item, index) in items">{{index}} - {{item}}</li>
  </ul>
  <ul>
    <li v-for="(value, key, index) in obj">{{index}} - {{key}} - {{value}}</li>
  </ul>
</div>
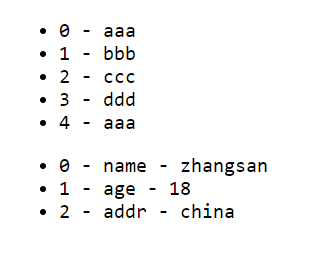
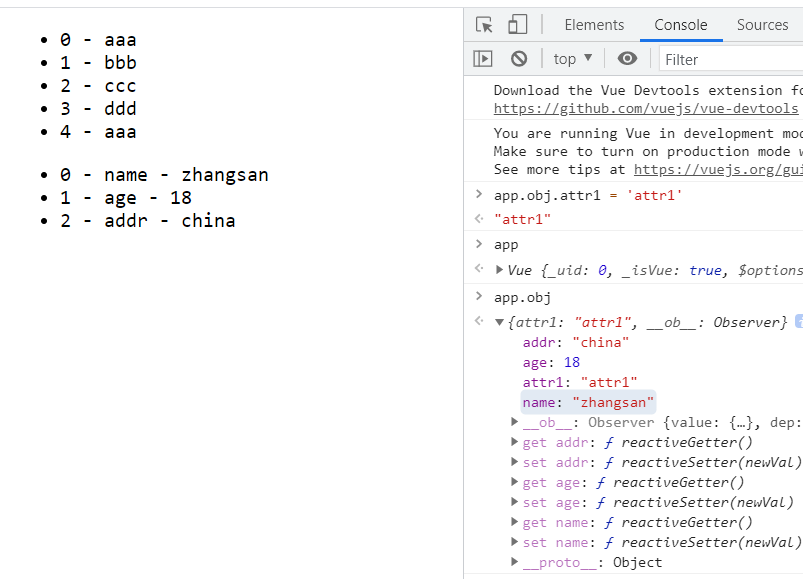
Dynamically adding attributes to an object will not cause the page to update in real time, but modifying the value of existing attributes will cause the page to update in real time
Specify key
When using the v-for instruction in a component, you must specify a key value for each component, which must be unique
6. Filter
The function of the filter is to further process the value of Vue variable through the pipeline. Those written in the options of app instance are called local filters, and those directly registered with Vue are called global filters. Local filters are preferred
<div id="app">
  <h3>{{val | lower}}</h3>
</div>

let app = new Vue({
  el: '#app',
  data:{
    val: 'TEST'
  },
  filters:{
    lower(data){
      return data.toLowerCase()
    }
  }
})
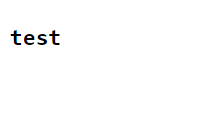
The meaning of the code is to call the lower function when outputting the value of the val variable, and then output the return value of the lower function after processing
Multiple filters can also be used at the same time. You only need to use | connection, and the returned result is the value returned by the last filter
7.v-model
The v-model instruction can realize the bidirectional binding function of forms
When there is no v-model, you can use v-bind to bind values
<div id="app">
  <input :value="val">
  <h3>val is: {{val}}</h3>
</div>

let app = new Vue({
  el: '#app',
  data:{
    val: 'aaa'
  }
})
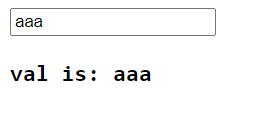
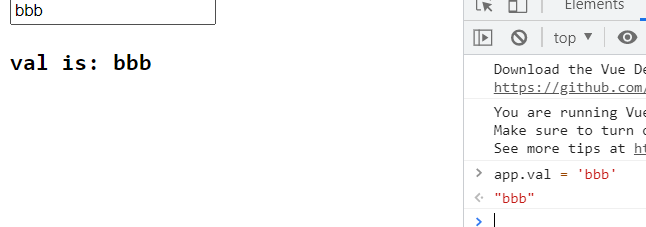
Modify the value directly through the console, and the page can be updated in real time
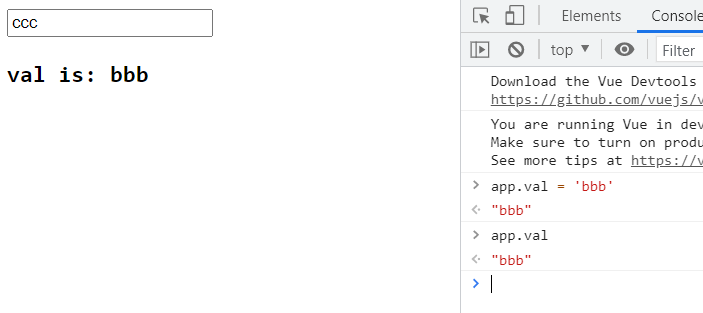
However, when you modify it on the page, the variable value in the instance does not change
The v-model instruction can realize bidirectional changes. First, use v-model to replace v-bind
<div id="app">
  <input v-model="val">
  <h3>val is: {{val}}</h3>
</div>
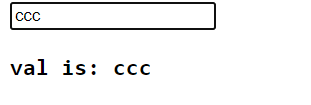
At this point, you can change the value of the variable in the instance through the input box
Bidirectional binding principle
V-bind provides binding from instance objects to pages. V-on can listen to input events in input boxes and handle them in instances. Therefore, two-way binding can be realized by combining v-bind and v-on
<div id="app">
  <input :value="val" @input="clk">
  <h3>val is: {{val}}</h3>
</div>

let app = new Vue({
  el: '#app',
  data:{
    val: 'aaa'
  },
  methods:{
    clk(event){
      this.val = event.target.value
    }
  }
})

Modifier
Like the event instruction, the v-model instruction also provides some modifiers. The usage is the same as that of the v-on instruction
