catalogue
(2) Local application (instruction)
(1) Local application - computer case
(2) Local application - picture switching case
(3) Local application - Notepad case
(4) Web application - weather query case
#END (for details, you can watch the black horse vue entry-level version of station b)
1, Introduction to Vue
1.JavaScript framework
2. Simplify Dom operation
3. Responsive data driven
4. What is the scope of Vue instance?
Vue manages the elements hit by the el option and its internal child elements
5. Can I use other selectors?
You can use other selectors, such as class selectors, but ID selectors are recommended
6. Can I set other dom elements?
Other double tags can be used, but HTML tags and body tags cannot be used
2, Vue Basics
(1) Simple knowledge
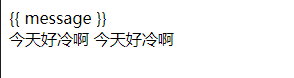
1.el mount point (corresponding to the fifth point in one: other selectors can be used, such as class selectors, but ID selectors are recommended)
1) Code:
<body>
    {{ message }}
    <div id="app" class="app">
      {{ message }}
      <span>{{ message }}</span>
    </div>
    <!-- Development environment version with helpful command warnings -->
    <script src="https://cdn.jsdelivr.net/npm/vue/dist/vue.js"></script>
    <script>
      //Any label can be nested inside the element of the el command
      var app = new Vue({
        //el: "#app",
        //el: ".app",
        el: "div",
        data: {
          message: "It's so cold today",
        },
      });
    </script>
  </body>
2) Results:
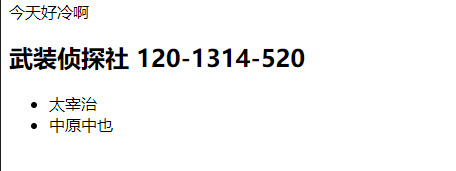
2.data: data object
1) Basic knowledge
① The data used in Vue is defined in data
② Types of complex data that can be written in data
③ When rendering complex type data, follow js syntax
2) Code:
<body>
    <div id="app" class="app">
      {{ message }}
      <h2>{{ school.name }} {{ school.mobile }}</h2>
      <ul>
        <li>{{ campus[0] }}</li>
        <li>{{ campus[1] }}</li>
      </ul>
    </div>
    <!-- Development environment version with helpful command warnings -->
    <script src="https://cdn.jsdelivr.net/npm/vue/dist/vue.js"></script>
    <script>
      //Any label can be nested inside the element of the el command
      var app = new Vue({
        el: "#app",
        data: {
          message: "It's so cold today",
          school: {
            name: "Armed Detective Agency",
            mobile: "120-1314-520",
          },
          campus: ["Taizaizhi", "Nakahara Chuya ", "Kiyoda alone"],
        },
      });
    </script>
3) Results:
(2) Local application (instruction)
1. Local application: content binding, event binding; Display switching and attribute binding; List loop, form element binding
2. Content binding and event binding
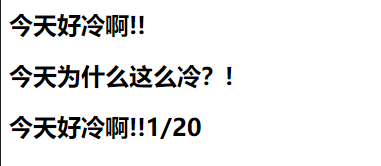
1)v-text:
① Function: set the content of the label (textContent)
② The default writing method will replace all contents, and the specified contents can be replaced by the difference expression {}}
③ Internal support for writing expressions
④ Code:
<body>
    <div id="app" class="app">
      <h2 v-text="message + '!'">1/20</h2>
      <h2 v-text="info + '!'">1/20</h2>
      <h2>{{ message +'!' }}1/20</h2>
    </div>
    <!-- Development environment version with helpful command warnings -->
    <script src="https://cdn.jsdelivr.net/npm/vue/dist/vue.js"></script>
    <script>
      //Any label can be nested inside the element of the el command
      var app = new Vue({
        el: "#app",
        data: {
          message: "It's so cold today!",
          info: "Why is it so cold today?",
        },
      });
    </script>
⑤ Results:
2)v-html:
① innerHTML tag settings
② HTML structure in the content will be parsed into tags
③ The v-text instruction will only parse into text regardless of the content
④ v-text is used for parsing text and v-html is used for parsing HTML structure
⑤ Code:
<body>
    <!-- 2.html structure -->
    <div id="app">
      <h2 v-html="content"></h2>
      <h2 v-text="content"></h2>
    </div>
    <!-- 1.Development environment version with helpful command warnings -->
    <script src="https://cdn.jsdelivr.net/npm/vue/dist/vue.js"></script>
    <script>
      //3. Create Vue instance
      var app = new Vue({
        el: "#app",
        data: {
          content: "<a href='https://baidu. Com '> cheers to Wenhao wild dog < / a > ",
        },
      });
    </script>
  </body>
⑥ Results:

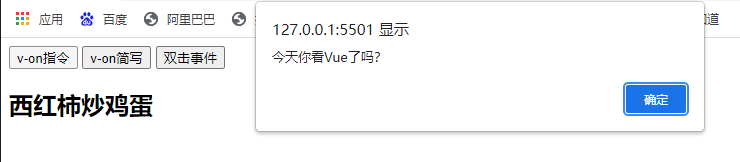
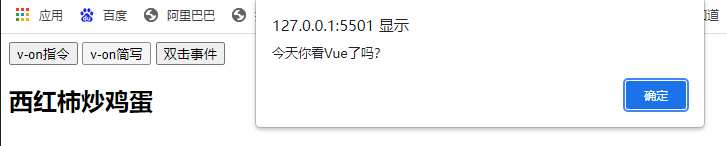
3) v-on Foundation
① Function: bind events for elements
② The event name does not need to be written as on, and the instruction can be abbreviated as@
③ The bound method is defined in the methods property
④ Method can access the data defined in data through this keyword
⑤ Code:
<body>
    <!-- 2.html structure -->
    <div id="app">
      <input type="button" value="v-on instructions" v-on:click="doIt" />
      <input type="button" value="v-on Abbreviation" @click="doIt" />
      <input type="button" value="Double click event" @dblclick="doIt" />
      <h2 @click="changeFood">{{food}}</h2>
    </div>
    <!-- 1.Development environment version with helpful command warnings -->
    <script src="https://cdn.jsdelivr.net/npm/vue/dist/vue.js"></script>
    <script>
      //3. Create Vue example
      var app = new Vue({
        el: "#app",
        data: {
          food: "Scrambled egg with tomato",
        },
        methods: {
          doIt: () => {
            alert("Today you see Vue Did you?");
          },
          changeFood: function () {
            this.food += "it's so delicious.!";
          },
        },
      });
    </script>
⑥ Results: (three button click results and text click events in sequence)


Supplement:
① The method of event binding is written in the form of function call, and user-defined parameters can be passed in
② When defining a method, you need to define formal parameters to accept the incoming arguments
③ Follow the events Modifiers can limit events
④ . Enter can limit the triggered case to enter
⑤ There are many kinds of event modifiers
⑥ Code:
<body>
    <!-- 2.html structure -->
    <div id="app">
      <input type="button" value="click" v-on:click="doIt(666,'Buddy')" />
      <!-- Event modifier  .enter It belongs to an event modifier-->
      <input type="text" @keyup.enter="sayHi" />
      <input type="button" value="Double click event" @dblclick="doIt" />
    </div>
    <!-- 1.Development environment version with helpful command warnings -->
    <script src="https://cdn.jsdelivr.net/npm/vue/dist/vue.js"></script>
    <script>
      //3. Create Vue example
      var app = new Vue({
        el: "#app",
        data: {
          food: "Scrambled egg with tomato",
        },
        methods: {
          doIt: (p1, p2) => {
            console.log(p2 + "do IT" + p1);
          },
          sayHi: function () {
            alert("hi");
          },
        },
      });
    </script>
⑦ Result: (events from left to right)


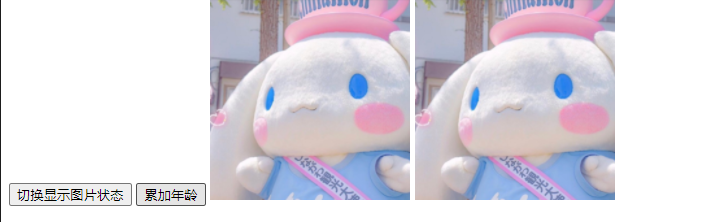
4) v-show instruction
① Function: switch the display state of elements according to the true or false of the expression
② Principle: modify the display of elements to realize display and hiding
③ The contents behind the instruction will eventually be parsed into Boolean values
④ Elements with a value of true are displayed and elements with a value of false are hidden
⑥ After the data changes, the display status of the corresponding element will be updated synchronously
⑦ Code:
<body>
    <div id="app">
      <button @click="changeIsShow">Toggle display picture status</button>
      <button @click="addAge">Cumulative age</button>
      <img v-show="isShow" src="1.jpg" alt="" srcset="" />
      <img v-show="age>=20" src="1.jpg" alt="" srcset="" />
    </div>
  </body>
  <!-- 1.Development environment version with helpful command warnings -->
  <script src="https://cdn.jsdelivr.net/npm/vue/dist/vue.js"></script>
  <script>
    var app = new Vue({
      el: "#app",
      data: {
        isShow: false,
        age: 17,
      },
      methods: {
        changeIsShow: function () {
          this.isShow = !this.isShow;
        },
        addAge: function () {
          this.age++;
        },
      },
    });
  </script>
⑧ Results:
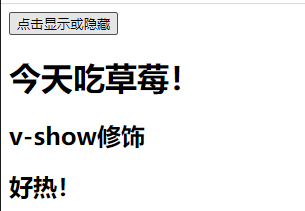
5) v-if instruction
① Function: switch the display state of elements according to the true or false of the expression
② Principle: switch the display state by manipulating dom elements
③ The value of the expression is true, and the element exists in the dom tree; false to remove from the dom tree
④ Frequently switch v-show, otherwise use v-if, the switching consumption of the former is small
⑤ Code:
<body>
    <div id="app">
      <button @click="toggleIsShow">Click to show or hide</button>
      <h1 v-if="isShow">Eat strawberries today!</h1>
      <h2 v-show="isShow">v-show modification</h2>
      <h2 v-if="temperature>=30">so hot!</h2>
    </div>
  </body>
  <!-- 1.Development environment version with helpful command warnings -->
  <script src="https://cdn.jsdelivr.net/npm/vue/dist/vue.js"></script>
  <script>
    var app = new Vue({
      el: "#app",
      data: {
        isShow: false,
        temperature: 32,
      },
      methods: {
        toggleIsShow: function () {
          this.isShow = !this.isShow;
        },
      },
    });
  </script>
⑥ Results:
6) v-bind instruction (set the attributes of the element, and the attributes are written inside the element)
v-bind: attribute + expression
① Function: bind attributes for elements
② Abbreviation: omit v-bind directly, and only keep: attribute name
③ You need to add or delete class es dynamically. It is recommended to use objects
④ Code:
<body>
    <div id="app">
      <img v-bind:src="imgSrc" alt="" />
      <br />
      <!-- More commonly used -->
      <img
        :src="imgSrc"
        alt=""
        :title="imgTitle+'!!!'"
        :class="isActive?'active':''"
        @click="toggleActive"
      />
      <br />
      <!-- Object writing
    :class="{active:isActive}" signify active The value of depends on isActive
        -->
      <img
        :src="imgSrc"
        alt=""
        :title="imgTitle+'!!!'"
        :class="{active:isActive}"
        @click="toggleActive"
      />
    </div>
  </body>
  <!-- 1.Development environment version with helpful command warnings -->
  <script src="https://cdn.jsdelivr.net/npm/vue/dist/vue.js"></script>
  <script>
    var app = new Vue({
      el: "#app",
      data: {
        imgSrc: "1.jpg",
        imgTitle: "Cinnamoroll ",
        isActive: false,
      },
      methods: {
        toggleActive: function () {
          this.isActive = !this.isActive;
        },
      },
    });
  </script>
⑤ Result: text will be displayed when the mouse moves over the picture
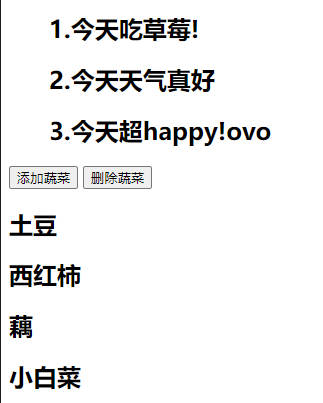
7)v-for
① Generate list structure from data
② Often used in conjunction with arrays
③ The syntax is (item, index) in data name (item represents each item and index represents subscript)
④ item and index can be used together with other instructions
⑤ The update of array length will be synchronized to the page, which is responsive
⑥ Code:
<body>
<div id="app">
<ul>
<h2 v-for="(it,index) in arr">{{ index+1 }}.today{{ it }}</h2>
</ul>
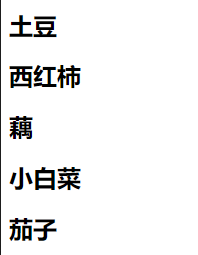
<button @click="add">Add vegetables</button>
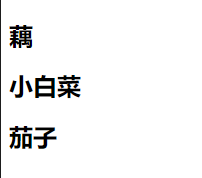
<button @click="remove">Delete vegetables</button>
<h2 v-for="item in vagetables" v-bind:title="item.name">{{item.name}}</h2>
</div>
</body>
<!-- 1.Development environment version with helpful command warnings -->
<script src="https://cdn.jsdelivr.net/npm/vue/dist/vue.js"></script>
<script>
var app = new Vue({
el: "#app",
data: {
arr: ["Eat strawberries!", "It's a lovely day", "exceed happy!ovo"],
vagetables: [
{ name: "potato" },
{ name: "Tomatoes" },
{ name: "Lotus root" },
{ name: "a variety of Chinese cabbage" },
],
},
methods: {
add: function () {
this.vagetables.push({ name: "eggplant" });
},
remove: function () {
this.vagetables.shift();
},
},
});
</script>⑦ Results:
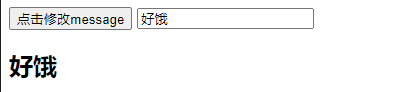
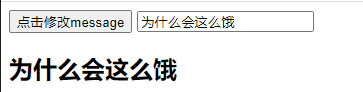
8) v-model (bidirectional data binding)
① Function: conveniently set and obtain the value of form elements
② The bound data is associated with the form element value
③ Bound data < - > value of form element
④ Code:
<body>
    <div id="app">
      <input
        type="button"
        value="Click Modify message"
        @click="setMessage('Why are you so hungry')"
      />
      <!-- Enter text in the text box and press enter -->
      <input type="text" v-model="message" @keyup.enter="getMessage" />
      <h2>{{ message }}</h2>
    </div>
  </body>
  <!-- 1.Development environment version with helpful command warnings -->
  <script src="https://cdn.jsdelivr.net/npm/vue/dist/vue.js"></script>
  <script>
    var app = new Vue({
      el: "#app",
      data: {
        message: "So hungry",
      },
      methods: {
        getMessage: function () {
          alert(this.message);
        },
        setMessage: function (p1) {
          this.message = p1;
        },
      },
    });
  </script>
</html>
⑤ Results:
3, axios and Vue
1.axios
① You must import it before you can use it
② Use get or post to send the corresponding request
③ The callback function in the then method is triggered when the request succeeds or fails
④ The response content or error information can be obtained through the formal parameters of the callback function
⑤ Code:
<body>
    <input type="button" value="get request" class="get" />
    <input type="button" value="post request" class="post" />
  </body>
  <script src="https://unpkg.com/axios/dist/axios.min.js"></script>
  <script>
    /*
    Interface 1: random joke
    Request address: https://autumnfish.cn/api/joke/list
    Request method: get
    Request parameter: num (number of jokes, number)
    Response content: random jokes
    */
    document.querySelector(".get").onclick = function () {
      axios.get("https://autumnfish.cn/api/joke/list?num=3").then(
        (value) => {
          console.log(value);
        },
        (reason) => {
          console.log(reason);
        }
      );
    };
    /*
    Interface 2: user registration
    Request address: https://autumnfish.cn/api/user/reg
    Request method: post
    Request parameters: username (user name, string)
    Response content: Registration success or failure
    */
    document.querySelector(".post").onclick = () => {
      axios
        .post("https://autumnfish.cn/api/user/reg", { username: "sehun" })
        .then(
          (value) => {
            console.log(value);
          },
          (reason) => {
            console.warn(reason);
          }
        );
    };
  </script>
⑥ Results:


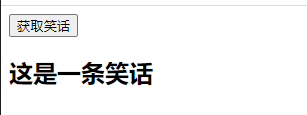
2. Combining axios and vue
① this in the axios callback function has been changed and the data in data cannot be accessed
② Save this and use it directly in the callback function
③ The biggest difference between and local application is the change of data source
④ Code:
<body>
    <div id="app">
      <input type="button" value="Get jokes" class="get" @click="getJoke" />
      <h2>{{joke}}</h2>
    </div>
  </body>
  <!-- Available on the official website axios Online address -->
  <script src="https://unpkg.com/axios/dist/axios.min.js"></script>
  <!-- 1.Development environment version with helpful command warnings -->
  <script src="https://cdn.jsdelivr.net/npm/vue/dist/vue.js"></script>
  <script>
    /*
    Interface: randomly get a joke
    Request address: https://autumnfish.cn/api/joke
    Request method: get
    Request parameters: None
    Response content: random jokes
    */
    var app = new Vue({
      el: "#app",
      data: {
        joke: "This is a joke",
      },
      methods: {
        getJoke: function () {
          var that = this; //Prevent the subsequent sequence this from changing
          axios.get("https://autumnfish.cn/api/joke").then(
            (value) => {
              that.joke = value.data;
            },
            (reason) => {
              console.warn(reason);
            }
          );
        },
      },
    });
  </script>
⑤ Results:

4, Case
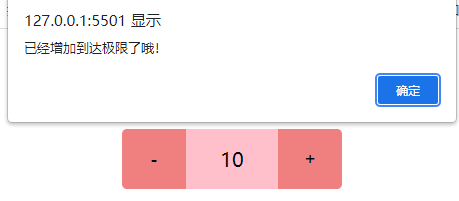
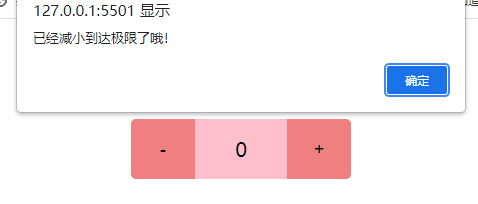
(1) Local application - computer case
1. Code:
1) html structure and vue
<body>
    <!-- html structure -->
    <div id="app">
      <!-- Counter function area -->
      <div class="input_num">
        <button class="left" @click="sub">-</button>
        <div class="center">{{ num }}</div>
        <button class="right" @click="add">+</button>
      </div>
    </div>
  </body>
  <!-- 1.Development environment version with helpful command warnings -->
  <script src="https://cdn.jsdelivr.net/npm/vue/dist/vue.js"></script>
  <!-- code -->
  <script>
    //Create vue instance
    var app = new Vue({
      el: "#app",
      data: {
        num: 0,
      },
      methods: {
        add: function () {
          if (this.num < 10 && this.num >= 0) {
            this.num++;
          } else {
            alert("It has increased to the limit!");
          }
        },
        sub: function () {
          if (this.num <= 10 && this.num > 0) {
            this.num--;
          } else {
            alert("It has reached the limit!");
          }
        },
      },
    });
  </script>
2) css Style
    * {
        margin: 0;
        padding: 0;
        box-sizing: border-box;
      }
      .input_num {
        margin: 100px auto;
        display: flex;
        justify-content: space-between;
        width: 220px;
        height: 60px;
        line-height: 60px;
        border-radius: 5px;
        overflow: hidden;
      }
      .input_num .left,
      .input_num .right {
        display: inline-block;
        width: 70px;
        border: none;
        background-color: lightcoral;
        text-align: center;
        font-size: 18px;
      }
      .input_num .center {
        display: inline-block;
        text-align: center;
        width: 100px;
        background-color: pink;
        font-size: 20px;
      }
2. Results:
(2) Local application - picture switching case
1. Code:
1) html structure and vue
<body>
    <div id="app" class="box">
      <img :src="imgArr[index]" alt="" />
      <div class="pre" @click="prev" v-show="index != 0"></div>
      <div class="next" @click="next" v-show="index < imgArr.length - 1"></div>
    </div>
  </body>
  <!-- 1.Development environment version with helpful command warnings -->
  <script src="https://cdn.jsdelivr.net/npm/vue/dist/vue.js"></script>
  <script>
    var app = new Vue({
      el: "#app",
      data: {
        imgArr: [
          "https://gimg2.baidu.com/image_search/src=http%3A%2F%2Fb-ssl.duitang.com%2Fuploads%2Fitem%2F201701%2F03%2F20170103130526_ytKBz.jpeg&refer=http%3A%2F%2Fb-ssl.duitang.com&app=2002&size=f9999,10000&q=a80&n=0&g=0n&fmt=jpeg?sec=1645513923&t=ebb1e89f026809c5c362b2846d807ba3",
          "https://gimg2.baidu.com/image_search/src=http%3A%2F%2Fci.xiaohongshu.com%2Fcc1916b4-9768-cb53-1d67-e7b273f818cd%3FimageView2%2F2%2Fw%2F1080%2Fformat%2Fjpg&refer=http%3A%2F%2Fci.xiaohongshu.com&app=2002&size=f9999,10000&q=a80&n=0&g=0n&fmt=jpeg?sec=1645513923&t=cdb9cf0657407ef7f3c5670471b60faf",
          "https://gimg2.baidu.com/image_search/src=http%3A%2F%2Fci.xiaohongshu.com%2F3f05a7ae-521c-dc4b-c87a-69624597ec82%3FimageView2%2F2%2Fw%2F1080%2Fformat%2Fjpg&refer=http%3A%2F%2Fci.xiaohongshu.com&app=2002&size=f9999,10000&q=a80&n=0&g=0n&fmt=jpeg?sec=1645513923&t=0388ae0caa02d4ebb7736fa622e5d3c3",
          "https://gimg2.baidu.com/image_search/src=http%3A%2F%2Fc-ssl.duitang.com%2Fuploads%2Fblog%2F202101%2F24%2F20210124164813_2296b.jpg&refer=http%3A%2F%2Fc-ssl.duitang.com&app=2002&size=f9999,10000&q=a80&n=0&g=0n&fmt=jpeg?sec=1645513923&t=22ea13320dd525d8d8ac5c59a1b75573",
          "https://gimg2.baidu.com/image_search/src=http%3A%2F%2Fc-ssl.duitang.com%2Fuploads%2Fitem%2F202002%2F19%2F20200219234319_lccfj.jpg&refer=http%3A%2F%2Fc-ssl.duitang.com&app=2002&size=f9999,10000&q=a80&n=0&g=0n&fmt=jpeg?sec=1645513923&t=47dbd2728ed6f82ca8f7b41b07f818ee",
        ],
        index: 0,
      },
      methods: {
        prev: function () {
          this.index--;
        },
        next: function () {
          this.index++;
        },
      },
    });
  </script>
2)css
    * {
      margin: 0;
      padding: 0;
      box-sizing: border-box;
    }
    .box {
      position: relative;
      width: 800px;
      height: 600px;
      margin: 100px auto;
    }
    .box img {
      position: absolute;
      top: 0;
      left: 0;
      display: block;
      width: inherit;
      height: inherit;
      object-fit: cover;
    }
    .box .pre,
    .box .next {
      position: absolute;
      top: 50%;
      transform: translateY(-50%);
      width: 60px;
      height: 60px;
      border-radius: 50%;
      z-index: 1;
      cursor: pointer;
      background-color: rgba(87, 85, 85, 0.4);
    }
    .box .pre {
      left: 10px;
    }
    .box .next {
      right: 10px;
    }
2. Results:


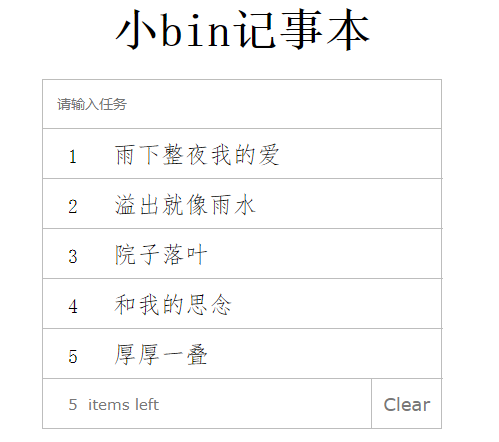
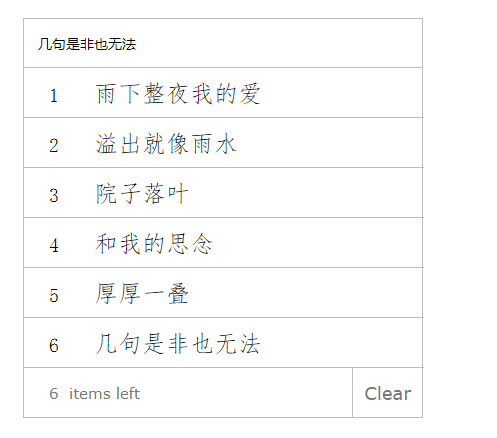
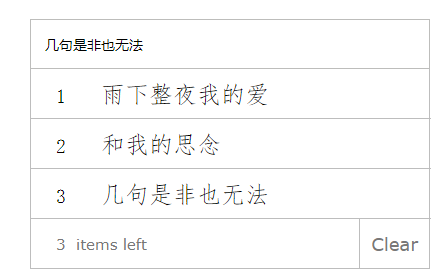
(3) Local application - Notepad case
1. Code:
1) html structure and vue
<body>
<!-- Main area -->
<section id="app">
<!-- Input box -->
<header>
<h1>Small bin Notepad</h1>
<!-- v-model Bidirectional binding data v-on Bind events for input fields -->
<input
v-model="inputMes"
@keyup.enter="add"
class="search"
type="text"
autofocus="autofocus"
autocomplete="off"
placeholder="Please enter a task"
/>
</header>
<div class="center">
<ul>
<!-- v-for Produce list structure according to array
mouseover: Mouse in event mouseleave: Mouse out event
-->
<li
v-for="(item,index) in list"
@mouseover="isShow"
@mouseleave="noShow"
>
<div class="center_id">{{ index+1 }}</div>
<div class="center_mess">{{item}}</div>
<div class="center_r" v-show="show" @click="remove(index)">×</div>
</li>
</ul>
</div>
<!-- bottom -->
<!--Hide the bottom when there is no data footer Or just hide the sub box inside-->
<footer>
<div class="footer_left" v-if="list.length != 0">
<!-- adopt lenth Method to get the length of the array -->
<span>{{list.length}}</span> items left
</div>
<div class="footer_right" @click="clear" v-show="list.length != 0">
Clear
</div>
</footer>
</section>
</body>
<!-- 1.Development environment version with helpful command warnings -->
<script src="https://cdn.jsdelivr.net/npm/vue/dist/vue.js"></script>
<script>
var app = new Vue({
el: "#app",
data: {
list: [
"Rain all night my love",
"Overflow is like rain",
"Yard leaves",
"And my thoughts",
"A thick stack",
],
inputMes: "",
show: false,
},
methods: {
add: function () {
this.list.push(this.inputMes);
},
//Show x symbol
isShow: function () {
this.show = true;
},
noShow: function () {
this.show = false;
},
remove: function (index) {
this.list.splice(index, 1);
//index stands for the number of deleted items. 1 stands for one deletion
},
clear: function () {
this.list = [];
},
},
});
</script>2) css Style
    <style>
      * {
        margin: 0;
        padding: 0;
        box-sizing: border-box;
      }
      li {
        list-style: none;
      }
      header {
        margin: 0px auto;
        width: 400px;
        height: 150px;
        margin-top: 100px;
      }
      header h1 {
        height: 100px;
        font-size: 46px;
        font-family: serif;
        line-height: 100px;
        text-align: center;
        background-color: #fff;
      }
      header .search {
        height: 50px;
        width: 400px;
        font-size: 14px;
        text-indent: 1em;
        border: 0.5px solid #bdbdbb;
        outline: none;
      }
      .center {
        margin: 0 auto;
        width: 400px;
        min-height: 0px;
        border: 1px solid #bdbdbd;
        border-top: none;
        border-bottom: none;
      }
      .center li {
        border-bottom: 1px solid #bdbdbd;
        width: 400px;
        height: 50px;
        line-height: 50px;
        font-size: 20px;
        font-family: "Fangsong";
        cursor: pointer;
      }

      footer {
        display: flex;
        justify-content: space-between;
        margin: 0 auto;
        width: 400px;
        height: 50px;
        font-size: 15px;
        line-height: 50px;
        color: #797878;
        font-family: Verdana, Geneva, Tahoma, sans-serif;
        border: 1px solid #bdbdbd;
        border-top: none;
      }
      footer .footer_left {
        width: 170px;
        text-align: left;
        padding-left: 25px;
      }
      footer .footer_right {
        cursor: pointer;
        font-size: 18px;
        width: 70px;
        border-left: 1px solid #bdbdbd;
        border-top: none;
        text-align: center;
      }
      .center .center_id {
        display: inline-block;
        width: 60px;
        text-align: center;
      }
      .center .center_mess {
        display: inline-block;
        width: 260px;
        text-align: left;
        font-size: 24px;
        font-weight: 500;
      }
      .center .center_r {
        display: inline-block;
        width: 60px;
        text-align: center;
        font-size: 14px;
      }
    </style>
2. Results:
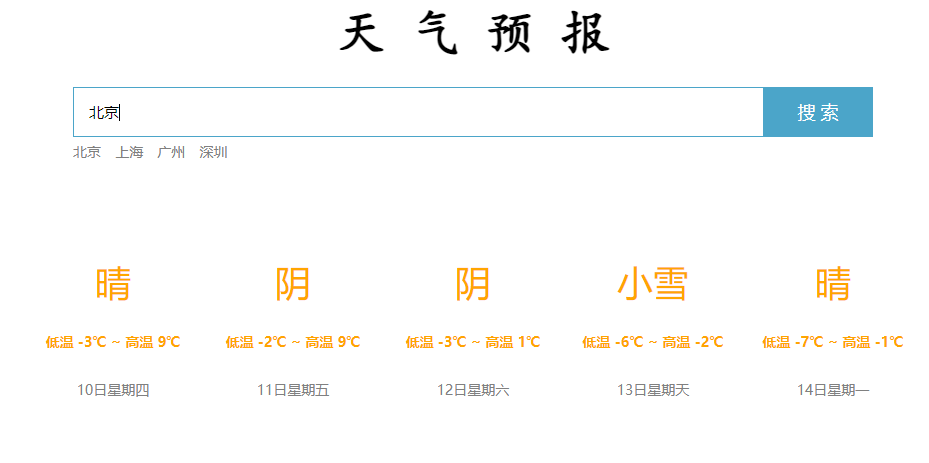
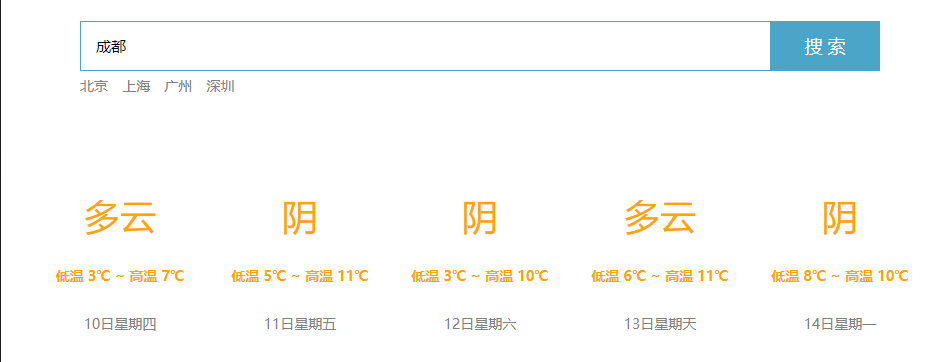
(4) Web application - weather query case
1. Code:
1) html structure
    <!-- 1.Development environment version with helpful command warnings -->
    <script src="https://cdn.jsdelivr.net/npm/vue/dist/vue.js"></script>
    <!-- axios -->
    <script src="https://unpkg.com/axios/dist/axios.min.js"></script>
  </head>
  <body>
    <div id="app" class="app">
      <h1 class="header">weather forecast</h1>
      <main>
        <input
          type="text"
          v-model="city"
          @keyup.enter="searchWeather"
          placeholder="Please enter the query City"
          class="search"
        />
        <input class="btn" type="button" value="Search" />
        <div class="main_city">
          <span @click="changeCity('Beijing')">Beijing</span>
          <span @click="changeCity('Shanghai')">Shanghai</span>
          <span @click="changeCity('Guangzhou')">Guangzhou</span>
          <span @click="changeCity('Shenzhen')">Shenzhen</span>
        </div>
      </main>
      <footer>
        <ul>
          <li v-for="item in weatherList">
            <div class="li_top">{{ item.type }}</div>
            <div class="li_center">{{ item.low }} ~ {{ item.high }}</div>
            <div class="li_bot">{{ item.date }}</div>
          </li>
        </ul>
      </footer>
    </div>
  </body>
  <script src="17.main.js"></script>
2) css Style
    <style>
      * {
        margin: 0;
        padding: 0;
        box-sizing: border-box;
      }
      li {
        list-style: none;
      }
      .app {
        width: 900px;
        height: 470px;
        margin: 200px auto;
      }
      .app h1 {
        height: 110px;
        line-height: 110px;
        text-align: center;
        font-size: 50px;
        font-family: cursive;
      }
      .app main {
        position: relative;
        margin: 0 auto;
        width: 800px;
        height: 80px;
      }
      main .search {
        position: absolute;
        top: 0;
        left: 0;
        width: 690px;
        height: 50px;
        font-size: 15px;
        border: none;
        border: 1px solid rgb(75, 165, 201);
        border-right: none;
        text-indent: 1em;
        outline: none;
      }
      main .btn {
        position: absolute;
        top: 0;
        right: 0;
        height: 50px;
        width: 110px;
        border: none;
        background-color: rgb(75, 165, 201);
        color: #fff;
        font-size: 18px;
        cursor: pointer;
      }
      main .main_city {
        position: absolute;
        bottom: 0;
        left: 0;
        height: 30px;
        line-height: 30px;
        font-size: 14px;
      }
      .main_city span {
        margin: 0 10px 0 0;
        color: gray;
        cursor: pointer;
      }
      .app footer {
        width: inherit;
        height: 170px;
        margin-top: 80px;
      }
      footer li {
        display: inline-block;
        width: 180px;
        height: inherit;
      }
      li .li_top {
        width: inherit;
        height: 70px;
        font-size: 36px;
        text-align: center;
        line-height: 70px;
        color: orange;
      }
      li .li_center {
        width: inherit;
        height: 50px;
        line-height: 50px;
        text-align: center;
        color: orange;
        font-size: 14px;
        font-weight: 600;
      }
      li .li_bot {
        width: inherit;
        height: 45px;
        line-height: 45px;
        text-align: center;
        color: gray;
        font-size: 14px;
      }
    </style>
3)vue
/**
 * Request address: http://wthrcdn.etouch.cn/weather_mini
 * Request method: get
 * Request parameter: City (city name)
 * Corresponding content: weather information
 *
 * 1. Click enter
 * 2. Query data
 * 3. Render data
 *
 * ① The logic code of the application is suggested to be separated from the page and written in a separate js file
 * ② axios The point of this in the callback function has changed, so you need to save this extra
 * ③ When the data returned by the server is complex, pay attention to the hierarchical results when obtaining
 *
 *
 * ① Custom parameters can make the code more reusable
 * ② methods Inside the method defined in, you can point out other methods through the keyword this
 */
var app = new Vue({
  el: "#app",
  data: {
    city: "",
    weatherList: [],
  },
  methods: {
    searchWeather: function () {
      //Call interface
      //Save this
      var that = this;
      axios
        .get("http://wthrcdn.etouch.cn/weather_mini?city=" + that.city)
        .then((value) => {
          that.weatherList = value.data.data.forecast;
        })
        .catch((reason) => {
          console.warn(reason);
        });
    },
    changeCity: function (city) {
      this.city = city;
      this.searchWeather();
    },
  },
});
2. Results: