The way of Vue middle road jump
router-link
Is the simplest way to achieve jump, also known as tag navigation.
<router-link to='The path of the page to jump to'>text<router-link>
When the browser parses it, it parses it into a label similar to.
(1) Without parameters
<router-link :to="{name:'home'}"><router-link>
<router-link :to="{path:'/home'}"> //name and path are OK. name is recommended
Note: if the link in router link is' / ', it starts from the root route. If it does not start with' / ', it starts from the current route.
(2) With parameters
Mode 1:
<router-link :to="{name:'home',params:{id:1}}"><router-link>
- Using params to pass parameters is similar to using post to send a request to the background.
- Route configuration path: "/ home/:id" or path: "/ home:id"
- html parameter: $route params. id
- script parameter: this$ route. params. id
Mode 2:
<router-link :to="{name:'home', query: {id:1}}">
- Using query to pass parameters is similar to a get request to send a request to the background
- html parameter: $route query. id
- script parameter: this$ route. query. id
this.$router
Represents the global router object, also known as programmatic navigation.
After the route is injected through the route parameter in the project, the router object can be obtained through this attribute on any page and its push(), go() and other methods can be called.
(1)this.$router.push()
Calling in a function is also called functional routing.
- Without parameters
this.$router.push('/home')
this.$router.push({name:'home'})
this.$router.push({path:'/home'})
- query parameter passing (get request)
this.$router.push({name:'home',query: {id:'1'}})
this.$router.push({path:'/home',query: {id:'1'}})
html parameter $route query. id
script takes parameter this$ route. query. id
- params parameter transfer (post request)
this.$router.push({name:'home',params: {id:'1'}}) // Only name can be used
Route configuration path: "/ home/:id" or path: "/ home:id"
html take parameter $route params. id
script takes parameter this$ route. params. id
- Differences between query and params
query is similar to get request. After jump, the parameters will be spliced behind the page url, similar to "get"? id=1. Non important items can be transmitted in this way. If it is a password or something, params is still used. The refresh page id is still there.
params is similar to post. After jump, parameters will not be spliced behind the page url, but the refresh page id will disappear.
(2)this.$ router. The usage of replace() is the same as that of push
(3)this.$router.go(n)
Jump forward or backward to n pages. n can be a positive integer or a negative integer.
(4) Three differences
-
this.$router.push: jump to the specified url path and add a record to the history stack. Click back to return to the previous page
-
this.$router.replace: jump to the specified url path, but there will be no record in the history stack. Clicking return will jump to the previous page (that is, directly replace the current page)
-
this.$router.go(n): jump forward or backward to N pages. N can be a positive integer or a negative integer
this.$route
Indicates the routing object currently being used for jump. You can access its name, path, query, params and other properties.
Example: parameter transfer between components
(1) Request component resourcevue vue
<template>
  <button @click="change">Verify routing parameters</button>
</template>
<script>
export default {
  name: "ResoureVue",
  data(){
    return {
      id:11
    }
  },
  methods:{
    change(){
      this.$router.push({
        path:'/select',
        query:{
          id:this.id
        }
      })
    }
  }
}
</script>
(2) Receive request component select vue
<template>
  <select>
    <option value="1" selected="selected">strawberry</option>
    <option value="2">lemon</option>
  </select>
</template>

<script>
export default {
  name: "Select",
  data(){
    return {
      id:''
    }
  },
  created() {
    this.id=this.$route.query.id,
        console.log(this.id)
  }
}
</script>
(3) Create a routing file index. In the router folder js
import Vue from "vue";
import VueRouter from 'vue-router';
import ResourceVue from "@/components/ResoureVue";
import Select from "@/components/Select";

Vue.use(VueRouter)

const router = new VueRouter({    //Create router
    routes:[      //Routing table
        {
            path:'/res',
            name:'ResourceVue',
            component:ResourceVue
        },
        {
            path:'/select',
            name:'select',
            component:Select
        },
        {
            path:'/',    //When the address is followed by '/', the ResourceVue content is displayed
            name:'ResourceVue',
            component:ResourceVue
        },
        {
            path:'',   //When the address is followed by '', the ResourceVue content is displayed
            name:'ResourceVue',
            component:ResourceVue
        }
    ],
    mode:'history'
})
export default router;
(4) Import entry file into router
import Vue from 'vue'
import App from './App.vue'
import router from "./router/index"   //Import routing file

Vue.config.productionTip = false
new Vue({
  render: h => h(App),
  router
}).$mount('#app')
(5)App. Configure navigation in JS file
<template>
  <div id="app">
    <router-link to="/res">Send request component</router-link>
    <br><br>
    <router-link to="/select">Receive request component</router-link>
    <br><br>
    <router-view></router-view>    <!--Add routing view-->
  </div>
</template>

<script>
export default {
  name: 'App',
  components: {
  }
}
</script>
Route redirection
Route redirection: when accessing address A, the user is forced to jump to address C to display A specific component page.
By specifying a new routing address through the redirect attribute of the routing rule, you can easily set the redirection of the route.
For example, the above example can be written as:
const router = new VueRouter({    //Create router
    routes:[      //Routing table
        {
            path:'/res',  //route
            name:'ResourceVue',
            component:ResourceVue    //assembly
        },
        {
            path:'/select',
            name:'select',
            component:Select
        },
        {     //Configure redirection
            path:'',
            redirect:'/res'   //Routing address
            // redirect:'res'
        },
        {   //Rewrite a route with empty path
            path:'',
            name:'ResourceVue',
            component:ResourceVue
        },
    ],
    mode:'history'
})
Dynamic routing
Dynamic routing refers to defining the variable part of the Hash address as a parameter item, so as to improve the reusability of routing rules.
method:
{
	path:'/page/:name',
	component:Page
}
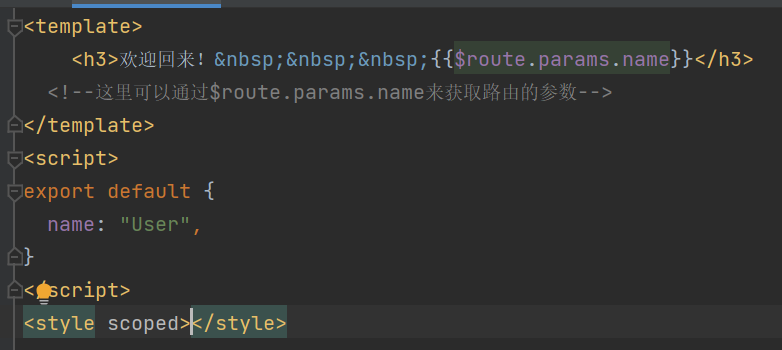
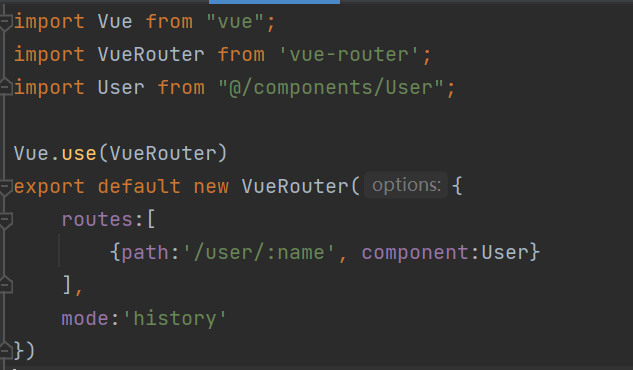
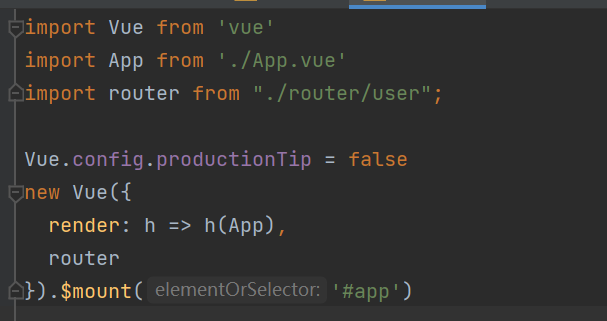
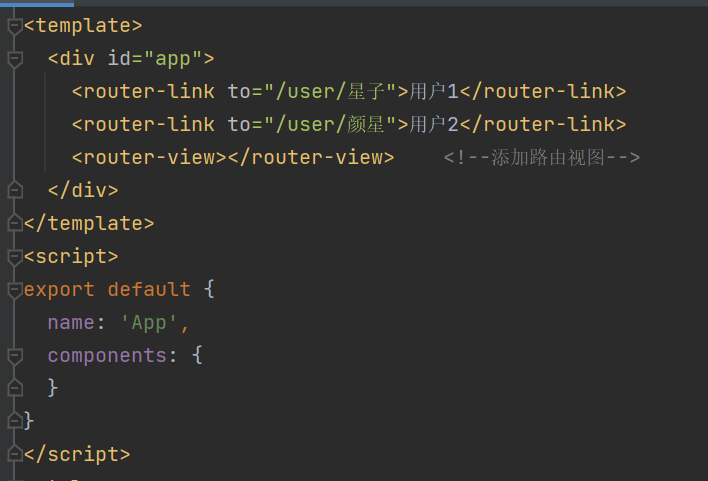
Example: realize the home page and welcome users back to display.
User component:

Routing file user js:

Import the entry file into the router:

App.vue configure navigation:

effect:

Nested Route
The nested display of components through routing is called nested routing.
The official document provides us with a children attribute, which is an array type, in which a group of routes are actually placed.
At this time, the parent-child relationship structure comes out - the route in the children attribute is the sub route of the external route of the children attribute.
const routes = [
    {
        path: '/page1',
        component: page1,
        children:[
            {
                path: 'phone',
                component: phone,
            },
            {
                path :'computer',
                component: computer
            }
        ]
    },
    {
        path: '/page2',
        component: page2
    },
    //Page redirection
    {
        path: '',
        redirect: 'page1'
    }
]
Two ways of route navigation
(1) Tag navigation
//Jump to the route named user and pass the parameter userId
<router-link :to="{ name: 'user', params: { userId: 123 }}">User</router-link>
(2) Programming navigation
this.$router.push({ name: 'user', params: { userId: 123 }})