Preface
In addition to the component development system, vue.js has its own routing vue-router.Before routing is used, our page jumps are either controlled in the background or linked with a tag.With vue-router, we can define jumps between component routes by ourselves, and set up slightly more complex nested routes to create real spa s (single-page applications).I wrote a simple vue-cli scaffold before Personnel Management Instances Now, instead of using scaffolding, we write with native vue. This article mainly explains vue.js+vue-router through examples.
Simple Routing Jump Instance
1. Start
download vue-router.js , name the new project folder router, and place the downloaded vue-router.js under the router/js/path.Create a new index.html as the home page, introduce a style file, introduce two key js, Vue and vue-router, and then introduce a main.js at the bottom of the body tag to write Vue instances and configure routes, noting the order of references.
<!DOCTYPE html>
<html lang="en">
<head>
    <meta charset="UTF-8">
    <title>home page</title>
    <link rel="stylesheet" href="css/main.css">
    <script src="js/vue.js"></script>
    <script src="js/vue-router.js"></script>
</head>
<body>
     <div id="app"></div>
     <template></template> //Component Area
     <script src="js/main.js"></script>
</body>
</html>
2. Define Routing View
The foot-nav component is called and the bottom navigation component is introduced here because it is used by both routing pages
<div id="app">
    <router-view></router-view>
    <foot-nav></foot-nav>
</div>
Knowledge Points: <router-view>
The <router-view>tag is equivalent to a slot used to render matching components, and the components defined by a route are equivalent to cards. When a route is jumped, the pages under that route are inserted in the slot to render the display.
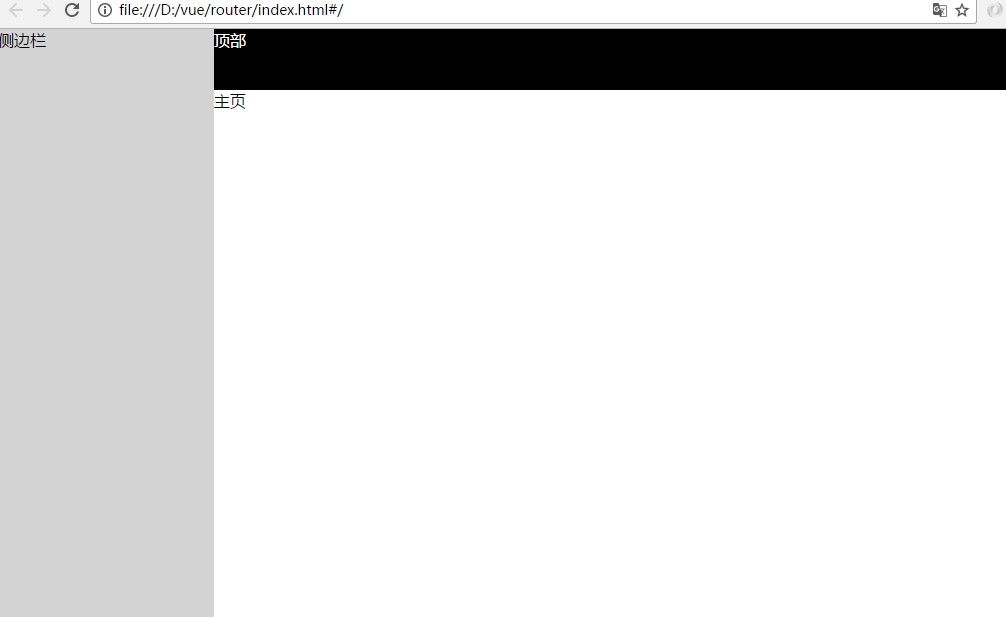
A component can have multiple <router-view>views and distinguish them with a name value, which is often used in page layouts, such as the left main structure above, where three <router-view>views can be defined
Example
<div id="app">
    <router-view name="top"></router-view>
    <router-view name="left"></router-view>
    <router-view name="main"></router-view>
</div>

<script>
    var topCom = Vue.extend({
        template: '<div>Top</div>'
    })

    var leftCom = Vue.extend({
        template: '<div>sidebar</div>'
    })

    var mainCom = Vue.extend({
        template: '<div>homepage</div>'
    })

    var router = new VueRouter({
        routes:[
            {
                path: '/',
                name: 'home',
                components:{
                    top: topCom,
                    left: leftCom,
                    main: mainCom
                }
            }
        ]
    })

    var app = new Vue({
        el: '#app',
        router
    })
</script>
Set a style for each section, open the browser to see the effect
3. Subcomponents (bottom navigation)
3.1 Create subcomponents
The personnel management system is divided into two modules, a home page, a management page, and both pages need to introduce a common component: bottom navigation.Add the following template to index.html on the first page
<template id="footer">
    <div class="footer fixed">
        <ul>
            <li><router-link to="/">home page</router-link></li>
            <li><router-link :to="{name:'manage',params:{id:1}}">Personnel management</router-link></li>
        </ul>
    </div>
</template>
Knowledge Points: <router-link>
The <router-link>tag mainly implements the skip link function, the attribute to='/'is the path to jump to path'/' (we will configure the paths to'/'and'/manage', etc.)
router-link can not only jump links, but also pass parameters, which can pass multiple parameters in the general format of
<router-link to="Routing Path"></router-link><router-link :to="{ path:Routing Path}"></router-link><router-link :to="{name:'Route Naming',params:{Parameter Name:parameter values,Parameter Name:parameter values}}"></router-link>Knowledge Point: this.$router.push
If you don't want to use the <router-link>tag, you can also add a click event to the place you want to jump and write this.$router.push method in the event
this.$router.push('Routing Path')this.$router.push({name:'route name', params:{parameter name: parameter value, parameter name: parameter value})3.2 Register subcomponents
Register subcomponents globally in main.js and define vue instances
Vue.component('foot-nav',{
    template: '#footer'
})

var app = new Vue({
    el: '#app'
})
4. Home page and management page components
4.1 Create Home Page and Administration Page
<template id="index">
    <div>
        //home page
    </div>
</template><template id="manage">
<div>
//Personnel management
<p>id:{{id}}</p>
</div>
</template>4.2 Registration Home Page and Administration Page
var Home = Vue.extend({
    template: '#index'
})

var Manage = Vue.extend({
    template: '#manage',
    data(){
        return{
            id: ''
        }
    },
    mounted:function(){
        this.id = this.$route.params.id
    }
})
Knowledge Point: this.$route.params
this.$route points to the routing object of the vue instance, params is the set of parameters passed in by the route
5. Define Routes
Define a routing router and introduce it into the vue instance
var router = new VueRouter({
    routes:[
        {
            path:'/',
            name: 'home',
            component:Home
        },
        {
            path:'/manage/:id',
            name: 'manage',
            component:Manage
        }
    ]
})

var app = new Vue({
    el: '#app',
    router
})
Knowledge Point: path:'/path/: parameter name'
For a route to pass parameters, add a'/'followed by a colon and a parameter name
Knowledge Point: Routing activation class
vue-router When a route is active, there will be a class class class "router-link-active". We only need to add a style for this class to implement routing in active state.
Next, go to the browser to see the effect of routing jumps
6. Nested Routing
Sometimes our project is made up of nested components, so nested routing is needed
Let's start with the following example, where we add two subroutes to the manage d route
6.1 Add <router-view>inside the component
<template id="manage">
    <div>
        //Personnel management
        <ul>
            <li><router-link to="/manage/list">Personnel List</router-link></li>
            <li><router-link to="/manage/edit">edit</router-link></li>
        </ul>
        <router-view></router-view>
    </div>
</template>
6.2 Define Subrouting
//Build Components
var List = Vue.extend({
    template: '<div>Personnel List</div>'
})

var Edit = Vue.extend({
    template: '<div>edit</div>'
})


var router = new VueRouter({
    routes:[
        {
            path:'/',
            name: 'home',
            component:Home
        },
        {
            path:'/manage',
            name: 'manage',
            component:Manage,
        //Subrouting is represented by children
            children:[
                {
                    path:'list',
                    name: 'list',
                    component:List
                },
                {
                    path:'edit',
                    name: 'edit',
                    component:Edit
                }
            ]
        }
    ]
})
7. Routing redirection
When route redirection is not set, a blank or 404 appears when we enter a route at will.To prevent this, we usually define a redirected route when configuring a route
var router = new VueRouter({
    routes:[
        {
            path:'/',
            name: 'home',
            component:Home
        },
        {
            path:'*',
            redirect: '/'
        },
    ]
})
Open your browser and enter an undefined route at will to see the effect