Configuring vue in webpack
If Vuejs is used in the project, it must be dependent, so it needs to be installed first. Because vue will also be used in the actual project later, it is not dependent during development, so it needs to be installed directly
npm install vue@2.5.21 --save
Use vue the way you learned before
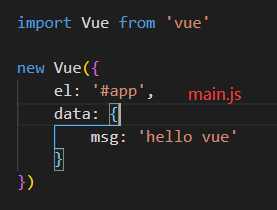
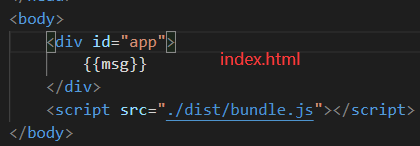
There is no error in the packaging process, but the program runs without effect, and an error is reported in the browser
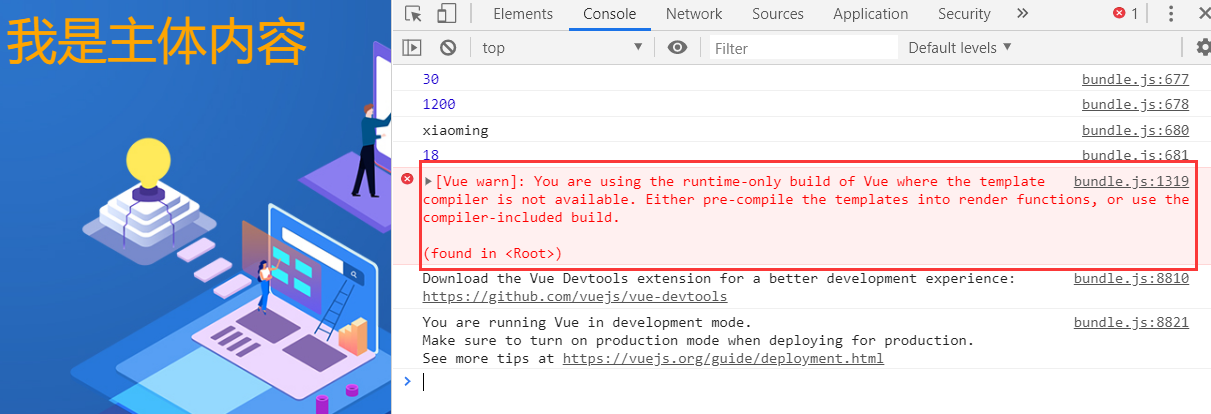
This error means that we are using the runtime only version of Vue and need to modify the configuration of webpack
resolve: {
  // Alias: alias
  // Runtime only - > no template is allowed in the code
  // Runtime compiler - > in the code, there can be a template, because there is a compiler that can be used to compile the template
  alias: {
    vue$: "vue/dist/vue.esm.js",
  },
},
Repackage and the operation display is normal

After normal operation, consider another problem
If you want to display the data in data in the interface, you must modify the index html
If you customize the component later, you must modify the index html
But in the actual project, you don't want to modify frequently manually. How to solve it
Define template attribute
In the above Vue instance, the el attribute is defined for and index The #app binding in HTML allows the Vue instance to manage its contents
Here, {{msg}} in the div element can be deleted and only one element with id app is retained
Then define a template attribute in the Vue instance
new Vue({
    el: '#app',
    template: `<div id="app">{{msg}}</div>`,
    data: {
        msg: 'hello vue'
    }
})
Repackage and run, and the display result is the same as before
Relationship between el and template
el is used to specify the DOM to be managed by Vue, which can help resolve instructions, event listening, etc
If template is specified in the Vue instance at the same time, the content of the template will replace the mounted corresponding el template
In this way, there is no need to operate index in future development HTML, just modify the corresponding tag in the template
However, it is troublesome to write the template. At this time, you can separate the content in the template into three parts: template, script and style, and the structure will be very clear
. vue file encapsulation processing
Create app Vue file
<template>
  <div>
    <h2 class="title">{{ msg }}</h2>
    <h2>{{ name }}</h2>
    <button @click="btnClick">Button</button>
  </div>
</template>

<script>
export default {
  name: 'App',
  data () {
    return {
      msg: "Hello",
      name: "Xiao Ming",
    }
  },
  methods: {
    btnClick() {
      console.log("The button is clicked");
    },
  },
}
</script>

<style  scoped>
    .title {
        color: red;
    }
</style>
Modify main JS file
import Vue from 'vue'
import App from "./vue/App.vue";

new Vue({
  el: "#app",
  template: `<App/>`,
  components: {
    App,
  },
});
Install Vue loader and Vue template compiler
npm install vue-loader@13.0.0 vue-template-compiler@2.5.21 --save-dev
Modify webpack config. JS file
{
  test: /\.vue$/,
  use: ["vue-loader"],
},
Repackaging run
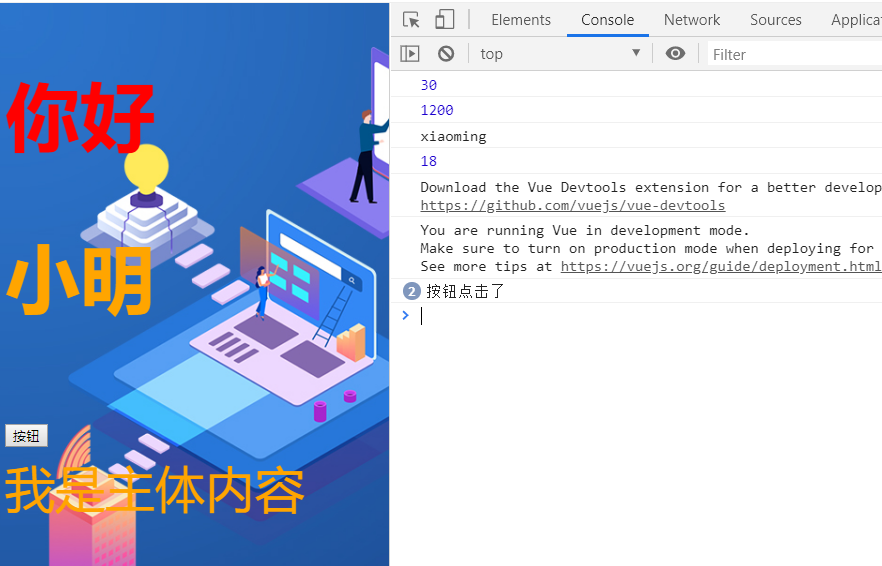
In the development process, the idea of component development will be adopted, such as in app Introduce the sub component CPN into the Vue vue
Create CPN vue
<template>
  <div>
    <h2>I am cpn Title of the component</h2>
    <p>I am cpn Contents of components</p>
    <h3>{{ name }}</h3>
  </div>
</template>

<script>
export default {
  name: "Cpn",
  data() {
    return {
      name: "I am cpn Name of",
    };
  },
};
</script>

<style scoped></style>
On app Import in Vue
<template>
  <div>
    ...
    <!-- Introducing sub components -->
    <Cpn></Cpn>
  </div>
</template>

<script>
// Import Cpn components
import Cpn from './Cpn.vue'
export default {
  name: 'App',
  ...,
  // Configure subcomponents
  components: {
      Cpn
  }
}
</script>
Repackaging run

plugin of webpack
Meet plugin
What is a plugin?
plugin means plug-in, which is usually used to extend an existing architecture
The plug-ins in webpack are various extensions to the existing functions of webpack, such as packaging optimization, file compression and so on
The difference between loader and plugin
loader is mainly used to convert some types of modules. It is a converter.
plugin is a plug-in. It is an extension of webpack itself and an extender
How to use plugin
I: install plugins that need to be used through npm (some plug-ins built in webpack do not need to be installed)
Second: on webpack config. Configure plug-ins in plugins in JS
Add a copyrighted plugin
Add a copyright notice to the packaged file. The plug-in name is BannerPlugin, which belongs to the plug-in of webpack
Modify webpack config. js
const webpack = require("webpack")

module.exports = {
  ...
  plugins:[
    new webpack.BannerPlugin('The final copyright belongs to XX All')
  ]
};
Repackage the program and package the bundle JS file, you can see the copyright information

Package html plugin
Currently, index The HTML file is stored in the root directory of the project, but when the project is actually published, the content in dist folder is published, but there is no index in this folder HTML file
If you need to package the index file into the dist folder, you can use the HtmlWebpackPlugin plug-in
The HTML webpack plugin can automatically generate an index HTML file (template generation can be specified), and the packaged js file can be automatically inserted into the body through the script tag
Install HtmlWebpackPlugin
npm install html-webpack-plugin@3.2.0 --save-dev
Modify webpack config. js
const HtmlWebpackPlugin = require("html-webpack-plugin")

module.exports = {
  ...
  output: {
    path: path.resolve(__dirname, "dist"), // Note: path is usually an absolute path
    filename: "bundle.js",
    // Remove the publicPath property, otherwise there may be a problem with src in the inserted script tag
    // publicPath: "dist/",
  },
  ...
  plugins:[
    new webpack.BannerPlugin('The final copyright belongs to XX All'),
    new HtmlWebpackPlugin({
      template: 'index.html'
    })
  ]
};
js compressed plugin
Before the project is released, files such as js need to be compressed
Compress the packaged js file
The plug-in uglifyjs webpack plugin is used, and the version number is specified as 1.1.1, which is consistent with CLI2
npm install uglifyjs-webpack-plugin@1.1.1 --save-dev
Modify webpack config. js
const UglifyjsWebpackPlugin = require("uglifyjs-webpack-plugin");
module.exports = {
  ...
  plugins: [
    ...
    // After compression, the comments will be invalid and do not need to be configured during development
    new UglifyjsWebpackPlugin(),
  ],
};
After repackaging, you can see the bundle JS file is compressed
Set up local server
webpack provides an optional local development server based on node JS build, internal use of express framework, can achieve the function of automatic browser refresh
Install webpack dev server
npm install webpack-dev-server@2.9.1 --save-dev
Modify webpack config. js
module.exports = {
  ...
  devServer: {
    // For which file
    contentBase: './dist',
    // Real time monitoring
    inline: true
  }
};
devserver set properties
contentBase: for which folder to provide local service, the default is the root folder. We need to fill in here/ dist
Port: port number
inline: page real-time refresh
History API fallback: in the SPA page, it depends on the history mode of HTML5
Modify package JSON, -- Open parameter means to open the browser directly
"scripts": {
  ...
  "dev": "webpack-dev-server --open"
},
Profile separation
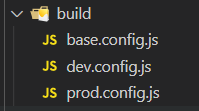
webpack.config.js file contains development time configuration and project release time configuration. In order to facilitate management, the configuration file can be separated
Create a build file containing base config. js,dev.config.js,prod.config.js
Basic configuration: base config. js
const path = require("path");
const webpack = require("webpack");
const HtmlWebpackPlugin = require("html-webpack-plugin");

module.exports = {
  entry: "./src/main.js",
  output: {
    path: path.resolve(__dirname, "../dist"),
    filename: "bundle.js",
  },
  module: {
    rules: [
      {
        test: /\.css$/i,
        use: ["style-loader", "css-loader"],
      },
      {
        test: /\.less$/,
        use: [
          {
            loader: "style-loader",
          },
          {
            loader: "css-loader",
          },
          {
            loader: "less-loader",
          },
        ],
      },
      {
        test: /\.(png|jpg|gif|jpeg)$/i,
        use: [
          {
            loader: "url-loader",
            options: {
              limit: 8192,
              name: "img/[name].[hash:8].[ext]",
            },
          },
        ],
      },
      {
        test: /\.m?js$/,
        exclude: /(node_modules|bower_components)/,
        use: {
          loader: "babel-loader",
          options: {
            presets: ["es2015"],
          },
        },
      },
      {
        test: /\.vue$/,
        use: ["vue-loader"],
      },
    ],
  },
  resolve: {
    // If you want to omit the extension, you can configure it
    extensions: [".js", ".css", ".vue"],
    alias: {
      vue$: "vue/dist/vue.esm.js",
    },
  },
  plugins: [
    new webpack.BannerPlugin("The final copyright belongs to Xiao Ming"),
    new HtmlWebpackPlugin({
      template: "index.html",
    }),
  ],
};
Development time configuration: dev.config js
const webpackMerge = require('webpack-merge')
const baseConfig = require('./base.config')

module.exports = webpackMerge(baseConfig, {
  devServer: {
    // For which file
    contentBase: "./dist",
    // Real time monitoring
    inline: true,
  },
});
Project publishing configuration: prod.config js
const UglifyjsWebpackPlugin = require("uglifyjs-webpack-plugin");
const webpackMerge = require('webpack-merge')
const baseConfig = require('./base.config')

module.exports = webpackMerge(baseConfig, {
  plugins: [
    // After compression, the comments will be invalid and do not need to be configured during development
    new UglifyjsWebpackPlugin(),
  ],
});
Modify package json
{
  ...
  "scripts": {
    ...
    "build": "webpack --config ./build/prod.config.js",
    "dev": "webpack-dev-server --open --config ./build/dev.config.js"
  },
  ...
}