preface
Why check the form? What are the hazards of not performing form verification? How to perform form verification? With these questions in mind, let's take a look at how to implement form verification in vue3 today~
1, Significance of form verification
- When the value entered by the user in the input box or the required option is not selected, the next operation will not be triggered
- Users' information can be set according to certain rules to facilitate unified management
- Form verification can effectively avoid dangerous input by criminals
2, How to verify a form?
A third-party package dedicated to form verification is used here. The document: vee-validate Support vue3.0
1. Preparation
Open any terminal under the project root directory and execute the command: npm i vee-validate@4.0.3
2. Steps
- Wrap the entire area of the Form with the Form label provided in package 3
- Replace the input of the input box with the file tag provided by the third-party package
- If the form needs verification, it must have a name attribute
- Bind the verification rules to the Field tag to be verified through rules
- When the content entered by the user fails to pass the validation rule, the error message is deconstructed from the slot on the Form label
3. Use
In any. vue terminated file
The previously encapsulated is used here Button assembly and Message prompt Component, you can click the link to see how it is encapsulated
The code is as follows (example):
<template>
  <Form class="form" ref="target" v-slot="{ errors }">
    <div class="form-item">
      <div class="input">
        <i class="iconfont icon-user"></i>
        <Field autocomplete="off" type="text" name="account" :rules="checkAccount" placeholder="Please enter your user name or mobile number" />
      </div>
      <div class="error" v-if="errors.account"><i class="iconfont icon-warning" />{{ errors.account }}</div>
    </div>

    <div class="form-item">
      <div class="input">
        <i class="iconfont icon-lock"></i>
        <Field type="password" v-model="form.password" name="password" :rules="checkPwd" placeholder="Please input a password" />
      </div>
      <div class="error" v-if="errors.password"><i class="iconfont icon-warning" />{{ errors.password }}</div>
    </div>
    <my-button type="plain" size="mini" @click="handleLogin" href="javascript:;" class="btn">Sign in</my-button>
  </Form>
</template>

<script>
import { Form, Field } from 'vee-validate'
import { ref, reactive, getCurrentInstance } from 'vue'

export default {
  name: 'App',
  components: { Field, Form },
  setup() {
    const instance = getCurrentInstance()
    const target = ref(null)
    // Form Data
    const form = reactive({
      // user name
      account: null,
      // password
      password: null
    })

    // Define form - user name validation rules
    const checkAccount = value => {
      // Value is the value of the form element that will use the rule in the future
      // 1. Required
      // 2. 6-20 characters, starting with a letter
      // How to feed back whether the verification is successful or failed? If it returns true, it will be successful. If it fails in other cases, it will return the failure reason.
      if (!value) return 'enter one user name'
      if (!/^[a-zA-Z]\w{5,9}$/.test(value)) return 'Start with a letter and 6-20 Characters'
      return true
    }

    // Password verification rules
    const checkPwd = value => {
      if (!value) return 'Please input a password'
      if (!/^\w{6,24}$/.test(value)) return 'The password is 6-24 Characters'
      return true
    }

    // Click login
    const handleLogin = async () => {
      const valid = await target.value.validate()
      if (valid) {
        // The form is verified and the login is realized by calling the interface
        // The following is the demonstration code
        return instance.proxy.$message({ text: 'Verification passed', type: 'success' })
      }
    }
    return { target, form, checkAccount, checkPwd, handleLogin }
  }
}
</script>

<style scoped lang="less">
// Account container
* {
  box-sizing: border-box;
}
.form {
  margin: 100px auto;
  padding: 50px;
  width: 500px;
  border: 1px solid #ccc;
  &-item {
    margin-bottom: 28px;
    .input {
      position: relative;
      height: 40px;
      outline: none;
      > i {
        width: 35px;
        height: 35px;
        background: #cfcdcd;
        color: #fff;
        position: absolute;
        left: 0;
        top: 0;
        text-align: center;
        line-height: 34px;
        font-size: 18px;
      }
      input {
        padding-left: 44px;
        border: 1px solid #cfcdcd;
        outline: none;
        height: 36px;
        line-height: 36px;
        width: 100%;
        &.error {
          border-color: #ff3040;
        }
        &.active,
        &:focus {
          border-color: skyblue;
        }
      }
    }
    > .error {
      position: absolute;
      font-size: 12px;
      line-height: 28px;
      color: #ff3040;
      i {
        font-size: 14px;
        margin-right: 2px;
      }
    }
  }
  .btn {
    float: right;
  }
}
</style>
Note: the above is the demonstration code
- When there are many verification rules, you can put the verification rules into a separate file for management, and then import them into the files you need to use
- You can write the steps to be carried out after the verification is passed according to your actual needs.
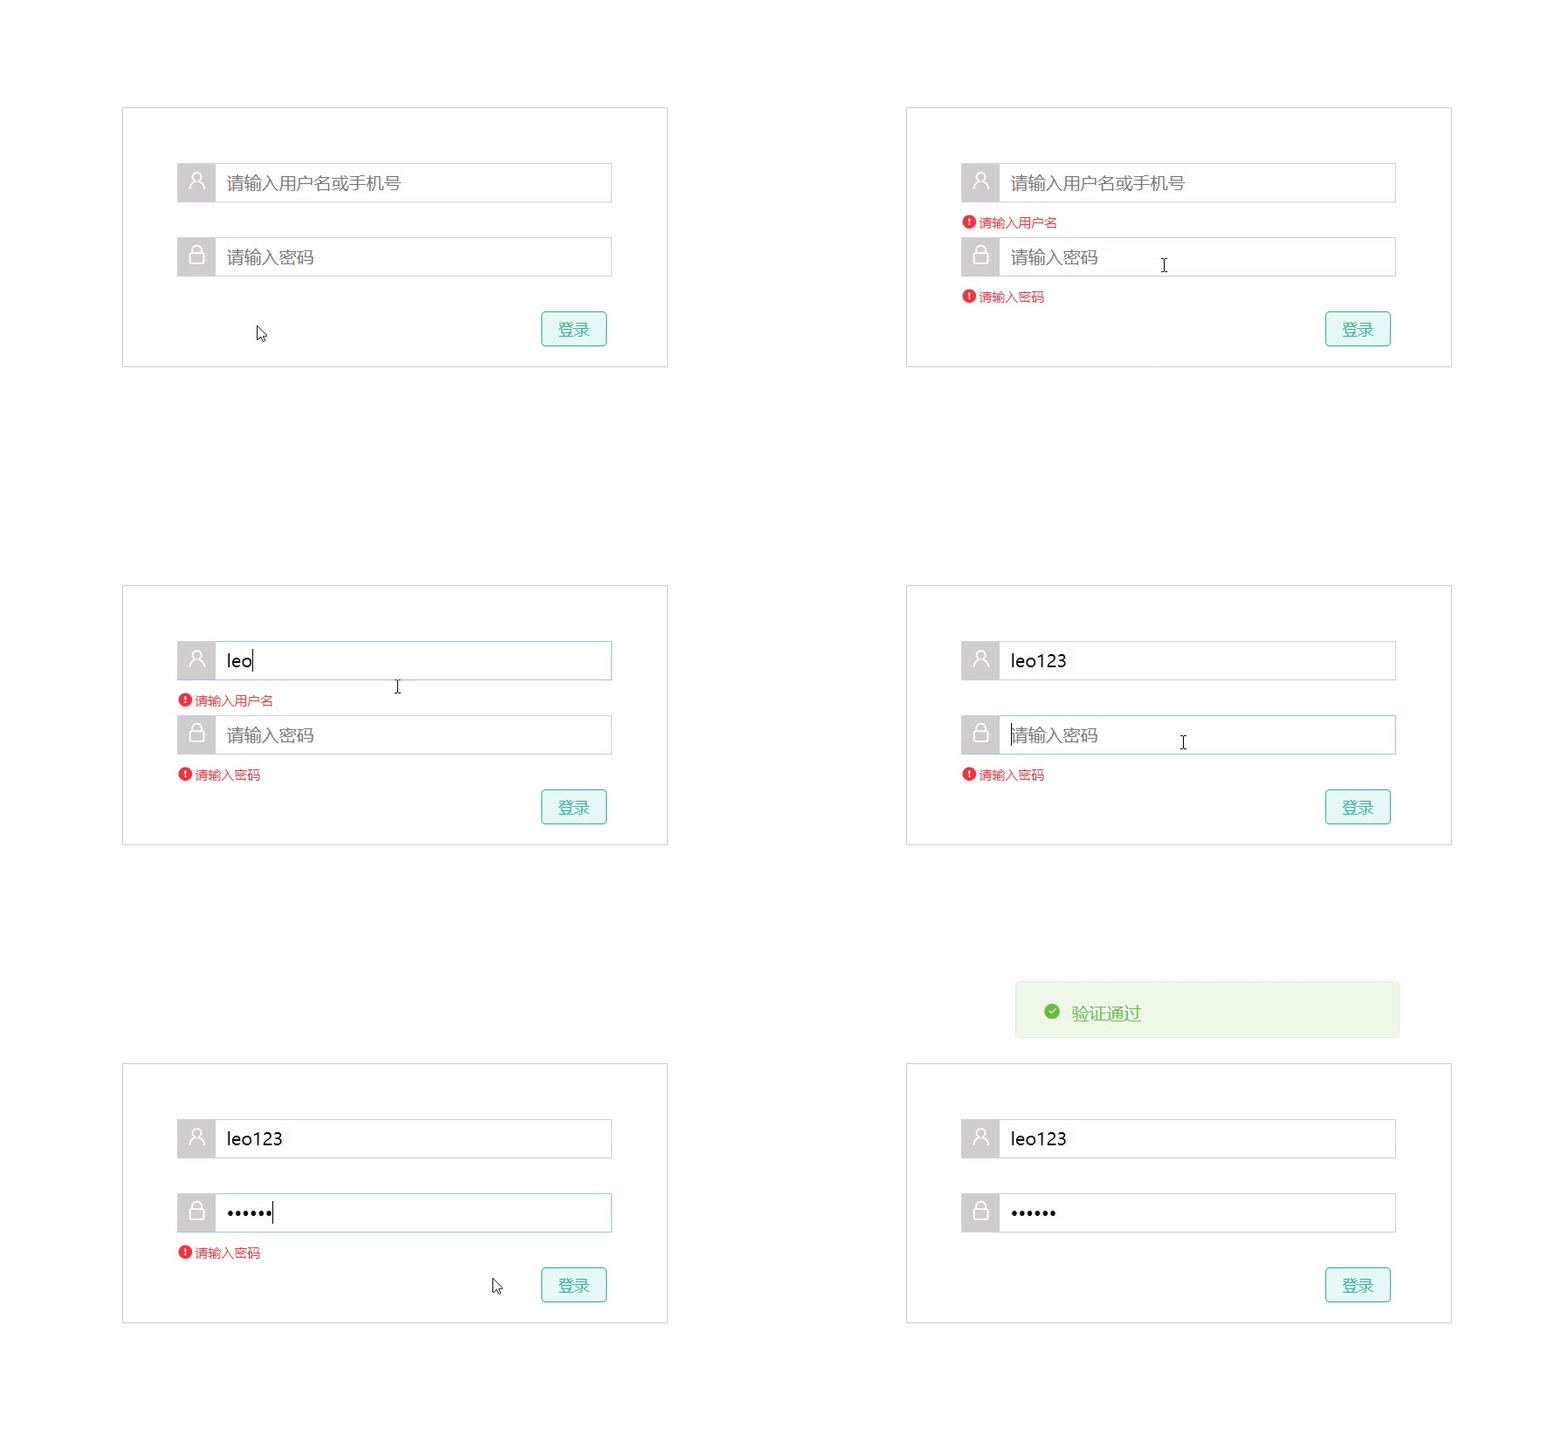
3, Result demonstration

summary
Rome was not built in a day.