In this tutorial, we will learn how to create a Maven-managed Java Ethernet project in Eclipse, connect Ethernet nodes using the web3j library, make JSON-RPC API calls, and display the results.
Learn in the language you are familiar with and develop in Taifang DApp: Java | Php | Python | .Net / C# | Golang | Node.JS | Flutter / Dart
web3j is a lightweight, modular development library, which implements all the functions needed to interact with Taifang, including JSON-RPC API client, wallet account management, Java smart contract wrapper, support for ENS, ERC20, ERC721, etc.
1. Preparing the Java Ethernet development environment
First you need to install Java 8 .Verify the installation of java using the following commands:
$ java -version
java version "1.8.0_201"
Next we need a package manager, such as Maven or Gradle .In this tutorial, we use Maven to manage dependencies. If you want to use Gradle, you can view this tutorial: Using Gradle in Eclipse to develop web 3j Ethernet Application.
Finally, we need an integrated development environment, such as the one used in this tutorial Eclipse.
2. Create a new Maven project
In this environment, the task we need to complete is to create a new Maven project in Eclipse and name it java_ethereum:
- After starting Eclipse, go to the File > New > Project > Maven > Maven Projects menu.
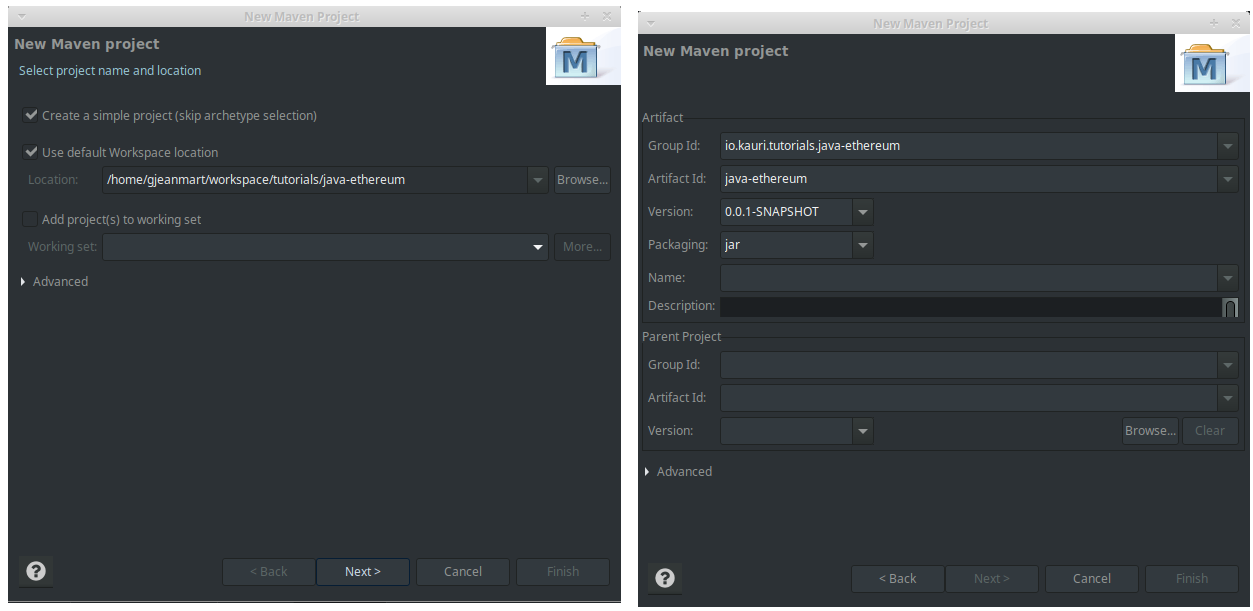
- Select Create a simple project (skip archetype selection) and click Next >
- Enter the Group ID and Artifact ID of the project and click Finish.
- Group Id: io.kauri.tutorials.java-ethereum
- Artifact Id: java-ethereum
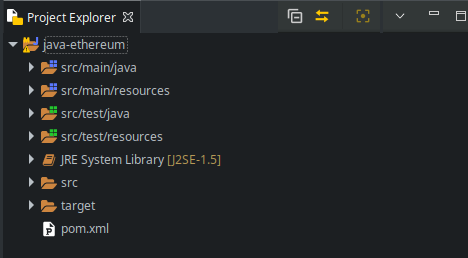
The following should be displayed in the project browser:
 Finally, we need to tell Eclipse and Maven to use Java 8.editPom.xmlFile and before </project>
<properties>
  <maven.compiler.target>1.8</maven.compiler.target>
  <maven.compiler.source>1.8</maven.compiler.source>
</properties>
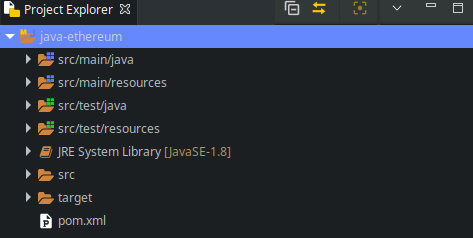
Right-click on the project name in the project browser and select Maven > Update Project. Click OK in the dialog box that pops up.You should see that the JER system library in the project browser has changed from JavaSE-1.5 to JavaSE-1.8:
3. Add the web3j library to the project
In this step, we'll import the latest version of web3j into the project via maven.
Editing files in Eclipse Pom.xmlAnd add the following before </project>
<dependencies>
  <dependency>
    <groupId>org.web3j</groupId>
    <artifactId>core</artifactId>
    <version>4.3.0</version>
  </dependency>
</dependencies>
CompletePom.xmlFile See Here.
Save the above file and the declared dependent package will be imported.In the package browser you will see a Maven dependency folder that contains JAR packages such as web3j.
4. Create Main Class
Now that we have all the dependencies we need to use Web3j, we can start writing Etaifang Java programs.
Create a Java class by right-clicking on the project and selecting New > Class Main.java.Enter package name io.kauri.tutorials.java_ethereum, class name Main, and check public static void main(String[] args):
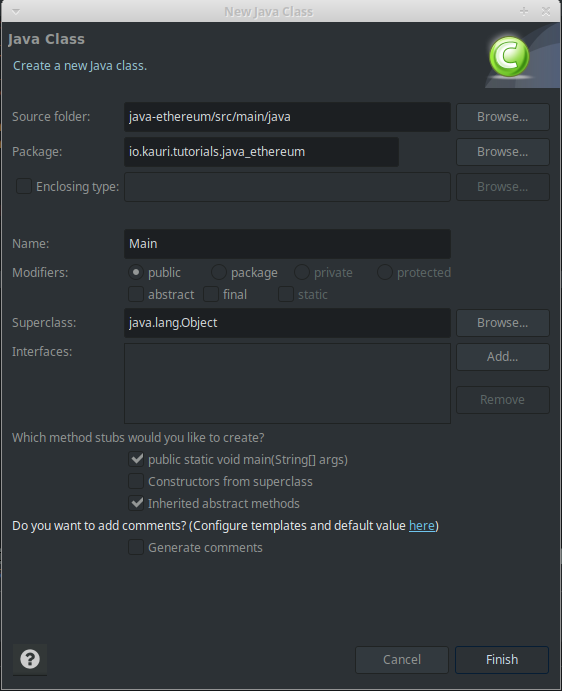
Click Finish to generate the file.
//Main.java
package io.kauri.tutorials.java_ethereum;

public class Main {
  public static void main(String[] args) {
    // TODO Auto-generated method stub
  }
}
5. Use web3j to connect Ethernet nodes
We've created the project, imported the Web3j library, and started preparing to implement the code.Now we can connect an Ethernet node and perform some Ethernet operations using Web3j's JSON-RPC API abstraction.
First import the package your code needs, or allow your IDE to import automatically:
import java.io.IOException;
import org.web3j.protocol.Web3j;
import org.web3j.protocol.http.HttpService;
import org.web3j.protocol.core.methods.response.EthBlockNumber;
import org.web3j.protocol.core.methods.response.EthGasPrice;
import org.web3j.protocol.core.methods.response.Web3ClientVersion;
To connect the Ethernet nodes, Web3j requires the JSON-RPC API to access the endpoints:
Web3j web3 = Web3j.build(new HttpService("<NODE ENDPOINT>"));
If you are running Geth, Parity, Pantheon, or Ganache-cli locally, your node's JSON-RPC API endpoint defaults toHttp://localhost: 8545:
Web3j web3 = Web3j.build(new HttpService("http://localhost:8545"));
If you are running a graphical Ganache application on your own machine, your JSON-RPC API endpoint defaults toHttp://localhost: 7545:
Web3j web3 = Web3j.build(new HttpService("http://localhost:7545"));
Note: As a test chain, Ganache is not supported by all JSON-RPC API s, such as net_peercount.
If you are using Infura Then the JSON-RPC API endpoint of the node is https://<network>.Infura.io/v3/<project key>:
Web3j web3 = Web3j.build(new HttpService("https://mainnet.infura.io/v3/<project key>"));
Web3j implements the JSON-RPC API client in Taifang using <response> = web3. <operation>.send().For example:
try {
  // web3_clientVersion returns the current client version.
  Web3ClientVersion clientVersion = web3.web3ClientVersion().send();

  //eth_blockNumber returns the number of most recent block.
  EthBlockNumber blockNumber = web3.ethBlockNumber().send();

  //eth_gasPrice, returns the current price per gas in wei.
  EthGasPrice gasPrice =  web3.ethGasPrice().send();

} catch(IOException ex) {
  throw new RuntimeException("Error whilst sending json-rpc requests", ex);
}
Note: Serialization of JSON-RPC requests may result in IOException exceptions, which need to be handled.
6. Complete Java access code for Ethernet block chain
The following code shows the complete Java program code that connects the Ethernet node and executes the JSON-RPC API call.
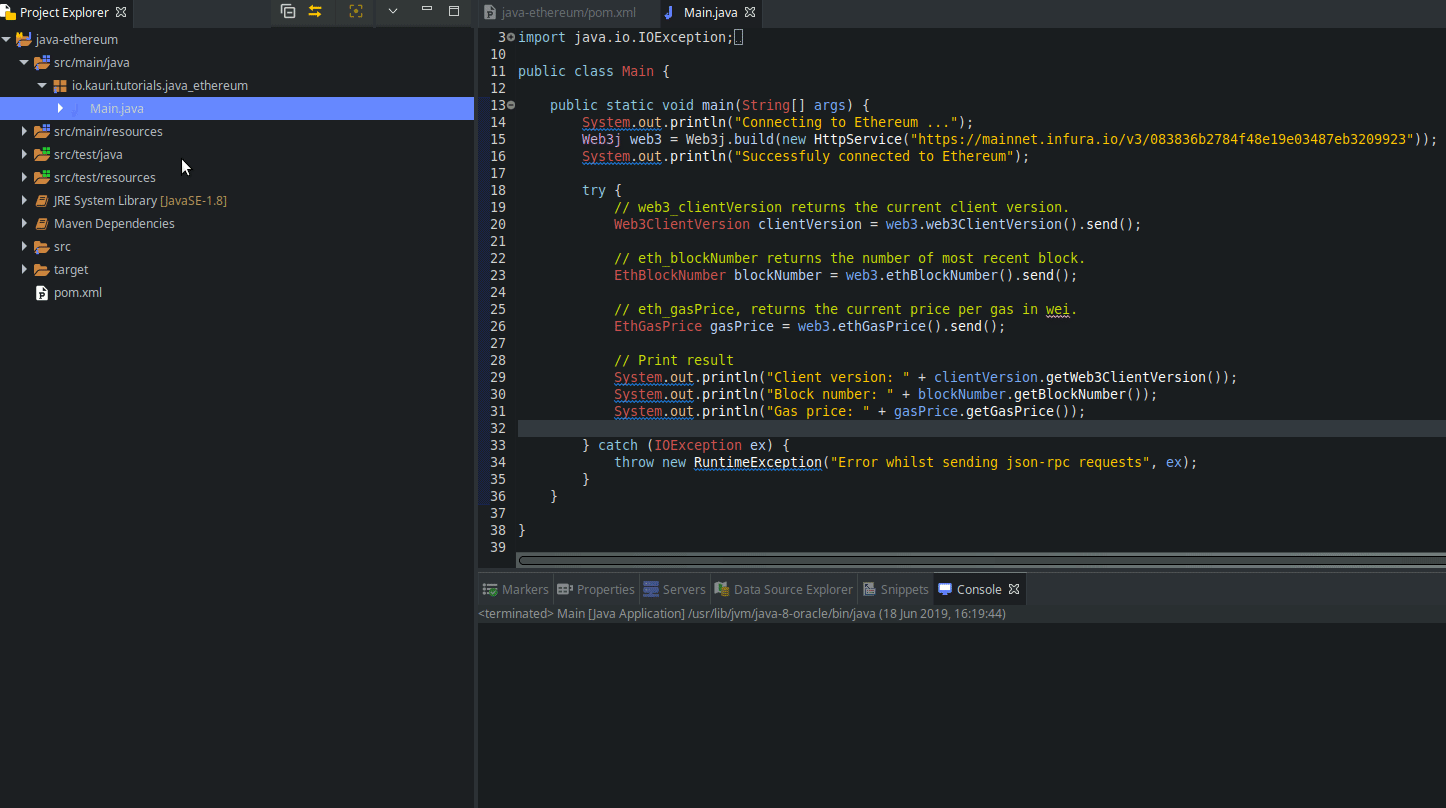
//Main.java
package io.kauri.tutorials.java_ethereum;

import java.io.IOException;

import org.web3j.protocol.Web3j;
import org.web3j.protocol.core.methods.response.EthBlockNumber;
import org.web3j.protocol.core.methods.response.EthGasPrice;
import org.web3j.protocol.core.methods.response.Web3ClientVersion;
import org.web3j.protocol.http.HttpService;

public class Main {

  public static void main(String[] args) {
    System.out.println("Connecting to Ethereum ...");
    Web3j web3 = Web3j.build(new HttpService("http://localhost:8545"));
    System.out.println("Successfuly connected to Ethereum");

    try {
      // web3_clientVersion returns the current client version.
      Web3ClientVersion clientVersion = web3.web3ClientVersion().send();

      // eth_blockNumber returns the number of most recent block.
      EthBlockNumber blockNumber = web3.ethBlockNumber().send();

      // eth_gasPrice, returns the current price per gas in wei.
      EthGasPrice gasPrice = web3.ethGasPrice().send();

      // Print result
      System.out.println("Client version: " + clientVersion.getWeb3ClientVersion());
      System.out.println("Block number: " + blockNumber.getBlockNumber());
      System.out.println("Gas price: " + gasPrice.getGasPrice());

    } catch (IOException ex) {
      throw new RuntimeException("Error whilst sending json-rpc requests", ex);
    }
  }
}
Right-click on the file Main.java And select Run As > Java Application to run the Java program.You should see the console display as follows;
Connecting to Ethereum ...
Successfuly connected to Ethereum
Client version: Geth/v1.8.22-omnibus-260f7fbd/linux-amd64/go1.11.1
Block number: 7983049
Gas price: 3000000000
The screenshots are as follows:
Original Link: Java to Taifang Development Environment Setup - Wizard Network