Webpack is a technology that many front-end workers will contact. It has no doubt about the effect of code optimization, but its complex operation is undoubtedly very troublesome for Xiaobai who is new to the front-end. Today, let's talk about the introduction and use of the basis of webpack.
Basic concepts
webpack is a static module packer for modern JavaScript applications.
When webpack processes applications, it will package a huge file into one or more bundle s to optimize the code. After all, most of the optimization process is from complex to simple.
1, Installation
First, make sure that your computer has a nodejs environment. Then, enter cmd through win+r to go to the console (the console will not be closed for the time being when it is opened, and it will be used later). Enter the following code
md mypack
//Create a folder named mypack

cd mypack
// Enter your project directory mypack directory, and you can create it yourself

npm init
//  Initializing the project folder creates a package js

npm i webpack webpack-cli -D
//Install webpack and webpack cli
Well, we have the following documents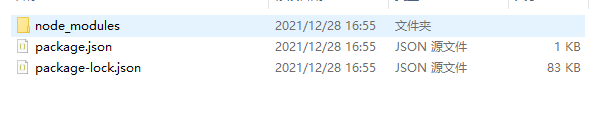
Then create an src folder under the root directory mypack
Then create two headers under the src folder JS and index JS JavaScript file
header.js contents are as follows
var elem = document.createElement("div");//Create a node
elem.innerHTML = "hello,webpack";//Set content
export default elem;//Export node
index.js contents are as follows
import elem from "./header.js";//Import node
document.body.appendChild(elem);//Insert to page
OK, now we have a basic webpack packer. Enter the following code on the cmd console
cd /mypack //Go to mypack folder


C:\myback>npx webpack
//After input, the root directory will generate a dist file with a main js
After that, you can create a new html page under the "dist" folder to check our results and insert it under "body"
<script src="./main.js"></script>
Open the new file again, and we can see the words "hello, webpack" on the page.
2, Utility profile
Create a new webpack under the folder mypack config. JS file (be sure to use this name, and you can't change it at will)
Then write the following code in the file
module.exports = {    // Export module in node
    entry: "./src/index.js",// Specify the entry of the file
    output: {               //Export
        filename: "main.js",// Define file name
        path: __dirname + "dist", // Define folder / /__ dirname get current directory
    },
    mode: "production", //Product module
};
Execute npx webpack command in cmd console to realize packaging.
3, Restart the server using webpack dev server to update
Enter the following command on the cmd console
npm i webpack-dev-server html-webpack-plugin -D
Create a public folder under the mypack folder in the root directory to store public data, and create an index. In the public folder HTML file
<!DOCTYPE html>
<html lang="en">

<head>
    <meta charset="UTF-8" />
    <meta http-equiv="X-UA-Compatible" content="IE=edge" />
    <meta name="viewport" content="width=device-width, initial-scale=1.0" />
    <title>index</title>
</head>

<body>

</body>

</html>
Select package. From the three files we automatically generated at the beginning Add the following code to the script in the JSON file
"scripts": {
        "build": "webpack",
        "serve": "webpack serve",
        "test": "echo \"Error: no test specified\" && exit 1"
},
In webpack config. JS configuration file
const HtmlWebpackPlugin = require("html-webpack-plugin");Then instantiate the plug-in plugins
module.exports = {    // Export module in node
    entry: "./src/index.js",// Specify the entry of the file
    output: {               //Export
        filename: "main.js",// Define file name
        path: __dirname + "dist", // Define folder / /__ dirname get current directory
    },
    plugins: [ // Instantiate vue plug-in
        new HtmlWebpackPlugin({//Specify template
            template: "./public/index.html",
        }),
    ],
    mode: "production", //Product module
};
Then add the local service setting devserver
module.exports = {    // Export module in node
    entry: "./src/index.js",// Specify the entry of the file
    output: {               //Export
        filename: "main.js",// Define file name
        path: __dirname + "dist", // Define folder / /__ dirname get current directory
    },
    plugins: [ // Instantiate vue plug-in
        new HtmlWebpackPlugin({//Specify template
            template: "./public/index.html",
        }),
    ],
    mode: "production", //Product module
    devServer: {
        open: true, //Open browser
        host: "localhost", //Local domain name
        port: 8080, //Port number
        hot: true, //Thermal loading
    },
};
Finally, enter npm run serve on the cmd console to display the page.
4, Various loader s
The loader gives webpack the ability to handle more files in other formats
Style loader: insert the style into the style tag
css loader: insert css into style and load css
In the cmd console, enter:
npm i style-loader css-loader -D
In webpack config. Add module module to JS:
module.exports = {    // Export module in node
    entry: "./src/index.js",// Specify the entry of the file
    output: {               //Export
        filename: "main.js",// Define file name
        path: __dirname + "dist", // Define folder / /__ dirname get current directory
    },
    plugins: [ // Instantiate vue plug-in
        new HtmlWebpackPlugin({//Specify template
            template: "./public/index.html",
        }),
    ],
    module:{
		// rule
		rules:[
			{
			//Testing End of css file
			test:/\.css$/,
			// Using two loader loaders
			use:["style-loader","css-loader"],

			}
		]
	},
    mode: "production", //Product module
    devServer: {
        open: true, //Open browser
        host: "localhost", //Local domain name
        port: 8080, //Port number
        hot: true, //Thermal loading
    },
};