preface
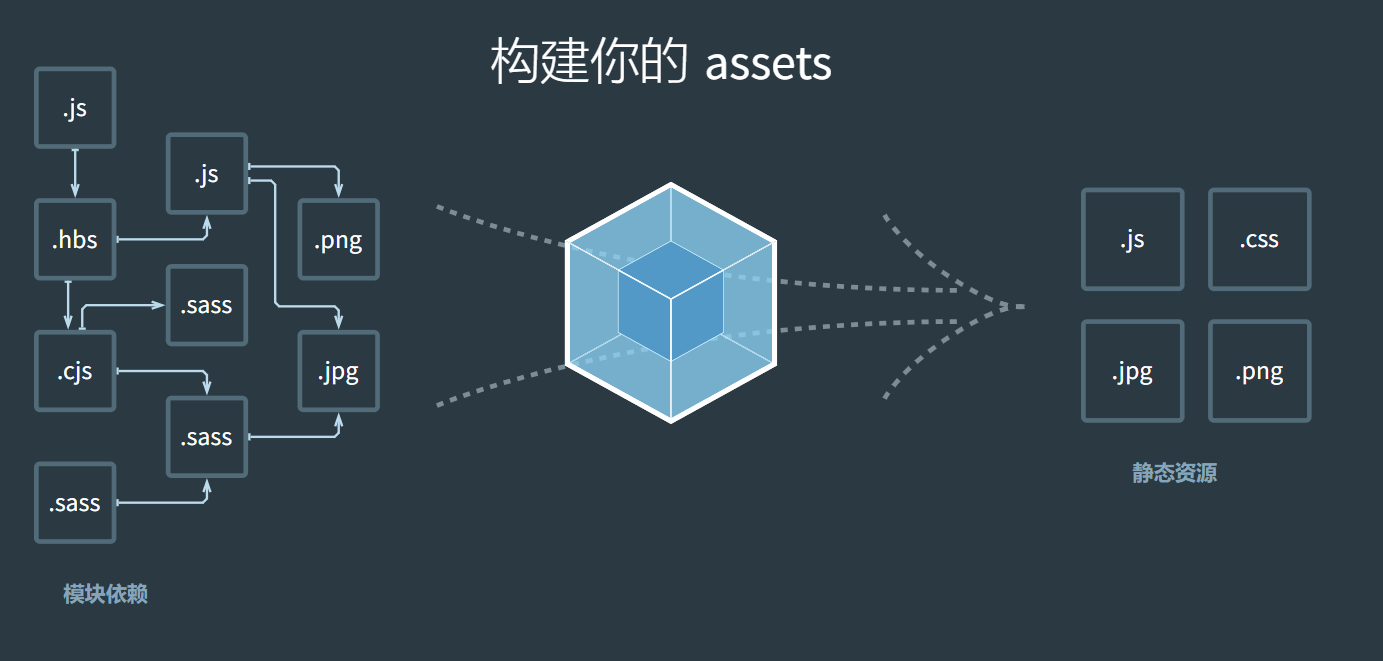
Webpack is a very powerful front-end resource loading / packaging tool. It can perform static analysis according to the dependencies of modules, and then generate static resources according to certain rules (the following contents are regulated in webpack 5)
Official website
1, webpack installation
1. Initialize npm
npm init -y
2. Installation
npm install webpack webpack-cli --save-dev
2, Write and run
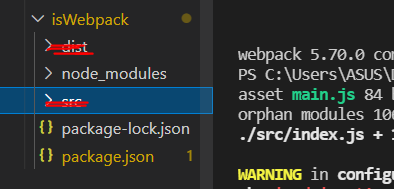
After installation, the directory under our folder is:
We recall that when we learned react, there was a src folder in the project directory to store our code files, so in the current directory, we created a new src file as the entry folder of our webpack. Under src file, we create a new index js file, we enter any js statement, and then run the npx webpack statement, we will find that the project automatically generates a dist file. Yes, this dist folder is our webpack export file.
In it you will find a main JS file is your packaged program. An example is given below:
Index. Under src JS file (demo file introduced externally:
import demo2 from './demo'
console.log(demo2)
console.log("123")
src demo JS file:
var demo1=function(){
    console.log("demo1")
}
demo1()
var demo2="demo2"
export default demo2
Main. In dist folder JS will appear:
(()=>{"use strict";console.log("demo1"),console.log("demo2"),console.log("123")})();
At first glance, it doesn't feel like the content of the file we want to package, but how to verify it?
I directly create an html file in the current directory, then introduce it into the operation, open the console and see the output. The final result (you can also try node):

We found that there was no error, and we printed all the data we want to print, indicating that there is no problem with our packaging.
3, Custom webpack
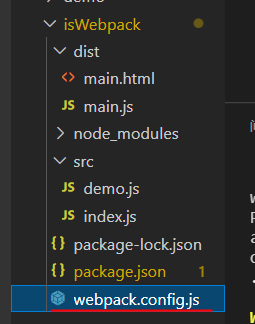
Because of different requirements, we often need to define sub webpack packaging rules. We created a webpack config. JS file to customize webpack.
Under this file, we use model Export to export. Internally, we define an entry and an exit output to specify the path of our entry and exit files. Because the export files are generally strict, we use the form of absolute path and path Resolve splices the paths and finally obtains the absolute path of the exit.
The specific codes are as follows:
const path=require("path")
module.exports={
    entry:"./src/index.js",
    output:{
        filename:"main.js",
        path:path.resolve(__dirname,"dist")
    }
}
Through the above code, it is not difficult to find that the customized webpack can change many places.
1. Manage input and output files (two plug-ins)
We can customize and modify the entry and output files, or define multiple entry files. Define multiple entry files in the form of the following code (multiple input files can be stored in the form of definition objects, and output files can be output in the form of square brackets):
const path=require("path")
module.exports={
    entry:{
        index:"./src/index.js",
        demo:"./src/demo.js"
    },
    output:{
        filename:"[name].js",
        path:path.resolve(__dirname,"dist")
    }
}
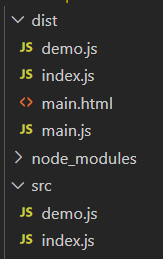
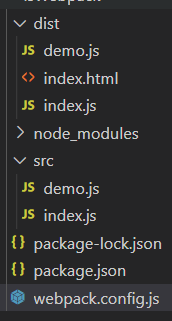
As a result, it is not difficult to find that a file with the corresponding name is generated in the dist folder. The name of the output file here is output according to the key name you entered (the key name of the incoming object):
Note: the name of the folder can also be changed. It doesn't have to be called "dist"
However, it is not difficult to find that we only need to output two files, but we still keep the files we ran last time. It shows that the results of each run will not be emptied and reloaded, but added on the original basis, which will cause a lot of redundant files.
1.html file initialization
We have to manually update the files in html every time the files are processed by webpack, so we want to achieve an effect. As long as I get the files from the exit, I can directly synchronize them to the html files. Here is a plug-in html webpack plugin
The first is the download of plug-ins:
npm i html-webpack-plugin --save-dev
At this time, we don't need to create html files manually, so we delete the html files in the original directory.
After downloading, use require to import the plug-in and write it in the form of a constructor when exporting. The specific code is as follows:
const path=require("path")
const HtmlWebpackPlugin = require('html-webpack-plugin');

module.exports={
    entry:{
        index:"./src/index.js",
        demo:"./src/demo.js"
    },
    output:{
        filename:"[name].js",
        path:path.resolve(__dirname,"dist")
    },
    plugins:[
        new HtmlWebpackPlugin()
    ]
}
At this time, we found that the dist exit folder automatically generates html files. The specific contents are as follows:
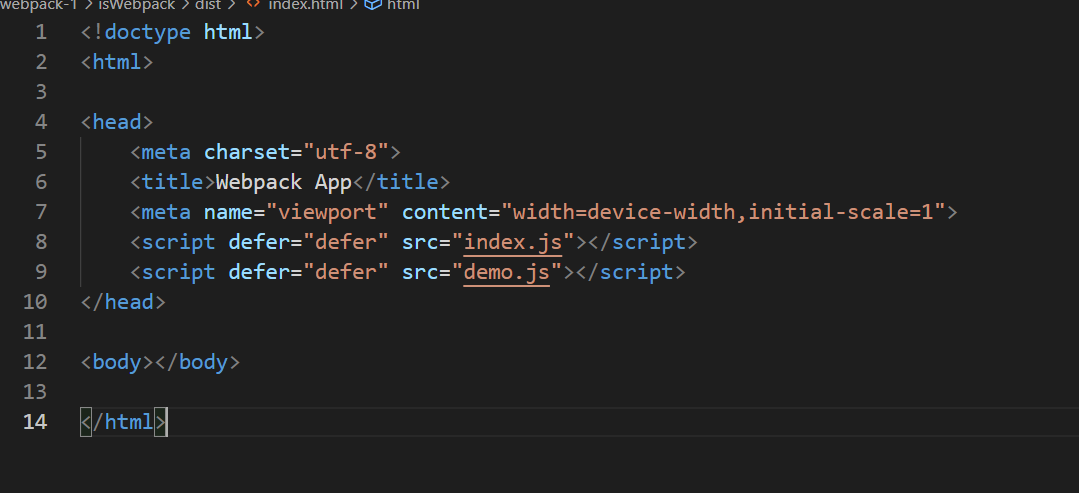
We found that he introduced two processed js files, which solved the problem of html file initialization.
Here is a brief summary of the role of HTML webpack plugin
1> Automatically generate html files
2> Automatically import the generated js file
2. Remove redundant files
Neither of the above two sections solves the problem of redundant files. Here we introduce clean webpack plugin, which is similar to HTML webpack plugin in specific usage, but introduces the attribute CleanWebpackPlugin in the plug-in. The specific code is as follows:
const path=require("path")
const HtmlWebpackPlugin = require('html-webpack-plugin');
const CleanWebpackPlugin=require('clean-webpack-plugin').CleanWebpackPlugin

module.exports={
    entry:{
        index:"./src/index.js",
        demo:"./src/demo.js"
    },
    output:{
        filename:"[name].js",
        path:path.resolve(__dirname,"dist")
    },
    plugins:[
        new HtmlWebpackPlugin(),
        new CleanWebpackPlugin()
    ]
}
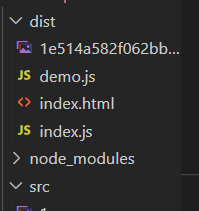
The terminal inputs npx webpack, and finally finds that the redundant files in the dist folder have been cleaned up. The following catalog pictures:
2. Managing resources
When we want to package our non js files with webpack, we will report an error in the above operation. As follows:
We're at index After creating the div style file, execute the following command:

So here we need to parse css files, so we also need to introduce two plug-ins css loader, style loader.
Installation statement:
npm i style-loader css-loader --save-dev
When exporting, write the module. A rule is defined in the module. The specific writing method is as follows (Note: "style loader" must be in front of "CSS loader", HMM. the official document stipulates this)
const path=require("path")
const HtmlWebpackPlugin = require('html-webpack-plugin');
const CleanWebpackPlugin=require('clean-webpack-plugin').CleanWebpackPlugin

module.exports={
    entry:{
        index:"./src/index.js",
        demo:"./src/demo.js"
    },
    output:{
        filename:"[name].js",
        path:path.resolve(__dirname,"dist")
    },
    plugins:[
        new HtmlWebpackPlugin(),
        new CleanWebpackPlugin()
    ],
    module:{
        rules:[
            {
                test:/\.css$/,
                use:[
                    "style-loader",
                    "css-loader"
                ]
            }
        ]
    }
}
At this point, open your html file and it will be displayed as follows;

Although your html itself has no div at all, in the console, tags and their styles are indeed rendered to the interface
Packaging of pictures
Add a picture background to the css file just now and compile it. The results are as follows:

The official website provides a plug-in dedicated to operating pictures. The first step is to install:
npm i file-loader --save-dev
The code is as follows:
const path=require("path")
const HtmlWebpackPlugin = require('html-webpack-plugin');
const CleanWebpackPlugin=require('clean-webpack-plugin').CleanWebpackPlugin

module.exports={
    entry:{
        index:"./src/index.js",
        demo:"./src/demo.js"
    },
    output:{
        filename:"[name].js",
        path:path.resolve(__dirname,"dist")
    },
    plugins:[
        new HtmlWebpackPlugin(),
        new CleanWebpackPlugin()
    ],
    module:{
        rules:[
            {
                test:/\.css$/,
                use:[
                    "style-loader",
                    "css-loader"
                ]
            },
            {
                test: /\.(png|jpg|gif)$/,
                use : ['file-loader']
            }
        ]
        ]
    }
}
Here you will find an image file in the dist folder
The front-end interface is displayed normally. After checking the console elements, we find the picture files under the official dist folder introduced in the html style, as shown below
