This tutorial and the full set of source code have been open-source on the OSChina code cloud and will be updated continuously. Please visit the latest version https://gitee.com/goeasy-io/GoEasyDemo-Live-Chatroom.git
That fire has been broadcast live in the last two years. It's really indescribable! Often a friend asks, I want to realize a live chat or I want to develop a chat room, how to start?
Today, Xiaobian will teach you how to make a chat room with go easy, which can also be used for the interaction in the live room. The full set of source code has been open-source, git address: https://gitee.com/goeasy-io/GoEasyDemo-Live-Chatroom.git
The main purpose of this tutorial is to introduce the implementation ideas for you. In order to ensure that this tutorial can help friends who use different front-end technologies, HTML + JQuery is used. In the future, Uniapp(nue/nvue) and applet versions will be launched, which you can continue to pay attention to.
The chat room we want to realize this time has two interfaces, namely:
- Login interface
- Chat room interface
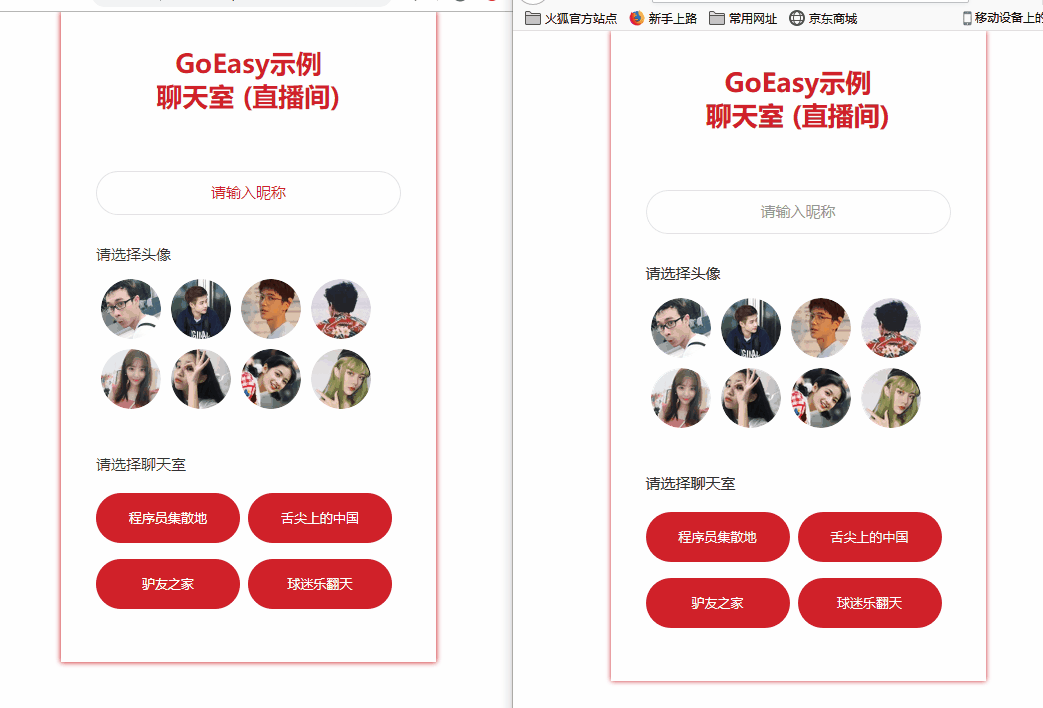
Sign in
For the login interface, we expect:
- Users can enter their own nicknames
- Users can choose their favorite avatars
- Users can choose to enter different chat rooms (live rooms)
Implementation steps
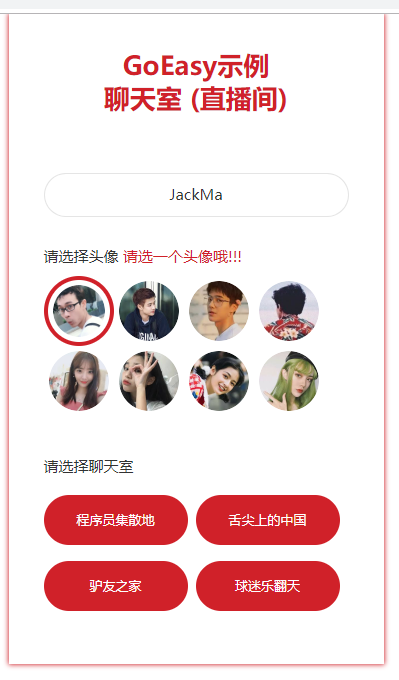
The implementation of login interface, needless to say, is really So Easy! A simple interface, only contains three simple logic:
- Verify nickname is entered
- Verify that a avatar is selected
- Enter the corresponding chat room according to the selection
Next, I will focus on the realization of chat room.
Chat room (Live Room)
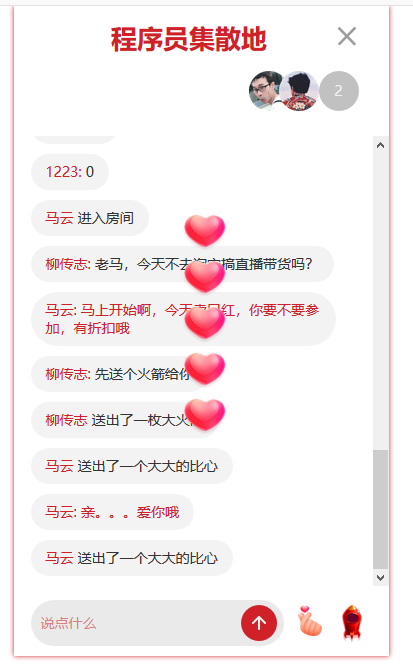
When we enter a chat room, we expect:
- Users can see how many users are online, and this number can be updated in real time
- Users can see the avatars of current online users and update them in real time
- If a user enters or leaves the chat room
a. There will be a prompt in the chat room that "XXX has come in" or "XXX has left"
b. The number of online users and the list of their avatars are automatically updated - Users can speak in chat
- Users can send props: rockets or heart comparison
Implementation steps
Step 1: chat interface display
1. Initialization: When the user selects a chat room and displays the chat interface, we need to initialize the following work first:
- Initialize current user, user id, nickname, Avatar
- Initialize current room ID: currentRoomId
- Initialize the GoEasy object, and note that the userId parameter must be added (it can be the unique id of the user, such as uuid or id. only when the client with userId is online or offline, the online or offline reminder will be triggered). At the same time, we need to put the avatar and nickname into userData. When we receive a user online reminder, we need to know the user's Avatar and nickname.
- Initialize onlineUsers. onlineUsers is used to store the number of current chat room online users and the list of online users. Take the current room Id (currentRoomId) as the channel, execute goEasy.hereNow to query the number of chat online users and user list at the moment, and assign it to onlineUsers. In addition to initializing onlineUsers when entering the chat room, when a user enters or leaves, the onlineUsers will also be updated dynamically.
- Take the id(currentRoomId) of the current chat room as the channel, execute the subscriber method to listen for and receive new chat messages.
- With the current room ID as the channel, execute subscriberPresence to listen for user entry and exit events.
Reference code: service.js
//Initialize chat room
this.joinRoom = function(userId,nickName, avatar, roomID) {
        //Initialize current user
        this.currentUser = new User(userId, nickName, avatar);
        //Initialize the current room id
        this.currentRoomId = roomID;
        //Initialize go easy and establish long connection
        this.goeasy = new GoEasy({
            host: "hangzhou.goeasy.io",
            appkey: "Your appkey",
            userId: this.currentUser.id,
            userData: '{"nickname":"' + this.currentUser.nickname + '","avatar":"' + this.currentUser.avatar + '"}',
            onConnected: function () {
                console.log( "GoEasy connect successfully.")
            },
            onDisconnected: function () {
                console.log("GoEasy disconnected.")
            }
        });
        //Query the current online user list and initialize the onlineUsers object
        this.initialOnlineUsers();
        //Monitor the online and offline reminders of users and update the onlineUsers object in real time
        this.subscriberPresence();
        //Listening and receiving new messages
        this.subscriberNewMessage();
};
2. Page display:
After initialization, jump to the live broadcast room interface and display the following data on the page:
- Name of the current chat room
- Chat record and show chat interface
- Show chat interface
Reference code: controller.js
//Page switch to chat interface
function showChatRoom() {
    //Update room name
    $("#chatRoom-header").find(".current-chatRoom-name").text(loginCommand.roomName);

    //Load chat history
    var chatHistory = service.loadChatHistory();
    chatHistory.forEach(function (item) {
        //Show messages sent
        var otherPerson = createCurrentChatRoomPerson(item.senderNickname + ":", item.content)
        $(".chatRoom-content-box").append($(otherPerson));
    });

    //Hide login interface
    $(".chat-login-box").hide();
    // //Show chat interface
    $(".chatRoom-box").show();
    // //Slide to last line
    scrollBottom();
}
So far, we have finished the initialization of the long connection of go easy and a static display of chat room. Next, let's see how to make the chat room move.
Step 2: chat room interaction
1. Real time update of online users and avatar list
Previously, the service.initialOnlineUsers method has initialized the onlineUsers object, but there are users in and out of the chat room at any time, so we need to be able to update the onlineUsers in real time when there are users online or offline, and display them on the page in real time. When we receive a user online reminder, we store the information of new online users in online user object onlineUsers, and delete it in the local online user list when any user leaves.
Reference code: service.js
//Monitor the user's up and down time and maintain the onlineUsers object
this.subscriberPresence = function() {
    var self = this;
    this.goeasy.subscribePresence({
        channel: this.currentRoomId,
        onPresence: function(presenceEvents) {
            presenceEvents.events.forEach(function(event) {
                var userId = event.userId;
                var count = presenceEvents.clientAmount;
                //Update online users
                self.onlineUsers.count = count;
                //If a user enters the chat room
                if (event.action == "join" || event.action == "online") {
                    var userData = JSON.parse(event.userData);
                    var nickName = userData.nickname;
                    var avatar = userData.avatar;
                    var user = new User(userId, nickName, avatar);
                    //Add new users to the onlineUsers list
                    self.onlineUsers.users.push(user);
                    //Update of trigger interface
                    self.onJoinRoom(user.nickname, user.avatar);
                } else {
                    for (var i = 0; i < self.onlineUsers.users.length; i++) {
                        var leavingUser = self.onlineUsers.users[i];
                        if (leavingUser.id == userId) {
                            var nickName = leavingUser.nickname;
                            var avatar = leavingUser.avatar;
                            //Delete the left users from onlineUsers
                            self.onlineUsers.users.splice(i, 1);
                            //Update of trigger interface
                            self.onLeaveRoom(nickName, avatar);
                        }
                    }
                }
            });
        },
        onSuccess : function () {
            console.log("Listening succeeded")
        },
        onFailed : function () {
            console.log("Listening failed")
        }
    });
};
2. Send message
- Initialize a chatMessage object, including sender id, nickname, message content, and message type chat
- Convert chatMessage to a string in Json format
- Call the Publish method of GoEasy to finish sending the message
Reference code (service.js)
this.sendMessage = function(content) {
    var message = new ChatMessage(this.currentUser.id,this.currentUser.nickname, MessageType.CHAT, content);
    var self = this;
    this.goeasy.publish({
        channel: self.currentRoomId,
        message: JSON.stringify(message),
        onSuccess: function() {
            console.log("Message published successfully.");
        },
        onFailed: function(error) {
            console.log("Message sending failed with error code:" + error.code + " Error message:" + error.content);
        }
    });
};
3. Receive and display new messages / props
Previously, we executed service.subscriberNewMessage() when initializing the page. When we received a message:
- Judge whether it is a chat message or a prop according to the message type
- If you receive a chat message, it will be directly displayed in the interface
- If it's a prop, play the animation
Reference code (service.js)
//Monitor messages or props
this.subscriberNewMessage = function() {
    var self = this;
    this.goeasy.subscribe({
        channel: this.currentRoomId, //Replace with your own channel
        onMessage: function(message) {
            var chatMessage = JSON.parse(message.content);
            //todo: in fact, it is not recommended to save when the front end receives. A user opens multiple windows, which will result in repeated saving. It is recommended that all messages be saved on the server side when they are sent. This is just for demonstration
            self.restapi.saveChatMessage(self.currentRoomId, chatMessage);
            //If a message is received, it is displayed as a message
            if (chatMessage.type == MessageType.CHAT) {
                var selfSent = chatMessage.senderUserId == self.currentUser.id;
                var content = JSON.parse(message.content);
                self.onNewMessage(chatMessage.senderNickname, content, selfSent);
            }
            //If you receive a prop, play the prop animation
            if (chatMessage.type == MessageType.PROP) {
                if (chatMessage.content == Prop.ROCKET) {
                    self.onNewRocket(chatMessage.senderNickname);
                }
                if (chatMessage.content == Prop.HEART) {
                    self.onNewHeart(chatMessage.senderNickname);
                }
            }
        }
    });
};
4. Send and receive and display props
In fact, it is almost the same as the implementation of sending messages. For specific code, please refer to the sendProp method of service.js and the onNewHeart() method of controller.js. The use of TweenMax library for animation playing is mainly to show an implementation idea. Xiaobian also doesn't know whether the library has good compatibility, and whether it can be used in Uniapp and small programs. Friends who know can leave messages and share them with you.
this.sendProp = function(prop) {
    var self = this;
    var message = new ChatMessage(this.currentUser.id,this.currentUser.nickname, MessageType.PROP, prop);
    this.goeasy.publish({
        channel: self.currentRoomId,
        message: JSON.stringify(message),
        onSuccess: function() {
            console.log("The props were released successfully.");
        },
        onFailed: function(error) {
            console.log("Failed to send props, error code:" + error.code + " Error message:" + error.content);
        }
    });
};
At this point, a chat room is done, isn't it very simple?
If you have any questions in reading this article or in development, you are welcome to add GoEasy as your friend on the GoEasy official website for more technical support.