Welcome to the world of Arduino
Hello, related netizens. Since you want to learn Arduino, I hope you have some C language foundation and basic circuit foundation.
Arduino is an open source electronic platform; Arduino includes hardware and software.
The hardware part is the development board, and the software part is the compiler.
Common board types of Arduino: Nano, UNO, mega2560, Leonardo; Arduino has also expanded more development boards, such as stm32, ESP8266 and digispark.
Arduino IDE, the programming software of Arduino, comes with its own compiler. Some small partners also use some external compilers, such as VScode.
Required for getting started
Today is mainly about getting started and preparing tools
- Arduino Nano328p development board
- One PC host with Arduino IDE
- Data lines cannot be less.
Introduction to Arduino Nano board
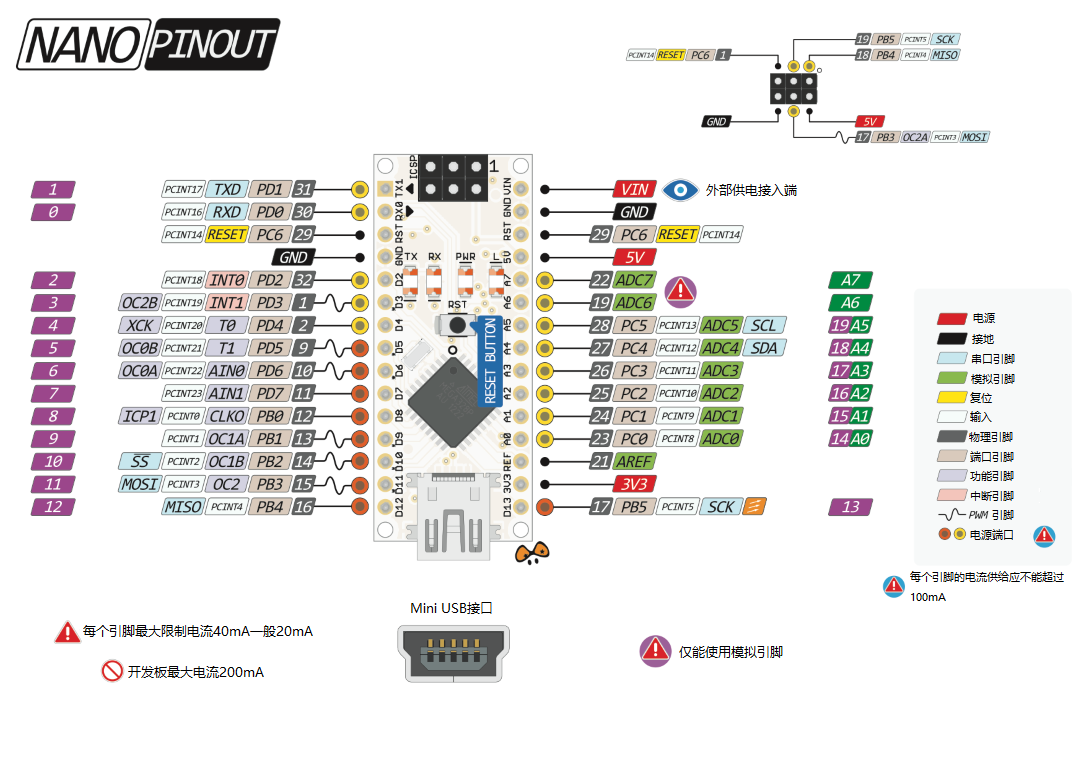
This figure is enough for Arduino's basic learning. First of all, when I build a circuit, I will determine the pin attribute, that is, which type of pin to choose. Generally, when using the sensor, I will choose the analog pin, the led lamp will choose the digital pin, and the motor will choose the PWM pin.
- Digital pins 0 ~ 19 of Arduino (Rx, Tx, D2 – D13, A0 – A5).
- Analog pins A0~A7 of Arduino (A6 and A7 can only be used for analog pins).
- The PWM pins are D3,D5, D6, D9, D10 and D11 respectively.
First understand these, read the picture, you can know more. The chip configuration information of Nano328p will be presented separately in detail.
Arduino IDE is easy to use
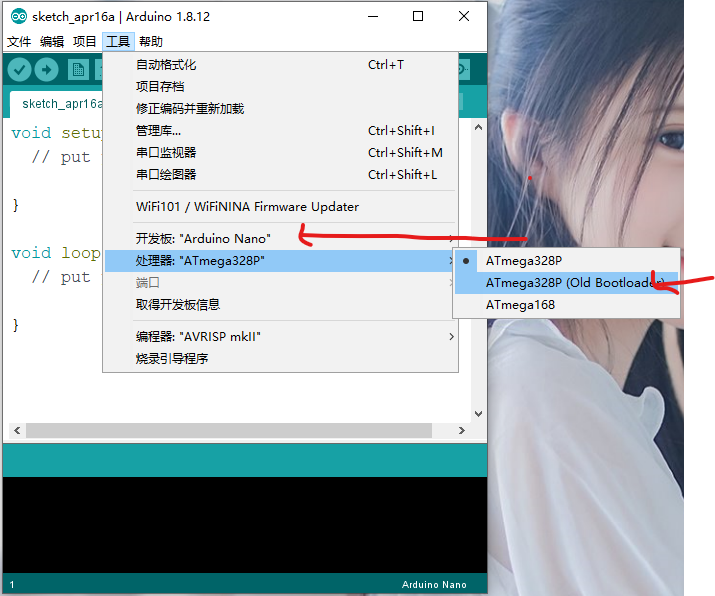
- Arduino main control board selection
At present, the Nano board tutorial is explained, so the board type is Arduino Nano.
At present, the board types purchased online are still different from the old board type and the new board type. You can ask the customer service about this. I want to use the old board type.
You can also select a port. After the computer is connected to the control board, you can open the device manager to view the port.
- Then upload the sample program.
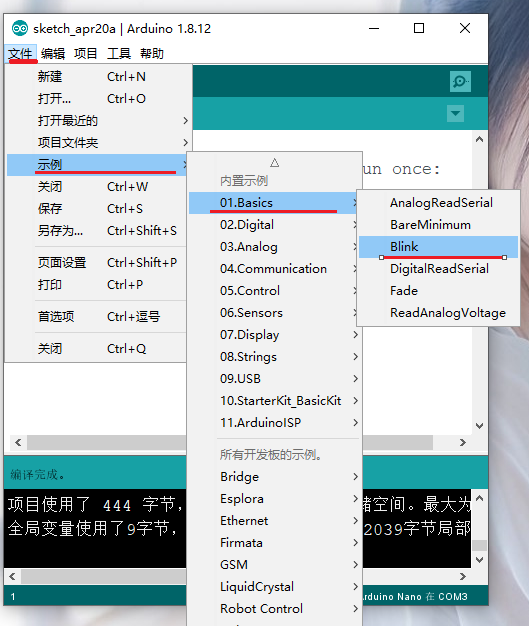
Then you will see the following code
/*
 Blink

 Turns an LED on for one second, then off for one second, repeatedly.

 Most Arduinos have an on-board LED you can control. On the UNO, MEGA and ZERO
 it is attached to digital pin 13, on MKR1000 on pin 6. LED_BUILTIN is set to
 the correct LED pin independent of which board is used.
 If you want to know what pin the on-board LED is connected to on your Arduino
 model, check the Technical Specs of your board at:
 https://www.arduino.cc/en/Main/Products

 modified 8 May 2014
 by Scott Fitzgerald
 modified 2 Sep 2016
 by Arturo Guadalupi
 modified 8 Sep 2016
 by Colby Newman

 This example code is in the public domain.

 http://www.arduino.cc/en/Tutorial/Blink
*/

// the setup function runs once when you press reset or power the board
void setup() {
 // initialize digital pin LED_BUILTIN as an output.
 pinMode(LED_BUILTIN, OUTPUT);
}

// the loop function runs over and over again forever
void loop() {
 digitalWrite(LED_BUILTIN, HIGH);   // turn the LED on (HIGH is the voltage level)
 delay(1000);                       // wait for a second
 digitalWrite(LED_BUILTIN, LOW);    // turn the LED off by making the voltage LOW
 delay(1000);                       // wait for a second
}
- Then upload the program.
The arrow of → is upload. When you upload successfully, the upload success logo appears in the blue bar box at the bottom.
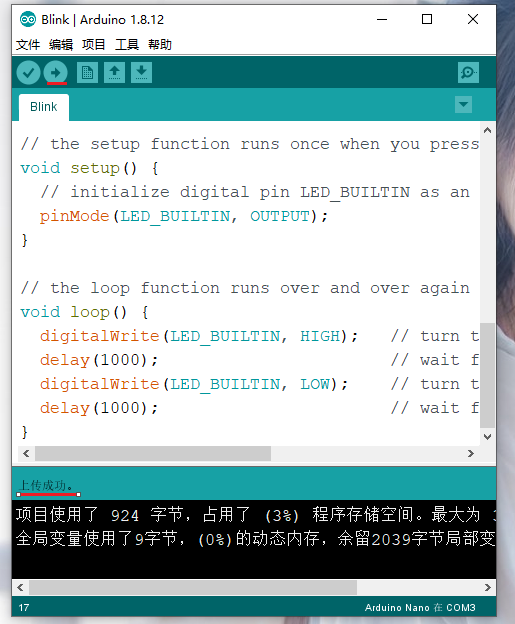
- Finally, let's talk about the program.
When you succeed, you can see that the L light on your Nano board will start flashing.
The sample programs are annotated in English. Let me make a simple modification.
//  LED used above_ Builtin can change it to the number 13
void setup() { //Here is the initial setting, which is generally run only once
 // Set the D13 pin mode to output
 pinMode(13, OUTPUT);
}

void loop() {		//Here is the main program, which will execute permanently
 digitalWrite(13, HIGH);   // Set the output of D13 pin to high level
 delay(1000);                       // Wait 1000 ms
 digitalWrite(13, LOW);    // Set the output of D13 pin to low level
 delay(1000);                       // Wait 1000 ms
}