Kotlin Is a modern programming language that focuses on simplicity, clarity and code security. Google officially adopted Kotlin by adding support to Android Studio in 2017, and then announced it as the preferred language for Android developers on Google I/O 2019. Perhaps your Android application team has gradually added Kotlin code to your project or chose to start a new Android project in Kotlin and move forward. Application code and UI automation code in the same language help engineering and QA teams set levels on the key user journey being tested. I want to share the basics of starting writing Appium tests in Kotlin. I will use Google News Android The application was targeted for this example and tested on a real Google Pixel 3 XL on the HeadSpin platform.
Kotlin is fully compatible with Java, so fortunately, in addition to writing code in the IntelliJ IDE, we can also take advantage of Appium Java client and JUnit library. IntelliJ has a free community version called IntelliJ IDEA CE, which can be downloaded from their website or through your package manager.
start
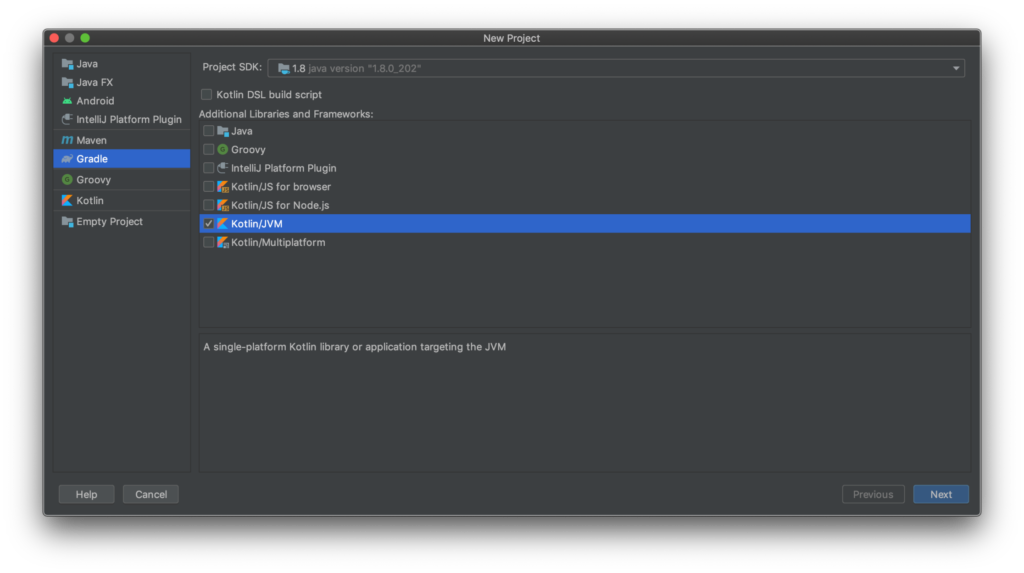
In the IntelliJ IDE, navigate to file > new project. Select Gradle, and then select Kotlin/JVM under Additional Libraries and Frameworks.
In the Project file view on the left, open build Gradle file and add the following dependencies:
Testpipe group: 'junit', name: 'junit', version: '4.13'
Compilation Group: 'io Appium ', name:' Java client ', version:' 7.3 0'
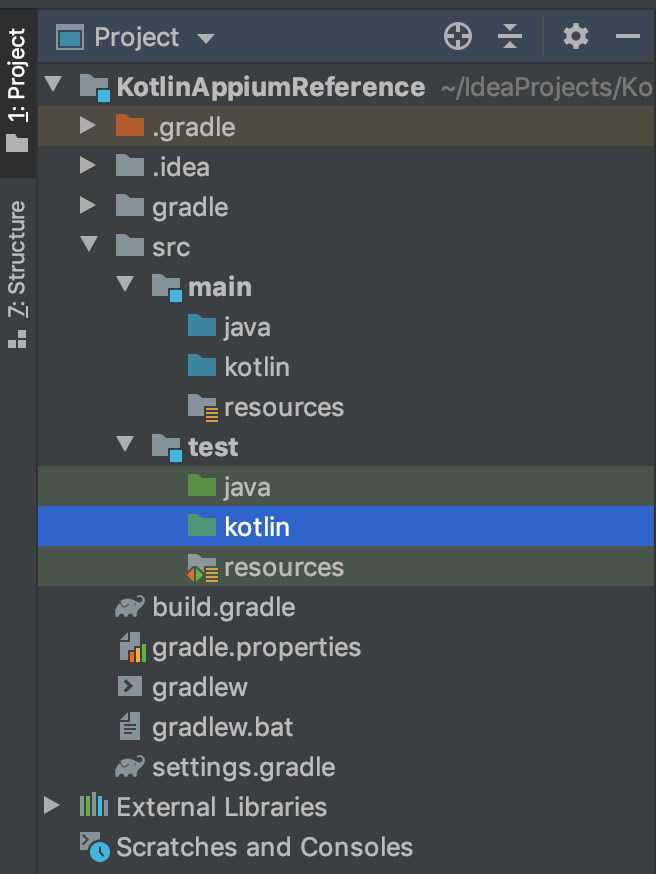
We will add Appium tests to the src/test/kotlin project directory.
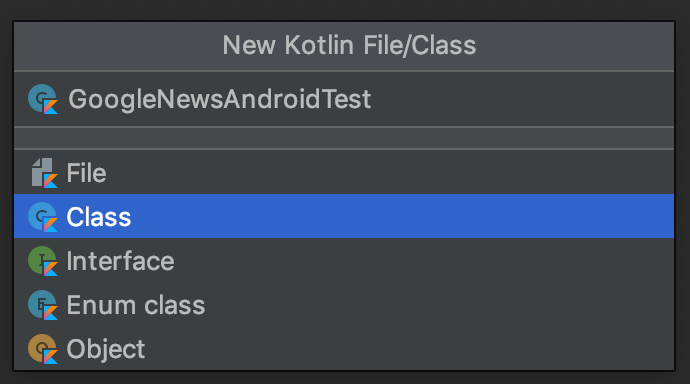
Right click the kotlin subdirectory and select new > kotlin file / class. Create three new classes:
- ProjectCapabilities
- TestBase
- GoogleNewsAndroidTest
We will build projects in these three classes to make the organization clear. The ProjectCapabilities class will return Desired Capabilities. TestBase will be the base class for our test, which is used to build the scaffolding for test setup and disassembly. Finally, the GoogleNewsAndroidTest class will inherit from our TestBase, use Desired Capabilities, and include our test logic.
1. ProjectCapabilities class
Let's start using the ProjectCapabilities class. This class will have a method to return the required functionality.
import org.openqa.selenium.remote.DesiredCapabilities

class ProjectCapabilities {
   companion object {
       fun AndroidBaseCapabilities(): DesiredCapabilities {
           val caps = DesiredCapabilities()
           caps.setCapability("autoAcceptAlerts", true)
           caps.setCapability("platformName", "Android")
           caps.setCapability("automationName", "UiAutomator2")
           caps.setCapability("deviceName", "8ABY0H6YG")
           caps.setCapability("udid", "8ABY0H6YG")
           caps.setCapability("appPackage", "com.google.android.apps.magazines")
           caps.setCapability("appActivity", "com.google.apps.dots.android.app.activity.CurrentsStartActivity")
           return caps
       }
   }
}
The functions and methods in Kotlin are declared with the "fun" keyword. You can also use a colon followed by a type to indicate the return type of a function. We can make it a static class method by declaring it in the companion object. You can use "val" to create read-only variables and variables that can be reassigned using "var".
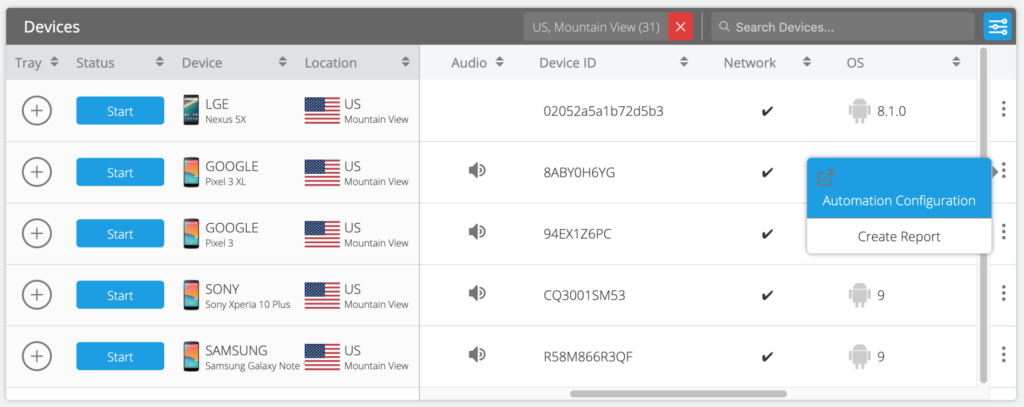
In this case, my goal is a real Pixel 3 XL device in the HeadSpin platform. In the HeadSpin Web UI, you can obtain the minimum required functions of the device by clicking the vertical point menu and selecting automatic configuration.
For appPackage and appActivity, I specified the associated value of Google News Android application.
2.TestBase class
Next, let's deal with our TestBase class. By default, classes in Kotlin are implicitly final and cannot be inherited. To make the class inheritable, we will mark it with the "open" keyword. In this lesson, we will create attribute variables for drivers, features, HeadSpin API tokens, and webdriver URLs. We will provide visibility modifiers for our properties, in which case:
Protected: visible only in classes or subclasses
Private: visible only in class
We also marked our Desired Capabilities variable "open" so that it can be overridden from the GoogleNewsAndroidTest class inherited from the TestBase class.
In addition, you can indicate whether the variable can be empty. The ability to declare this in advance is an important feature of the kotlin language because it prevents unexpected NullPointerExceptions in our code. In this case, we can use "?" Indicates that the driver and capital letters can be empty. After types and set them to null. Kotlin also supports string insertion by using the "$" character to insert variables or "${}" to insert expressions. We will use this convenient language feature to pass our HeadSpin API token to our WebDriver URL string.
Our TestBase will also have two JUnit comments: @ Before for our setup function and @ After for our disassembly to execute driver exit. Our setup function will be simple, it will instantiate the driver object. In our disassembly function, we will check whether the driver object is not empty, and if so, exit our session. Otherwise, we will throw an exception. Kotlin provides a convenient operator to check null conditions with '?:'. This is called Elvis Operator, because if you turn your head to one side, the question mark character looks like a strand of hair and the colon looks like eyes.

Do you see the similarities now? Anyway, the source code of the class can be found below. Let's continue.
import io.appium.java_client.MobileElement
import io.appium.java_client.android.AndroidDriver
import org.junit.After
import org.junit.Before
import org.openqa.selenium.remote.DesiredCapabilities
import java.lang.Exception
import java.net.URL

open class TestBase {
   protected var driver: AndroidDriver<MobileElement>? = null
   protected open var caps: DesiredCapabilities? = null
   private val headSpinAPIToken: String = "your-api-token-here"
   private val webDriverURL: URL = URL("https://appium-dev.headspin.io/v0/$headSpinAPIToken/wd/hub")


   @Before
   fun setUp() {
       this.driver = AndroidDriver(webDriverURL, caps)
   }

   @After
   fun tearDown() {
       this.driver?.quit() ?: throw Exception("Driver instance was unable to quit.")
   }

}
3. GoogleNewsAndroidTest class
Our last class, Google News Android test, will contain our test logic. Here we have a test function annotated with JUnit Test. Our test will be simple and clear. We will click the "title" tab button and scroll down from the list of news articles. Since we will perform driver operations, we first need to ensure that the driver is not empty. Kotlin provides a way to use "? Only when the value is not empty The method of performing the operation. (safe call operator) used with 'let'.
import io.appium.java_client.MobileBy
import org.junit.Test
import org.openqa.selenium.interactions.Interaction
import org.openqa.selenium.interactions.PointerInput
import org.openqa.selenium.interactions.Sequence
import org.openqa.selenium.remote.DesiredCapabilities
import org.openqa.selenium.support.ui.ExpectedConditions
import org.openqa.selenium.support.ui.WebDriverWait
import java.time.Duration

class GoogleNewsAndroidTest: TestBase() {
   override var caps: DesiredCapabilities? = ProjectCapabilities.AndroidBaseCapabilities()
   private val headlinesTabButton: String = "com.google.android.apps.magazines:id/tab_headlines"

   @Test
   fun headlinesScrollTest() {

       // Set an explicit wait of 10 seconds
       val wait = WebDriverWait(driver?.let { it }, 10)

       // Tap on the Headlines tab button
       wait.until(ExpectedConditions.presenceOfElementLocated(MobileBy.id(headlinesTabButton))).click()

       // Scroll Down
       val finger: PointerInput = PointerInput(PointerInput.Kind.TOUCH, "finger")
       val moveToStart: Interaction = finger.createPointerMove(Duration.ZERO, PointerInput.Origin.viewport(), 726, 2452)
       val pressDown: Interaction = finger.createPointerDown(PointerInput.MouseButton.LEFT.asArg());
       val moveToEnd: Interaction = finger.createPointerMove(Duration.ofMillis(1000), PointerInput.Origin.viewport(), 726, 660)
       val pressUp: Interaction = finger.createPointerUp(PointerInput.MouseButton.LEFT.asArg())

       val swipe = Sequence(finger, 0)
       swipe.addAction(moveToStart)
       swipe.addAction(pressDown)
       swipe.addAction(moveToEnd)
       swipe.addAction(pressUp)

       driver?.let { it.perform(arrayListOf(swipe)) }

   }
}
conclusion
Our work here is finished! We can now execute our test and observe its operation.

Congratulations, you have now experienced the feeling of writing Appium tests in Kotlin! If this article is helpful to your knowledge, please feel free to like or share it. You can here Download the complete project source code.
