Mysqldump is a logical backup method. Its biggest defect is that the speed of backup and recovery is slow. For a database less than 50G, this speed is acceptable. But if the database is very large, it is not suitable to use mysqldump backup again. At this time, you need a kind of easy-to-use and efficient tool. Xtrabackup is one of them, known as the free version of InnoDB HotBackup. Xtrabackup implementation is a physical backup, and it is a physical hot backup. At present, there are two mainstream tools to implement the physical hot backup: ibbackup and xtrabackup; ibbackup is a commercial software, which needs authorization and is very expensive. Xtrabackup is more powerful than ibbackup, but it is open source. So let's introduce the use of xtrabackup here. Xtrabackup provides two command-line tools: xtrabackup, which is dedicated to backing up data of InnoDB and xtrabb engine; innobackupex, which is a perl script. Xtrabackup command will be called during execution, so that InnoDB and objects of MyISAM engine can be backed up with this command.
Xtrabackup is a mysql database backup tool provided by percona, featuring:
(1) Fast and reliable backup process;
(2) The backup process will not interrupt the ongoing transaction;
(3) Save disk space and traffic based on compression and other functions;
(4) Automatic backup inspection;
(5) Fast restore speed.
1. Install xtrabackup
[root@mysql ~]# wget https://www.percona.com/downloads/XtraBackup/Percona-XtraBackup2.4.4/binary/tarball/percona-xtrabackup-2.4.4-Linux-x86_ Sixty-four tar.gz                #Download xtrabackup
#Extract and enter directory replication
[root@mysql ~]# tar zxf percona-xtrabackup-2.4.4-Linux-x86_64.tar.gz
[root@mysql ~]# cd percona-xtrabackup-2.4.4-Linux-x86_64/
[root@mysql percona-xtrabackup-2.4.4-Linux-x86_64]# cp bin/* /usr/bin/
[root@mysql percona-xtrabackup-2.4.4-Linux-x86_64]# ls bin/
Xtrabackup includes two tools: xtrabackup, which is used for hot backup Innodb, Xtrabackup is a perl script that encapsulates xtrabackup. It can process both Innodb and Myisam, but it needs to add a read lock when processing Myisam. Because of the need to add a read lock when operating Myisam, which will block the write operation of online services, and Innodb has no such limitation, the larger the proportion of Innodb table types in the database, the more favorable it is.
#Install related plug-ins
[root@mysql ~]# yum -y install  perl-DBI perl-DBD-MySQL perl-Time-HiRes perl-IO-Socket-SSL perlTermReadKey.x86_64 perl-Digest-MD5
#Download percona toolkit and install it
[root@mysql /]# wget https://www.percona.com/downloads/percona-toolkit/2.2.19/RPM/perconatoolkit-2.2.19-1.noarch.rpm
[root@mysql ~]# rpm -ivh percona-toolkit-2.2.19-1.noarch.rpm
In this way, the xtrabackup tool is installed, and then you can start the backup
Scheme 1: xtrabackup full backup + binlog incremental backup
1. Create backup directory
[root@mysql ~]# mkdir -p /opt/mysqlbackup/{full,inc}
#Full: full directory; inc: incremental backup directory
1) , full backup
[root@mysql ~]# innobackupex --defaults-file=/etc/my.cnf --user=root --password=123 /opt/mysqlbackup/full/
Note: - defaults file = / etc/ my.cnf Specify the configuration file of mysql my.cfg , must be the first parameter if specified. /path/to/BACKUP-DIR / specifies the target directory where the backup is stored. During the backup process, a directory named after the backup time is created to store the backup files.
As shown in the following figure, the backup is successful: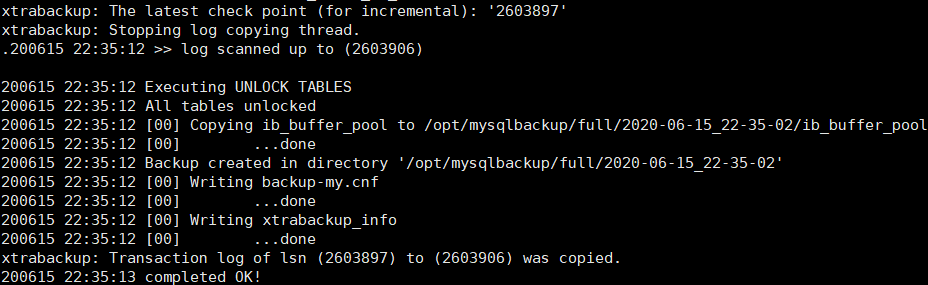
At the same time of backup, the backup data will create a directory named current date and time under the backup directory to store the backup files:
[root@mysql ~]# cd /opt/mysqlbackup/full/
[root@mysql full]# ll
total 0
drwxr-x--- 6 root root 206 Jun 15 22:35 2020-06-15_22-35-02
[root@mysql full]# ll 2020-06-15_22-35-02/
total 12336
-rw-r----- 1 root root      425 Jun 15 22:35 backup-my.cnf
-rw-r----- 1 root root      338 Jun 15 22:35 ib_buffer_pool
-rw-r----- 1 root root 12582912 Jun 15 22:35 ibdata1
drwxr-x--- 2 root root     4096 Jun 15 22:35 mysql
drwxr-x--- 2 root root     8192 Jun 15 22:35 performance_schema
drwxr-x--- 2 root root     8192 Jun 15 22:35 sys
drwxr-x--- 2 root root       50 Jun 15 22:35 test1
-rw-r----- 1 root root      113 Jun 15 22:35 xtrabackup_checkpoints
-rw-r----- 1 root root      459 Jun 15 22:35 xtrabackup_info
-rw-r----- 1 root root     2560 Jun 15 22:35 xtrabackup_logfile
Description of each document:
(1)xtrabackup_checkpoints -- backup type (such as full or incremental), backup status (such as whether it has been prepared), and LSN (log sequence number) range information; each InnoDB page (usually 16k size) will contain a log sequence number, that is, LSN. LSN is the system version number of the whole database system. The LSN related to each page can indicate how this page has changed recently.
(2)xtrabackup_binlog_info - the binary log file currently in use by mysql server and the location of binary log events up to the time of backup.
(3)xtrabackup_binlog_pos_innodb -- the current position of the binary log file and the binary log file used for InnoDB or XtraDB tables.
(4)xtrabackup_binary -- the executable file of xtrabackup used in backup;
(5)backup-my.cnf ——Configuration option information for backup command;
When using innobackupex for backup, you can also use the -- no timestamp option to prevent the command from automatically creating a directory named after time; in this way, the innobackupex command will create a backup dir directory to store backup data
Note: related options Description: where, - user specifies the user name to connect to the database, - password specifies the password to connect to the database, - defaults file specifies the configuration file of the database, from which innobackupex obtains information such as datadir; - database specifies the database to be backed up, and the database specified here is only valid for the MyISAM table, and for InnoDB For data, it is full backup (all InnoDB data in the database is backed up, not only the specified database, but also during recovery); / opt/mysqlbackup/full is the storage location of backup files.
Note: the user who backs up the database needs to have the corresponding permission. If you want to use a user with the minimum permission to back up, you can create such a user based on the following command:
#Create user
mysql> create user 'bkpuser'@'localhost' identified by '123456';
#Reclaim all user rights
mysql> revoke all privileges,grant option from 'bkpuser'@'localhost';
#Authorize appropriate permissions for backups
mysql> grant reload,lock tables,replication client, process on *.* to 'bkpuser'@'localhost';
mysql> flush privileges;
At this point, the full backup is completely successful. Then insert several pieces of data into a mysql database, and then make an incremental backup. For the database changes after the full backup, make a binary log incremental backup:
#View binlog log location during full backup
[root@mysql full]# cat /opt/mysqlbackup/full/2020-06-15_22-49-41/xtrabackup_binlog_info
bin_log.000001  154
#Simulation database modification:
mysql>select * from tb1;
+------+----------+--------+
|   id | name     | back   |
|------+----------+--------|
|    1 | zhangsan | w      |
|    2 | lisi     | q      |
|    3 | wangwu   | e      |
|    4 | zhaoliu  | r      |
|    5 | liuyi    | t      |
|    6 | didi     | y      |
+------+----------+--------+
6 rows in set
mysql>insert into tb1 values(7,'tom','u');
mysql>insert into tb1 values(8,'tom2','i');
[root@mysql data]# pwd
/usr/local/mysql/data
[root@mysql data]# mysqlbinlog -v bin_log.000001       # You can use mysqlbinlog binary log number
[root@mysql data]# cat /opt/mysqlbackup/full/2020-06-15_22-49-41/xtrabackup_binlog_info
bin_log.000001  154            # The 154 in the back is the beginning
#Because I did some operations after I was fully prepared, I am not 154
#Incremental backup binaries
[root@mysql data]# mysqlbinlog --start-position=219 /usr/local/mysql/data/bin_log.000001 > /opt/mysqlbackup/inc/`date +%F`.sql
[root@mysql data]# ls /opt/mysqlbackup/inc/
2020-06-15.sql
2. Restore database
#Simulation database damage, I use delete data directory file directly to simulate damage.
[root@mysql ~]# rm -rf /usr/local/mysql/data/*
Restore full backup:
prepare a full backup generally, after the backup is completed, the data cannot be used for recovery operation, because the backed up data may contain transactions that have not been committed or transactions that have been committed but have not been synchronized to the data file. Therefore, the data file still handles the inconsistent state at this time. The main function of "preparation" is to make the data file consistent by rolling back uncommitted transactions and synchronizing committed transactions to the data file. After the preparation process, the InnoDB table data has rolled forward to the point where the entire backup ends, rather than to the point where xtrabackup started.
[root@mysql ~]# innobackupex --apply-log /opt/mysqlbackup/full/2020-06-15_22-49-41/
Note: opt/mysqlbackup/full/2020-06-15_22-49-41 / if the directory name of the backup file is executed correctly, the last few lines of information output are usually as follows: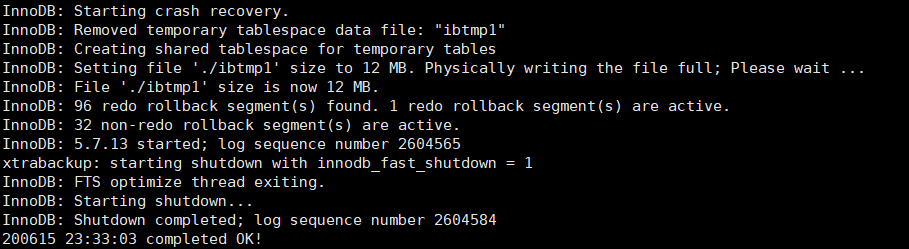
In the process of implementing "preparation", innobackupex can also use the -- use memory option to specify the size of memory it can use, usually 100M by default. If enough memory is available, you can partition more memory to prepare to improve its completion speed. The -- copy back option of the innobackupex command is used to perform the recovery operation, which performs the recovery process by copying all data related files to the DATADIR directory of the mysql server. Innobackupex through backup-my.cnf To get information about the DATADIR directory.
(2) Restore database syntax:
[root@mysql ~]# innobackupex --copy-back /opt/mysqlbackup/full/2020-06-15_22-49-41/
Here -- copy back indicates data recovery. After the completion of data recovery, you need to modify the permission mysql database of related files to start normally.
If executed correctly, the last lines of its output information are usually as follows: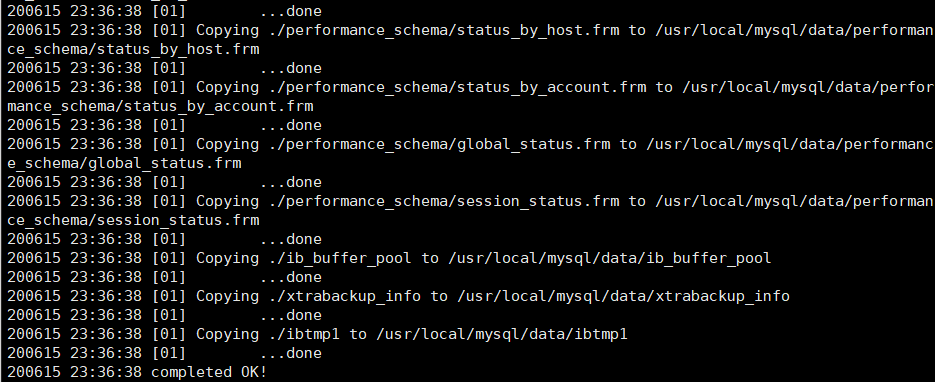
Make sure that "completed OK!" appears on the top line of the above message. Modify the restored data directory permissions:
[root@mysql ~]# ll /usr/local/mysql/data/
total 122916
-rw-r----- 1 root root      357 Jun 15 23:36 ib_buffer_pool
-rw-r----- 1 root root 12582912 Jun 15 23:36 ibdata1
-rw-r----- 1 root root 50331648 Jun 15 23:36 ib_logfile0
-rw-r----- 1 root root 50331648 Jun 15 23:36 ib_logfile1
-rw-r----- 1 root root 12582912 Jun 15 23:36 ibtmp1
drwxr-x--- 2 root root     4096 Jun 15 23:36 mysql
drwxr-x--- 2 root root     8192 Jun 15 23:36 performance_schema
drwxr-x--- 2 root root     8192 Jun 15 23:36 sys
drwxr-x--- 2 root root       50 Jun 15 23:36 test1
-rw-r----- 1 root root      504 Jun 15 23:36 xtrabackup_info
After the data is restored to the DATADIR directory, it is also necessary to ensure that the owner and group of all data files are correct users, such as mysql. Otherwise, the owner and group of data files need to be modified in advance before starting mysqld. For example:
[root@mysql ~]# chown -R mysql:mysql /usr/local/mysql/data/
[root@mysql ~]# ll /usr/local/mysql/data/
total 122916
-rw-r----- 1 mysql mysql      357 Jun 15 23:36 ib_buffer_pool
-rw-r----- 1 mysql mysql 12582912 Jun 15 23:36 ibdata1
-rw-r----- 1 mysql mysql 50331648 Jun 15 23:36 ib_logfile0
-rw-r----- 1 mysql mysql 50331648 Jun 15 23:36 ib_logfile1
-rw-r----- 1 mysql mysql 12582912 Jun 15 23:36 ibtmp1
drwxr-x--- 2 mysql mysql     4096 Jun 15 23:36 mysql
drwxr-x--- 2 mysql mysql     8192 Jun 15 23:36 performance_schema
drwxr-x--- 2 mysql mysql     8192 Jun 15 23:36 sys
drwxr-x--- 2 mysql mysql       50 Jun 15 23:36 test1
-rw-r----- 1 mysql mysql      504 Jun 15 23:36 xtrabackup_info
[root@mysql ~]# systemctl restart mysqld
#Verify restored data
mysql> select * from tb1;
+------+----------+------+
| id   | name     | back |
+------+----------+------+
|    1 | zhangsan | w    |
|    2 | lisi     | q    |
|    3 | wangwu   | e    |
|    4 | zhaoliu  | r    |
|    5 | liuyi    | t    |
|    6 | didi     | y    |
+------+----------+------+
6 rows in set (0.00 sec)
(3) Restore incremental backup:
To prevent a large number of binary logs from being generated during restore, you can temporarily shut down the binary logs before restoring:
mysql> set sql_log_bin=0;
mysql> source /opt/mysqlbackup/inc/2020-06-15.sql
You can also execute the following statement on the command line
mysql –uroot –p  < /opt/mysqlbackup/inc/2020-06-15.sql
mysqlbinlog /opt/mysqlbackup/inc/2020-06-15.sql | mysql –uroot -p
Restart the binary log and verify the restore data:
mysql> set sql_log_bin=1;
mysql> select * from tb1;       # You can see that two Toms have come back
+------+----------+------+
| id   | name     | back |
+------+----------+------+
|    1 | zhangsan | w    |
|    2 | lisi     | q    |
|    3 | wangwu   | e    |
|    4 | zhaoliu  | r    |
|    5 | liuyi    | t    |
|    6 | didi     | y    |
|    7 | tom      | u    |
|    8 | tom2     | i    |
+------+----------+------+
8 rows in set (0.00 sec)
Scheme 2: xtrabackup full backup + xtrabacup incremental backup
In the previous incremental backup, we used the old method: Backup binary logs. In fact, xtrabackup also supports incremental backup. First, I will introduce the principle of xtrabackup. In InnoDB, a redo log file will be maintained. We can also call it transaction log. The transaction log stores the record changes of each InnoDB table data. When InnoDB starts, InnoDB will check the data file and transaction log, and perform two steps: it applies the transaction log that has been committed to the data file, and rolls back the modified but not committed data. Xtrabackup remembers log sequence number (LSN) at startup and copies all data files. The replication process takes some time, so if the data file changes during this period, the database will be at a different point in time. At this point, xtrabackup runs a background process to monitor the transaction log and copy the latest changes from the transaction log. Xtrabackup must continue to do this operation, because the transaction log will rotate and write repeatedly, and the transaction log can be reused. So xtrabackup keeps recording the changes of every data file in the transaction log since it was started. This is the xtrabackup backup process, so every InnoDB page will contain an LSN information. Whenever the relevant data changes, the LSN of the relevant page will grow automatically. This is the basis for the incremental backup of InnoDB tables. Xtrabackup is based on the crash recovery function of InnoDB. It will copy the data file of InnoDB. Since the table is unlocked, the copied data is inconsistent. When recovering, crash recovery is used to make the data recovery consistent. When InnoDB is started, it will first check the data file and transaction log, and do two steps:
1.It applies committed transaction logentries to the data files
2. It performs an undo operation on any transactions that modified data but did not commit.
Prepare the test environment, create a test database, and create a table to input several rows of data
mysql> create database test2;
mysql> use test2;
mysql> create table tab1(id int,name varchar(20));
mysql> insert into tab1 values(1,'tom1');
mysql> insert into tab1 values(2,'tom2');
1. xtrabacup to perform a full backup:
[root@mysql ~]# xtrabackup --default-file=/etc/my.cnf --user=root --password="123" --port=3306 --backup --target-dir=/opt/mysqlbackup/full/full_incre_$(date+%Y-%m-%d_%H:%M:%S)
#View full backup files
[root@mysql ~]# ls /opt/mysqlbackup/full/ -l
total 0
drwxr-x--- 6 root root 288 Jun 15 23:33 2020-06-15_22-49-41
drwxr-x--- 7 root root 249 Jun 15 23:56 full_incre_
#xtrabackup enters some data for incremental backup to realize the first incremental data:
mysql> use test2;
mysql> insert into tab1 values(3,'tom3');
[root@mysql ~]# xtrabackup --defaults-file=/etc/my.cnf --user=root --password="123" --port=3306 --backup --target-dir=/opt/mysqlbackup/inc/incre_$(date  +%Y%m%d_%H%M%S) --incremental-basedir=/opt/mysqlbackup/full/full_incre_
Some of the displayed information is shown in the following figure: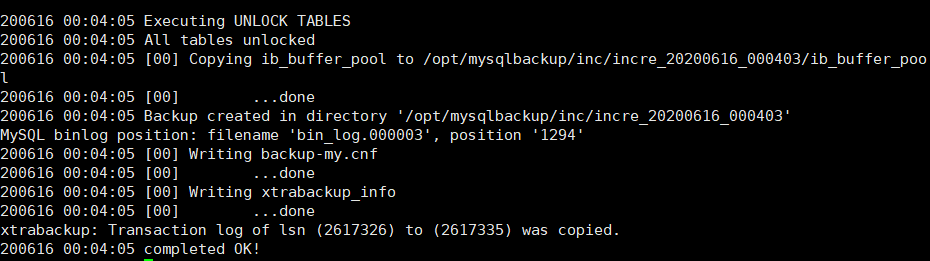
#To view an incremental backup file:
[root@mysql ~]# ls -l /opt/mysqlbackup/inc/
total 8
drwxr-x--- 7 root root  275 Jun 16 00:04 incre_20200616_000403
#The incremental backup here is actually only for InnoDB. For MyISAM, it is still a full backup.
#Insert several more rows of data into the table to continue the second incremental backup
mysql> insert into tab1 values (4,'tom4');
mysql> commit;
#Next, do a second incremental backup
[root@mysql ~]# xtrabackup --defaults-file=/etc/my.cnf --user=root --password="123" --port=3306 --backup --target-dir=/opt/mysqlbackup/inc/incre_$(date  +%Y%m%d_%H%M%S) --incremental-basedir=/opt/mysqlbackup/inc/incre_20200616_000403
As shown in the figure below: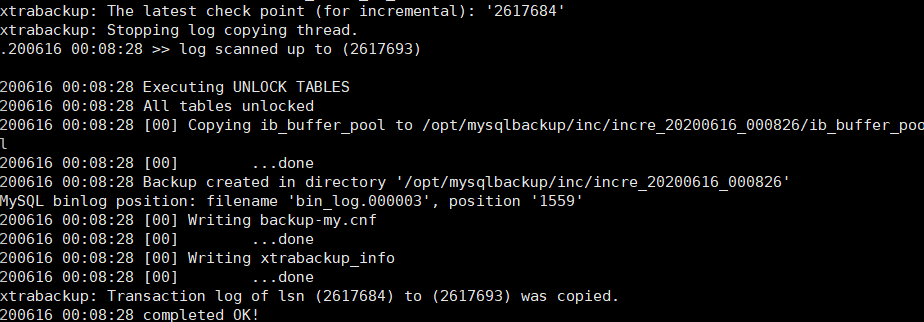
Note: the second incremental backup -- incremental basedir points to the location of the last incremental backup file.
Note: the second incremental backup -- incremental basedir points to the location of the last incremental backup file.
Note: the second incremental backup -- incremental basedir points to the location of the last incremental backup file.
#Viewing incremental backup files
[root@mysql ~]# ls -l /opt/mysqlbackup/inc/
total 8
drwxr-x--- 7 root root  275 Jun 16 00:04 incre_20200616_000403
drwxr-x--- 7 root root  275 Jun 16 00:08 incre_20200616_000826
2. xtrabacup performs incremental recovery. To verify the comparison, first delete the data in the table before two incremental backups
mysql> delete from tab1 where id=3;
Full backup recovery: before recovery, if the full backup is on the remote host, first copy the full backup to the local host. If it is a tar package, unpack first. The unpacking command is tar – izxf xxx.tar , where the - i parameter must be used (ignoring the 0 byte block in the archive, which usually means the end of the file).
Start full backup recovery:
[root@mysql ~]# xtrabackup --defaults-file=/etc/my.cnf --prepare --user=root --password="123" --apply-log-only --target-dir=/opt/mysqlbackup/full/full_incre_/
The recovery is successful as shown in the figure: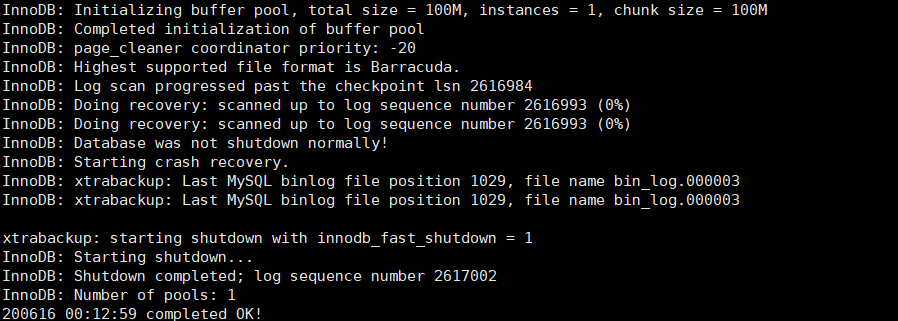
The steps of incremental backup recovery at the time of first incremental recovery are basically the same as those of full backup recovery, but the process of applying logs is slightly different. In incremental backup recovery, all incremental backups are applied to the data files of the full backup one by one, and then the data in the full backup is recovered to the database.
[root@mysql ~]# xtrabackup --defaults-file=/etc/my.cnf --prepare --user=root --password="123" --apply-log-only --target-dir=/opt/mysqlbackup/full/full_incre_/ --incremental-dir=/opt/mysqlbackup/inc/incre_20200616_000403/
As shown in the figure: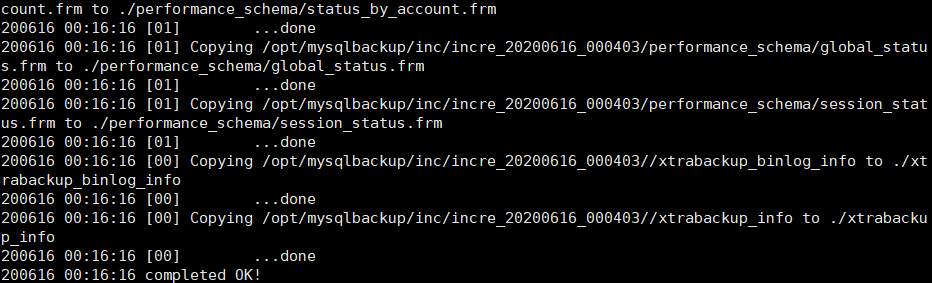
Restore to the front of the second incremental backup:
[root@mysql ~]# xtrabackup --defaults-file=/etc/my.cnf --prepare --user=root --password="123" --apply-log-only --target-dir=/opt/mysqlbackup/full/full_incre_/ --incremental-dir=/opt/mysqlbackup/inc/incre_20200616_000826/
As shown in the figure: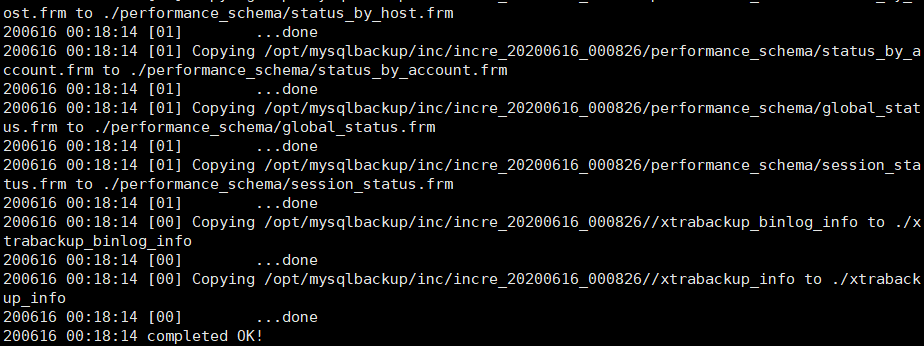
Restore entire library:
[root@mysql ~]# xtrabackup --defaults-file=/etc/my.cnf --prepare --user=root --password="123" --target-dir=/opt/mysqlbackup/full/full_incre_/
As shown in the figure: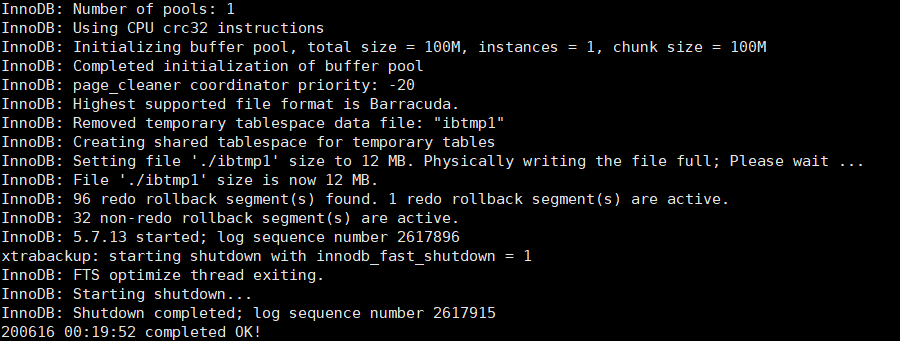
Stop mysql database:
[root@mysql ~]# systemctl stop mysqld
Start rsync sync data file:
[root@mysql full_incre_]# rsync -rvt --exclude 'xtrabackup_checkpoints' --exclude 'xtrabackup_logfile' ./ /usr/local/mysql/data/
#After the data is restored to the DATADIR directory, it is also necessary to ensure that the owner and group of all data files are correct users, such as mysql. Otherwise, the owner and group of data files need to be modified in advance before starting mysqld.
[root@mysql data]# ll
total 122972
-rw-r----- 1 mysql mysql       56 Jun 15 23:38 auto.cnf
-rw-r----- 1 root  root       425 Jun 15 23:56 backup-my.cnf
-rw-r----- 1 mysql mysql      177 Jun 15 23:38 bin_log.000001
-rw-r----- 1 mysql mysql      177 Jun 15 23:40 bin_log.000002
-rw-r----- 1 mysql mysql     1847 Jun 16 00:42 bin_log.000003
-rw-r----- 1 mysql mysql      111 Jun 15 23:41 bin_log.index
-rw-r----- 1 root  root       298 Jun 15 23:56 ib_buffer_pool
-rw-r----- 1 root  root  12582912 Jun 16 00:19 ibdata1
-rw-r----- 1 root  root  50331648 Jun 16 00:19 ib_logfile0
-rw-r----- 1 root  root  50331648 Jun 16 00:19 ib_logfile1
-rw-r----- 1 root  root  12582912 Jun 16 00:19 ibtmp1
drwxr-x--- 2 mysql mysql     4096 Jun 16 00:18 mysql
-rw-r----- 1 mysql mysql    22460 Jun 16 00:42 mysql.err
drwxr-x--- 2 mysql mysql     8192 Jun 16 00:18 performance_schema
drwxr-x--- 2 mysql mysql     8192 Jun 16 00:18 sys
drwxr-x--- 2 mysql mysql       50 Jun 16 00:18 test1
drwxr-x--- 2 mysql mysql       52 Jun 16 00:18 test2
-rw-r----- 1 root  root        20 Jun 16 00:18 xtrabackup_binlog_info
-rw-r--r-- 1 root  root        20 Jun 16 00:19 xtrabackup_binlog_pos_innodb
-rw-r----- 1 root  root       628 Jun 16 00:18 xtrabackup_info
[root@mysql data]# chown -R mysql:mysql /usr/local/mysql/data/
[root@mysql data]# systemctl restart mysqld
mysql> select * from tab1;
+------+------+
| id   | name |
+------+------+
|    1 | tom1 |
|    2 | tom2 |
|    3 | tom3 |
|    4 | tom4 |
+------+------+
Scheme 3: innobackupex full database backup + innobackupex incremental backup
The test environment is ready to create a test database and create a table to input several rows of data
mysql> create database test3;
mysql> use test3;
mysql> create table tab1(id int,name varchar(20));
mysql> insert into tab1 values(1,'lisi1');
mysql> insert into tab1 values(2,'lisi2');
1. innobackupex makes a full backup first
[root@mysql data]# innobackupex --defaults-file=/etc/my.cnf --user=root --password="123" /opt/mysqlbackup/full/full_incre_$(date +%Y%m%d_%H%M%S) --no-timestamp
#View full backup files
[root@mysql data]# ls /opt/mysqlbackup/full/
full_incre_20200616_005156
For the first incremental backup, input the incremental data first
mysql> insert into tab1 values(3,'lisi3');
#For enhanced backup
[root@mysql data]# innobackupex --incremental /opt/mysqlbackup/inc/incre_$(date +%Y%m%d_%H%M%S) --incremental-basedir=/opt/mysqlbackup/full/full_incre_20200616_005156 --user=root --password="123" --no-timestamp
#Viewing incremental backup files
[root@mysql data]# ll /opt/mysqlbackup/inc/
drwxr-x--- 8 root root  288 Jun 16 00:56 incre_20200616_005610
Make the second incremental backup based on the full backup and the first incremental backup, input the incremental data first
mysql> insert into tab1 values(4,'lisi4');
[root@mysql inc]# innobackupex --incremental /opt/mysqlbackup/inc/incre_$(date +%Y%m%d_%H%M%S) --incremental-basedir=/opt/mysqlbackup/inc/incre_20200616_005610/ --user=root --password="123" --no-timestamp
#Viewing incremental backup files
[root@mysql inc]# ll
total 8
drwxr-x--- 8 root root  288 Jun 16 00:56 incre_20200616_005610
drwxr-x--- 8 root root  288 Jun 16 01:03 incre_20200616_010301
#**Delete the incremental data twice to view the verification recovery results**
mysql> delete from tab1 ;
#Start recovery, restore full backup
[root@mysql inc]# innobackupex --apply-log --redo-only /opt/mysqlbackup/full/full_incre_20200616_005156/
#--Redo only is used to prepare the incremental backup content, merge the data into the full backup directory, and use it with the incremental dir incremental backup directory
#Recovery of the first incremental backup based on full backup
[root@mysql ~]# innobackupex --apply-log --redo-only /opt/mysqlbackup/full/full_incre_20200616_005156/ --incremental-dir=/opt/mysqlbackup/inc/incre_20200616_005610/
#Restore the second incremental backup based on the full backup and the first incremental backup
[root@mysql ~]# innobackupex --apply-log --redo-only /opt/mysqlbackup/full/full_incre_20200616_005156/ --incremental-dir=/opt/mysqlbackup/inc/incre_20200616_010301/
#Stop database
[root@mysql ~]# systemctl stop mysqld
#Empty all files in the data directory

[root@mysql ~]# mkdir -p /tmp/mysqldatabak
[root@mysql ~]# mv /usr/local/mysql/data/* /tmp/mysqldatabak/
#Copy the recovered data to the corresponding directory according to the requirements of the configuration file
[root@mysql ~]# innobackupex --defaults-file=/etc/my.cnf --user=root --password="123" --copy-back /opt/mysqlbackup/full/full_incre_20200616_005156/
#After the data is restored to the DATADIR directory, you also need to ensure that the owner and group of all data files are correct users, such as mysql. Otherwise, you need to modify the owner and group of data files before starting mysqld
[root@mysql ~]# cd /usr/local/mysql/data/
[root@mysql data]# ll
total 12328
-rw-r----- 1 root root      298 Jun 16 01:12 ib_buffer_pool
-rw-r----- 1 root root 12582912 Jun 16 01:12 ibdata1
drwxr-x--- 2 root root     4096 Jun 16 01:12 mysql
drwxr-x--- 2 root root     8192 Jun 16 01:12 performance_schema
drwxr-x--- 2 root root     8192 Jun 16 01:12 sys
drwxr-x--- 2 root root       50 Jun 16 01:12 test1
drwxr-x--- 2 root root       52 Jun 16 01:12 test2
drwxr-x--- 2 root root       52 Jun 16 01:12 test3
-rw-r----- 1 root root       20 Jun 16 01:12 xtrabackup_binlog_pos_innodb
-rw-r----- 1 root root      598 Jun 16 01:12 xtrabackup_info
[root@mysql data]# chown -R mysql:mysql /usr/local/mysql/data/
#Start service
[root@mysql data]# systemctl restart mysqld
Log in to mysql interface to check whether the data has been recovered
mysql> select * from tab1;
+------+-------+
| id   | name  |
+------+-------+
|    1 | lisi1 |
|    2 | lisi2 |
|    3 | lisi3 |
|    4 | lisi4 |
+------+-------+
4 rows in set (0.00 sec)
Xtrabackup's "stream" and "backup compression" function xtrabackup supports the "stream" function for the backed up data files, that is, the backed up data can be transferred to tar program through STDOUT for archiving, instead of being directly saved to a backup directory by default. To use this feature, you only need to use the - stream option.
# innobackupex --user=root --password="123" --stream=tar /opt/mysqlbackup/full/ | gzip >/opt/mysqlbackup/full/full_`date +%F_%H%M%S`.tar.gz