catalogue
3. Manually implement the yeoman construction project
1. Introduction to Yeoman
Yeoman is a general type scaffold used to automatically build js projects. Unlike Vue cli, create react app and angular cli, yeoman can do the same for generating scaffolds for specific types of projects.
2. Yeoman uses
First, open the command line and execute npm install -g yo to install yo, and then install the generator of the corresponding type of project,
For example, to create a react project, execute npm install -g # generator react, and then execute yo react 'project name'.
For example, to create a vue project, execute NPM install - G generator vue, and then execute yo vue 'project name‘
For example, to create a node project, execute NPM install - G generator node, and then execute yo node 'project name'
3. Manually implement the yeoman construction project
Step 1: first create a file, execute the npm init initialization project, and then I choose vscode to open it.
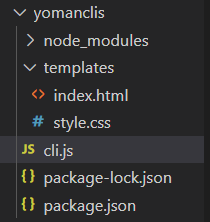
Step 2: install the two plug-ins or packages we need, execute npm i -S inquirer ejs under the project directory, and install inquirer and ejs. Then create a new templates file under the project file. This file stores our file templates, and create a cli JS file, which is where our main logic code is stored. Then the following is the whole project structure.
Step 3: cli JS and index The code in html is as follows
#!/ usr/bin/env node / / this line of code indicates that the file is run as a script, and the node script is used

//Some core modules and two plug-ins are introduced here
var path = require('path')
var inquirer = require('inquirer')
var fs = require('fs')
var ejs = require('ejs')


//Here, the interaction between the user and the command line is realized, and the user input anwsers are obtained
inquirer.prompt([
    {
        type: 'input',
        name: 'title',
        message: 'Project name:',
        default: this.appname
    }
]).then(anwsers => {

    //Gets the relative path to the templates file
    const tmpDir = path.join(__dirname, 'templates')

    //Get the path of the directory where the command line is currently running, that is, the file path I want to write
    const destDir = process.cwd()

    //Cycle through the file, then replace the template characters of the template file with the user input data, and create the file to your project directory
    fs.readdir(tmpDir, (err, files) => {
        if (err) throw err
        files.forEach(file => {

            //Replace user input with template string
            ejs.renderFile(path.join(tmpDir, file), anwsers, (err, result) => {
                if(err) throw err
                //Write the replaced template into our project directory
                fs.writeFileSync(path.join(destDir, file), result)
            })
        });
    })
})

//The whole code logic is to read the user input through the command line, then traverse and read each file under the templates, and replace it according to the user input
//Replace the template character data, otherwise the default data will not be replaced, and a copy of the replaced corresponding file will be copied to our new project
//Under the directory. Then repeat the operation until the files under templates are replaced and copied completely.
cli.js file
<!DOCTYPE html>
<html lang="en">
<head>
    <meta charset="UTF-8">
    <meta http-equiv="X-UA-Compatible" content="IE=edge">
    <meta name="viewport" content="width=device-width, initial-scale=1.0">
    <!--
        Used here ejs Template string for<%= %>To implement content insertion and replacement
        Here, the content delivered with the user will be title Replace here
     -->
    <title><%= title %></title>
</head>
<body>

</body>
</html>
index.html file
Step 4: open the terminal under our project folder. This is the yomanclis folder, and then enter npm link

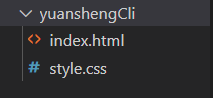
This means that the name of our project folder (yomanclis) is used as the command to trigger our customized yeoman generator, which is mounted to the terminal. To uninstall, enter the npm unlink command. After that, we will use our custom yeoman generator to build the project. You can execute the command yomanclis under our project folder. My project folder here is yuanshengCli.

Then we can see all the files in the templates under the yuanshengCli project.
4. Summary
The principle of yeoman scaffold is to set the templates template file, then use the inquirer plug-in to interact with the user, get the user content, then use the ejs plug-in to replace the content into the templates, and then copy the content in the templates to our project folder. It mainly uses the core module of node and external plug-ins to complete the main functions.