The specific concept and process of YOLOv3 will not be introduced here, but the implementation steps will be explained directly below.
Computer environment: win10 + Python 3.6 + tensorflow GPU 1.12.0 + keras GPU 2.2.4 + cuda9.0
IDE: PyCharm + Anaconda
Catalog
I. production of data set
The amount of data set production is huge. If you have thousands of pictures, you need to mark them one by one. If you are not doing actual engineering projects or competitions, you can skip this step and download the marked data sets directly on the Internet.
Famous dataset:
1 CIFAR-10 and CIFAR-100 datasets Processed data, unable to see the original image.
2 PASCAL VOC The original picture can be viewed directly, and the data set is in VOC format
Data set of this article: Safety helmet Baidu online disk Adopt VOC format
1.1 LabelImg tag image
Mark image is to mark the target to be recognized in the image. If the recognized target is a cat or a dog, mark the cat or a dog with a box, and their labels are cat and dog respectively. When the markup is complete, an. xml file with the same filename is generated.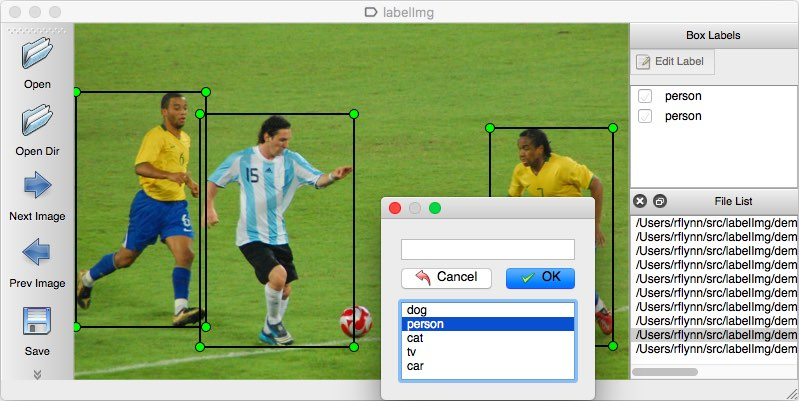
LabelImg installation and use
The software used to mark pictures is LabelImg, Installation course and usage of labelImg.
1.2 introduction to VOC data set format
Most of the data sets used in deep learning are in VOC format,. So we also need to change our tagged images to VOC format.
Available in PASCAL VOC Download datasets to view VOC datasets. You can also view this article: Introduction to VOC data set format This paper introduces the composition of VOC with voc207 as an example.
1.3 converting to VOC data set
After all the pictures are marked, all jpg and xml are in one directory. We will create a new folder, dataset, JPEGImages, Annotations and ImageSets.
Put all jpg files into JPEGImages;
Put all xml files into Annotations;
Create a new Main standby in the ImageSets folder.
1.4 generate ImageSets
Use the code make main txt.py to generate the train.txt, train val.txt, val.txt, test.txt in the ImageSets / main directory. The directory where this code is stored is shown in the figure below. Make main txt.py is the same as ImageSets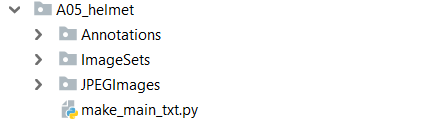
Code: make main txt.py
import os
import random

trainval_percent = 0.2 # The proportion of test and val, (1-training [percent] is the proportion of training set
train_percent = 0.8  # The ratio of test to trainval is used in train

xmlfilepath = 'Annotations'
txtsavepath = 'ImageSets\Main'
total_xml = os.listdir(xmlfilepath)

num = len(total_xml)     # Picture quantity
list = range(num)
tv = int(num * trainval_percent)
tr = int(tv * train_percent)
trainval = random.sample(list, tv)
train = random.sample(trainval, tr)

ftrainval = open('ImageSets/Main/trainval.txt', 'w')
ftest = open('ImageSets/Main/test.txt', 'w')
ftrain = open('ImageSets/Main/train.txt', 'w')
fval = open('ImageSets/Main/val.txt', 'w')

for i in list:
    name = total_xml[i][:-4] + '\n'
    if i in trainval:
        ftrainval.write(name)
        if i in train:
            ftest.write(name)
        else:
            fval.write(name)
    else:
        ftrain.write(name)

ftrainval.close()
ftrain.close()
fval.close()
After running, the following files will be generated.
2. Code modification
Code download: keras-yolo3
Weight Download: yolov3.weights And put the weight under the folder of keras-yolo3-master.
2.1 modify VOC · announcement.py
This file is used to generate the text file shown below, including train.txt, test.txt, val.txt.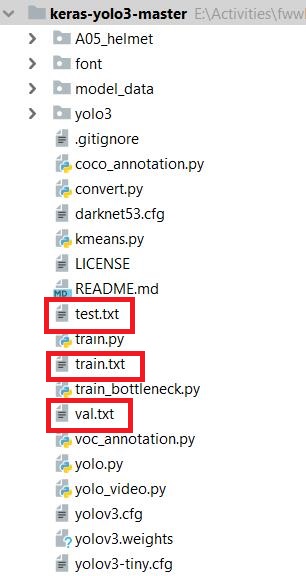
It contains the contents of the picture and the label position data in the picture.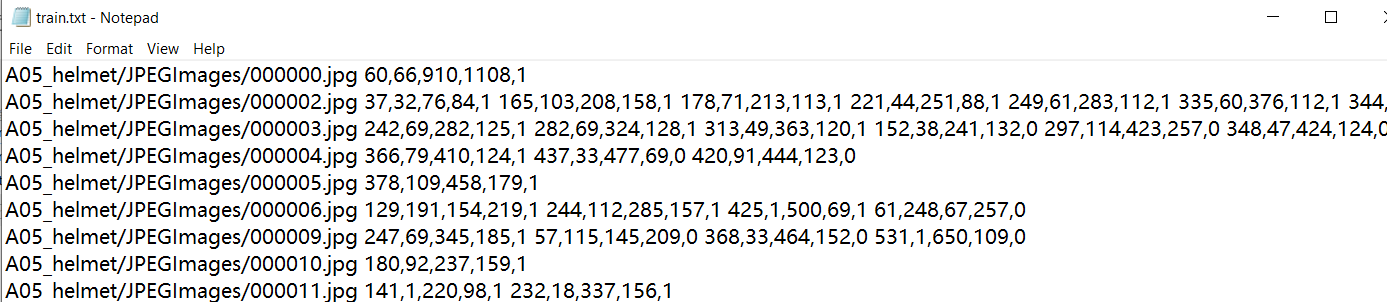
Modify the file. The results are as follows. Modify the classes, the open directory and the save directory of the picture.
# -*- coding:utf-8 -*-
import xml.etree.ElementTree as ET
from os import getcwd

sets = ['train', 'val', 'test']
classes = ["person", "hat"]


def convert_annotation(image_id, list_file):
    print(image_id)
    in_file = open('A05_helmet/Annotations/%s.xml' % image_id)
    tree = ET.parse(in_file)
    root = tree.getroot()

    for obj in root.iter('object'):
        difficult = obj.find('difficult').text
        cls = obj.find('name').text
        if cls not in classes or int(difficult)==1:
            continue
        cls_id = classes.index(cls)
        xmlbox = obj.find('bndbox')
        b = (int(xmlbox.find('xmin').text), int(xmlbox.find('ymin').text), int(xmlbox.find('xmax').text), int(xmlbox.find('ymax').text))
        list_file.write(" " + ",".join([str(a) for a in b]) + ',' + str(cls_id))

wd = getcwd()

for image_set in sets:
    image_ids = open('A05_helmet/ImageSets/Main/%s.txt' % image_set).read().strip().split()
    print(image_ids)
    list_file = open('%s.txt' % image_set, 'w')

    for image_id in image_ids:
        list_file.write('A05_helmet/JPEGImages/%s.jpg' % image_id)
        convert_annotation(image_id, list_file)
        list_file.write('\n')
    list_file.close()
2.2 modify yolo3.cfg
Open yolo3.cfg, search Yolo (three places in total), and modify each time as shown in the figure below.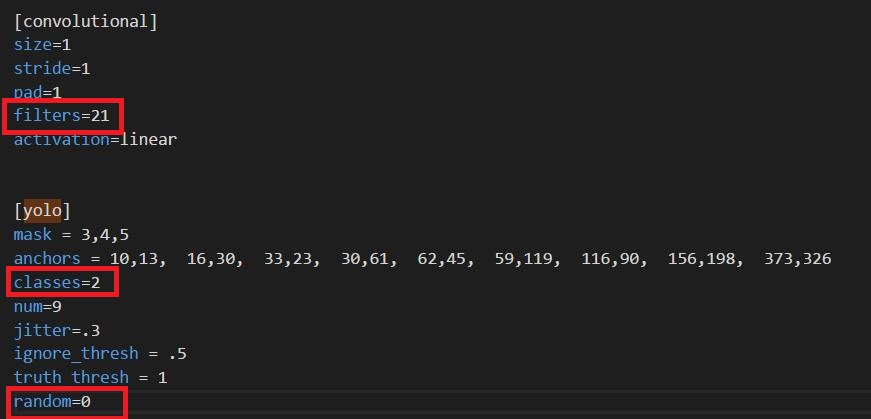
filters: 3*(5+len(classes))
classes: number of training categories
random: originally 1, changed the memory size to 0
2.3 modify voc_classes.txt
As shown in the figure below, change the content of voc_classes.txt to the category of your own training.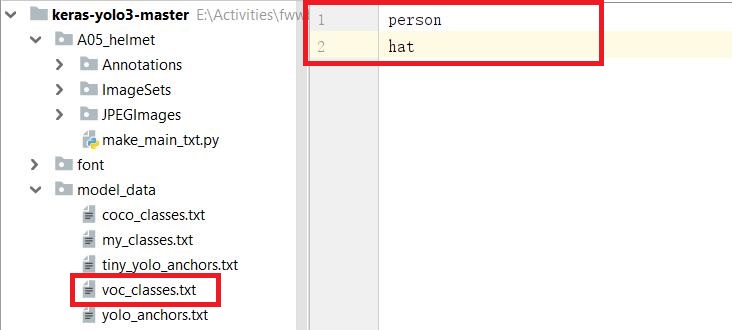
2.4 modify train.py
Replace the original train.py code directly with the following code.
"""
Retrain the YOLO model for your own dataset.
"""
import numpy as np
import keras.backend as K
from keras.layers import Input, Lambda
from keras.models import Model
from keras.callbacks import TensorBoard, ModelCheckpoint, EarlyStopping

from yolo3.model import preprocess_true_boxes, yolo_body, tiny_yolo_body, yolo_loss
from yolo3.utils import get_random_data


def _main():
    annotation_path = 'train.txt'
    log_dir = 'logs/000/'
    classes_path = 'model_data/voc_classes.txt'
    anchors_path = 'model_data/yolo_anchors.txt'
    class_names = get_classes(classes_path)
    anchors = get_anchors(anchors_path)
    input_shape = (416,416) # multiple of 32, hw
    model = create_model(input_shape, anchors, len(class_names) )
    train(model, annotation_path, input_shape, anchors, len(class_names), log_dir=log_dir)

def train(model, annotation_path, input_shape, anchors, num_classes, log_dir='logs/'):
    model.compile(optimizer='adam', loss={
        'yolo_loss': lambda y_true, y_pred: y_pred})
    logging = TensorBoard(log_dir=log_dir)
    checkpoint = ModelCheckpoint(log_dir + "ep{epoch:03d}-loss{loss:.3f}-val_loss{val_loss:.3f}.h5",
        monitor='val_loss', save_weights_only=True, save_best_only=True, period=1)
    batch_size = 10
    val_split = 0.1
    with open(annotation_path) as f:
        lines = f.readlines()
    np.random.shuffle(lines)
    num_val = int(len(lines)*val_split)
    num_train = len(lines) - num_val
    print('Train on {} samples, val on {} samples, with batch size {}.'.format(num_train, num_val, batch_size))

    model.fit_generator(data_generator_wrap(lines[:num_train], batch_size, input_shape, anchors, num_classes),
            steps_per_epoch=max(1, num_train//batch_size),
            validation_data=data_generator_wrap(lines[num_train:], batch_size, input_shape, anchors, num_classes),
            validation_steps=max(1, num_val//batch_size),
            epochs=500,
            initial_epoch=0)
    model.save_weights(log_dir + 'trained_weights.h5')

def get_classes(classes_path):
    with open(classes_path) as f:
        class_names = f.readlines()
    class_names = [c.strip() for c in class_names]
    return class_names

def get_anchors(anchors_path):
    with open(anchors_path) as f:
        anchors = f.readline()
    anchors = [float(x) for x in anchors.split(',')]
    return np.array(anchors).reshape(-1, 2)

def create_model(input_shape, anchors, num_classes, load_pretrained=False, freeze_body=False,
            weights_path='model_data/yolo_weights.h5'):
    K.clear_session() # get a new session
    image_input = Input(shape=(None, None, 3))
    h, w = input_shape
    num_anchors = len(anchors)
    y_true = [Input(shape=(h//{0:32, 1:16, 2:8}[l], w//{0:32, 1:16, 2:8}[l], \
        num_anchors//3, num_classes+5)) for l in range(3)]

    model_body = yolo_body(image_input, num_anchors//3, num_classes)
    print('Create YOLOv3 model with {} anchors and {} classes.'.format(num_anchors, num_classes))

    if load_pretrained:
        model_body.load_weights(weights_path, by_name=True, skip_mismatch=True)
        print('Load weights {}.'.format(weights_path))
        if freeze_body:
            # Do not freeze 3 output layers.
            num = len(model_body.layers)-7
            for i in range(num): model_body.layers[i].trainable = False
            print('Freeze the first {} layers of total {} layers.'.format(num, len(model_body.layers)))

    model_loss = Lambda(yolo_loss, output_shape=(1,), name='yolo_loss',
        arguments={'anchors': anchors, 'num_classes': num_classes, 'ignore_thresh': 0.5})(
        [*model_body.output, *y_true])
    model = Model([model_body.input, *y_true], model_loss)
    return model
def data_generator(annotation_lines, batch_size, input_shape, anchors, num_classes):
    n = len(annotation_lines)
    np.random.shuffle(annotation_lines)
    i = 0
    while True:
        image_data = []
        box_data = []
        for b in range(batch_size):
            i %= n
            image, box = get_random_data(annotation_lines[i], input_shape, random=True)
            image_data.append(image)
            box_data.append(box)
            i += 1
        image_data = np.array(image_data)
        box_data = np.array(box_data)
        y_true = preprocess_true_boxes(box_data, input_shape, anchors, num_classes)
        yield [image_data, *y_true], np.zeros(batch_size)

def data_generator_wrap(annotation_lines, batch_size, input_shape, anchors, num_classes):
    n = len(annotation_lines)
    if n==0 or batch_size<=0: return None
    return data_generator(annotation_lines, batch_size, input_shape, anchors, num_classes)

if __name__ == '__main__':
    _main()
After the replacement is complete, the logs/000 directory needs to be created.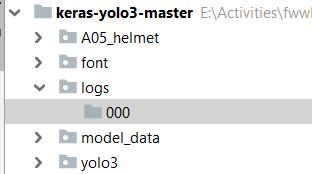
The function of this directory is to store the models trained by its own dataset. Otherwise, when the program runs to the end, an error will occur because the path cannot be found. The resulting model is trained_weights.h5.
2.5 modify yolo.py
Modify the yolo.py file to change the following two lines of directory.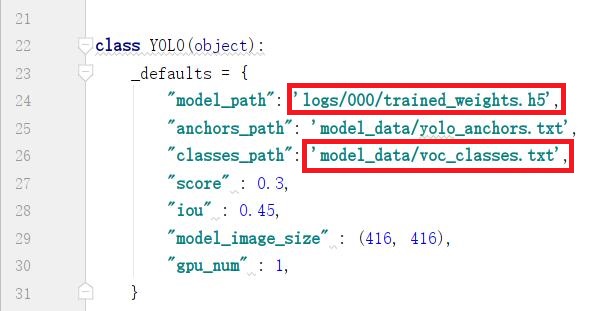
Reference blog: Fast use of yolov3 under Windows 10 + keras and training of its own data set

