Recently, I was training my data set with yolov5. During this period, I took many detours and was ruthlessly diss by my senior brother. Therefore, I want to record this process. For the first time, if there is infringement, contact me to delete it. If there is anything wrong, please exchange and correct it in the comment area. Thank you!
1. Download items
Source code link: https://github.com/ultralytics/yolov5
In fact, there are official tutorials on the official website. You can have a look at what you want to see
2. Configuration environment
Law 1 (official): just open the project file with the terminal and run the command.
pip install -r requirements.txt
Method 2: because pytorch is not easy to install, the official method may be interrupted at the time of torch, so you can install the pytorch environment yourself in advance. Then comment out the requirements Txt file, and the torchvision section. Then enter the above command to install the remaining packages.
Note: yolov5 requires Python > = 3.8, torch > = 1.7.
3. Prepare data set (VOC format)
Under the downloaded yolov5 project folder, create the folder VOCdevkit. Under this folder, create the folder voc207, and then create three folders under voc207:
JPEGImages: used to store all images
Annotations: used to store the label file corresponding to the picture
Imagesets: then create a folder Main under the imagesets folder to store the generated train txt, val.txt, trainval. txt, test. Txt file.
Put the pictures and label files into the corresponding folders.
Create test under voc207 Py file, the code is as follows (relative path, no need to modify, run directly). Its function is to divide the training set and verification set, so as to generate four files, that is, train under the Main folder txt, val.txt, trainval. txt, test. txt.
import os
import random

trainval_percent = 0.1
train_percent = 0.9
xmlfilepath = 'Annotations'
txtsavepath = 'ImageSets\Main'
total_xml = os.listdir(xmlfilepath)

num = len(total_xml)
list = range(num)
tv = int(num * trainval_percent)
tr = int(tv * train_percent)
trainval = random.sample(list, tv)
train = random.sample(trainval, tr)

ftrainval = open('ImageSets/Main/trainval.txt', 'w')
ftest = open('ImageSets/Main/test.txt', 'w')
ftrain = open('ImageSets/Main/train.txt', 'w')
fval = open('ImageSets/Main/val.txt', 'w')

for i in list:
    name = total_xml[i][:-4] + '\n'
    if i in trainval:
        ftrainval.write(name)
        if i in train:
            ftest.write(name)
        else:
            fval.write(name)
    else:
        ftrain.write(name)

ftrainval.close()
ftrain.close()
fval.close()
ftest.close()
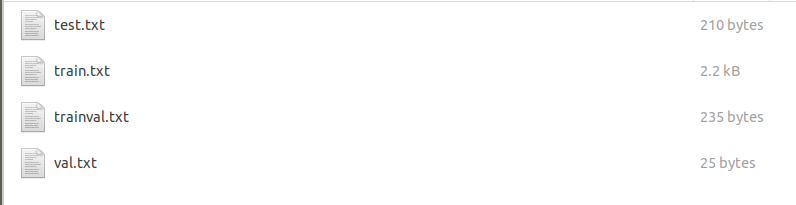
After operation, see the following figure:
Next, create a VOC in the project root directory_ label. Py file. The code is as follows. Change the category of classes into the category you want to train.
import xml.etree.ElementTree as ET
import pickle
import os
from os import listdir, getcwd
from os.path import join

sets=[('2007', 'train'), ('2007', 'val'), ('2007', 'test')]

classes = ["aeroplane", "bicycle", "bird", "boat", "bottle", "bus", "car", "cat", "chair", "cow", "diningtable", "dog", "horse", "motorbike", "person", "pottedplant", "sheep", "sofa", "train", "tvmonitor"]


def convert(size, box):
    dw = 1./(size[0])
    dh = 1./(size[1])
    x = (box[0] + box[1])/2.0 - 1
    y = (box[2] + box[3])/2.0 - 1
    w = box[1] - box[0]
    h = box[3] - box[2]
    x = x*dw
    w = w*dw
    y = y*dh
    h = h*dh
    return (x,y,w,h)

def convert_annotation(year, image_id):
    in_file = open('VOCdevkit/VOC%s/Annotations/%s.xml'%(year, image_id))
    out_file = open('VOCdevkit/VOC%s/labels/%s.txt'%(year, image_id), 'w')
    tree=ET.parse(in_file)
    root = tree.getroot()
    size = root.find('size')
    w = int(size.find('width').text)
    h = int(size.find('height').text)

    for obj in root.iter('object'):
        difficult = obj.find('difficult').text
        cls = obj.find('name').text
        if cls not in classes or int(difficult)==1:
            continue
        cls_id = classes.index(cls)
        xmlbox = obj.find('bndbox')
        b = (float(xmlbox.find('xmin').text), float(xmlbox.find('xmax').text), float(xmlbox.find('ymin').text), float(xmlbox.find('ymax').text))
        bb = convert((w,h), b)
        out_file.write(str(cls_id) + " " + " ".join([str(a) for a in bb]) + '\n')

wd = getcwd()

for year, image_set in sets:
    if not os.path.exists('VOCdevkit/VOC%s/labels/'%(year)):
        os.makedirs('VOCdevkit/VOC%s/labels/'%(year))
    image_ids = open('VOCdevkit/VOC%s/ImageSets/Main/%s.txt'%(year, image_set)).read().strip().split()
    list_file = open('%s_%s.txt'%(year, image_set), 'w')
    for image_id in image_ids:
        list_file.write('%s/VOCdevkit/VOC%s/JPEGImages/%s.jpg\n'%(wd, year, image_id))
        convert_annotation(year, image_id)
    list_file.close()

os.system("cat 2007_train.txt 2007_val.txt 2012_train.txt 2012_val.txt > train.txt")
os.system("cat 2007_train.txt 2007_val.txt 2007_test.txt 2012_train.txt 2012_val.txt > train.all.txt")
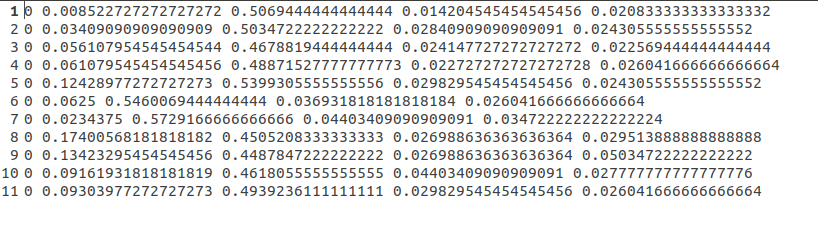
Run voc_label.py gets the new labels folder under the VOC2007 folder. The content is the txt format of the label corresponding to each picture, with the category of the target in the picture and the coordinate position of the detection box, as shown in the figure.
At the same time, get 2007 in the root directory_ train. txt,2007_ Val.txt and 2007_test.txt. Each TXT is the absolute path of the picture, as shown in the figure below.

At this point, the data set is established.
4. Modify the configuration file
1. Modify data configuration file
Copy coco.com in the data folder under the root directory of the project Yaml file and rename it mycoco Yaml, open this file and make the following modifications, as shown in the following figure:
Modify the category and category name to your own category
Train: generated in 2007_train.txt absolute path
Val: it's generated in 2007_ Absolute path of val.txt
Test: generated in 2007_test.txt absolute path
And comment out the first line of download

2. Modify the configuration file of the model
First of all, you need to select a model. yolov5 provides four models, namely s, m, L and X. you can choose them according to the graphics card and data. Since there is only one category here, I choose s, so modify yolov5s in the models folder Yaml, just modify the first line nc and change it to your own category. Then you can train the model.

5. Model training
First, you need to download the pre training weight, which can be downloaded from the official website. The link is
https://github.com/ultralytics/yolov5/releases
In train Py:
- weights weight: replace the path after default with the downloaded weight path
- cfg: replace the file after default with the model configuration file you use
- data: replace it with mycoco yaml
- epochs: change according to your own needs
- Batch size: adjust according to the computing power of the graphics card. If the graphics card can't work, turn it down
- IMG size: enter the size of the picture. The default is 640, which needs to be a multiple of 32.

Run train Py file. The model weights will be saved to the runs/exp0/weights / folder, and two models, the best and the last, will be saved.
6. Visualization of training process
Using the tensorboard visual training process, run the following command to open tensorboard, and the changes of data can be observed in real time.
tensorboard --logdir=runs

7. Reasoning
Modify detect Py file:
Replace the weight with the trained best Absolute path of Pt
source is the image path to be detected
Other threshold parameters can be modified according to their own needs.

Run with the following command:
python detect.py --save-txt
The results are displayed in runs/detect/exp, and the detailed data is in the txt folder with the same image name. If the command does not add the following – save TXT, only the image will be generated.
All right! That's it. Go and try it! If you have any questions, please leave a message!