Related articles
1, Python getting started environment configuration: Anaconda3 and pycharm installation tutorial
2, labelimg application: dataset Tags
3, Build a pytoch environment under Windows (CPU version)
4, Building a pytoch environment under Windows (super detailed)
1, YOLOV5 environment construction
(official requirements: Python > = 3.6.0, python > = 1.7)
- YOLOV5 GitHub address:https://github.com/ultralytics/yolov5
1. Download the entire project to your local desktop
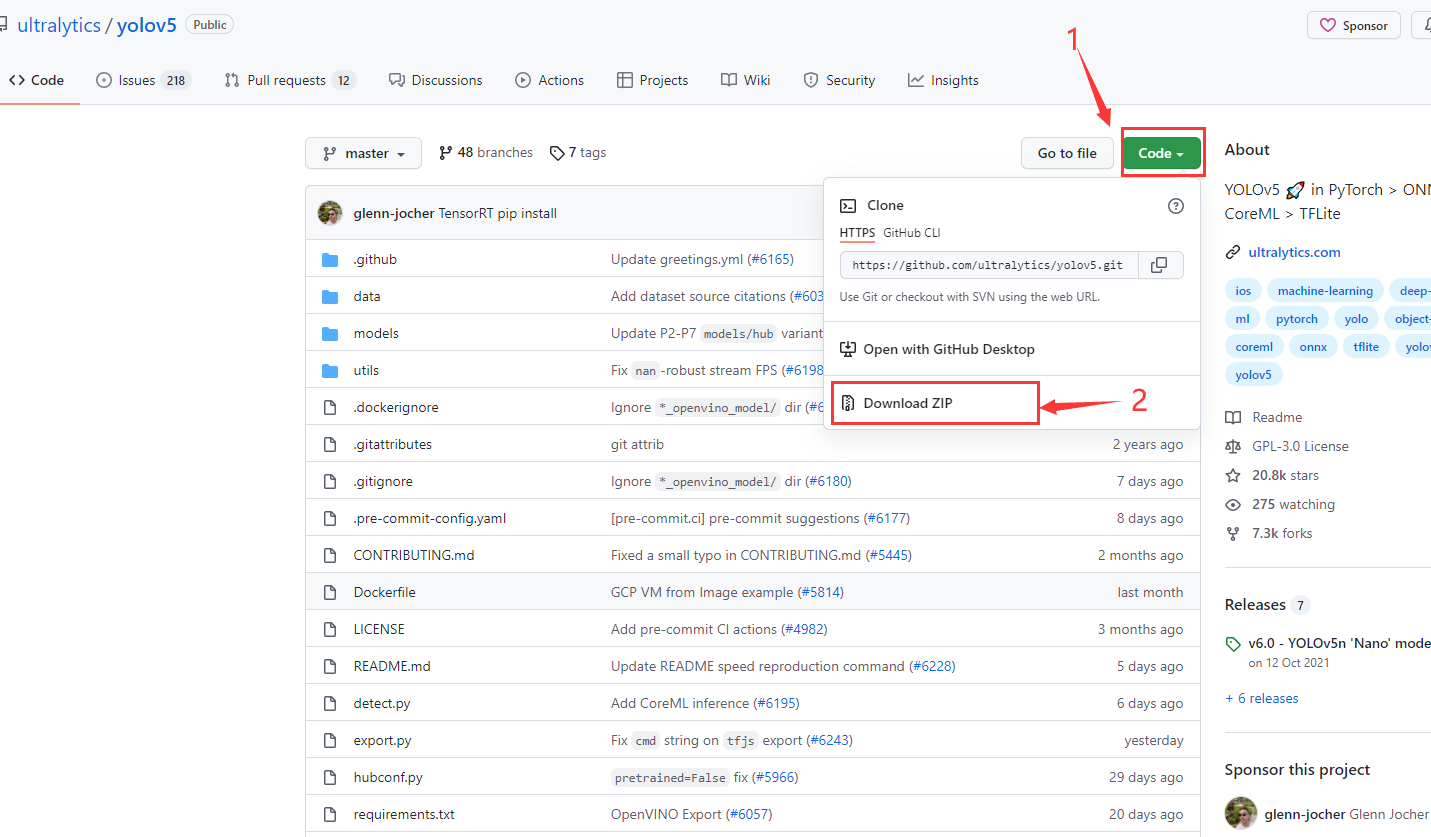
2. [click]
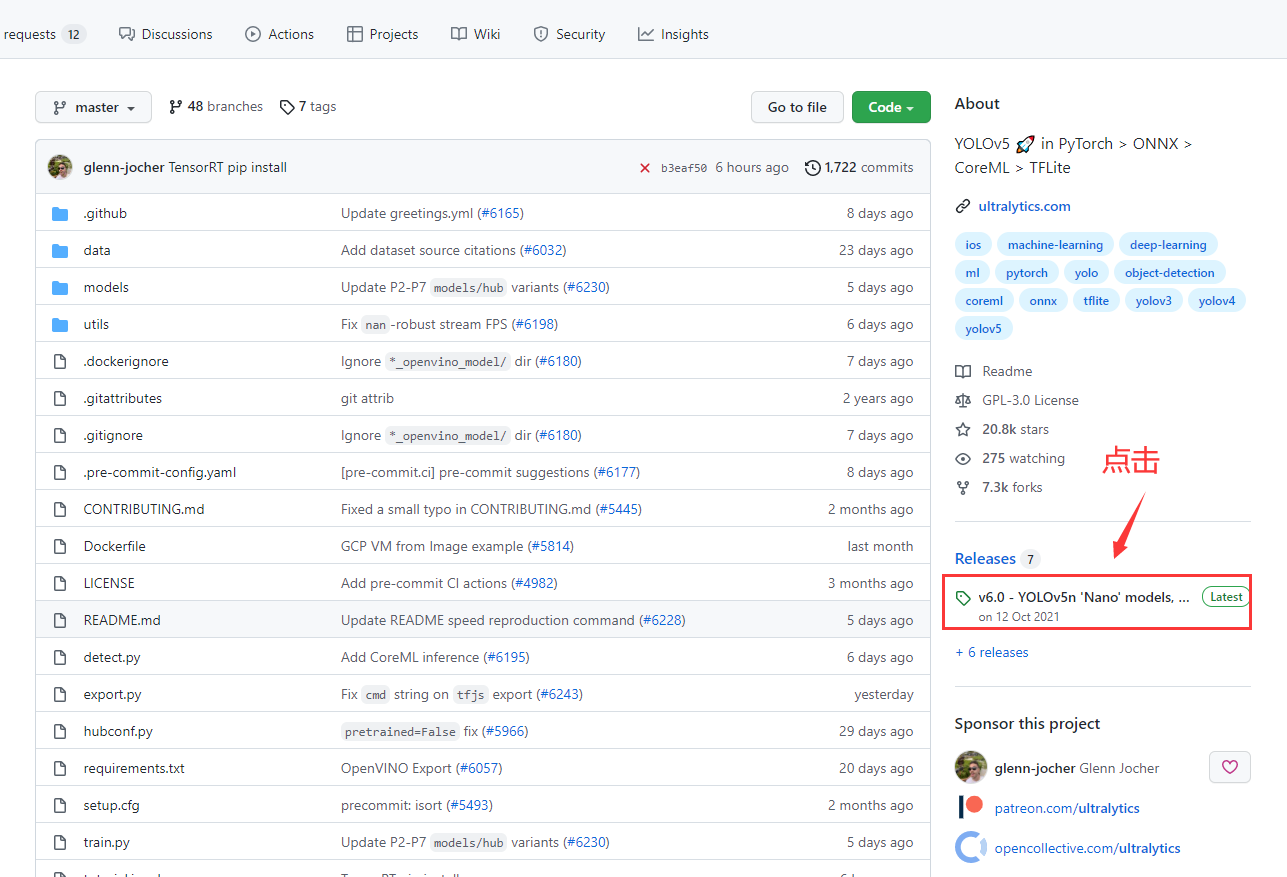
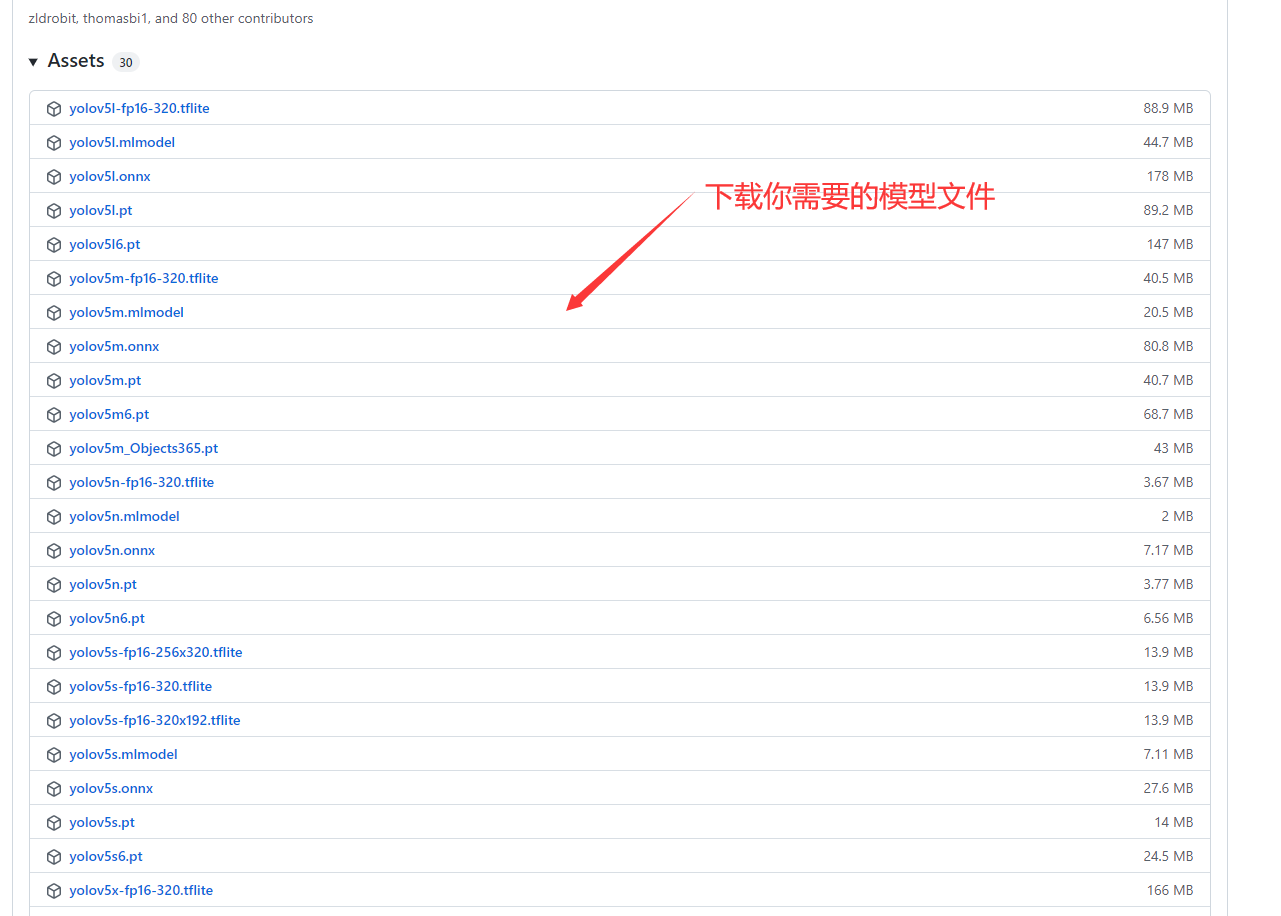
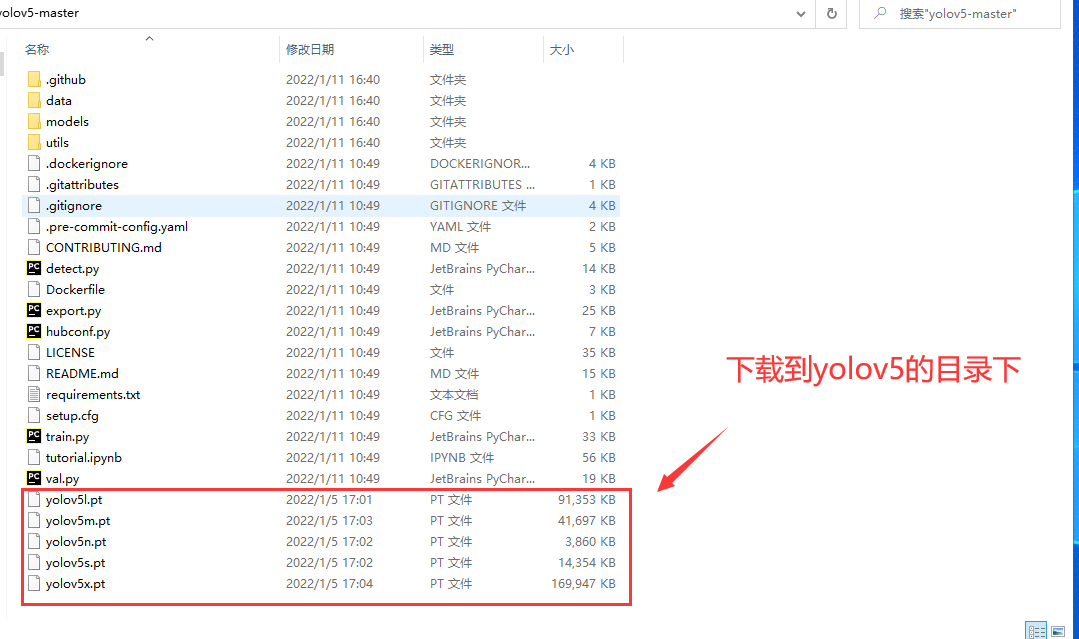
3. Pull to the bottom of the page and download the model file to the yolov5 directory
4. Libraries required to install yolov5
-
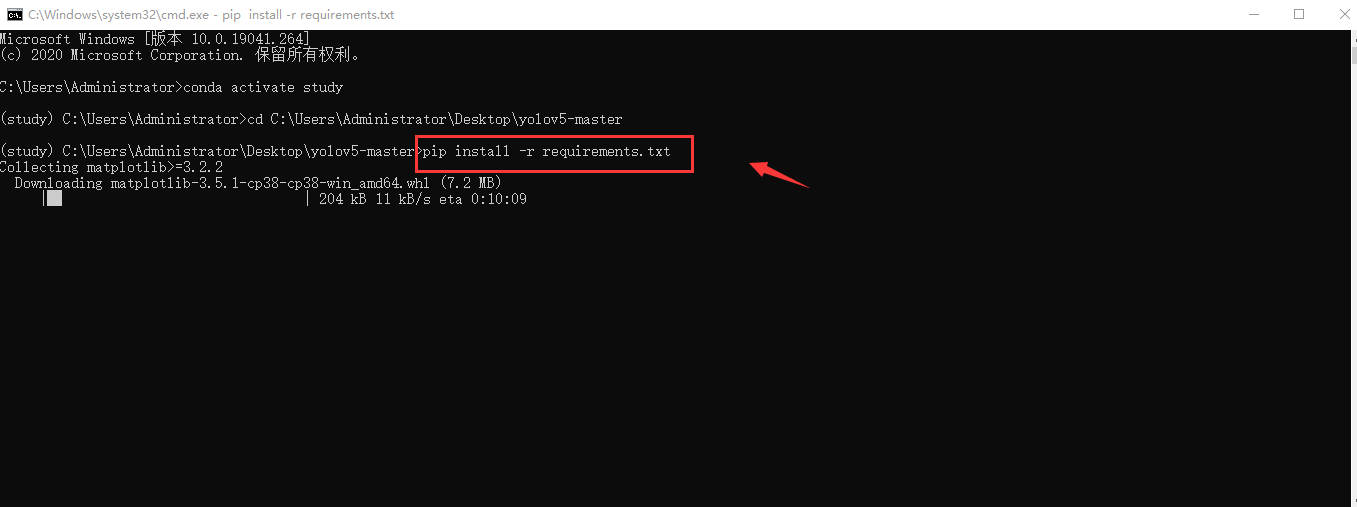
Method 1 (this method is slow):
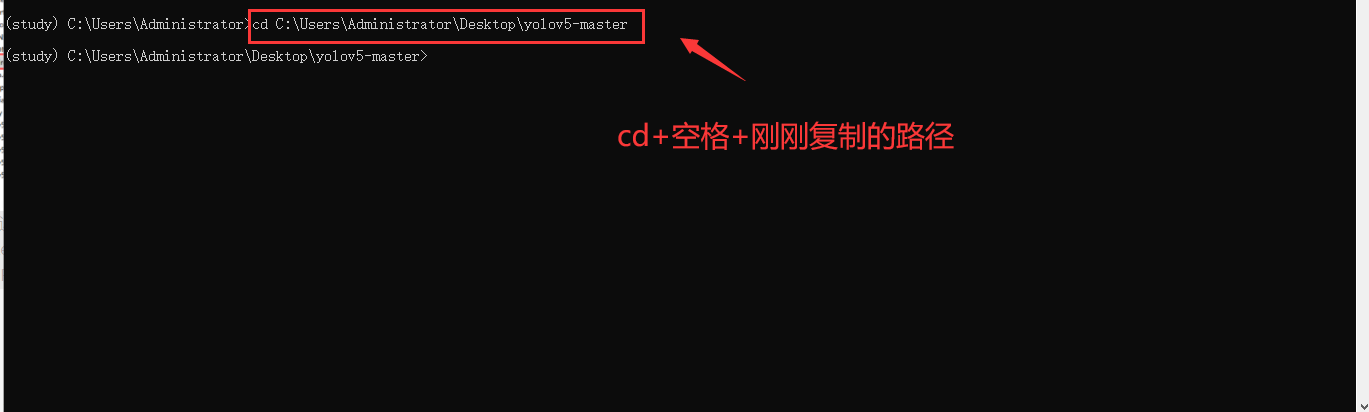
Right click requirements Txt [attribute], copy [location]

Shortcut key: Ctrl + r open cmd, cd to requirements Txt directory

Enter PIP install - R requirements Txt command, and then wait for installation
-
Method 2 (download the required Library of requirements.txt by using the domestic image source, with fast speed):
As above, right-click requirements Txt [attribute], copy [location]
cd go to requirements Txt directory
Enter PIP install - R requirements txt -i https://pypi.tuna.tsinghua.edu.cn/simple , and then wait for installation

2, Dataset preparation
-
Create a new folder train under the YOLOv5 directory_ data

In train_ Create a new folder in data. The structure is as follows:
						 -- trian
					    |
			-- images -
		   |		    |
     	   |		     -- val
train_data-
	   	   |		 	 -- train
	   	   |		    |
	        -- labels -
	    		   	    |
	    		         -- val
Explanation:
train_ Save training set under data \ images \ train
train_ Store the validation set under data \ images \ val
train_data\labels\train is the label where the training set is stored txt file
train_data\labels\val stores the label of the validation set txt file
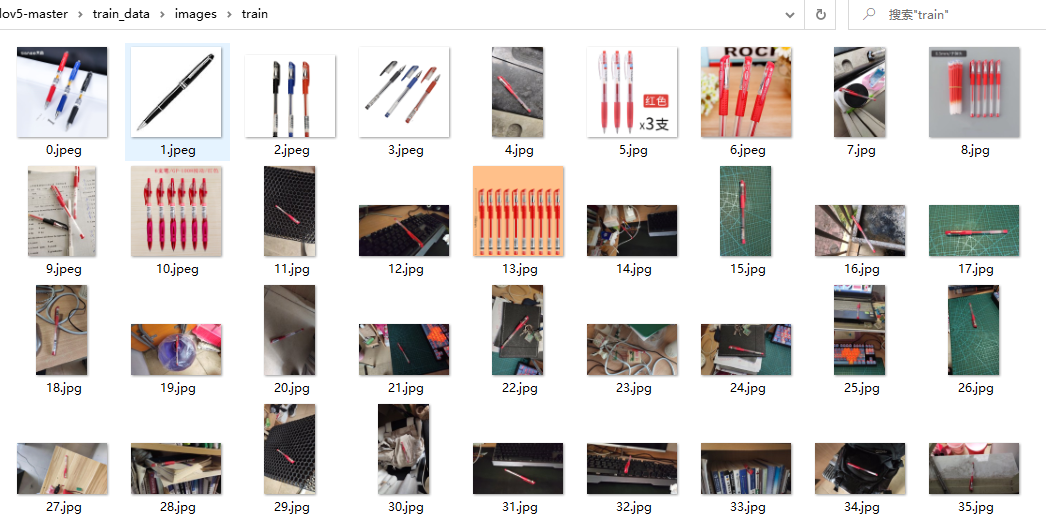
Put all your collected image data sets in train first_ Data \ images \ train
-
Renaming and splitting pictures with python scripts
In train_ Create a new rename under the data \ images \ path Py (be sure to put it under this path)
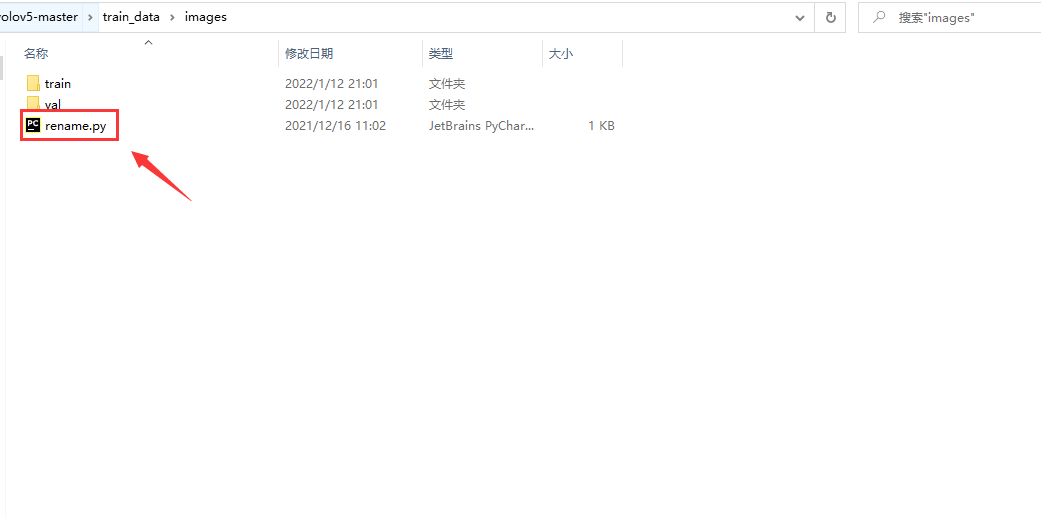
Paste in the following code and run the code
import os
import random
import shutil

class Dataset_split():
	def __init__(self):
    	self.train_path= os.getcwd()+ r'/train/'
    	self.val_path = os.getcwd()+ r'/val/'

	def split_train_val(self,train_ratio=0.8,val_ratio=0.2):
    	"""
    	Dataset image segmentation
    	:param train_ratio: Training set scale (changeable, default 0).8)
    	:param val_ratio: Validation set scale (changeable, default 0).2)
    	:return:
    	"""
    	filelist = os.listdir(self.train_path)
    	pic_num = len(filelist)
    	num =[q for q in range(0,pic_num)]
    	index = random.sample(num,int(val_ratio*pic_num))
    	for i in index:
        	src = self.train_path+filelist[i]
        	dst = self.val_path+filelist[i]
        	shutil.copy(src,dst)
    	for i in index:
        	src = self.train_path + filelist[i]
        	os.remove(src)


	def rename(self,filename):
    	"""
    	File rename
    	:param filename: Current directory file name
    	:return:
    	"""
    	nowdir = os.getcwd() + '/' +filename + '/'
    	filelist = os.listdir(nowdir)
    	num = len(filelist)
    	i = 0
    	for item in filelist:
         	if item.endswith('.jpg') or item.endswith('jpeg'):
            	src= nowdir + item
            	dst =nowdir + "00" + str(i) + os.path.splitext(item)[-1]
            	os.rename(src, dst)
            	i = i + 1


if __name__ == '__main__':
	a=Dataset_split()
	a.split_train_val()
	a.rename('train')
	a.rename('val')
effect:

-
Label pictures with labelimg
Label the sorted pictures and don't read this article with labelimg: https://blog.csdn.net/weixin_44630522/article/details/122441572
To set train_ Save the tag file corresponding to the image of data \ images \ train to train_data\labels\train.
Similarly, train_ Save the tag file corresponding to the image of data \ images \ Val to train_data\labels\val.
3, Configuration file
-
data file configuration
Create a new XXX in the yolov5 master \ data directory Yaml file (I'll create pen.yaml here for demonstration)
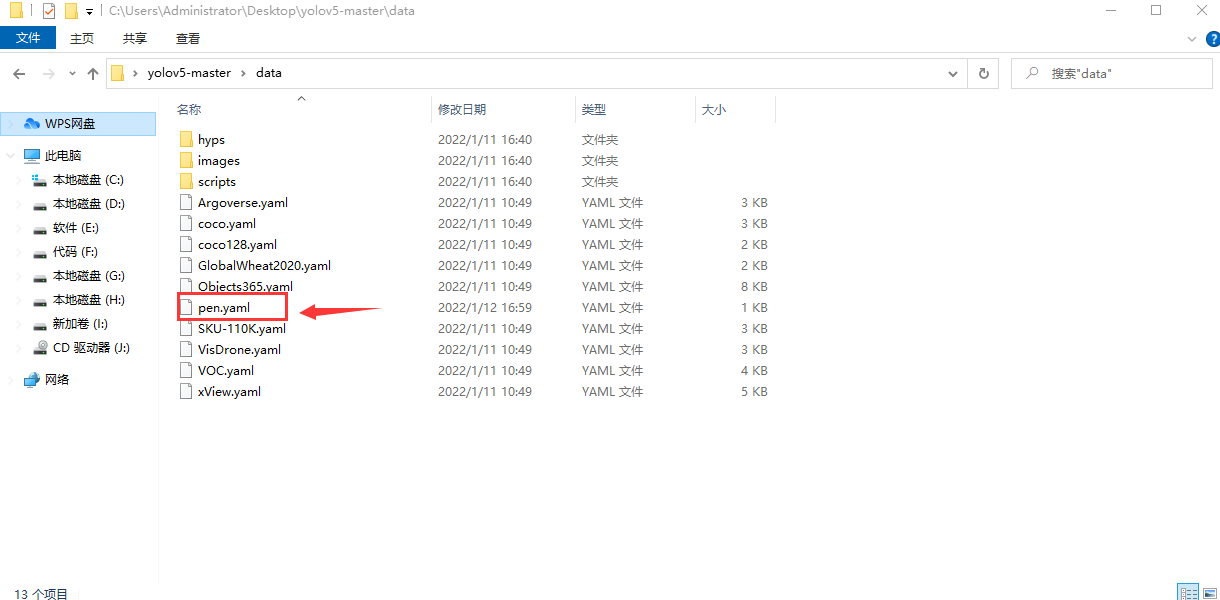
Paste the code into pen Yaml, then Ctrl + s to save
path: ../train_data  # dataset root dir
train: images/train  # train images (relative to 'path')
val: images/val  # val images (relative to 'path')

# Classes
nc: 1  # number of classes
names: ['pen']  # class names
Explanation:
path: the root directory where the dataset is stored
train: the training set path stored in the root directory
val: the path of the validation set stored in the root directory
nc: number of classes (fill in as many types as indicated)
names: name of the class
-
models file configuration
Then, in the yolov5 master \ models directory
Copy the model configuration you want to use (I'm going to use yolov5s to train here)
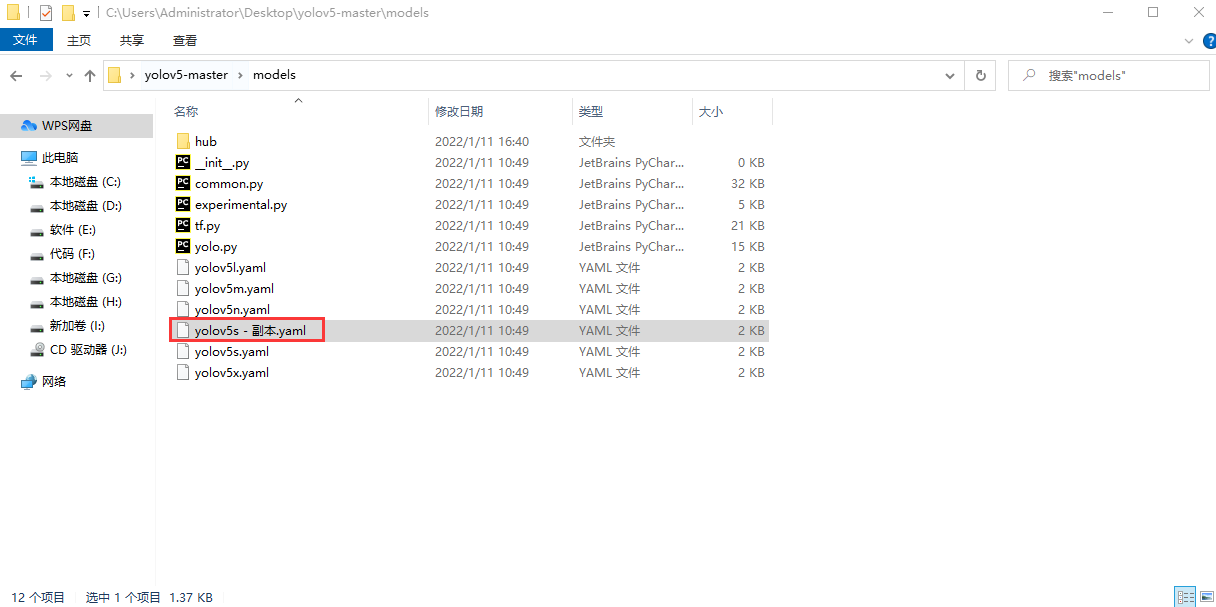
Open the file and modify nc: quantity (fill in as many types as indicated)
Ctrl + s save

Modify the file name (the following figure shows the modified file name)

-
train.py configuration
Open train py
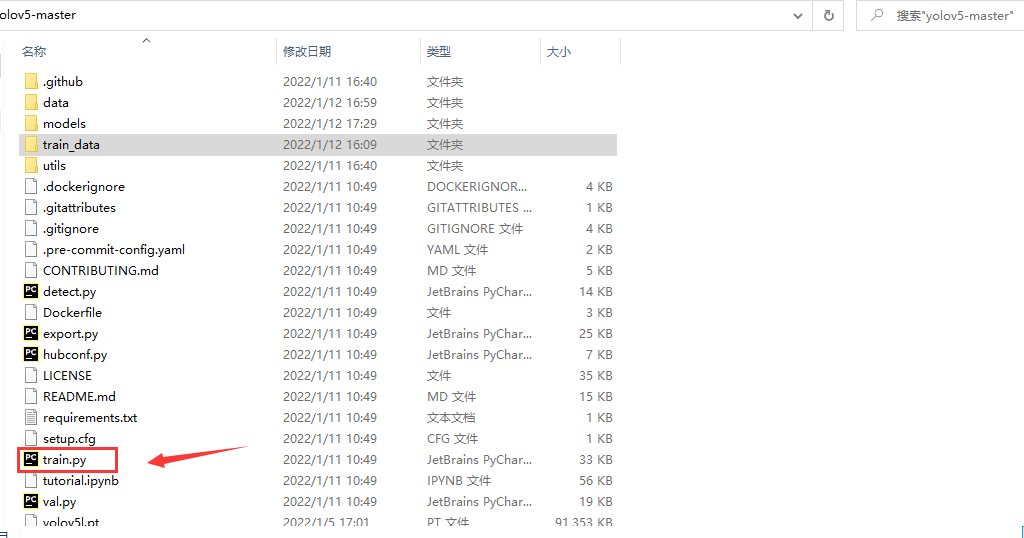
Pull down the code and focus on modification
--weights corresponding weight file
--cfg corresponding model configuration file
--Data corresponds to the data configuration file
(you can modify other parameters according to your needs. See help =)


Ctrl + s save
4, Training model
-
(method 1): directly run the modified train Py program
-
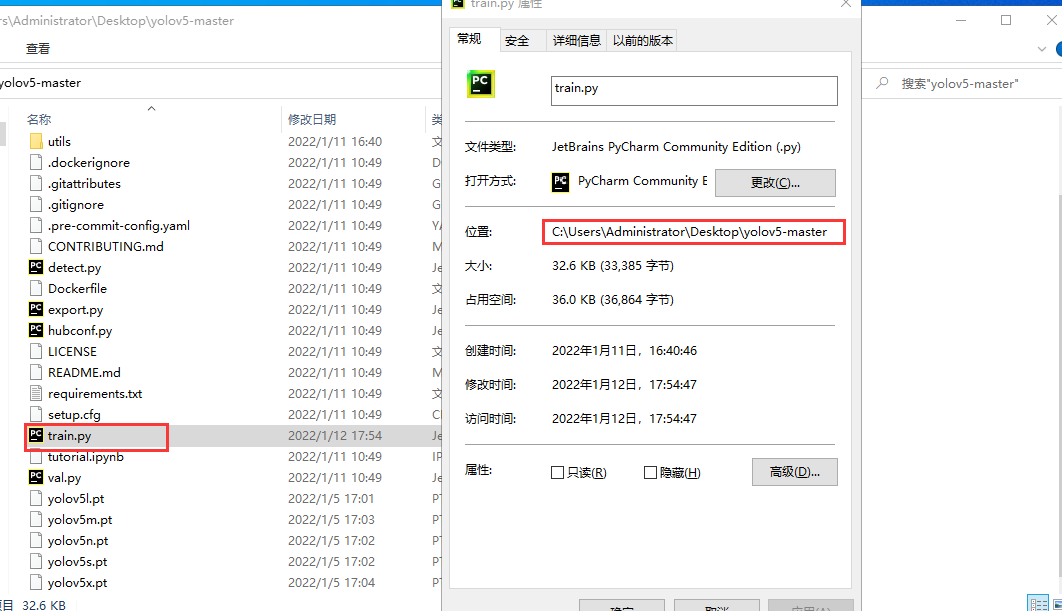
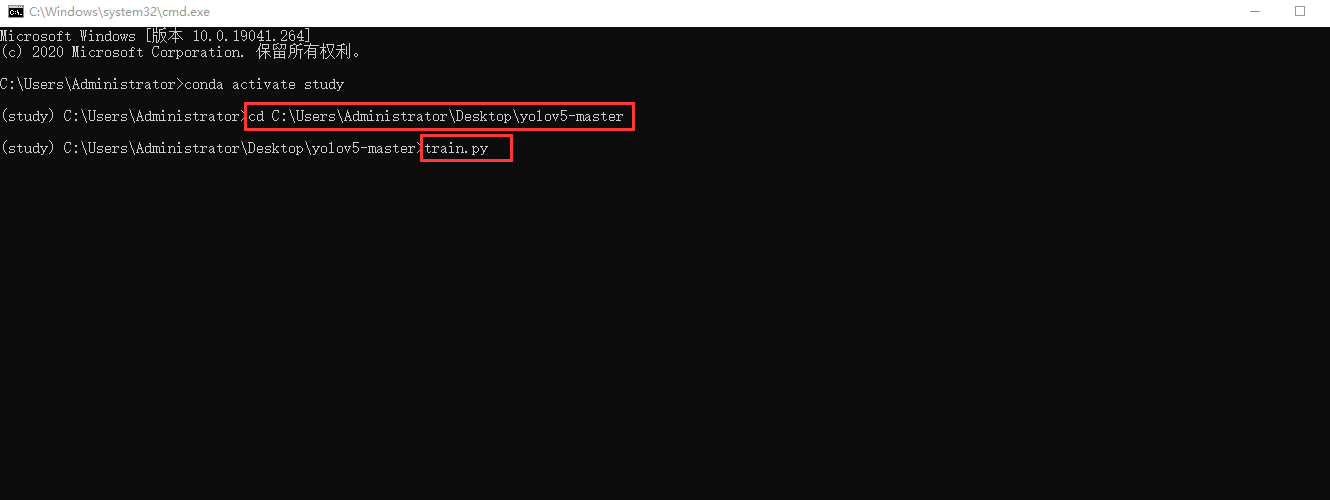
(method 2:) shortcut key: win + r open cmd, cd to yolov5 directory, (right click train.py [attribute] to copy [location], and then enter train Py press enter
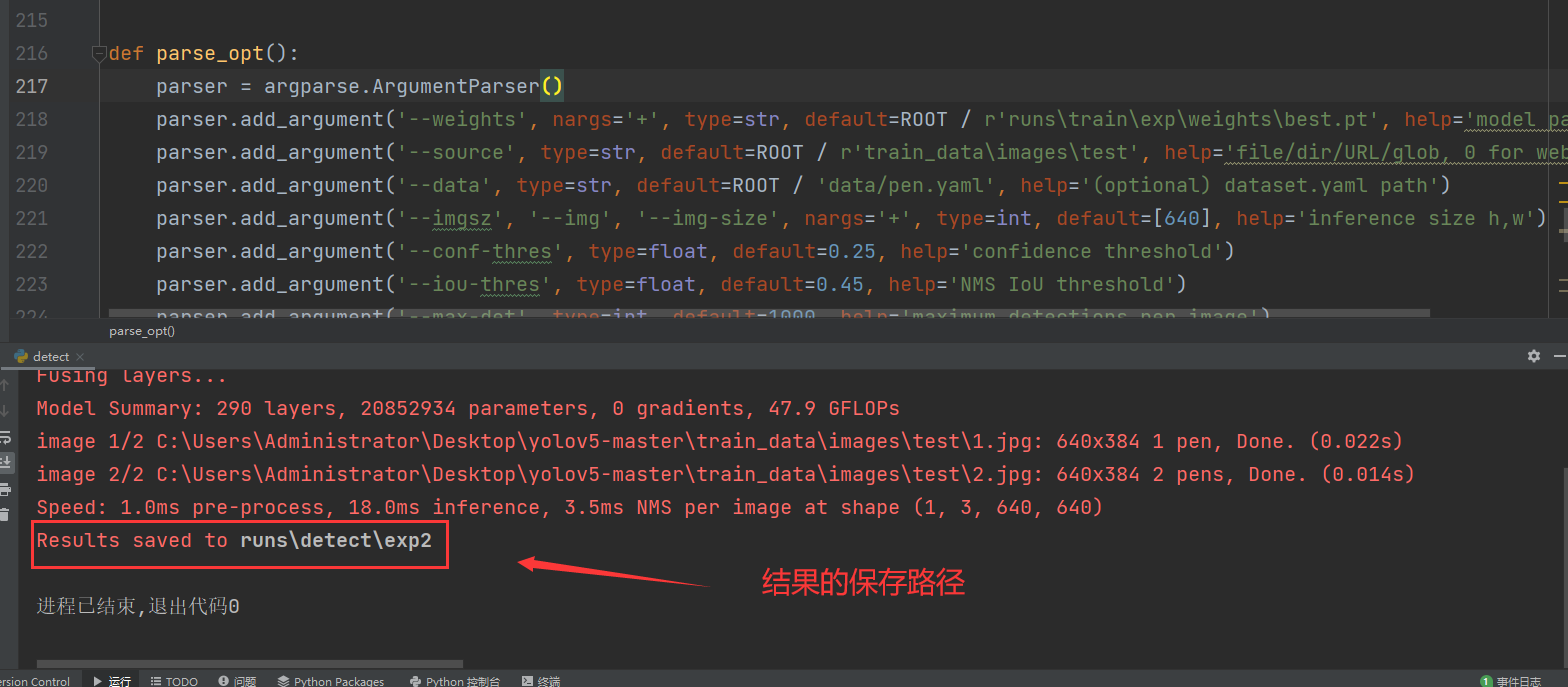
After training, the runs folder will be generated in the yolov5 folder, and the weight file is in \In runs\train\exp\weights, best Pt and last PT represents the best effect model and the final training model.
5, Test model
Open detect. In the directory py
(before modification)
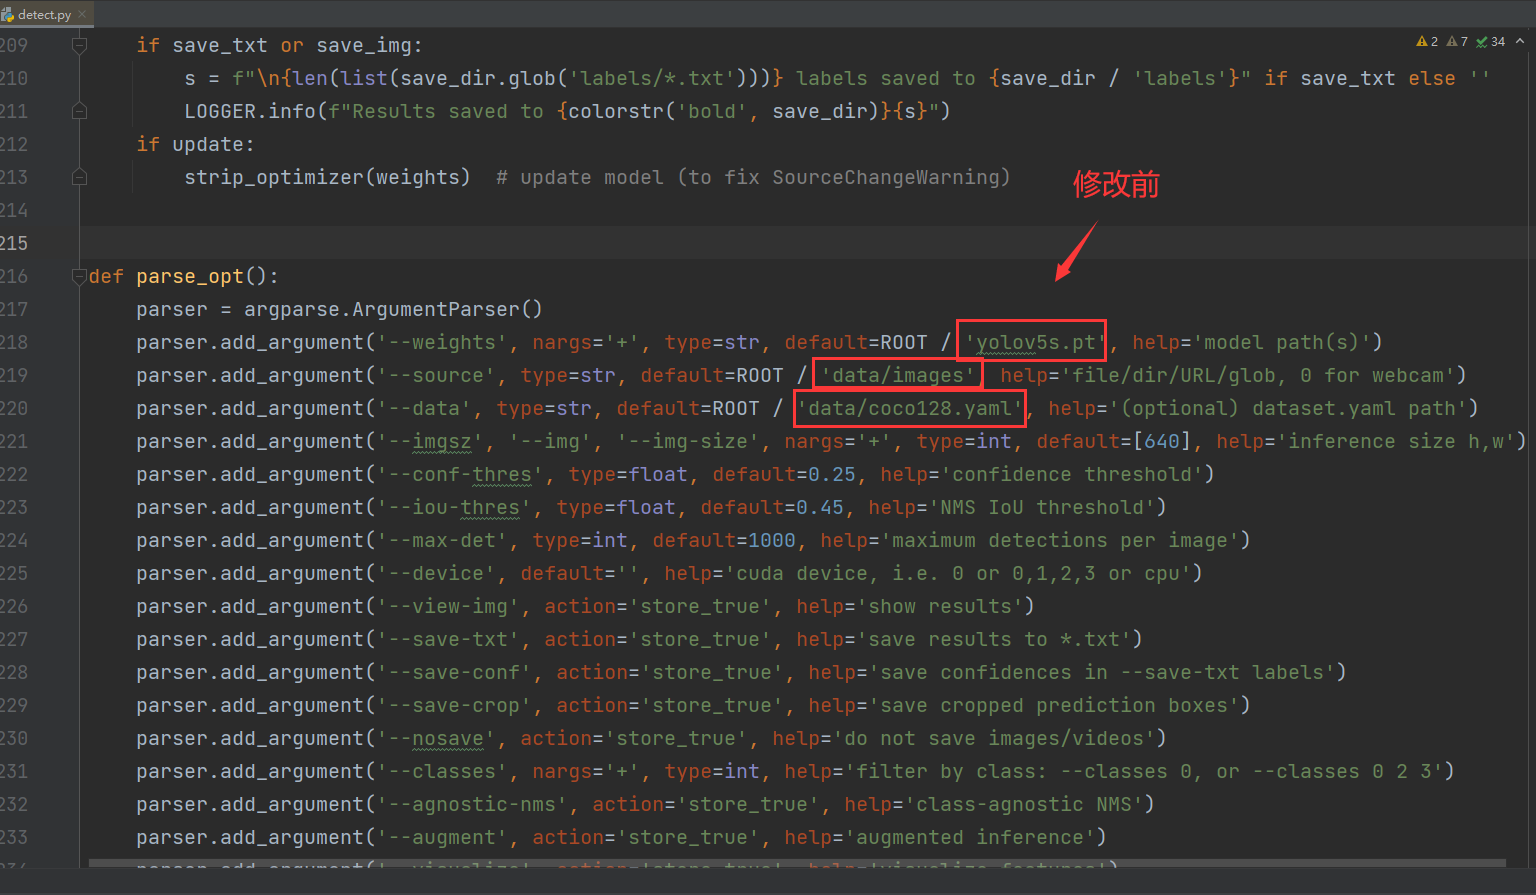
--weights corresponds to the weight file of your training (modify the path by yourself)
--source corresponds to the picture you want to detect (modify the path by yourself)
--Data corresponds to the data configuration file (modify the path by yourself)
(modified)

Run detect directly Py program
If there is any mistake, please correct O(∩∩) O