MySQL installation using yum
MariaDB is installed by default in CentOS7, which is a branch of MySQL. However, MySQL should be installed in the system for the sake of needs, and MariaDB can be directly overwritten after installation.
1. Download and install the official MySQL} Yum Repository
[root@BrianZhu /]# wget -i -c http://dev.mysql.com/get/mysql57-community-release-el7-10.noarch.rpm
Use the above command to directly download the Yum Repository for installation, which looks like 25KB, and then you can install it directly using yum.
[root@BrianZhu /]# yum -y install mysql57-community-release-el7-10.noarch.rpm
Here is how to install MySQL using yum
[root@BrianZhu /]# yum -y install mysql-community-server
This step may take some time, and the previous mariadb will be overwritten after the installation is completed.

If such a prompt appears during the installation process, the installation is successful
How to solve the problem of retrieving the key when installing MySQL using yum on CentOS
reference resources
Installing MySQL using yum reported an error
yum -y install mysql mysql-server
yum -y install mysql-community-server
The error contents are as follows:
warning: /var/cache/yum/x86_64/7/mysql57-community/packages/mysql-community-libs-compat-5.7.37-1.el7.x86_64.rpm: Header V4 RSA/SHA256 Signature, key ID 3a79bd29: NOKEY
 from file:///Etc / PKI / RPM GPG / RPM GPG key MySQL retrieval key
 source "MySQL 5.7 Community Server" of GPG The key is installed, but not applicable to this package. Please check the public key of the source URL Whether the configuration is correct.
Failed packages are: mysql-community-libs-compat-5.7.37-1.el7.x86_64
GPG  The key is configured as: file:///etc/pki/rpm-gpg/RPM-GPG-KEY-mysql
There are two ways to deal with it
- Download the verification file from the mysql official website
- Modify configuration skip verification
This paper records the second way
Edit file
/etc/yum.repos.d/mysql-community.repo
Modify gpgcheck=0 of the corresponding installation version, and the default value is 1
[mysql57-community]
name=MySQL 5.7 Community Server
baseurl=http://repo.mysql.com/yum/mysql-5.7-community/el/7/$basearch/
enabled=1
gpgcheck=0
gpgkey=file:///etc/pki/rpm-gpg/RPM-GPG-KEY-mysql
Just install it again
2. MySQL database settings
Start MySQL first
[root@BrianZhu /]# systemctl start mysqld.service
Check the running status of MySQL, as shown in the figure below:
[root@BrianZhu /]# systemctl status mysqld.service
1 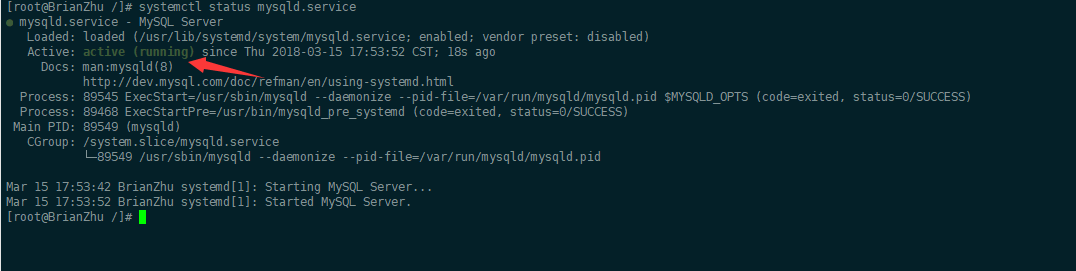
If you want to find the password of the user who has entered the MySQL file normally, you must first find the password in the MySQL file through the following command:
1 [root@BrianZhu /]# grep "password" /var/log/mysqld.log

The initial password is marked on it
Enter the database with the following command:
1 [root@BrianZhu /]# mysql -uroot -p # After entering, you will be prompted for the password
Enter the initial password. Nothing can be done at this time, because MySQL must change the password by default before operating the database:
1 mysql> ALTER USER 'root'@'localhost' IDENTIFIED BY 'new password';
There is a problem here. If the new password is set too simply, an error will be reported:

The reason is that MySQL has a password setting specification, which is related to validate_ password_ The value of policy is related to:

The complete initial password rules of MySQL can be viewed through the following commands:
1 2 3 4 5 6 7 8 9 10 11 12 13 mysql> SHOW VARIABLES LIKE 'validate_password%'; +--------------------------------------+-------+ | Variable_name | Value | +--------------------------------------+-------+ | validate_password_check_user_name | OFF | | validate_password_dictionary_file | | | validate_password_length | 4 | | validate_password_mixed_case_count | 1 | | validate_password_number_count | 1 | | validate_password_policy | LOW | | validate_password_special_char_count | 1 | +--------------------------------------+-------+ rows in set (0.01 sec)
The length of the password is determined by validate_password_length determines and validates_ password_ The calculation formula of length is:
1 validate_password_length = validate_password_number_count + validate_password_special_char_count + (2 * validate_password_mixed_case_count)
The solution is to change the password to a standardized and complex password:
1 2 3 4 mysql> ALTER USER 'root'@'localhost' IDENTIFIED BY 'z?guwrBhH7p>'; Query OK, 0 rows affected (0.00 sec) mysql>

At this time, we need to change the password rules and execute the following sql:
1 2 3 4 5 6 7 mysql> set global validate_password_policy=0; Query OK, 0 rows affected (0.00 sec) mysql> set global validate_password_length=1; Query OK, 0 rows affected (0.00 sec) mysql>
After setting, there are the values I found above. At this time, the password can be set very simply, such as 1234. The password setting for this database is completed.
However, there is another problem at this time. Because Yum Repository is installed, it will be updated automatically every time yum operation is performed in the future. You need to uninstall this:
1 [root@BrianZhu ~]# yum -y remove mysql57-community-release-el7-10.noarch
The configuration is complete
Login authorization of visualizer: (if the authorization is unsuccessful, please check the firewall)
After completing the above operations, we can't connect with the visual client yet. We need to authorize:
1 grant all on *.* to root@'%' identified by 'Database password'; flush privileges;
Set the mysql service to start with the system startup
systemctl enable mysqld.service
Firewall settings
Turn off server firewall
#Stop firewall systemctl stop firewalld.service
#Disable firewall startup and start systemctl disable firewalld service
You can also add the mysql port to the firewall to enable access
be accomplished!!!