In this tutorial, we will fine tune the pre trained Mask R-CNN for pedestrian detection and segmentation in Penn Fudan database
Model. It contains 170 images and 345 pedestrian instances. We will use it to illustrate how to use the new function in torchvision
Yes, so as to train the instance segmentation model on the user-defined data set.
1. Define data set
For the reference script of training object detection, instance segmentation and personnel key point detection are required to easily support the addition of new custom numbers
According to. The dataset should be from the standard class torch utils. data. Inherited from dataset and implemented_ len and_ getitem
The only feature we require is that the getitem of the dataset should return: * image: PIL image size (H,W) * target: include
Dictionary of the following fields
<1> Boxes (floattensor [n, 4]): the format of N bounding boxes coordinates [x0,x1,y0,y1], and the value range is
0 to W,0 to H.
<2> Labels (int64tensor [n]): label of each border.
<3> image_ ID (int64tensor [1]): image recognizer, which should be unique among all images in the dataset and
Used during evaluation.
<4> Area (tensor [n]): the area of the frame. This item is used to separate small, medium and large frames when evaluating with COCO index
Measure score between.
<5> Iscrowed (uint8tensor [n, h, w]): instances whose property is set to iscrowed=True during evaluation will be ignored.
<6> (optional) masks(UInt8Tesor[N,H,W]): segmentation mask of each object.
<7> (optional) keypoints (FloatTensor[N, K, 3]: for each of the N objects, it contains [x, y,
K key points in visibility] format, which are used to define objects. visibility = 0 means the key is invisible. Note that for
The concept of data expansion and flipping key points depends on the data representation. You should adjust reference / detection / transforms Py to
Used for new key representation.
If your model returns the above methods, they will make them suitable for training and evaluation, and will use the evaluation script of pycocotools.
In addition, if you want to use aspect ratio grouping during training (so that each batch contains only images with similar aspect ratios), you can create
We also implement get_height_and_width method, which returns the height and width of the image. If this method is not provided, we
All elements of the dataset will be queried through getitem, which will load the image into memory, but it is better than when providing a custom method
Slow down.
2. Write a custom dataset for PennFudan
2.1 downloading datasets
Download and unzip the zip file After, we have the following folder structure:
PennFudanPed/
	PedMasks/
		FudanPed00001_mask.png
		FudanPed00002_mask.png
		FudanPed00003_mask.png
		FudanPed00004_mask.png
		...
	PNGImages/
		FudanPed00001.png
		FudanPed00002.png
		FudanPed00003.png
		FudanPed00004.png
The following is an example of an image and its segmentation mask:
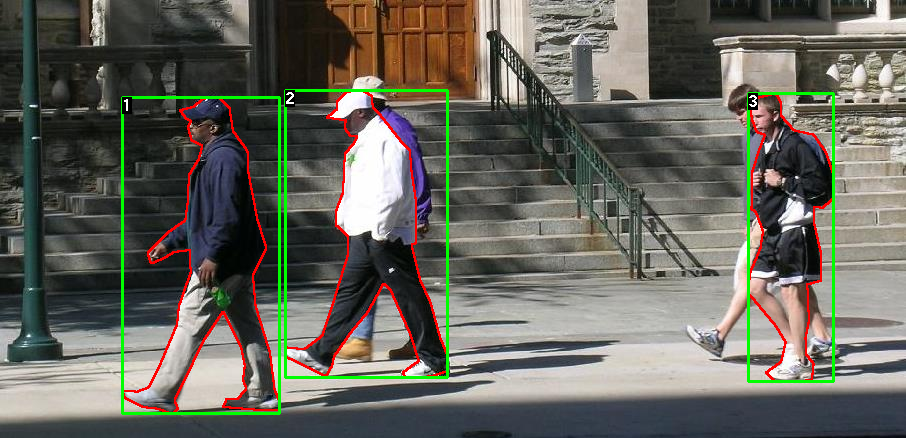

Therefore, each image has a corresponding segmentation mask, where each color corresponds to a different instance. Let's write a for this dataset
Torch utils. data. Dataset class.
2.2 writing classes for datasets
import os
import numpy as np
import torch
from PIL import Image


class PennFudanDataset(torch.utils.data.Dataset):
    def __init__(self, root, transforms):
        self.root = root
        self.transforms = transforms
        # load all image files, sorting them to
        # ensure that they are aligned
        self.imgs = list(sorted(os.listdir(os.path.join(root, "PNGImages"))))
        self.masks = list(sorted(os.listdir(os.path.join(root, "PedMasks"))))

    def __getitem__(self, idx):
        # load images and masks
        img_path = os.path.join(self.root, "PNGImages", self.imgs[idx])
        mask_path = os.path.join(self.root, "PedMasks", self.masks[idx])
        img = Image.open(img_path).convert("RGB")
        # note that we haven't converted the mask to RGB,
        # because each color corresponds to a different instance
        # with 0 being background
        mask = Image.open(mask_path)
        # convert the PIL Image into a numpy array
        mask = np.array(mask)
        # instances are encoded as different colors
        obj_ids = np.unique(mask)
        # first id is the background, so remove it
        obj_ids = obj_ids[1:]

        # split the color-encoded mask into a set
        # of binary masks
        masks = mask == obj_ids[:, None, None]

        # get bounding box coordinates for each mask
        num_objs = len(obj_ids)
        boxes = []
        for i in range(num_objs):
            pos = np.where(masks[i])
            xmin = np.min(pos[1])
            xmax = np.max(pos[1])
            ymin = np.min(pos[0])
            ymax = np.max(pos[0])
            boxes.append([xmin, ymin, xmax, ymax])

        # convert everything into a torch.Tensor
        boxes = torch.as_tensor(boxes, dtype=torch.float32)
        # there is only one class
        labels = torch.ones((num_objs,), dtype=torch.int64)
        masks = torch.as_tensor(masks, dtype=torch.uint8)

        image_id = torch.tensor([idx])
        area = (boxes[:, 3] - boxes[:, 1]) * (boxes[:, 2] - boxes[:, 0])
        # suppose all instances are not crowd
        iscrowd = torch.zeros((num_objs,), dtype=torch.int64)

        target = {}
        target["boxes"] = boxes
        target["labels"] = labels
        target["masks"] = masks
        target["image_id"] = image_id
        target["area"] = area
        target["iscrowd"] = iscrowd

        if self.transforms is not None:
            img, target = self.transforms(img, target)

        return img, target

    def __len__(self):
        return len(self.imgs)
3. Define the model
Now we need to define a model that can perform prediction on the above data set. In this tutorial, we will use Mask R-CNN,
It is based on fast r-cnn. Fast r-cnn is a model that can predict the bounding box and category of potential objects in the image
Points.
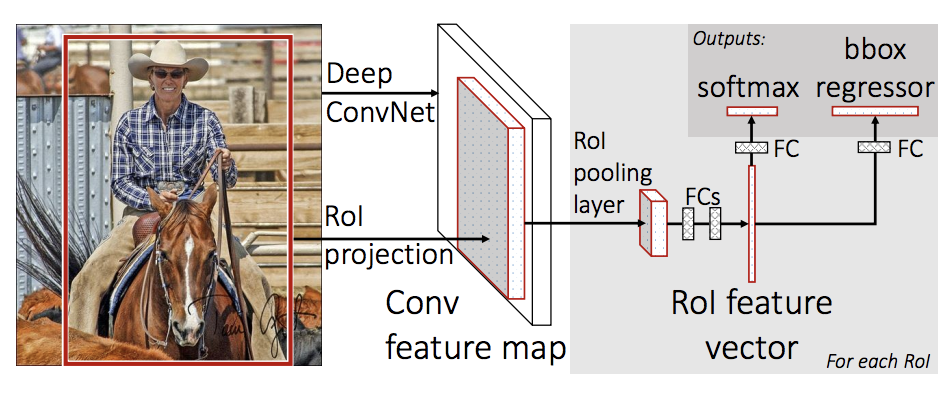
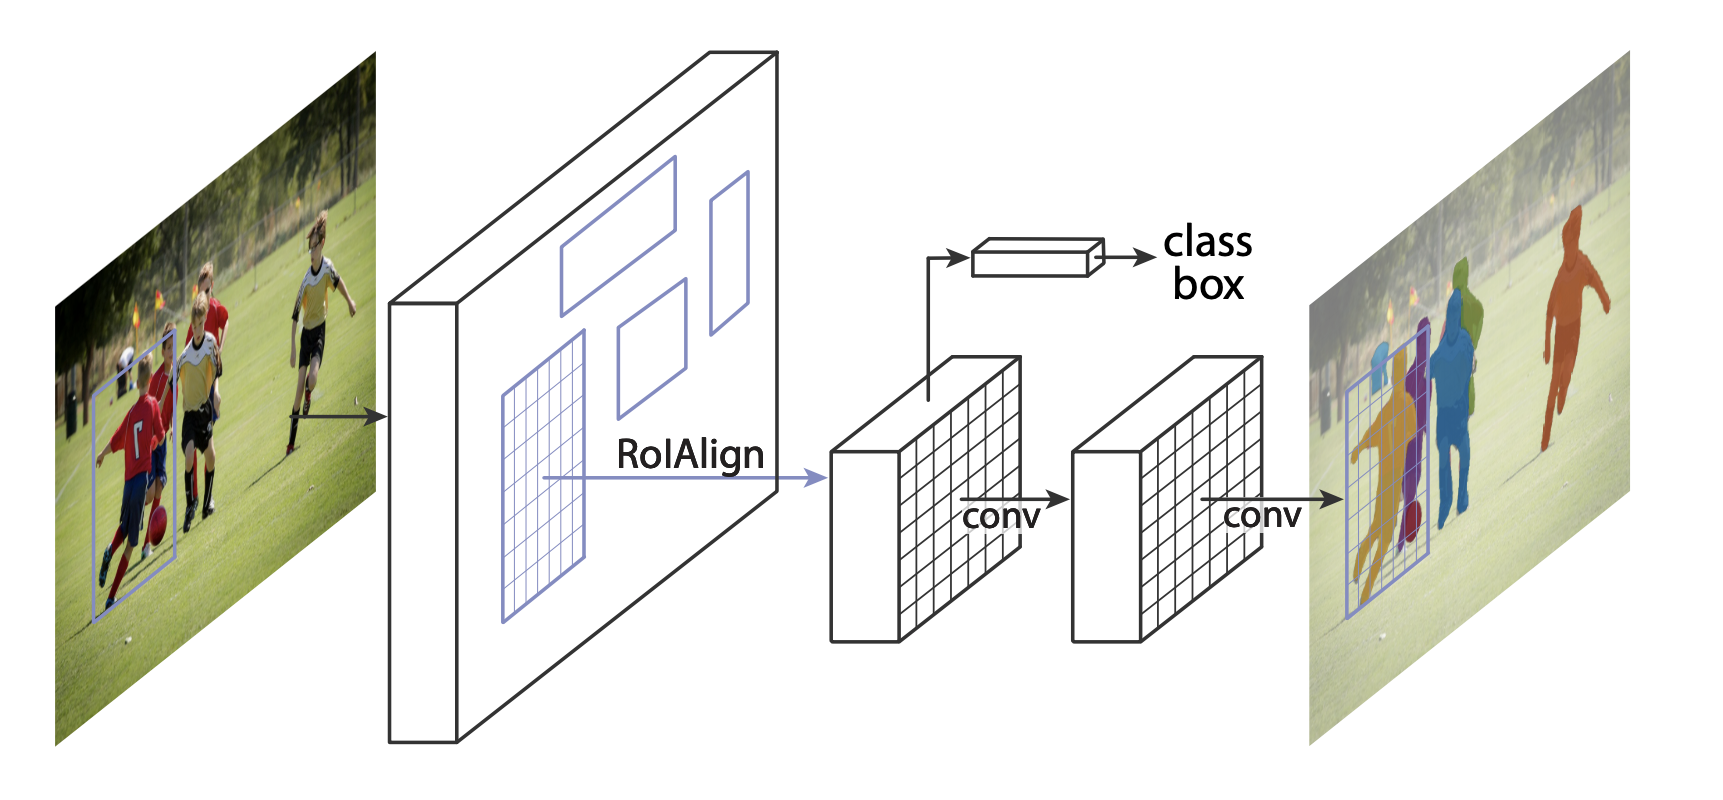
Mask R-CNN adds an additional branch to fast r-cnn, which also predicts the segmentation mask of each instance.
There are two common situations where you may need to modify one of the available models in torchvision modelzoo. The first is that we want to start from
Start with the training model, and then fine tune the last layer. The other is when we want to replace the trunk of the model with a different model
(for example, for faster prediction).
The following is the treatment of these two cases.
- 1 fine tuning a pre trained model let's assume that you want to start with a model that has been pre trained on COCO and want to fine tune for your specific class. This is a feasible method:
import torchvision
from torchvision.models.detection.faster_rcnn import FastRCNNPredictor

# load a model pre-trained on COCO
model = torchvision.models.detection.fasterrcnn_resnet50_fpn(pretrained=True)

# replace the classifier with a new one, that has
# num_classes which is user-defined
num_classes = 2  # 1 class (person) + background
# get number of input features for the classifier
in_features = model.roi_heads.box_predictor.cls_score.in_features
# replace the pre-trained head with a new one
model.roi_heads.box_predictor = FastRCNNPredictor(in_features, num_classes)
- 2 modify the model to add a different backbone
import torchvision
from torchvision.models.detection import FasterRCNN
from torchvision.models.detection.rpn import AnchorGenerator

# load a pre-trained model for classification and return
# only the features
backbone = torchvision.models.mobilenet_v2(pretrained=True).features
# FasterRCNN needs to know the number of
# output channels in a backbone. For mobilenet_v2, it's 1280
# so we need to add it here
backbone.out_channels = 1280

# let's make the RPN generate 5 x 3 anchors per spatial
# location, with 5 different sizes and 3 different aspect
# ratios. We have a Tuple[Tuple[int]] because each feature
# map could potentially have different sizes and
# aspect ratios
anchor_generator = AnchorGenerator(sizes=((32, 64, 128, 256, 512),),
                                   aspect_ratios=((0.5, 1.0, 2.0),))

# let's define what are the feature maps that we will
# use to perform the region of interest cropping, as well as
# the size of the crop after rescaling.
# if your backbone returns a Tensor, featmap_names is expected to
# be [0]. More generally, the backbone should return an
# OrderedDict[Tensor], and in featmap_names you can choose which
# feature maps to use.
roi_pooler = torchvision.ops.MultiScaleRoIAlign(featmap_names=['0'],
                                                output_size=7,
                                                sampling_ratio=2)

# put the pieces together inside a FasterRCNN model
model = FasterRCNN(backbone,
                   num_classes=2,
                   rpn_anchor_generator=anchor_generator,
                   box_roi_pool=roi_pooler)
3.1 instance segmentation model of pennfudan dataset
In our example, we want to fine tune from the pre trained model, because our data set is very small, so we
The first case above will be followed.
Here we also need to calculate the instance segmentation mask, so we will use Mask R-CNN:
import torchvision
from torchvision.models.detection.faster_rcnn import FastRCNNPredictor
from torchvision.models.detection.mask_rcnn import MaskRCNNPredictor


def get_model_instance_segmentation(num_classes):
    # load an instance segmentation model pre-trained on COCO
    model = torchvision.models.detection.maskrcnn_resnet50_fpn(pretrained=True)

    # get number of input features for the classifier
    in_features = model.roi_heads.box_predictor.cls_score.in_features
    # replace the pre-trained head with a new one
    model.roi_heads.box_predictor = FastRCNNPredictor(in_features, num_classes)

    # now get the number of input features for the mask classifier
    in_features_mask = model.roi_heads.mask_predictor.conv5_mask.in_channels
    hidden_layer = 256
    # and replace the mask predictor with a new one
    model.roi_heads.mask_predictor = MaskRCNNPredictor(in_features_mask,
                                                       hidden_layer,
                                                       num_classes)

    return model
That's it, which will prepare the model for training and evaluation on your custom dataset.
4. Integration
In references/detection /, we have many auxiliary functions to simplify the training and evaluation of the detection model. Here, we
References / detection / engine. Will be used py , references/detection/utils.py and references/
detection/transforms.py . Just copy them to your folder and use them here.
Note: the three py files here need to be downloaded by yourself, and two other files need to be downloaded at the same time. All the codes have been integrated into github, and the address will be given at the end of the article
4.1 write auxiliary functions for data expansion / conversion:
import transforms as T

def get_transform(train):
    transforms = []
    transforms.append(T.ToTensor())
    if train:
        transforms.append(T.RandomHorizontalFlip(0.5))
    return T.Compose(transforms)
4.2 main functions of preparation and implementation training and verification
from engine import train_one_epoch, evaluate
import utils


def main():
    # train on the GPU or on the CPU, if a GPU is not available
    device = torch.device('cuda') if torch.cuda.is_available() else torch.device('cpu')

    # our dataset has two classes only - background and person
    num_classes = 2
    # use our dataset and defined transformations
    dataset = PennFudanDataset('PennFudanPed', get_transform(train=True))
    dataset_test = PennFudanDataset('PennFudanPed', get_transform(train=False))

    # split the dataset in train and test set
    indices = torch.randperm(len(dataset)).tolist()
    dataset = torch.utils.data.Subset(dataset, indices[:-50])
    dataset_test = torch.utils.data.Subset(dataset_test, indices[-50:])

    # define training and validation data loaders
    data_loader = torch.utils.data.DataLoader(
        dataset, batch_size=2, shuffle=True, num_workers=4,
        collate_fn=utils.collate_fn)

    data_loader_test = torch.utils.data.DataLoader(
        dataset_test, batch_size=1, shuffle=False, num_workers=4,
        collate_fn=utils.collate_fn)

    # get the model using our helper function
    model = get_model_instance_segmentation(num_classes)

    # move model to the right device
    model.to(device)

    # construct an optimizer
    params = [p for p in model.parameters() if p.requires_grad]
    optimizer = torch.optim.SGD(params, lr=0.005,
                                momentum=0.9, weight_decay=0.0005)
    # and a learning rate scheduler
    lr_scheduler = torch.optim.lr_scheduler.StepLR(optimizer,
                                                   step_size=3,
                                                   gamma=0.1)

    # let's train it for 10 epochs
    num_epochs = 10

    for epoch in range(num_epochs):
        # train for one epoch, printing every 10 iterations
        train_one_epoch(model, optimizer, data_loader, device, epoch, print_freq=10)
        # update the learning rate
        lr_scheduler.step()
        # evaluate on the test dataset
        evaluate(model, data_loader_test, device=device)

    print("That's it!")
Because I learned with my own computer without GPU, I found that it took more than an hour to finish 60 epoch s, so I gave up running and studied Analysis of results given on the official website
5. Summary
In this tutorial, you learned how to create your own training pipeline for the instance segmentation model on a custom dataset. To this end, we have compiled
Wrote a torch utils. data. Dataset class, which returns the image as well as the ground live frame and segmentation mask. Also used in
Mask R-CNN model pre trained on COCO train2017 to perform transmission learning on this new data set.
For a more complete example with multi machine / multi GPU training, check the in the torchvision repository
references/detection/train.py .
Can be in here Download the complete source file for this tutorial.