Preface
Currently it includes slow follow characters, range limits, room switching, screen shaking.
Why do you need to write your own camera script?
Unity itself comes with plug-ins such as Cinemachine, which have many common camera functions. On the one hand, it is very bulky and cumbersome. On the other hand, if we have special requirements, such as changing the limits of the camera at any time, it will be difficult to read and change the source code of these plug-ins. Therefore, it is extremely important to write a camera script that meets your needs and is easy to modify.
In addition, although it is a 2D camera, many of its ideas are also useful in 3D.
Project file links (including initial and final scenarios)
Declarations: Artistic material within the project originates from: Tiny RPG - Forest and UP Aoham_at Station B Awesome
1. Camera Offset Following
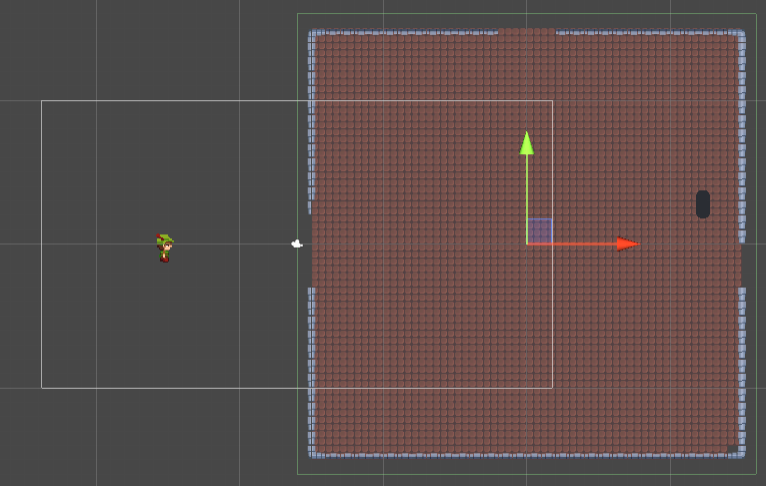
Start_in Project There should be four objects in Scene, a Player and a mobile script, a camera, a tiled map of two rooms, and a CameraBoundary for testing.
First, we solve the camera followup and offset, create a new CameraScript script, and add it to MainCamera.
First, follow, as long as the x and y coordinates of the camera are always equal to the coordinates of the Player's camera, then the camera center is always facing the player's position. Code is
    Transform target;
    void Start()
    {
        target = GameObject.FindGameObjectWithTag("Player").transform;
    }
    private void FixedUpdate()
    {
        transform.position = target.position;
    }
Run, Error...
The reason is that the z-axis coordinate of the camera is also changed to the z-axis coordinate of the Player, so the Player can't be seen anymore by adding an offset.
We create a container for Vector3, [SerializeField]Vector3 offset;
([SerializeField] guarantees that the variable is private ly, but we can still observe and adjust its value in the Inspector.)
Then use target.position+offset is assigned to transform.position
The total code is:
using System.Collections;
using System.Collections.Generic;
using UnityEngine;

public class CameraScript : MonoBehaviour
{
    Transform target;
    [SerializeField]Vector3 offset;

    void Start()
    {
        target = GameObject.FindGameObjectWithTag("Player").transform;
    }

    private void FixedUpdate()
    {
        Vector3 desiredPosition = target.position + offset;
        transform.position = desiredPosition;
    }
}
First set the z coordinate of Offset to -10, then adjust the x, y coordinates arbitrarily, and we get a camera that you can offset from.
Run Results

2. Slow Follow
Add a little slowing effect to the camcorder, fly over quickly when it is far from the target point, and move slowly when it is close to the target point. There are many ways to achieve this. We use each fixed frame to shift a certain proportion of the method.
Introduces a variable of smoothSpeed, using the Lerp() function, which, if 0.5, is equal to half the current distance to the target when each frame is fixed.
Notice here that we are equivalent to directly changing the position value, so put it in FixedUpdate()
    public float smoothSpeed = 0.125f;//Camera slow speed
    private void FixedUpdate()
    {
        Vector3 desiredPosition = target.position + offset;

        Vector3 smoothedPosition = Vector3.Lerp(transform.position,desiredPosition,smoothSpeed);
        transform.position = smoothedPosition;
    }
Run Results
3. Scope limitation
Currently, the theme only has square limits. The principle is to control x and y between [leftLimit,rightLimit] and [bottomLimit,topLimit], respectively. You can use the clamp function (), coded as
        Vector3 desiredPosition = target.position + offset;

        desiredPosition = new Vector3(
            Mathf.Clamp(desiredPosition.x,leftLimit,rightLimit),
            Mathf.Clamp(desiredPosition.y, bottomLimit, topLimit),
            desiredPosition.z
            );
Here we can see that we need four values, the minimum and maximum of x and y. For more elegant use, we can use BoxCollider2D to adjust the range size. The size property of BoxCollider2D is determined by Size and Offset.
The size represents the length of the BoxCollider, which is twice as long as the center point to the leftmost and rightmost points, and the offset represents the offset of the position from the origin.
Convert Relationships to
    public void refreshBoundary(BoxCollider2D boundary)
    {
        leftLimit =   boundary.transform.position.x - boundary.size.x / 2 + boundary.offset.x;
        rightLimit =  boundary.transform.position.x + boundary.size.x / 2 + boundary.offset.x;
        bottomLimit = boundary.transform.position.y - boundary.size.y / 2 + boundary.offset.y;
        topLimit =    boundary.transform.position.y + boundary.size.y / 2 + boundary.offset.y;
    }
Here we add the position of BoxCollider2D, because BoxCollider2D records only relative range locations.
Function:
If something goes wrong, we want the edge of the camera's field of view to be just inside the BoxCollider. The result is that the center of the camera is inside the BoxCollider, so we should subtract half of the camera's field of view.
Half the camera range is calculated as:
cameraHalfHeight = Camera.orthographicSize;
cameraHalfWidth = cameraHalfHeight * Screen.width / Screen.height;
Code
using System.Collections;
using System.Collections.Generic;
using UnityEngine;

public class CameraScript : MonoBehaviour
{
    Transform target;
    [SerializeField]Vector3 offset;//Offset of camera center from player
    [SerializeField]float smoothSpeed;//Slow moving speed

    float cameraHalfWidth, cameraHalfHeight;//Stores half of the camera's field of view
    float topLimit, bottomLimit, leftLimit, rightLimit;//Range of Camera Activity

    // Start is called before the first frame update
    void Start()
    {
        target = GameObject.FindGameObjectWithTag("Player").transform;

        cameraHalfHeight = GameObject.FindGameObjectWithTag("MainCamera").GetComponent<Camera>().orthographicSize;
        cameraHalfWidth = cameraHalfHeight * Screen.width / Screen.height;

        refreshBoundary(GameObject.Find("CameraBoundary/1").GetComponent<BoxCollider2D>());
    }

    private void FixedUpdate()
    {
        Vector3 desiredPosition = target.position + offset;
        desiredPosition = new Vector3(
            Mathf.Clamp(desiredPosition.x, leftLimit, rightLimit),
            Mathf.Clamp(desiredPosition.y, bottomLimit, topLimit),
            desiredPosition.z
            );

        Vector3 smoothedPosition = Vector3.Lerp(transform.position, desiredPosition, smoothSpeed);
        transform.position = smoothedPosition;
    }

	public void refreshBoundary(BoxCollider2D boundary)
    {
        leftLimit =   boundary.transform.position.x - boundary.size.x / 2 + boundary.offset.x + cameraHalfWidth;
        rightLimit =  boundary.transform.position.x + boundary.size.x / 2 + boundary.offset.x - cameraHalfWidth;
        bottomLimit = boundary.transform.position.y - boundary.size.y / 2 + boundary.offset.y + cameraHalfHeight;
        topLimit =    boundary.transform.position.y + boundary.size.y / 2 + boundary.offset.y - cameraHalfHeight;
    }
}
4. Camera wobble
Here we create a CameraShake, a parent object with an initial position of (0,0,0), and a CameraShake script using an easily implemented random direction shaking.
Write a protocol that moves each frame in a random direction as it progresses and returns to its initial position at the end of the protocol
using System.Collections;
using System.Collections.Generic;
using UnityEngine;

public class CameraShake : MonoBehaviour
{
    public static CameraShake instance;
    [SerializeField]float duration, magnitude;//Jitter duration, jitter amplitude

    private void Start()
    {
        instance = this;
    }

    public IEnumerator Shake()
    {

        float elapsed = 0.0f;

        while (elapsed < duration)
        {

            float x = Random.Range(-1f, 1f) * magnitude;
            float y = Random.Range(-1f, 1f) * magnitude;
            transform.localPosition = new Vector3(x, y, 0);
            elapsed += Time.deltaTime;
            yield return null;
        }
        transform.localPosition = new Vector3(0, 0, 0);
    }
}
I have an Enemy in the initial room that triggers the camera to vibrate when I meet a player.
Run Results

5. Switching into a new room
The principle is to call the refreshBoundary(BoxCollider2D boundary) function again when it detects entering the room
We want two triggers for each room, one for the RoomCameraBoundary to store the camera's field of view in that room, and the other for the PlayerInJudge to detect if a player enters the room.
Enable annotated functions in Room
Run Results