Previously, we have learned how to use the two service data types defined in ROS: spawn and Trigger. When the defined service data cannot meet our needs, we need to define and use a service data type according to our own needs
In the previous example in the message of the custom topic, one publisher kept publishing a person's message and another subscriber kept displaying and receiving the message. We don't want publisher to keep sending messages. We hope it uses a mechanism such as service to publish and display once every request, and whether it has received a successful publication at the same time, Let's use a model such as service to improve such an example
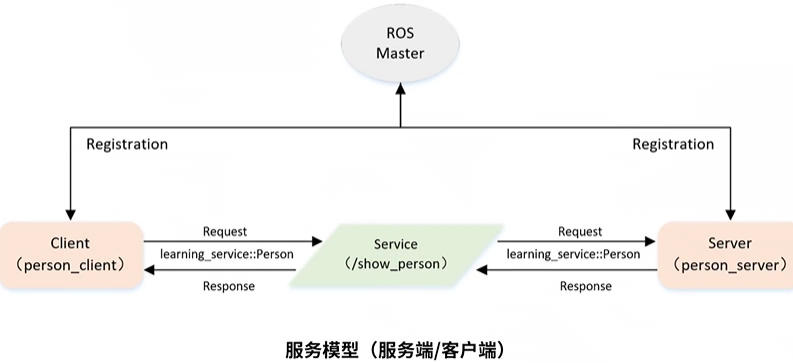
In such a model, we use ROS Master to manage two nodes, a Client and a server, which are to be implemented; The Client side is going to issue a request to display a person's information and send the person's information through the data of our custom service. Then we will receive the request on the server side. At the same time, it will contain information such as the person's name, age and gender, which will be displayed through the log, At the same time, the results are displayed through response feedback. The service used is called show_person (this is our custom name), and the data type used is called learning_service::Person, which is the service data type we will define immediately. The above is the case we want to implement
The first step is to customize the service data
1. Define srv file
Customize the structure of service data. Compared with the previous data definition method of message, message is defined in message MSG file, similar to the service definition, is a srv file
The difference between a service and a message is that a service has a feedback response, so its data will be divided into two parts. As mentioned earlier, the first part is the request data and the second part is the response data. During compilation, the corresponding header file will be generated through this definition, which is a fixed definition method in ros
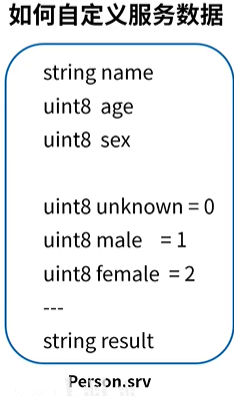
Definition and interpretation:
- the above is the name, age and gender of the person we want to send to the Server through the Client side, which is similar to the previous implementation of Topice. - the following will tell the Client on the response side whether the Server side shows success
establish. srv file
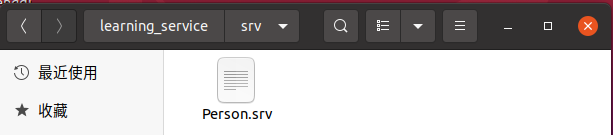
In the workspace, the home directory is / catkin_ws/src/learning_service, create a folder named srv (msg folder is created in message)
Open the terminal in srv and use the touch command, touch person srv, create a person srv file; Then open the file and enter these definitions
Then ros will become different c + + and python programs according to these definitions at compile time
(in the following compilation part, the configuration is exactly the same as that of the previous message. You need to configure the dependent function package for dynamically generating message in the package. You also need to add several compilation options in CMakeLists. Finally, the relevant header files of the corresponding language will be generated during compilation.)
2. In package Add function package dependency to XML
Here we will add a dependency of a function package of a dynamic generator
<build_depend>message_generation</build_depend>
<exec_depend>message_runtime</exec_depend>
Copy the two lines to package In XML

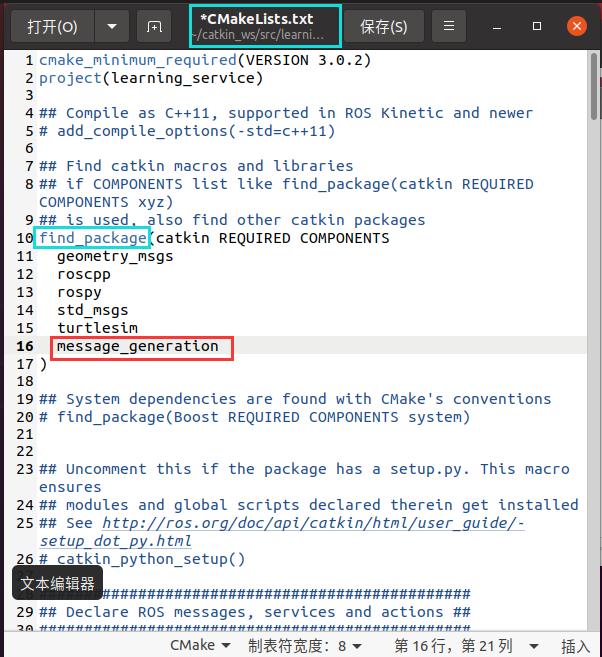
3. In cmakelists Txt add compilation options
find_package( ... message_generation)
We need to find_package finds such a function package as a dependency
add_service_files(FILES Person.srv)
generate_messages(DEPENDENCIES std_msgs)
Let's add our definition srv file, let our compiler know which srv file you want to generate the corresponding header file according to now
In the first sentence, it will automatically search the file under the srv folder
The second sentence, according to our person SRV file definition, and std_msgs depends on this to generate the corresponding header file

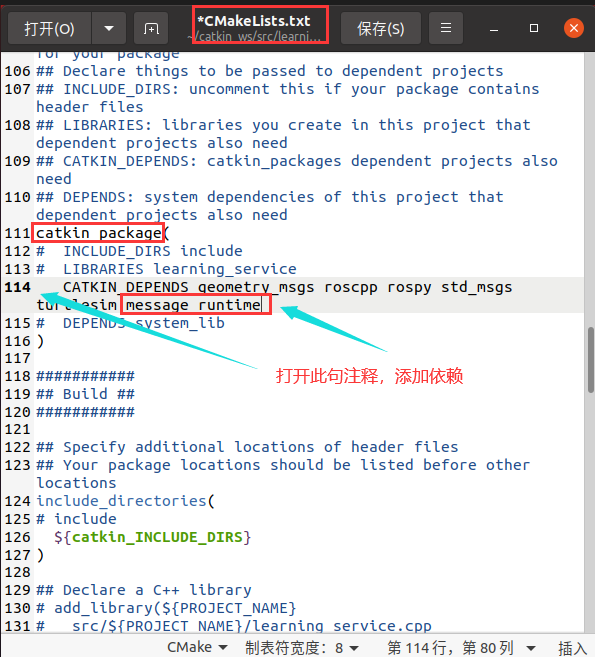
catkin_package( ... message_runtime)
4. Compile and generate language related files
After the basic configuration is completed, you can return to the workspace directory for compilation. You can also use catkin_make compilation
After the compilation is successful, view the compilation result, that is, the generated code file
devel/include/lenrning_service / three files person h ,PersonRequest.h ,PersonResponse.h
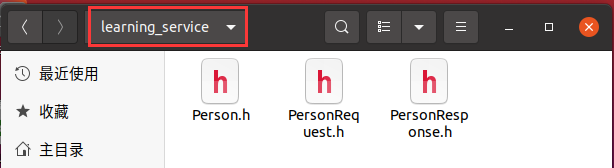
This is because we just passed three horizontal lines in srv, and the lower part will be placed in personreqest H, the following part will be put into personresponse In H, there will be an overall person H contains such two header files, so only this one can be used
So far, the user-defined service type, person type, has been created; After successful compilation, compile a series of header files. The next step is how to use these header files
The second step is to create the Server code and the implementation of Server side and Client side (C + +)
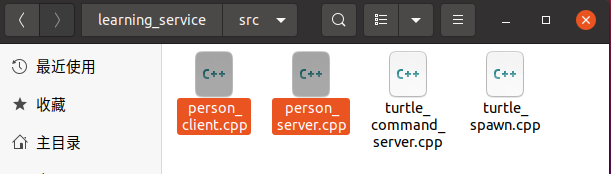
Courseware code / learning_ Person in service / SRC_ client. CPP and person_ server. Copy the cpp file to the workspace catkin_ ws/src/learning_ In service / SRC
Client side person_client.cpp code
/**
 * This routine will request / show_person service, service data type learning_service::Person
 */

#include <ros/ros.h>
#include "learning_service/Person.h" / / the header file contains the header file just generated dynamically

int main(int argc, char** argv)
{
    // Initialize ROS node
	ros::init(argc, argv, "person_client");

    // Create node handle
	ros::NodeHandle node;

    // Discovery / show_ After the person service, create a service client with the connection name of / show_person's service
    //waitForService, wait for this show_ A service provider such as person runs
	ros::service::waitForService("/show_person");
	ros::ServiceClient person_client = node.serviceClient<learning_service::Person>("/show_person");
	//Create the Client side here. The request data that the Client side will publish is learning_service::Person (customized). In addition, the object of the service whose data is to be used is show_person channel

    // Initialize learning_ Request data of service:: person
    //For the person data, add the name, age and gender, which is exactly the same as before
	learning_service::Person srv;
	srv.request.name = "Tom";
	srv.request.age  = 20;
	srv.request.sex  = learning_service::Person::Request::male;
	//Because of the previously defined macro, the definition of male can use learning_ Because service:: person is in request, the difference between service:: person and message is that a new request namespace is added

    // Request service call
    //Next, through person_ The client issues a call to request that the requested data be sent out, and then returns to the card to wait for the feedback result of srv. After the final feedback is received, it will jump to the last line to display the feedback result
	ROS_INFO("Call service to show person[name:%s, age:%d, sex:%d]",
			 srv.request.name.c_str(), srv.request.age, srv.request.sex);

	person_client.call(srv);

	// Display service call results
	ROS_INFO("Show person result : %s", srv.response.result.c_str());

	return 0;
};
it is to be noted that learning_service::Person How to use, to include The header file is then placed in angle brackets, and then filled with specific data. It is used learning_service Specific space plus Person name learning_service::Person srv Pay attention here Person Name and definition srv File name for Person srv It is the same, because when we generate a header file, the header file will be named completely according to the name of the file
//This is how we use the person data type on the Client side
srv file defined above
catkin_ws/src/learning_service/srv/Person srv
Server side person_server.cpp code
/**
 * This routine will execute / show_person service, service data type learning_service::Person
 */

#include <ros/ros.h>
#include "learning_service/Person.h"
//Call the include header file first

// service callback function, input parameter req, output parameter res
bool personCallback(learning_service::Person::Request  &req,
         			learning_service::Person::Response &res)
{
    // Display request data, person's name, age, gender
    ROS_INFO("Person: name:%s  age:%d  sex:%d", req.name.c_str(), req.age, req.sex);

	// Set the feedback data, ok can be changed, because this is a string fed back to the Client, such as ok and success
	res.result = "OK";

    return true;
}

int main(int argc, char **argv)
{
    // ROS node initialization
    ros::init(argc, argv, "person_server");

    // Create node handle
    ros::NodeHandle n;

    // Create a file named / show_ The server of person registers the callback function personCallback
    //Create an instance of the server. The server will always provide show_person such a server service, and once the service request comes in, call personCallback to enter the callback function.
    ros::ServiceServer person_service = n.advertiseService("/show_person", personCallback);

    // Loop waiting callback function
    ROS_INFO("Ready to show person informtion.");
    ros::spin();
    //Finally, there is a spin that will constantly wait for the request data to come in. Once a request comes in, it will enter the callback function. Therefore, our server side is a cycle that will always be executed in the spin. After our Client side requests once, it will end. We can continuously run the program on the Client side, and the server side can only run once

    return 0;
}
//Here, we need to pay attention to the defined Person, which first contains the header file and then can be used. At the same time, we need to pay attention to the input parameters in the callback function, which are generally of this type. Learning in front_ Service:: Person, then the Request side and the Response side. These two namespaces are forcibly defined by ROS. You only need to modify the previous paragraph of learning_service::Person can be changed to the defined data type; And the usage of the following data types req name. c_ str(), req. age, req. sex
//This is how we use our customized data on the server side of person
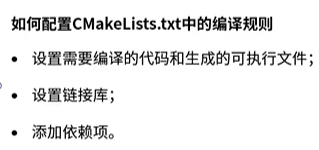
Step 3: configure the server / client code compilation rules
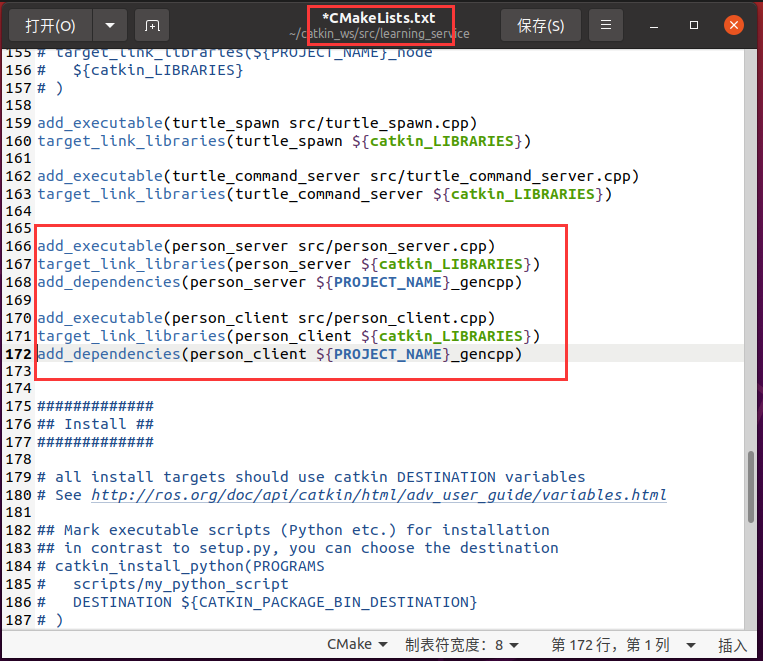
Copy the following Compilation Rules to cmakelists Txt
add_executable(person_server src/person_server.cpp)
target_link_libraries(person_server ${catkin_LIBRARIES})
add_dependencies(person_server ${PROJECT_NAME}_gencpp)
add_executable(person_client src/person_client.cpp)
target_link_libraries(person_client ${catkin_LIBRARIES})
add_dependencies(person_client ${PROJECT_NAME}_gencpp)
First, compile cpp into corresponding executable files, one server and one client
Second, make a link between server and client
Third, make a dependency on the dynamically generated header file
Step 4, compile and run publishers and subscribers
cd ~/catkin_ws / / return to the root directory of the workspace
catkin_make / / use this command to compile
source devel/setup.bash / / set the environment variable. You can subtract this step by the following method. Skip

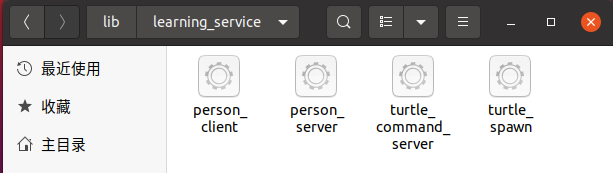
The compilation results can also be found in catkin_ ws/devel/lib/learning_ You can see the compiled results under service
roscore
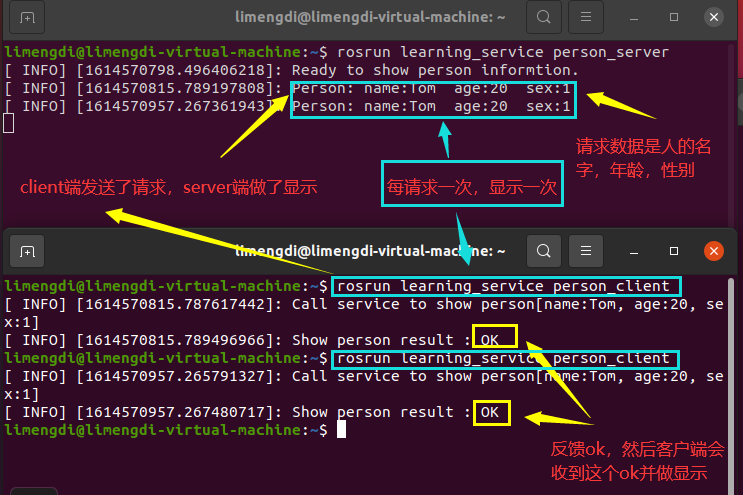
rosrun learning_service person_server
(run the server side, and the server side will wait for the request after running)
rosrun learning_service person_client
(run Client side)
The client sends a request, and the server displays it. The request data is the person's name, age and gender, and then feedback ok. Then the client will receive the ok and display it
Display once per request
Note: if you run the client first, it will wait for your server to run because there is waitForService

Note: before running the program every time, especially before running a new program, pay attention to turning off roscore, because there is a parameter in roscore, and many parameters will be stored in the server. If the program runs a lot, there will be conflicts when some parameter names are the same, resulting in many problems
Create client and server code (python)
person_server.py code
#!/usr/bin/env python
# -*- coding: utf-8 -*-
# This routine will execute / show_person service, service data type learning_service::Person

import rospy
from learning_service.srv import Person, PersonResponse

def personCallback(req):
	# Display request data
    rospy.loginfo("Person: name:%s  age:%d  sex:%d", req.name, req.age, req.sex)

	# Feedback data
    return PersonResponse("OK")

def person_server():
	# ROS node initialization
    rospy.init_node('person_server')

	# Create a file named / show_ The server of person registers the callback function personCallback
	#Create a server for show_ The Person service provides services. Its data type is self-defined Person, so we need from learning_service.srv import Person, PersonResponse, through from learning_service.srv imports the data types Person and PersonResponse created by itself (one PersonResponse and one personrequest for both server and client)
    s = rospy.Service('/show_person', Person, personCallback)

	# Loop waiting callback function
    print "Ready to show person informtion."
    rospy.spin()

if __name__ == "__main__":
    person_server()
person_client.py code
#!/usr/bin/env python
# -*- coding: utf-8 -*-
# This routine will request / show_person service, service data type learning_service::Person

import sys
import rospy
from learning_service.srv import Person, PersonRequest

def person_client():
	# ROS node initialization
    rospy.init_node('person_client')

	# After discovering the / spawn service, create a service client and connect to the service named / spawn
	#Create a client-side object and wait_for_service waiting for your show_ When person runs, it will create an object such as client, and he will give it to show_person sends a request. The request data type is person
    rospy.wait_for_service('/show_person')
    try:
        person_client = rospy.ServiceProxy('/show_person', Person)

		# Request service call, input request data
		#Pass this data type through person_ Enter the client, send the requested data as person name, age and gender, and then return the result, and then print it out
        response = person_client("Tom", 20, PersonRequest.male)
        return response.result
    except rospy.ServiceException, e:
        print "Service call failed: %s"%e

if __name__ == "__main__":
	#Service call and display the call result
    print "Show person result : %s" %(person_client())