1 data organization
(1) coco128 dataset
Here we use the coco dataset, but the coco dataset is too large. Here we use the coco128 dataset, because there are only 128 pictures, and the speed of copying and decompression can be fast. The download link of the coco128 dataset is: https://github.com/ultralytics/yolov5/releases/download/v1.0/coco128.zip
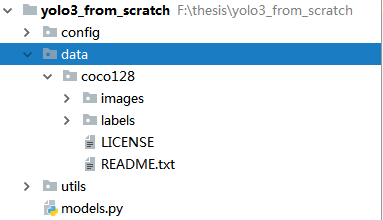
Create a folder named data in the current directory and put the entire coco128 folder into data. At this time, the project structure is shown in the following figure:
Open data / coco128 / labels / train2017 / 00000000000 9.txt and you can see
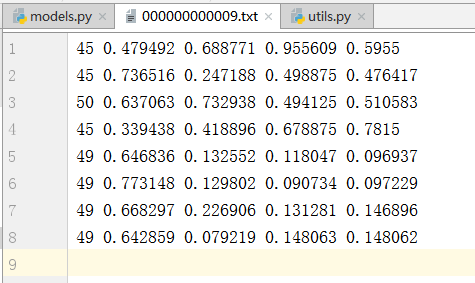
The first number in each line is the category number of the target, the second is the abscissa of the center point of the frame, the third is the ordinate, the fourth is the width of the frame, and the fifth is the height of the frame. The coordinates of the center point and the width and height are the normalized results.
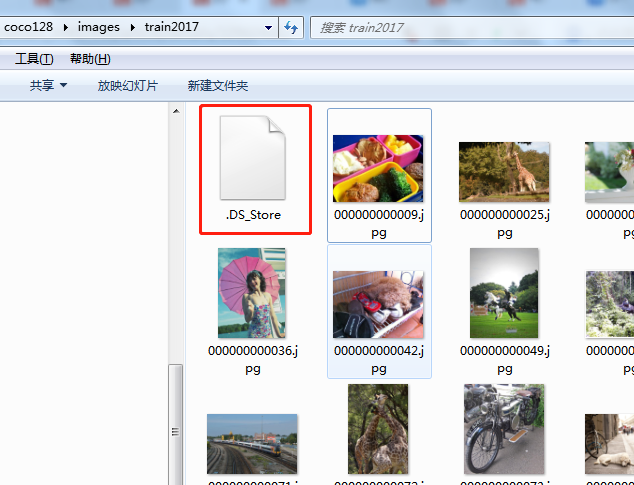
In data/coco128/images/train2017, you can see a file named ". DS_Store". Delete this file to prevent it from being used as a sample
(2) Divide the verification set from the training set
A new Python script named "partition dataset. py" is created under data/coco128. The program design idea of the script is: first find out how many pictures there are (use os.listdir to make the picture file names in the picture directory into a list and find the length of the list), and then generate 10 random numbers as indexes to obtain the names of 10 pictures from the list with enough picture names, Write the path of these 10 pictures into a file named "val_path.txt", and then write the other pictures into a file named "train_path.txt". The code is as follows:
import os
import random
random.seed(10)

# Get picture name from picture path
images_path = r"F:\thesis\yolo3_from_scratch\data\coco128\images\train2017"
images_names = os.listdir(images_path)      # Returns the first level subdirectory as a list
images_num = len(images_names)

# Randomly obtain 10 numbers as the index of the picture name list, and then obtain the picture name
num_val = 10                # Number of validation sets
idx_img = random.sample(range(0, images_num), num_val)   # Generate non duplicate num_ A random number

# Generate the name of the validation set sample to form a list
val_names = [images_names[i] for i in idx_img]
# print(val_names)

# Generate the names of training set samples to form a list
train_names = [images_names[i] for i in range(images_num) if i not in idx_img]
# print(train_names)

# Write the path of the training set sample to the txt file
with open(r"F:\thesis\yolo3_from_scratch\data\coco128\train_path.txt", 'w') as f:
    for file_name in train_names:
        f.write(os.path.join(images_path, file_name)+'\n')

# Write the path of the validation set sample to the txt file
with open(r"F:\thesis\yolo3_from_scratch\data\coco128\val_path.txt", 'w') as f:
    for file_name in val_names:
        f.write(os.path.join(images_path, file_name)+'\n')
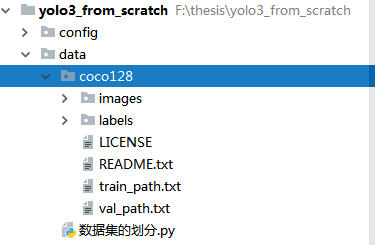
After the program is executed, the project structure is:
Where, train_ The path.txt file is as follows:

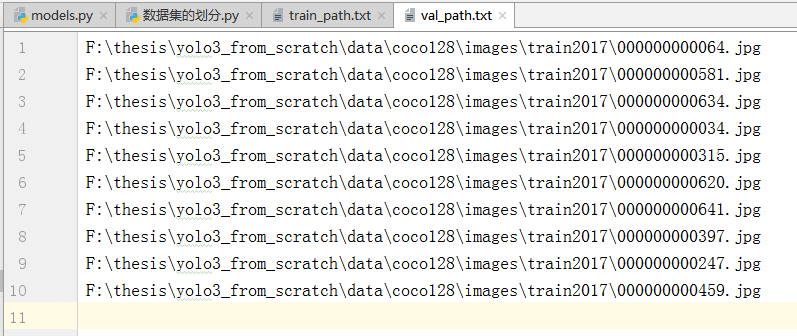
val_ The path.txt file is as follows:
At this point, the data organization is completed.
2 create classes for datasets
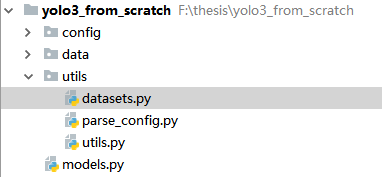
In the utils directory, create a new file named datasets.py. At this time, the project structure becomes
In datasets.py, write the required modules first:
import os
from PIL import Image
import torch
from torch.utils.data import Dataset
import torchvision.transforms as transforms
import numpy as np
import random
random.seed(0)
Of course, the above modules are not enough, but the rest can be added gradually in the process of creating classes.
In datasets.py, create a Dataset class that inherits the Dataset class in torch.utils.data. The self-made Dataset class must implement three functions: init and Len__ And__ getitem, which is the initialization class, calculates the length len(obj), and obtains a single sample and its label through the index.
There is nothing to say about the initialization function. Its code is as follows:
class ListDataset(Dataset):
    def __init__(self, list_path, img_size=416, augment=True, multiscale=True, normalized_labels=True):
        '''

        :param list_path: One txt Documents, such as what we wrote earlier train_path.txt and val_path.txt
        :param img_size: Data picture to be converted to high
        :param augment: Use data enhancement
        :param multiscale: Whether to perform multi-scale transformation (see self.collate_fn You can understand its function)
        :param normalized_labels: Has the label been normalized, i.e boundingbox Have the center coordinates, height, width, etc. of been normalized
        '''
        with open(list_path, "r") as file:
            self.img_files = file.readlines()   # Read the contents of txt file and read out the sample path

        # The path of the label can be obtained according to the path of the sample. Just change the images in the path name to labels and the suffix to txt
        self.label_files = [
            path.replace("images", "labels").replace(".png", ".txt").replace(".jpg", ".txt")
            for path in self.img_files
        ]
        self.img_size = img_size    # The height and width of the image after being processed into a square (the image should be processed into a square before being input into the model)
        self.max_objects = 100      # Maximum number of targets in a picture
        self.augment = augment
        self.multiscale = multiscale
        self.normalized_labels = normalized_labels
        self.min_size = self.img_size - 3 * 32  # Minimum scale in multi-scale transformation
        self.max_size = self.img_size + 3 * 32  # Maximum scale in multi-scale transformation
        self.batch_count = 0                    # Count how many batch es have been traversed
        # TODO max_ What are objects for
The length function is also relatively simple, and the code is as follows:
    def __len__(self):
        return len(self.img_files)
The more difficult thing is the getitem function. To return the picture and label of the specified index, the picture and label must be made into tensors before the function returns. It also involves the problem of whether the label is normalized, so it is cumbersome.
Let's deal with the picture first. The code is as follows:
    def __getitem__(self, index):
        img_path = self.img_files[index % len(self.img_files)].rstrip()     # Gets the pathname of the picture

        # Extract image as PyTorch tensor
        img = transforms.ToTensor()(Image.open(img_path).convert('RGB'))    # Read the picture and convert it to torch tensor
        # mage.open(img_path) reads the Image and returns the Image object, which is not an ordinary array
        # convert('RGB ') performs channel conversion because when the image format is RGBA, the format read by Image.open('xxx.jpg') is RGBA

        # Handle images with less than three channels
        if len(img.shape) != 3:
            img = img.unsqueeze(0)
            img = img.expand((3, img.shape[1:]))
        # The image may be a grayscale image, so img.shape is (h, w)
        # After unsqueeze(0), img.shape is (1, h, w)
        # img.expand((3, img.shape[1:]) is img.expand((3, h, w))

        _, h, w = img.shape
        h_factor, w_factor = (h, w) if self.normalized_labels else (1, 1)
        # h_factor, w_factor is used to inverse calculate the specific coordinates of the target in the picture. You can understand it naturally when you see the back of this function
        # If normalized, the scale factor is the true height and width of the image
        # If not normalized, the scale factor is 1

        # Pad to square resolution
        img, pad = pad_to_square(img, 0)
        _, padded_h, padded_w = img.shape
Here comes the pad_to_square function, which passes through letter_box algorithm to turn the picture into a square. We can add pad after the ListDataset class_ to_ Square code:
import torch.nn.functional as F
def pad_to_square(img, pad_value):
    """
    This function expands the picture into a square
    :param img: Picture tensor
    :param pad_value:   The value used to fill in, that is, the left and right or up and down bars
    :return:
    """
    c, h, w = img.shape
    dim_diff = np.abs(h - w)
    # (upper / left) padding and (lower / right) padding
    pad1, pad2 = dim_diff // 2, dim_diff - dim_diff // 2

    # Determine padding
    pad = (0, 0, pad1, pad2) if h <= w else (pad1, pad2, 0, 0)
    # (0, 0, pad1, pad2) and (pad1, pad2, 0, 0), the four values in brackets represent left, right, up and down respectively
    # If h is less than w, it is filled up and down, otherwise it is filled left and right
    # Because the F.pad function is used later, the second parameter is pad, which is a tuple containing four numbers

    # Add padding
    img = F.pad(img, pad, "constant", value=pad_value)

    return img, pad
Let's go back to the getitem function of the ListDataset class. Since we write the picture_ After the box is processed, the corresponding label should also be transformed. The code is as follows:
        label_path = self.label_files[index % len(self.img_files)].rstrip() # Get label path

        targets = None
        if os.path.exists(label_path):
            f = open(label_path, 'r')
            if f.readlines() != []:
                # Some pictures have no target, but have label files. There is no content in these label files
                # We only deal with tag files with content. For tag files without content, let targets equal None

                boxes = torch.from_numpy(np.loadtxt(label_path).reshape(-1, 5))

                # Extract coordinates for unpadded + unscaled image
                # Get bbox the real coordinates of the upper left corner and the lower right corner on the original picture
                x1 = w_factor * (boxes[:, 1] - boxes[:, 3] / 2)
                y1 = h_factor * (boxes[:, 2] - boxes[:, 4] / 2)
                x2 = w_factor * (boxes[:, 1] + boxes[:, 3] / 2)
                y2 = h_factor * (boxes[:, 2] + boxes[:, 4] / 2)

                # Adjust for added padding
                # Since it has been adjusted to be square, the size of pad needs to be added
                x1 += pad[0]
                y1 += pad[2]
                x2 += pad[1]
                y2 += pad[3]

                # Returns (x, y, w, h)
                # Calculate the normalized center point coordinates and height and width
                boxes[:, 1] = ((x1 + x2) / 2) / padded_w
                boxes[:, 2] = ((y1 + y2) / 2) / padded_h
                boxes[:, 3] *= w_factor / padded_w
                boxes[:, 4] *= h_factor / padded_h

                targets = torch.zeros((len(boxes), 6))
                targets[:, 1:] = boxes          # The last five columns are the position, height and width of bbox, and then the classification index
                # target column 0, according to the following collapse_ FN function, you can see that column 0 is the index of the picture in batch

                # Apply augmentations
                # Random horizontal flip
                if self.augment:
                    if np.random.random() < 0.5:
                        img, targets = horisontal_flip(img, targets)

            f.close()

        return img_path, img, targets
Here comes horisontal_flip function, which is a self-defined horizontal flip operation as a data enhancement method. In the utils directory, create a new script named "augmentations.py". The code is as follows:
import torch
def horisontal_flip(images, targets):
    """
    Flip horizontally
    :param images:Picture tensor
    :param targets:label
    :return:
    """
    images = torch.flip(images, [-1])   # Flip according to the specified dimension, - 1 represents the last dimension, that is, width
    targets[:, 2] = 1 - targets[:, 2]   # The abscissa of the center point should also be flipped randomly, because it has been normalized, so just subtract 1
    return images, targets
Remember to add the following sentence to datasets.py:
from utils.augmentations import horisontal_flip
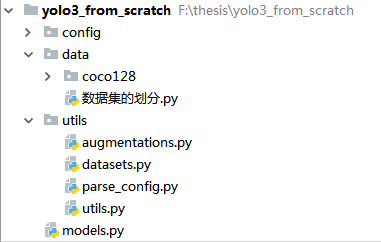
At this time, the project structure is:
Here, we can write a test script datasets under "/ yolo3_from_scratch"_ test.py:
# coding=utf-8
import torch
from utils.datasets import ListDataset

train_path = r"F:\thesis\yolo3_from_scratch\data\coco128\train_path.txt"
dataset = ListDataset(train_path, augment=True, multiscale=True)

dataloader = torch.utils.data.DataLoader(
    dataset,
    batch_size=2,
    shuffle=True
)
Output:
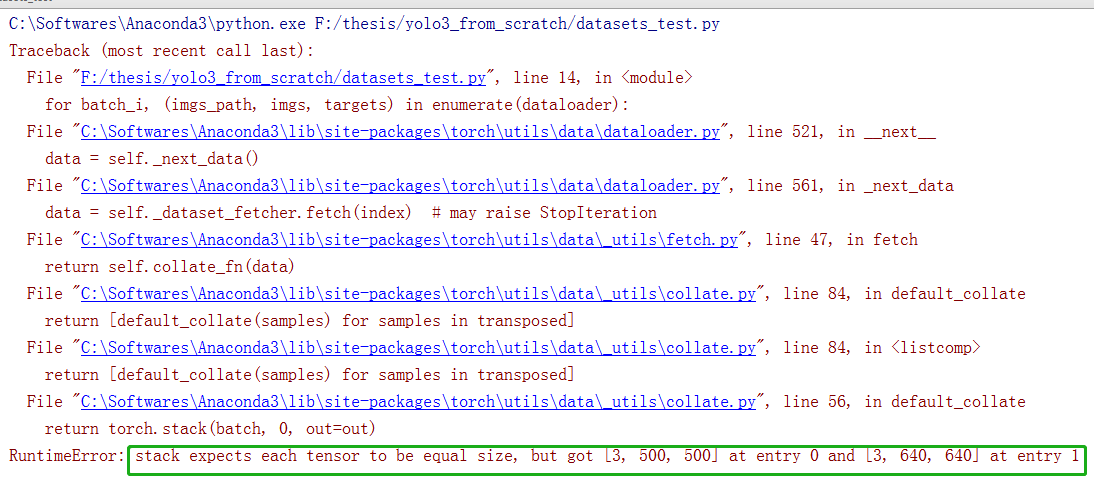
The reason why this happens is that the two pictures are different in size. They are passing through letter_box cannot be stacked. Here we need to add a collapse in the ListDataset class_ FN function to scale the two figures to the same size. About collate_fn function, you can see this article:
https://blog.csdn.net/qq_43391414/article/details/120462055
    def collate_fn(self, batch):
        """
        Used to organize data
        :param batch: several times__getitem__A list of the contents returned by the function
                    If say batch_size Is 2, then batch It's a list of two elements,
                    Each element represents once__getitem__Return result of function
                    __getitem__The return value of a function consists of three parts: img_path, img, targets
                    that batch Each element of is a tuple containing img_path, img, targets
        :return:
        """
        paths, imgs, targets = list(zip(*batch))    # zip starts with the parameter * in parentheses, indicating decompression
        # After the last command is executed, paths, IMGs and targets will become tuples,
        # Take paths as an example. After the above command is executed, paths will become a tuple composed of two picture paths

        # Add sample index to targets adds the index of the picture in the batch to the 0th column of the target
        for i, boxes in enumerate(targets):
            if boxes is not None:
                boxes[:, 0] = i     # i represents the ith picture in the current batch

        # Remove empty placeholder targets if some pictures have no targets, the corresponding label is None
        targets = [boxes for boxes in targets if boxes is not None]  # Keep labels other than None

        targets = torch.cat(targets, 0)     # Tags are concatenated. targets is a tuple before conversion

        # Selects new image size every tenth batch
        if self.multiscale and self.batch_count % 10 == 0:  # Every 10 batch es, change the scale randomly
            self.img_size = random.choice(range(self.min_size, self.max_size + 1, 32))
            # The third parameter of the range function is 32, which can ensure that the new size obtained randomly is a multiple of 32,
            # Because the backbone is 32 times down sampled, if it is not a multiple of 32, the convolution kernel cannot completely scan the image

        # Zooms the picture to the specified size
        imgs = torch.stack([resize(img, self.img_size) for img in imgs])    #
        self.batch_count += 1

        # After the image is scaled, the label does not need to be changed because the label has been normalized, so there is no need to convert

        return paths, imgs, targets
In the above program section, list(zip(*batch)) and resize appear. Let's talk about list(zip(*batch)) first. You can understand its functions through the following program section:
# This code has nothing to do with YOLOv3. It just explains what list(zip(*batch)) implements
a = ('a', 25, 1)
b = ('b', 43, 0)
L= [a, b]
m = zip(*L)     # zip object
print(m)
print(list(m))
Output:
<zip object at 0x00000000026828C0>
[('a', 'b'), (25, 43), (1, 0)]
collate_ The resize function appears in FN. You can add this function to datasets.py:
def resize(image, size):
    """
    Scales the picture to the specified size
    :param image: Picture tensor
    :param size:  The specified size, height and width are all this value, that is, the function scales the square
    :return:
    """
    image = F.interpolate(image.unsqueeze(0), size=size, mode="nearest").squeeze(0)
    return image
Slightly modify the test script and the modified datasets_ The test.py code is as follows:
# coding=utf-8
import torch
from utils.datasets import ListDataset

train_path = r"F:\thesis\PyTorch-YOLOv3\data\coco\trainvalno5k.txt"
dataset = ListDataset(train_path, augment=True, multiscale=True)

dataloader = torch.utils.data.DataLoader(
    dataset,
    batch_size=2,
    shuffle=True,
    collate_fn=dataset.collate_fn,  #
)

for batch_i, (_, imgs, targets) in enumerate(dataloader):
    print(batch_i)
    print("imgs.shape:", imgs.shape)
    print("targets.shape:", targets.shape)
    break
Output:
0
imgs.shape: torch.Size([2, 3, 384, 384])
targets.shape: torch.Size([6, 6])
In addition, in order to test the dataset class's handling of label files without content, you can also write another test script to test whether the label files without targets can be handled correctly when importing data in batches.
# Test whether there is a row with an image index of 1 in the targets of the 18th batch when the batch is 5
# 1 indicates the index of the second picture, i.e. 000000000508.jpg in batch, but there is no target in 000000000508.jpg
# Because 000000000508.jpg is in the train_ Line 87 of path.txt, because the index of this picture is 86, is in the 18th batch
# You can see the image index of the last few lines of the returned targets

import torch
from utils.datasets import ListDataset

train_path = r"F:\thesis\yolo3_from_scratch\data\coco128\train_path.txt"
dataset = ListDataset(train_path, augment=True, multiscale=True)
dataloader = torch.utils.data.DataLoader(
    dataset,
    batch_size=5,
    shuffle=False,              # You can't mess up here
    collate_fn=dataset.collate_fn,  #
)

for batch_i, (imgs_path, imgs, targets) in enumerate(dataloader):
    if batch_i<17:
        continue

    print(targets[:3, :])   # Only the first three lines are displayed, because the picture with index 85 has only one target
    # If line 2 starts with 2, it indicates that the program has been modified correctly. If it starts with 1, it indicates that there is a problem with the program
    break

# From the output, you can see that the second line of targets starts with 2, indicating that the program handles 00....0508.txt properly.
Output:
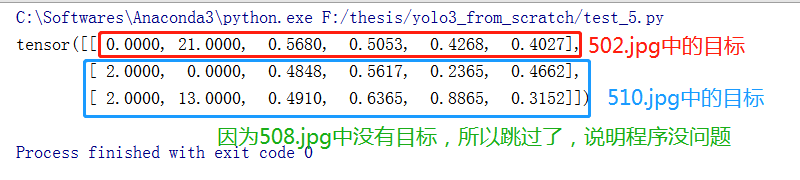
Open the file train created when dividing data_ Path.txt, you can see that 502.jpg, 508.jpg and 510.jpg are adjacent

So far, the dataset class has been preliminarily established. We will continue to add methods and classes as needed.
In the next chapter, we will explain the training YOLOv3 model.