11:Player Attack realizes attack animation
Now when you click the enemy, the mouse will change, but when you click the character, there is no change. The reason is that the enemy blocks the ray of the mouse, and the ray can't find the enemy's ground, so the character can't run in front of the enemy. Next, we implement this effect in the code,
Create another event in MouseManager:
public event Action<GameObject> OnEnemyClicked;
When we click on the enemy, the object of the current enemy will be passed. Change the MouseControl method:
    void MouseControl()//Return: click the left mouse button to return the value
    {
        if(Input.GetMouseButtonDown(0)&&hitInfo.collider != null)
        {
            if(hitInfo.collider.gameObject.CompareTag("Ground"))
            {
                OnMouseClicked?.Invoke(hitInfo.point); //If the current onmouseclicked event is not empty, the coordinates of the clicked on the ground will be returned to this event (execute all functions and methods added to onmouseclicked)
            }
        }
        if(Input.GetMouseButtonDown(0)&&hitInfo.collider != null)
        {
            if(hitInfo.collider.gameObject.CompareTag("Enemy"))
            {
                OnEnemyClicked?.Invoke(hitInfo.collider.gameObject); //If the current OnEnemyClicked event is not empty, return the gameObject clicked on the enemy to this event (execute all functions and methods added to OnEnemyClicked)
            }
        }
    }
}
Back to PlayerController, add another method in Start and move it to the target to be attacked. This time, we first add the event without writing the method,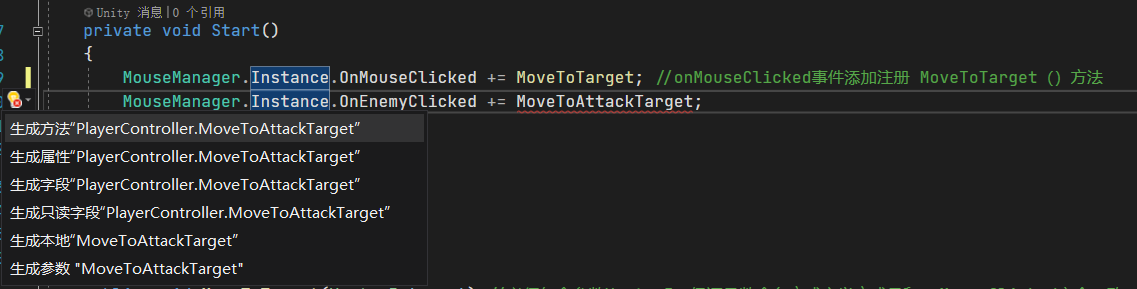
Click to add this method directly.
Next, we set the parameters of some variables to facilitate us to obtain these variables,
Press Ctrl+R+R to rename all MoveToTarget
    private GameObject attackTarget;
    private float lastAttackTime;   //Attack cooldown timer

    private void EventAttack(GameObject target)
    {
        if(target != null)
        {
            attackTarget = target;
        }
    }
To move the character to the enemy, we define a Ctrip:
    IEnumerator MoveToAttackTarget()
    {
        agent.isStopped = false;

        transform.LookAt(attackTarget.transform);//Turn to my target

        while(Vector3.Distance(attackTarget.transform.position,transform.position) > 1)
        {
            agent.destination = attackTarget.transform.position;
            yield return null;
        }
        agent.isStopped = true;
        //Attack
        if(lastAttackTime < 0)
        {

        }
    }
Add attack animation: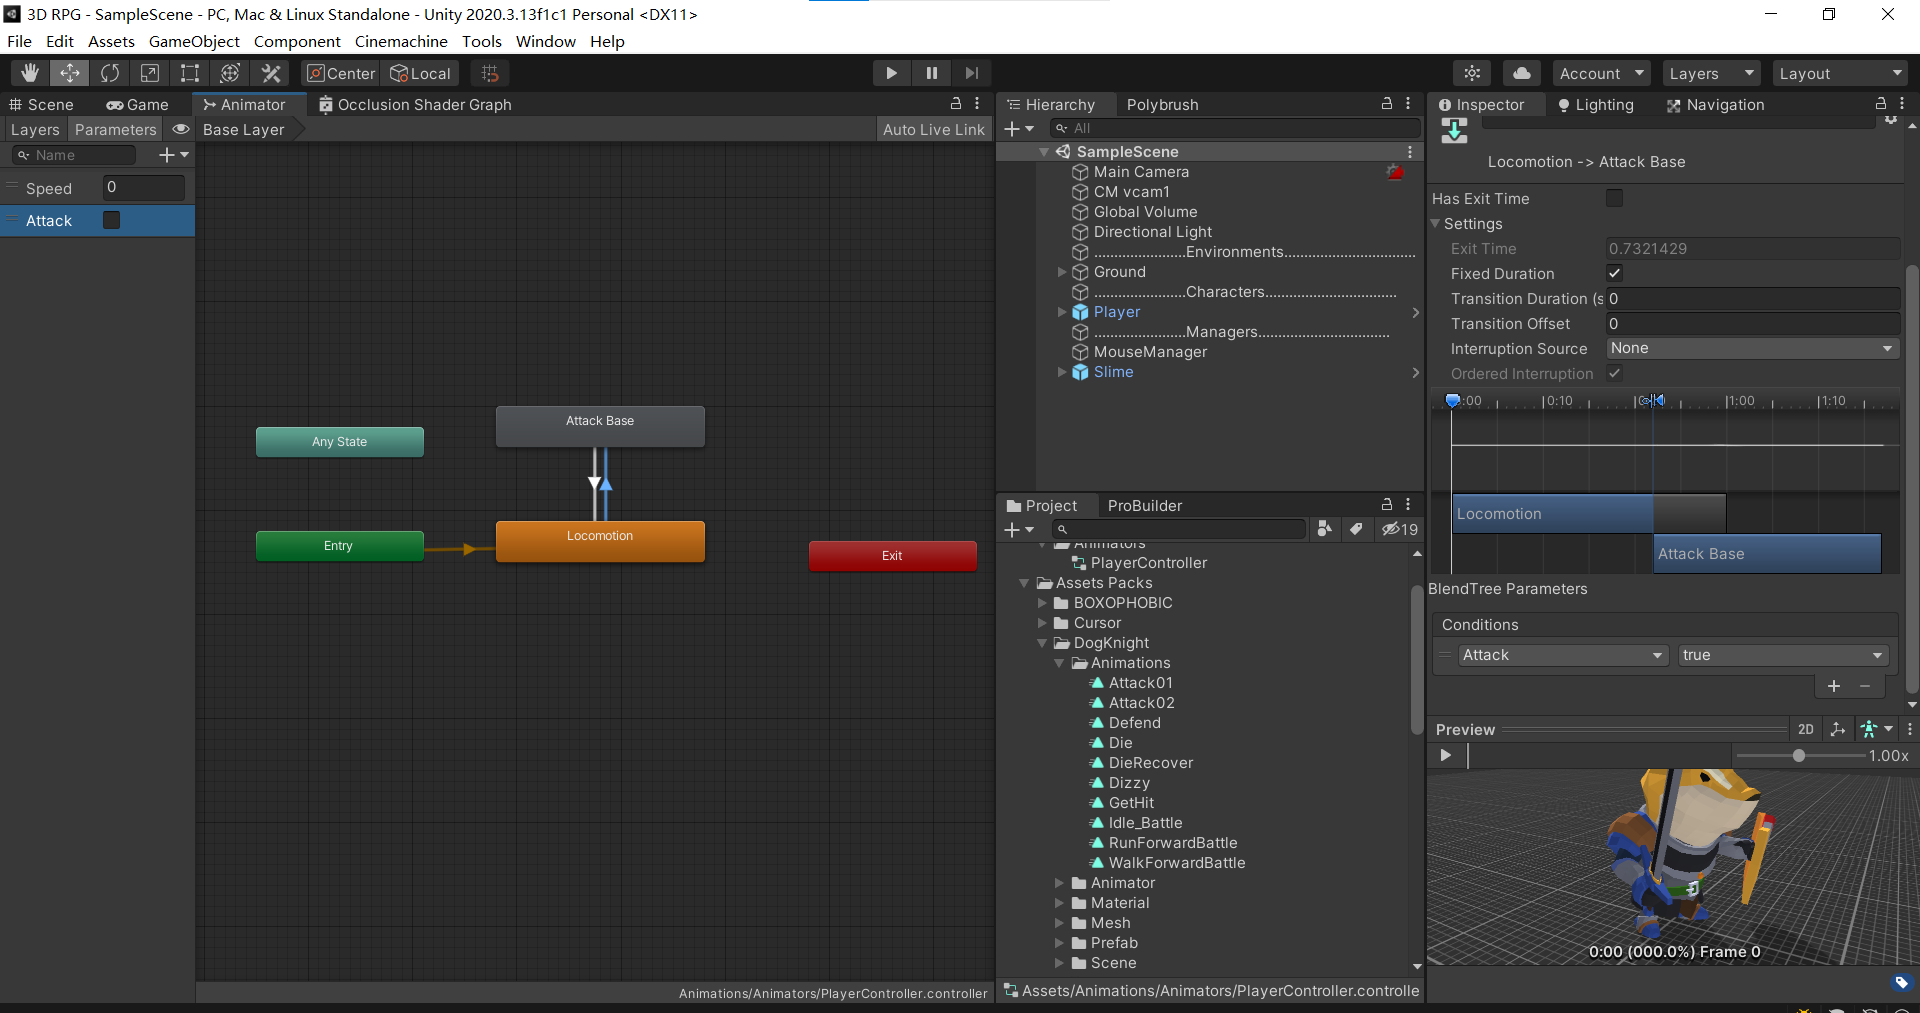
The exit time is required to exit the attack animation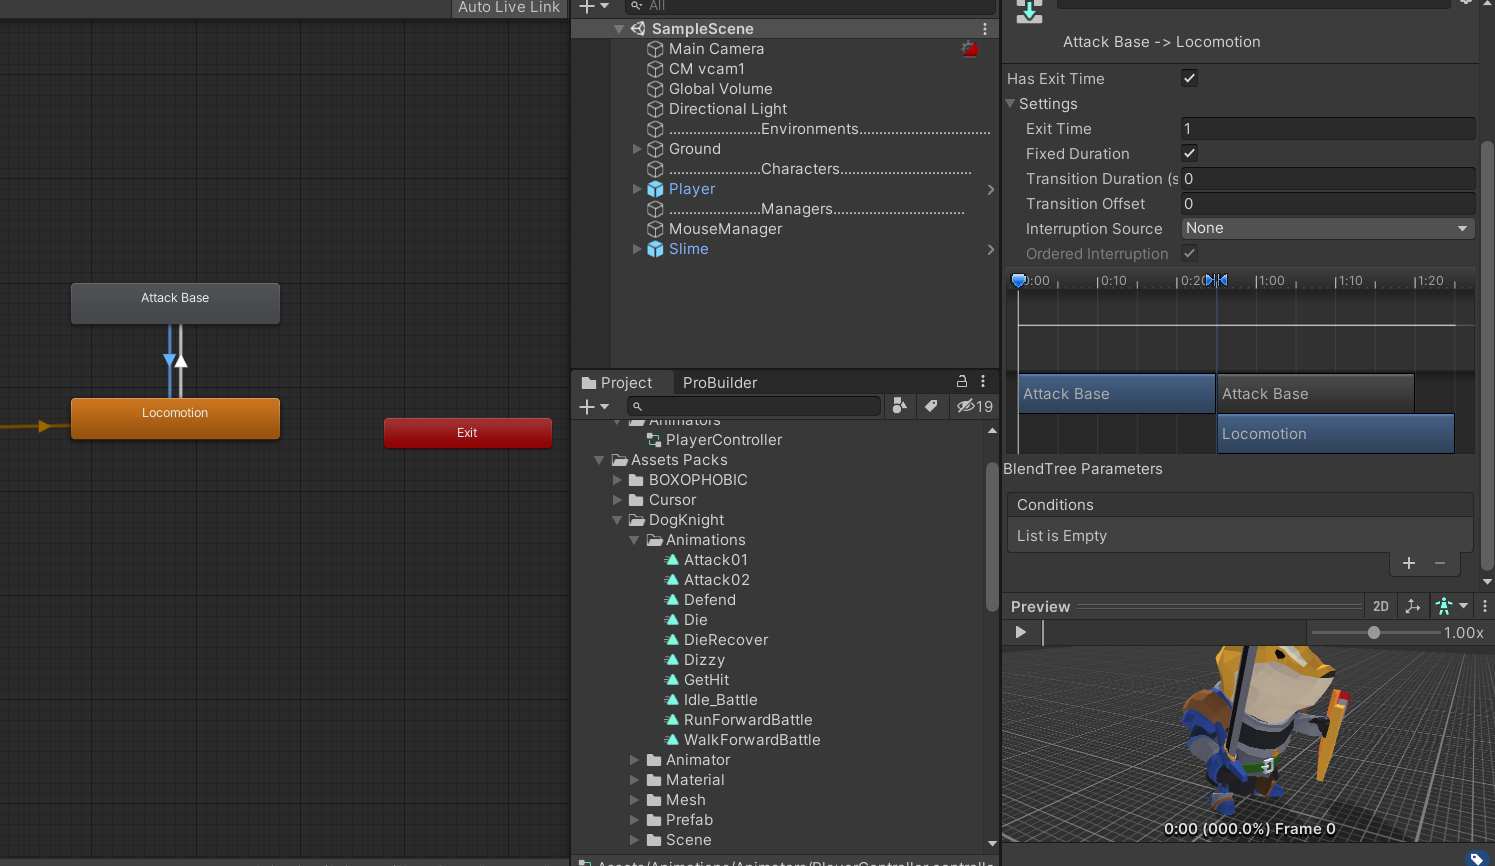
Attack here first,
    private void EventAttack(GameObject target)
    {
        if(target != null)
        {
            attackTarget = target;
            StartCoroutine(MoveToAttackTarget());//Synergy: attack the enemy
        }
    }

    IEnumerator MoveToAttackTarget()//Synergy: attack the enemy
    {
        agent.isStopped = false;

        transform.LookAt(attackTarget.transform);//Turn to my target

      //Todo: modify attack range parameters
        while(Vector3.Distance(attackTarget.transform.position,transform.position) > 1)
        {
            agent.destination = attackTarget.transform.position;
            yield return null;
        }
        agent.isStopped = true;
        //Attack
        if(lastAttackTime < 0)
        {
            anim.SetTrigger("Attack");
            //Reset cooldown
            lastAttackTime = 0.5f;
            yield return new WaitForSeconds(0.2f);
            anim.ResetTrigger("Attack");
        }
    }
In order to interrupt the attack animation during the attack, we need to cancel the co process in the method of clicking on the ground to move and ensure that we can move:
    public void MoveToTarget(Vector3 target) //The parameter Vector3 must be included to ensure that the function naming method and definition method are exactly the same as onMouseClicked
    {
        StopAllCoroutines();//Interrupt attack
        agent.isStopped = false;//Can move
        agent.destination = target;
    }
12:FoundPlayer found Player to chase
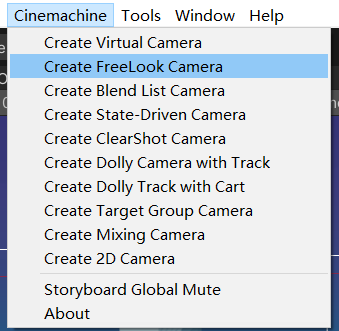
Using FreeLook Camera:
Add camera:
Change parameters and InputAxis:
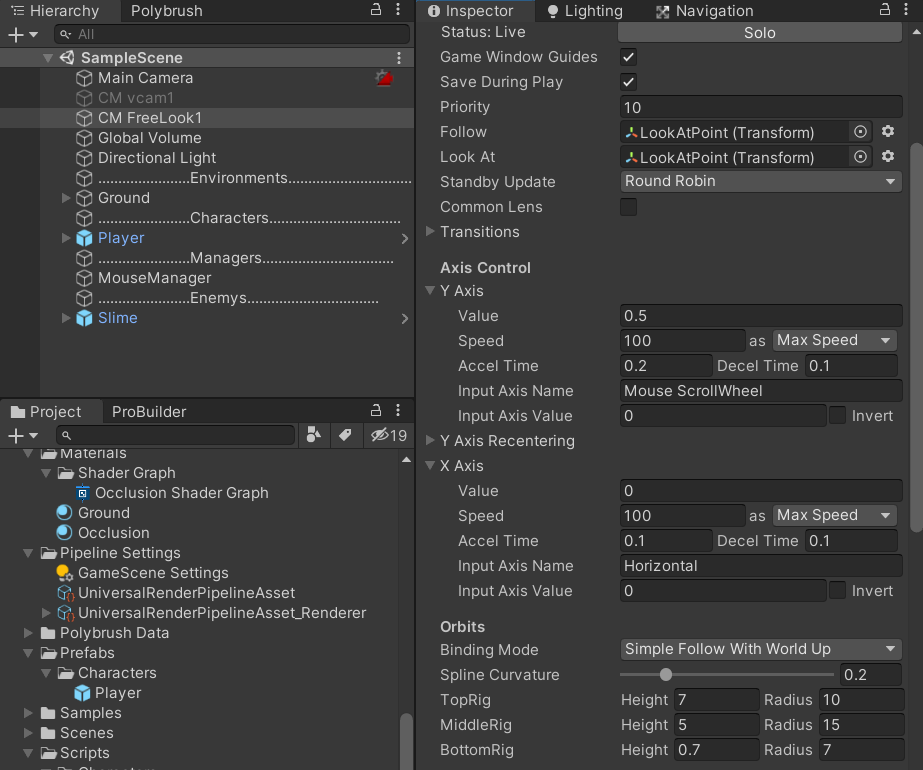
So you can change your perspective when you move.
Next, change the EnemyController code so that the enemy can find the Player and chase it:
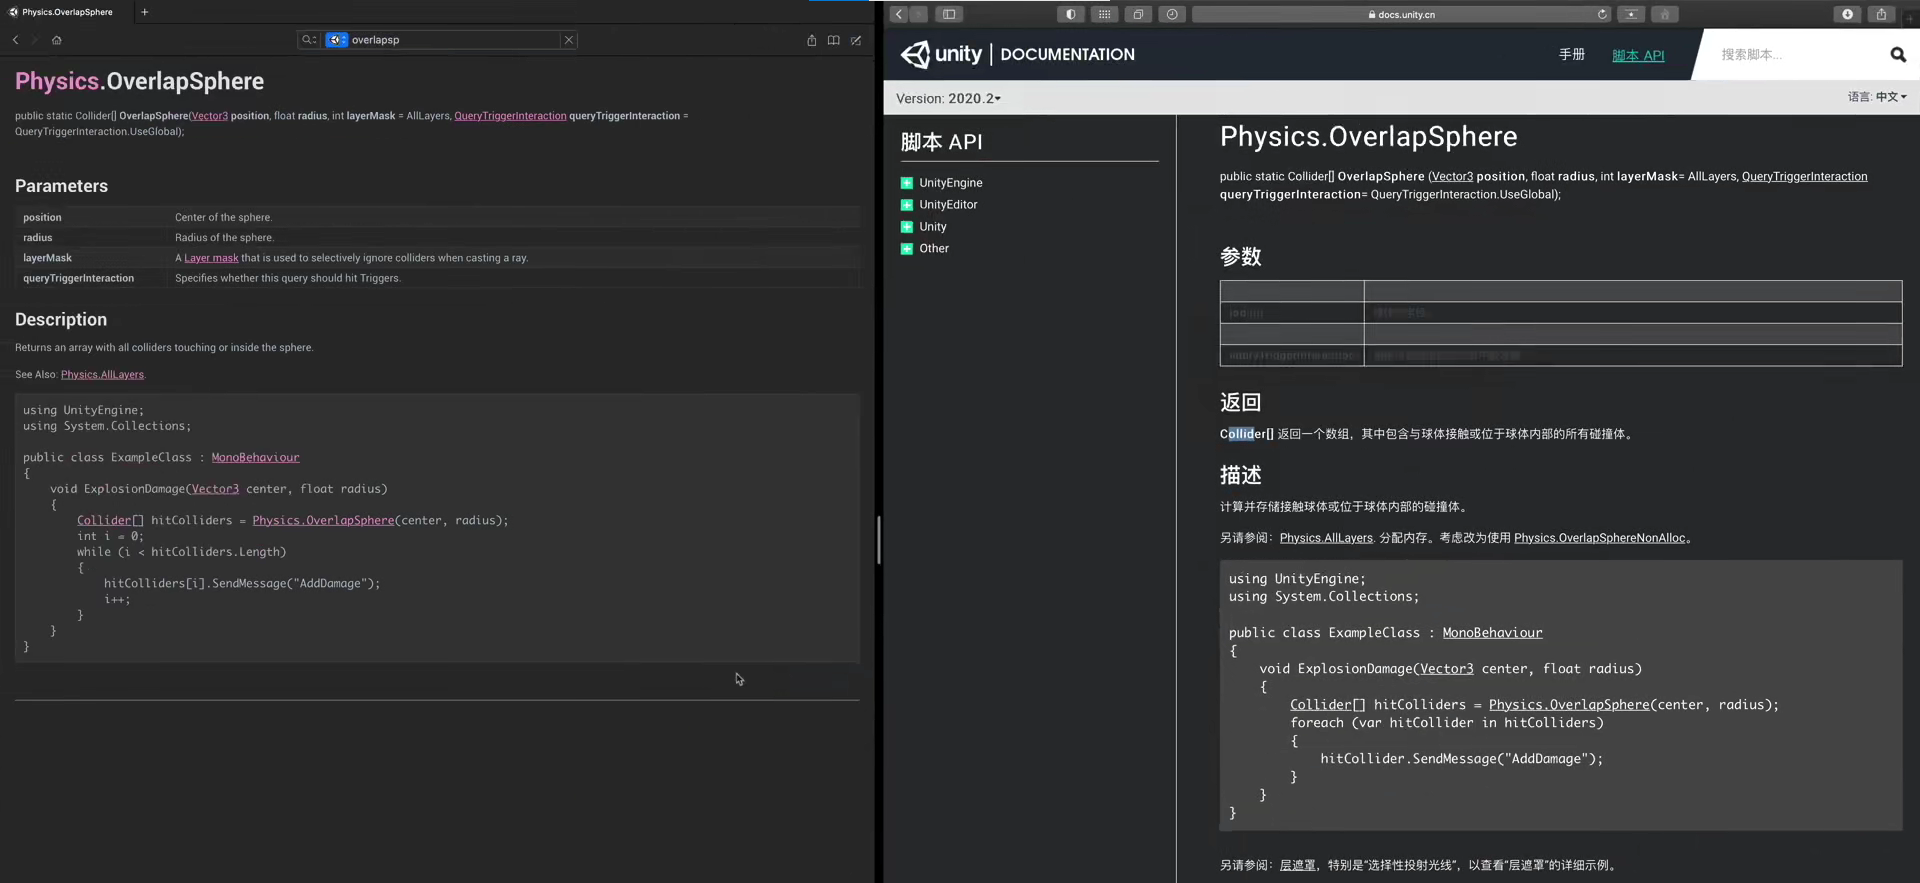
Change the public variable ememyStates to private EnemyStates ememyStates; There is no need for external selection, just internal change, and define a boolean variable to facilitate the subsequent determination of the initial state public bool isGuard// Judge whether it is a standing pile monster. Define a variable sightradradius to represent the visual range. If you find a Player and switch to CHASE, how to find our Player in our visual range: we use a physical judgment: OverlapSphere is whether there is a collider we want to find within the sphere around him
We use this case to push our script:
    [Header("Basic Settings")]
    public float sightRadius;//Visual range


    void SwitchStates() //Switching state
    {
        //If Player is found, switch to CHASE
        if(FoundPlayer())
        {
            ememyStates = EnemyStates.CHASE;
            Debug.Log("find Player");
        }

        switch(ememyStates)
        {
            case EnemyStates.GUARD:
                break;
            case EnemyStates.PATROL:
                break;
            case EnemyStates.CHASE:
                break;
            case EnemyStates.DEAD:
                break;
        }
    }


    bool FoundPlayer()//Find Player in visual range
    {
        var colliders = Physics.OverlapSphere(transform.position, sightRadius);

        foreach(var target in colliders)
        {
            if(target.CompareTag("Player"))
            {
                return true;
            }
        }
        return false;
    }
In this way, the enemy can find our Player, and then I can do a series of operations. After switching to CHASE mode, we can write his method in this part of the code of CHASE mode, and judge whether to CHASE our Player or carry out remote attack
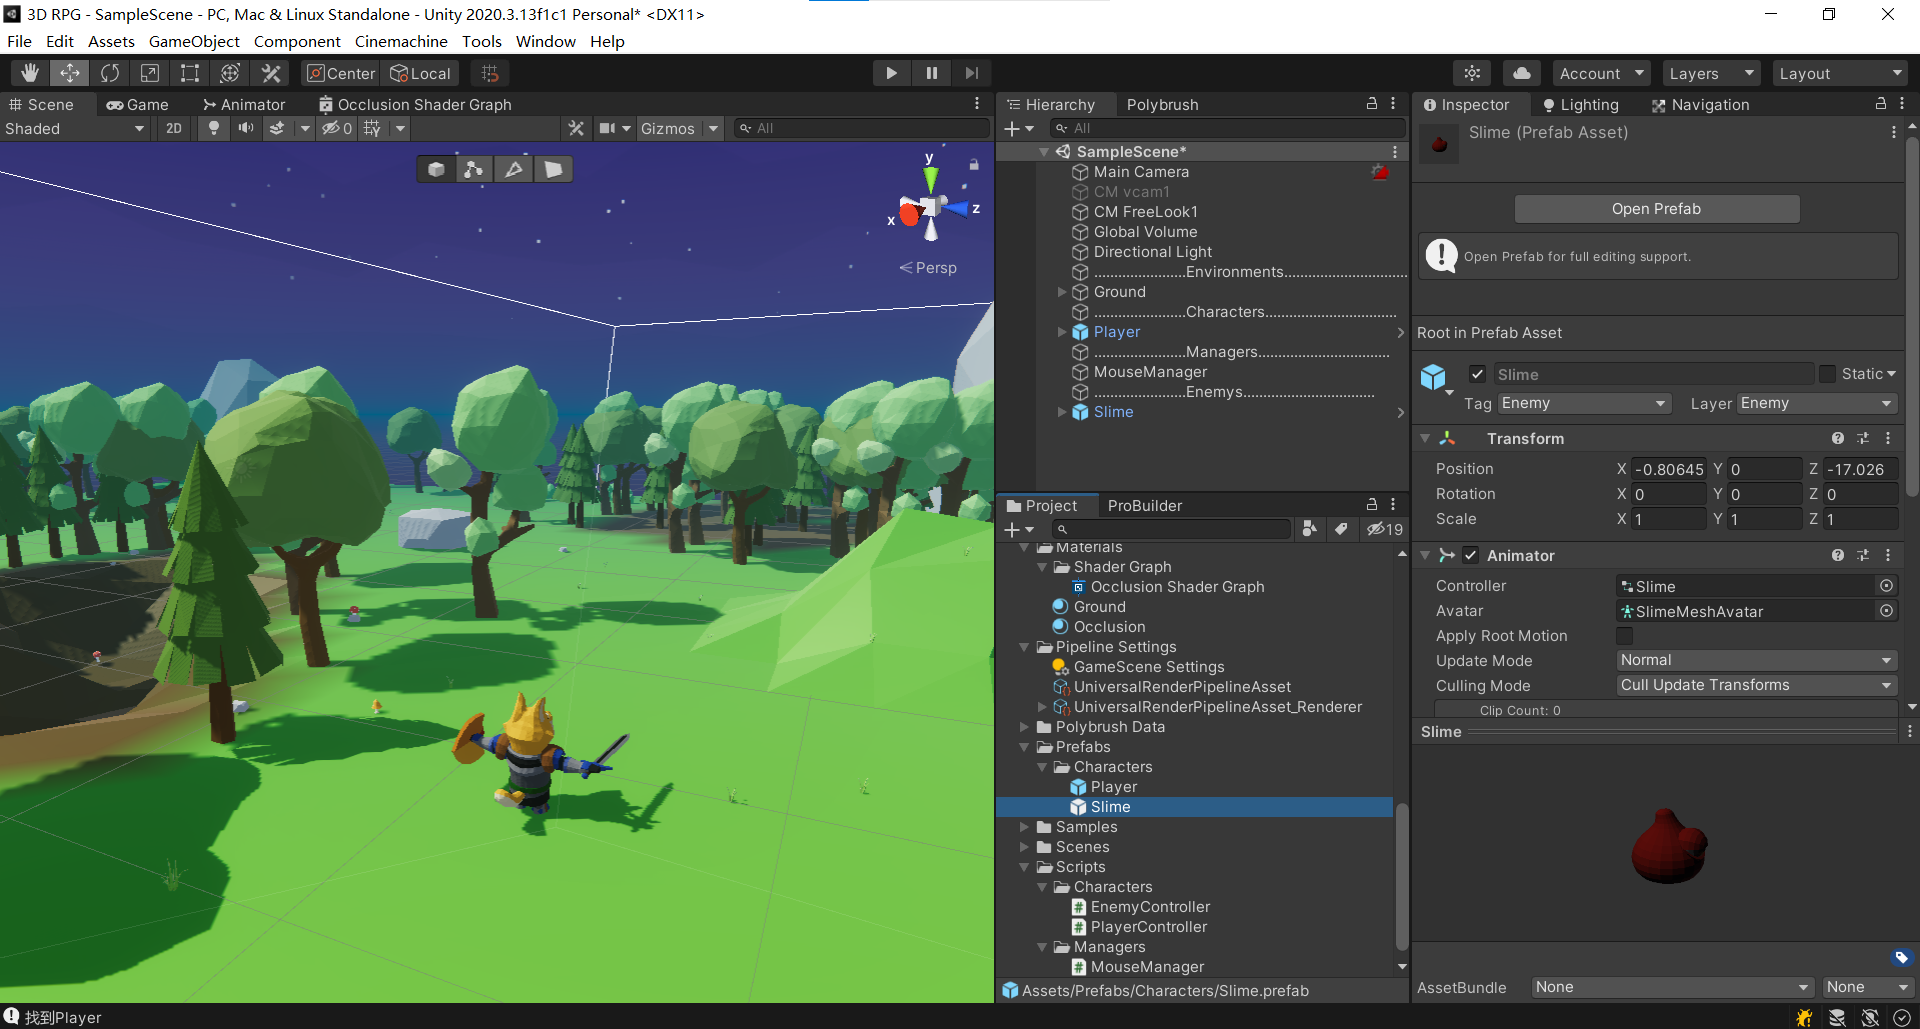
13Enemy Animator sets the enemy's animation controller
Save shrem as a preform of Characters. We will give the Enemy a field of vision. When we come within the Enemy's field of vision, the Enemy will pursue. This logic needs to obtain the Player coordinates and set the Enemy target as our Player, so that the Enemy can go to the position of our Player
When we come to the enemy's code, we need to obtain the Player: private GameObject attackTarget; This is the enemy's attack target. In the FoundPlayer() method, if the Player is found, the attackTarget is assigned as target. If it is not found, it is assigned as null, and the Player is out of view.
When the enemy finds Player, he will enter the pursuit state to pursue:
            case EnemyStates.CHASE:
                //TODO: chasing Player
                //TODO: attack within the attack range
                //TODO: fit animation

                if(!FoundPlayer())
                {
                    //TODO: lato returns to the previous state
                }
                else
                {
                    agent.destination = attackTarget.transform.position;
                }
                break;
We need to set a variable to record speed, so that the patrol monster patrol speed is slow and the pursuit speed is fast
private float speed;// Moving speed
Initialization in wake: speed = agent speed;
Change Enemy's pursuit speed in CHASE status: agent speed = speed;
To make a slide animation controller:
New controller: drag Walk and Idle animations into BaseLayer, and set a bool variable Walk to judge whether it is a standing pile monster or a patrol monster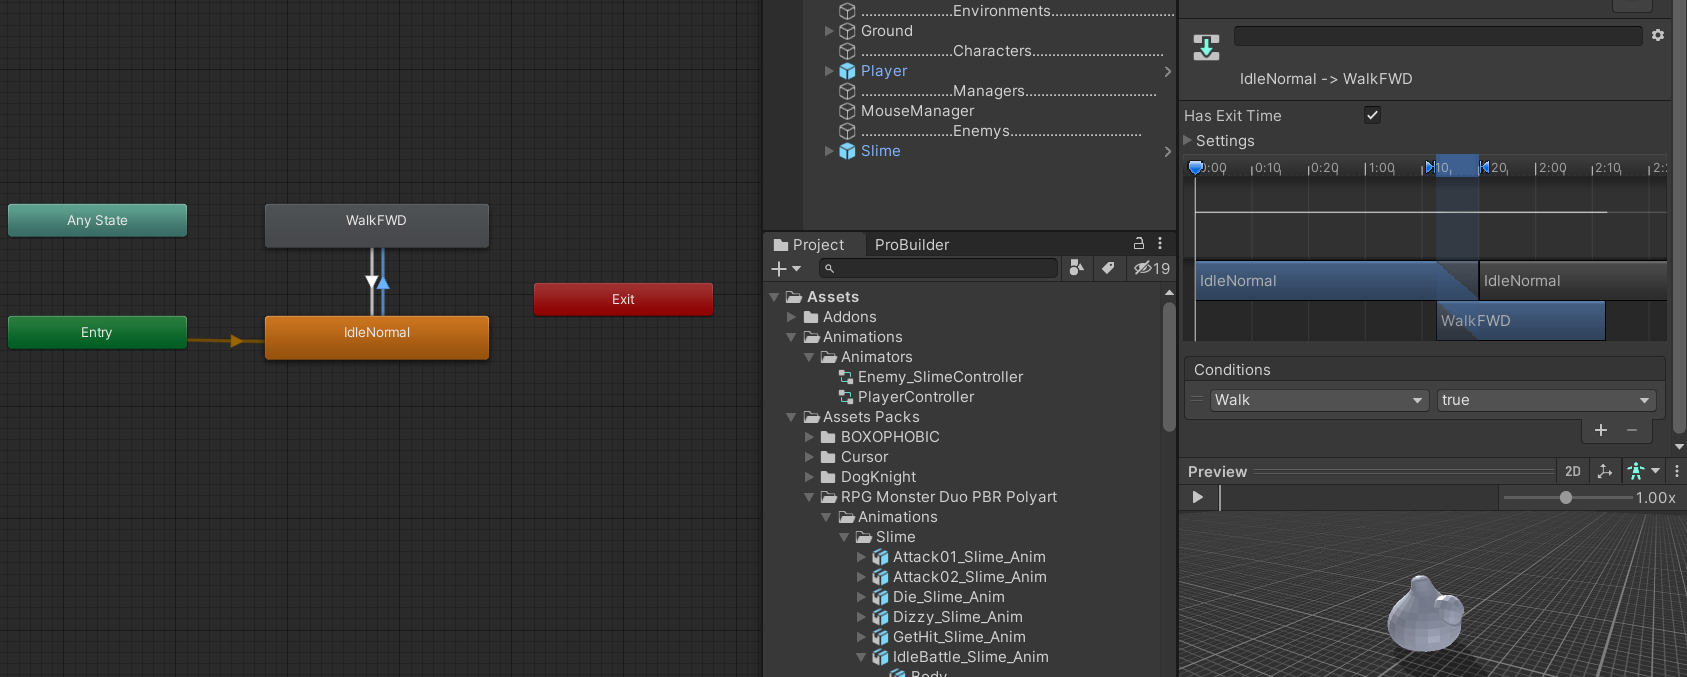
Create a new Layer:Attack Layer: completely overwrite
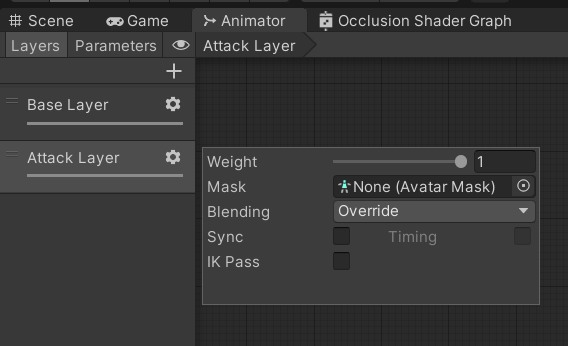
Create an empty animation Base State in the Attack Layer as the default animation, drag in IdleBattle and Run animations, and create bool type variables Chase and Follow to identify and Chase the enemy
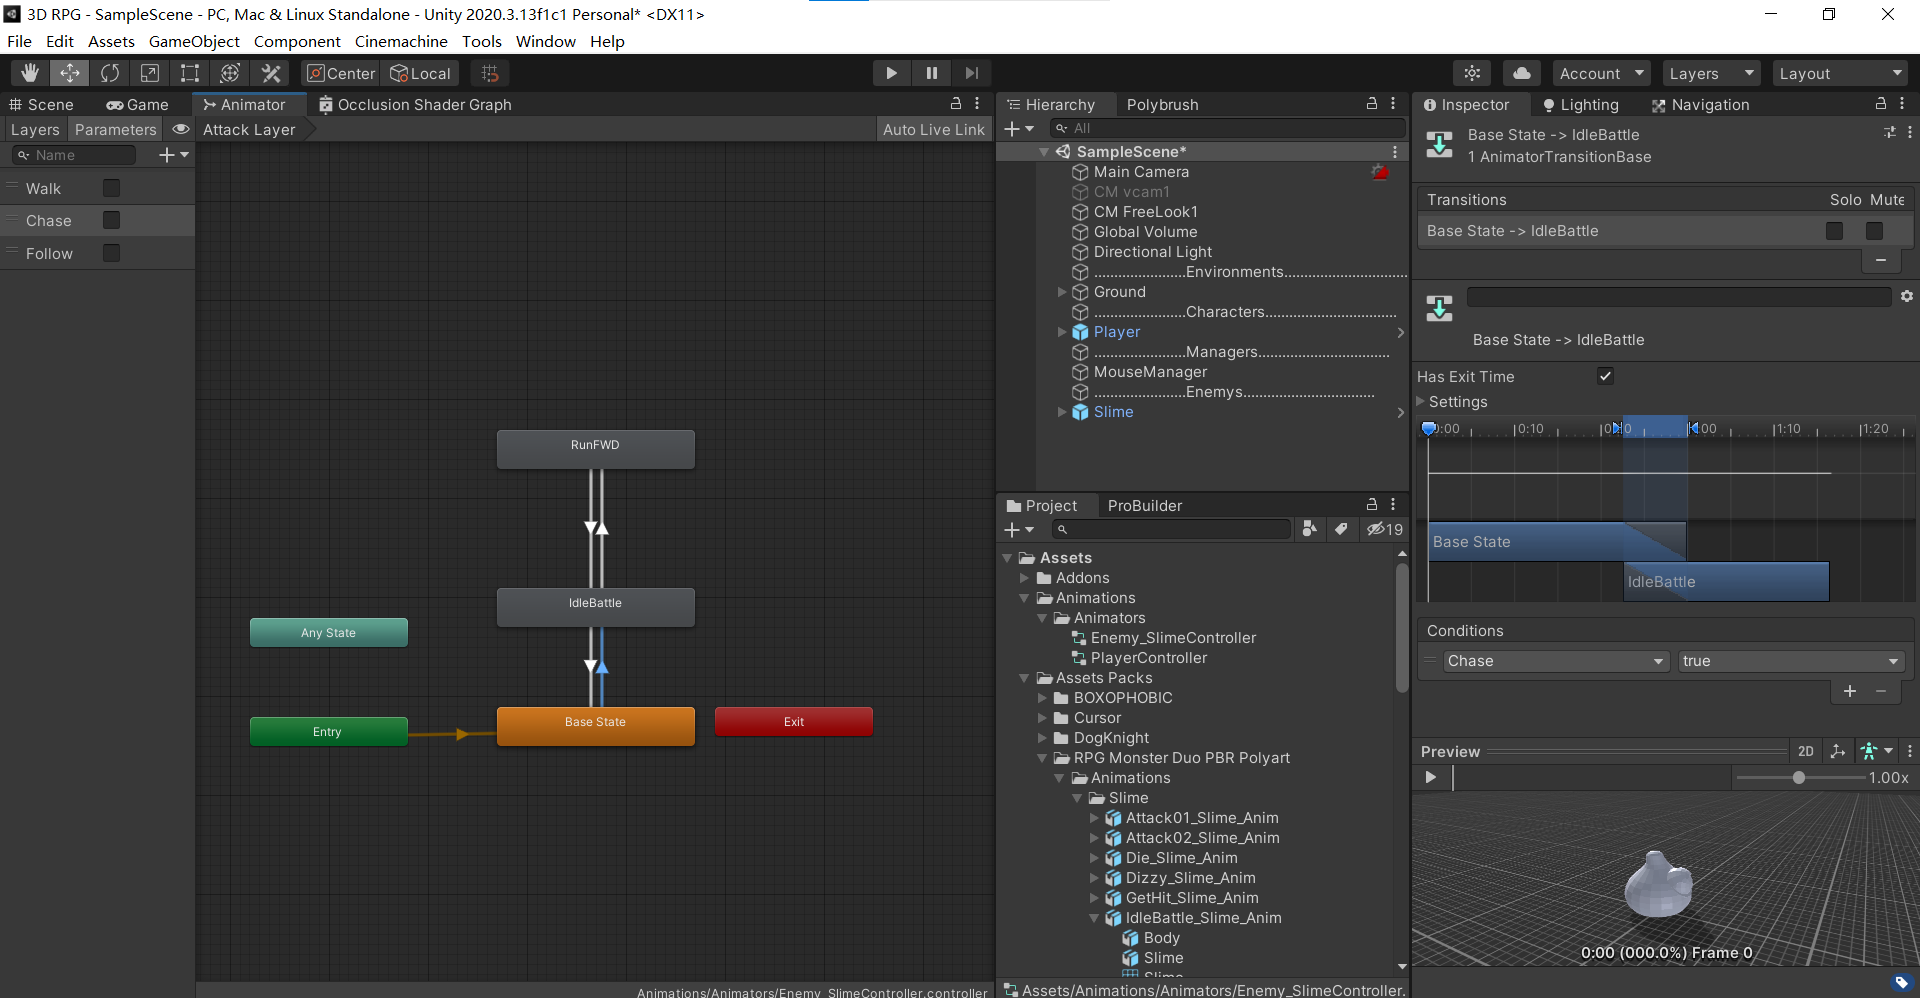
Temporarily set these States, and the return code adds these variables to match these animations:
To control Animator, first declare the variable of Animator, assign value in wake, and set the variable of bool value to fix the conversion of animation:
/ / bool fit animation
bool isWalk;
bool isChase;
bool isFollow;
The judgment method of animation needs to be synchronized in real time in Update,
    void SwitchAnimation()//Toggle animation
    {
        anim.SetBool("Walk",isWalk);
        anim.SetBool("Chase",isChase);
        anim.SetBool("Follow",isFollow);
    }
Match animation in Chasea state:
            case EnemyStates.CHASE:
                //TODO: chasing Player
                //TODO: attack within the attack range
                //TODO: fit animation
                isWalk = false;
                isChase = true;

                agent.speed = speed;

                if(!FoundPlayer())
                {
                    //TODO: lato returns to the previous state
                    isFollow = false;
                }
                else
                {
                    isFollow = true;
                    agent.destination = attackTarget.transform.position;
                }
                break;
In order to make the Player out of the enemy's visual range, the enemy will not have pursuit delay, you can add a sentence under isFollow = false
agent.destination = transform.position;
Now we can simply pursue the enemy.
14: Patrol Randomly random patrol point
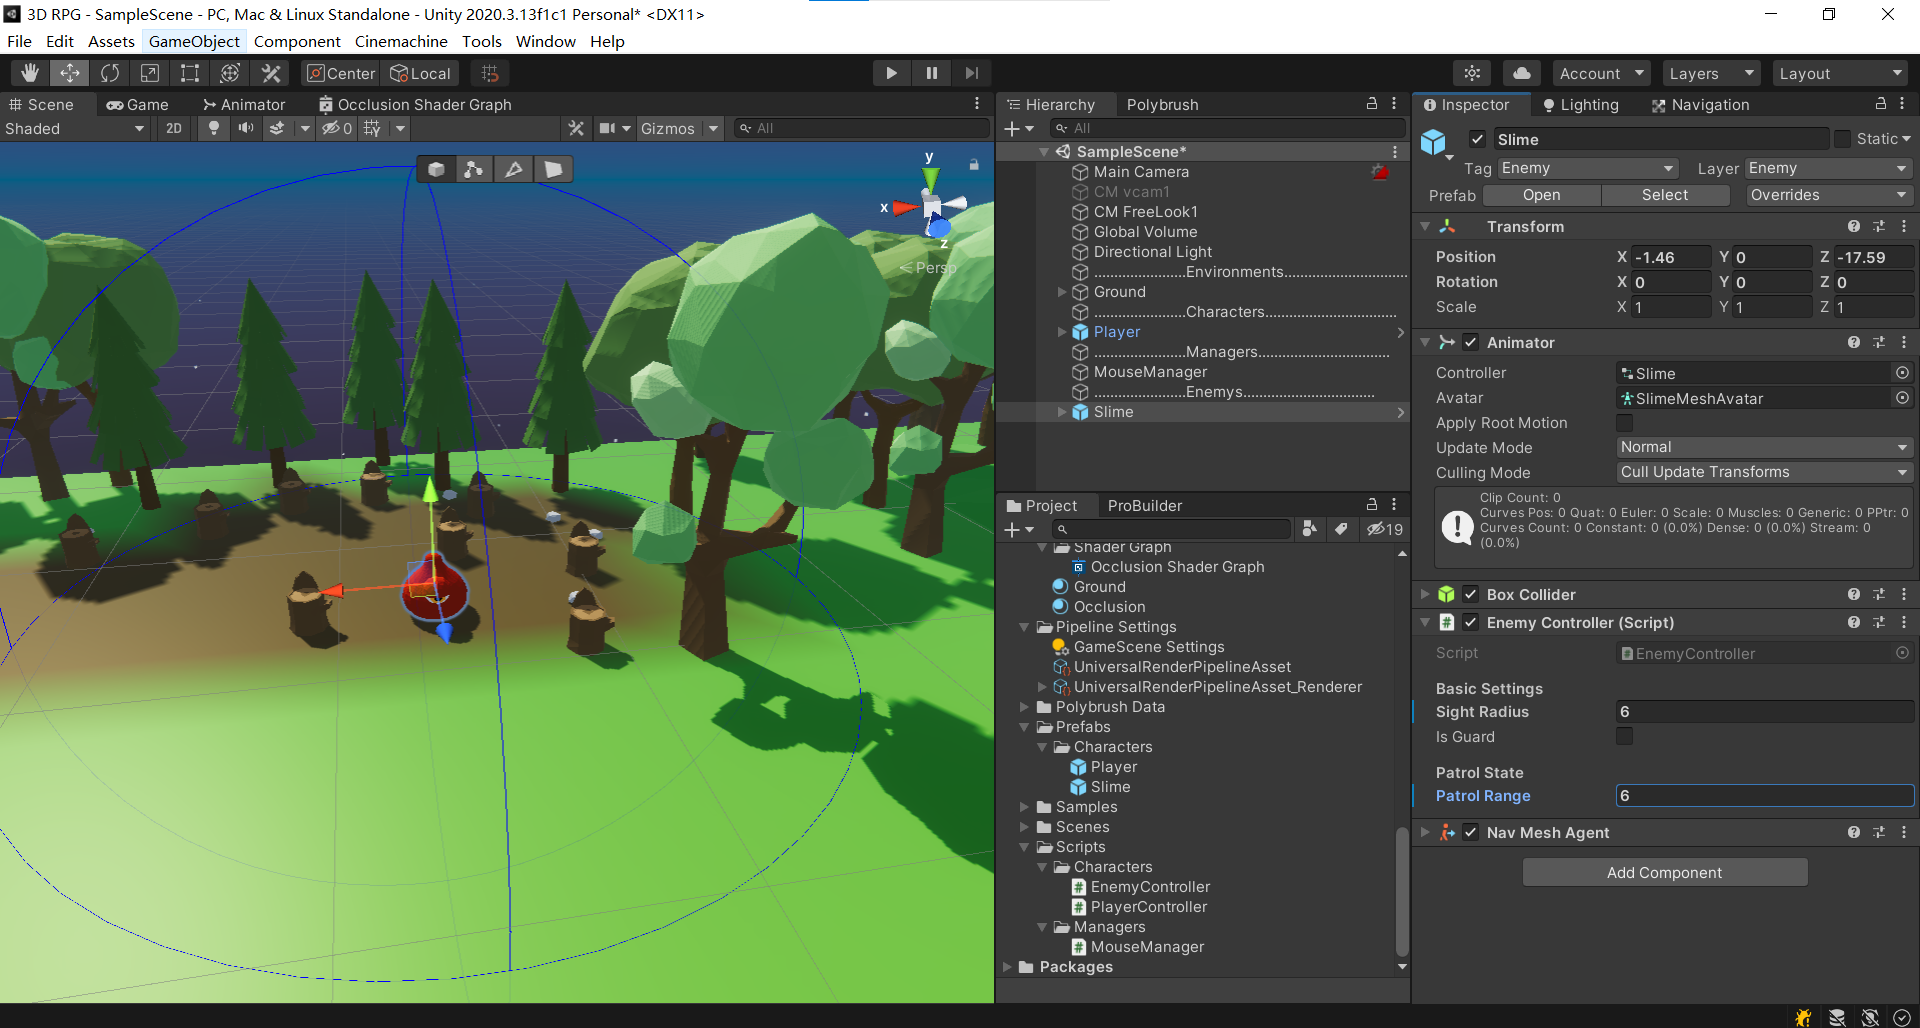
We want to realize the random movement of the enemy, so it can patrol according to a certain range given by us. Open the enemy code, and we want to give a variable to represent the patrol range,
    [Header("Patrol State")]
    public float patrolRange;
Then, this range and the previously visible range cannot be viewed in our unit editor, which greatly affects us to adjust our game later. We hope that the range of a given float can be seen in the window. Next, write a Gizmos to draw our range
    private void OnDrawGizmosSelected()//Draw Gizmos when the object is selected
    {
        Gizmos.color = Color.blue;
        Gizmos.DrawWireSphere(transform.position, sightRadius);//Painting field of view
    }
This will draw the enemy's field of vision
Next, it is hoped that the enemy can select the coordinates of a point in a given area, and then once it moves to this point, randomly select the coordinates of another point, and then let it move. After clarifying the logic, write the code:
Since you need to select a point, you need to create this point as a variable {private Vector3 wayPoint;
Next, write a function method to randomly obtain a point within the patrol range: note that this point is not in the air
    void GetNewWayPoint()//Randomly obtain a point within the patrol range
    {
        float randomX = Random.Range(-patrolRange, patrolRange);
        float randomZ = Random.Range(-patrolRange, patrolRange);

        Vector3 randomPoint = new Vector3(transform.position.x+randomX, transform.position.y,transform.position.z+randomZ);
        //FIXME: possible problems
        wayPoint = randomPoint;
    }
Status of supplementary patrol Monster:
            case EnemyStates.PATROL:

                isChase = false;
                agent.speed = speed * 0.5f;

                if(Vector3.Distance(wayPoint,transform.position) <= agent.stoppingDistance)
                {
                    isWalk = false;

                    GetNewWayPoint();//Randomly obtain a point within the patrol range
                }
                else
                {
                    isWalk = true;

                    agent.destination = wayPoint;
                }

                break;
Determine the initial state in Start:
    private void Start()
    {
        if(isGuard)//Judge whether it is a standing pile monster
        {
            enemyStates = EnemyStates.GUARD;
        }
        else//Patrol monster
        {
            enemyStates = EnemyStates.PATROL;
            GetNewWayPoint();//Get the initial moving point
        }
    }
In this way, the patrol monster can patrol normally, but it is found that the patrol monster patrols not according to the given range, but randomly selects the surrounding points to patrol during the movement. The code needs to be modified:
You need to get the initial coordinates of the enemy from the beginning: private Vector3 guardPos// Initial coordinates
In wake: guardpos = transform position;
Modify GetNewWayPoint() method:
    void GetNewWayPoint()//Randomly obtain a point within the patrol range
    {
        float randomX = Random.Range(-patrolRange, patrolRange);
        float randomZ = Random.Range(-patrolRange, patrolRange);

        Vector3 randomPoint = new Vector3(guardPos.x+randomX, transform.position.y,guardPos.z+randomZ);
        //FIXME: possible problems
        wayPoint = randomPoint;
    }
In this way, the enemy can patrol within a given range, but there is another problem: if the enemy is placed near the head, the patrol point selected by the enemy is in the stone, and there is no way to pass through the stone model, it will be stuck here, so we should try to avoid the immovable range when selecting the point, So how to judge whether a point on the ground is an immovable range? Here we need to use Nav Mesh's method: find another nearest point that can be moved near the found target point, and return true if found

Change enemy Code:
    void GetNewWayPoint()//Randomly obtain a point within the patrol range
    {
        float randomX = Random.Range(-patrolRange, patrolRange);
        float randomZ = Random.Range(-patrolRange, patrolRange);

        Vector3 randomPoint = new Vector3(guardPos.x+randomX, transform.position.y,guardPos.z+randomZ);

        NavMeshHit hit;
        wayPoint = NavMesh.SamplePosition(randomPoint, out hit, patrolRange, 1) ? hit.position : transform.position;

    }
This will allow the enemy to conduct normal mobile patrols,
Now I hope the enemy doesn't walk all the time, but stops at a point to observe for a period of time to simulate the state of patrol monsters,
Define 2 variables
    public float lookAtTime;//Observation time
    private float remainLookAtTime;//Time to view
Initialize remainLookAtTime in wake: remainLookAtTime = lookAtTime;
Modify patrol status code:
                //Determine whether a random patrol point has been reached
                if(Vector3.Distance(wayPoint,transform.position) <= agent.stoppingDistance)
                {
                    isWalk = false;
                    if(remainLookAtTime > 0)
                    {
                        remainLookAtTime -= Time.deltaTime;
                    }
                    else
                    {
                        GetNewWayPoint();//Randomly obtain a point within the patrol range
                    }
                }
In the GetNewWayPoint() method, reassign remainLookAtTimex:
remainLookAtTime = lookAtTime; Then we can realize real patrol
Now start the game. When the player approaches the patrolling enemy, the enemy will enter the pursuit state. When the player pulls the enemy, the enemy will not go back to patrol, but change to the standing pile state. The following code is briefly modified:
            case EnemyStates.CHASE:

                //TODO: attack within the attack range

                //Match animation
                isWalk = false;
                isChase = true;

                agent.speed = speed;

                if(!FoundPlayer())
                {
                    //Lato returns to the previous state
                    isFollow = false;
                    if(remainLookAtTime > 0)
                    {
                        agent.destination = transform.position;
                        remainLookAtTime -= Time.deltaTime;
                    }

                    else if(isGuard)
                    {
                        enemyStates = EnemyStates.GUARD;
                    }
                    else
                    {
                        enemyStates = EnemyStates.PATROL;
                    }

                }
                else
                {
                    isFollow = true;
                    agent.destination = attackTarget.transform.position;//Chase Player
                }
                break;
Now we can let the enemy go back to patrol
15:Character Stats basic character attributes and values
~Scriptable Object stores and calls numeric values
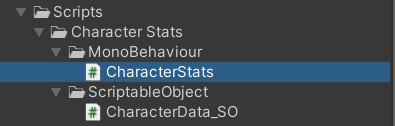
In the Scripts folder, create a folder Character Stats to save the status of characters. In this folder, create two subfolders, one to store our ScriptableObject generated resource file, one to store our monobehavior mounted on our characters, and create a script characterdata in the monobehavior folder_ So, it is convenient to know that this is a data storage file through its name when other code calls it
Open CharacterData_SO: it inherits from ScriptableObject. We will create resource files in our project, so we need to write [CreateAssetMenu()] on it at the beginning, which can help us create a subset menu in the menu,
[CreateAssetMenu(fileName ="New Data",menuName = "Character Stats/Data")]
Indicates that the menu name is Character Stats, the subset menu is Data, and the default name of the created file is New Data.
[CreateAssetMenu(fileName ="New Data",menuName = "Character Stats/Data")]
public class CharacterData_SO : ScriptableObject
{

}
Now you can create a Player Data
Next, you can fill in some attributes:
[CreateAssetMenu(fileName ="New Data",menuName = "Character Stats/Data")]
public class CharacterData_SO : ScriptableObject
{
    [Header("Stats Info")]
    public int maxHealth;//Max Hp

    public int currentHealth;//Current blood volume

    public int baseDefence;//Basic defense

    public int currentDefence;//Current defense

}
For the content related to attack power, an additional ScriptableObject will be created separately to store all the information related to the attack, because the attack includes more specific values, and even the attack values will be changed according to the switching of weapons. We write them separately for comparison.
Then you can see the variables of these values:

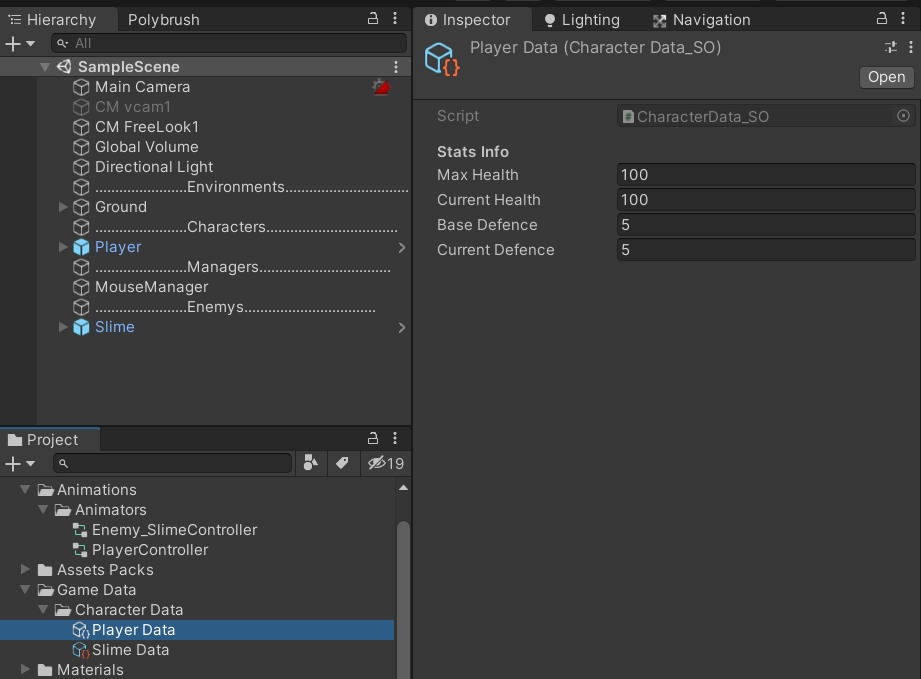
This makes it easy for us to create templates for these values: create the values of multiple characters through this script
These Data are not monobehavior and cannot be attached to our characters. Next, we create a script to manage our Data and realize the conversion, reading and change of Data
Create a script CharacterStats under the monobehavior folder
To read our ScriptableObject, we need to create this variable at the beginning:
public CharacterData_SO characterData;
Next, we will read the values into our character stats: using a new method
public class CharacterStats : MonoBehaviour
{
    public CharacterData_SO characterData;

    #region Read from Data_SO
    public int MaxHealth
    {
        get//read
        {
            if (characterData != null)
                return characterData.maxHealth;
            else return 0;
        }
        set//write
        {
            characterData.maxHealth = value;//Enter the incoming value
        }
    }
    public int CurrentHealth
    {
        get//read
        {
            if (characterData != null)
                return characterData.currentHealth;
            else return 0;
        }
        set//write
        {
            characterData.currentHealth = value;//Enter the incoming value
        }
    }
    public int BaseDefence
    {
        get//read
        {
            if (characterData != null)
                return characterData.baseDefence;
            else return 0;
        }
        set//write
        {
            characterData.baseDefence = value;//Enter the incoming value
        }
    }
    public int CurrentDefence
    {
        get//read
        {
            if (characterData != null)
                return characterData.currentDefence;
            else return 0;
        }
        set//write
        {
            characterData.currentDefence = value;//Enter the incoming value
        }
    }
    #endregion
}
Now you can add function methods for Player and slice, and select the set Data
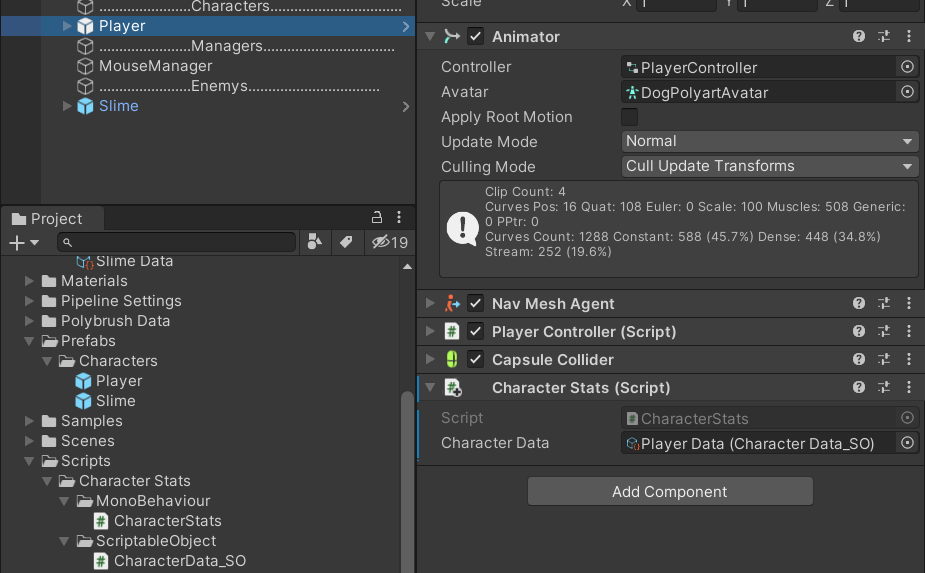
Now create the variable characterstats of characterstats in PlayerController
And initialize in wake: characterstats = getcomponent < characterstats > ();
In Start, change the assignment and edit {characterStats MaxHealth = 2; You can directly read the Data in Data, so if you want to change the value template in the future, you only need to go back to the value template of Data and adjust it. You don't need to consider whether there are some other Data in the characterStats code