preface
This article mainly records the whole process of making Star Wars games.
Sets the movement of the background
First create two board planes, and then move the stars behind them.
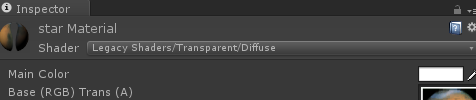
Notes: the original planet has a border. How to make the border disappear?
– set transparency: in the Matrial setting:
Move the background stars:
It's similar to setting the Cube movement in the previous article, but here are a few points to note:
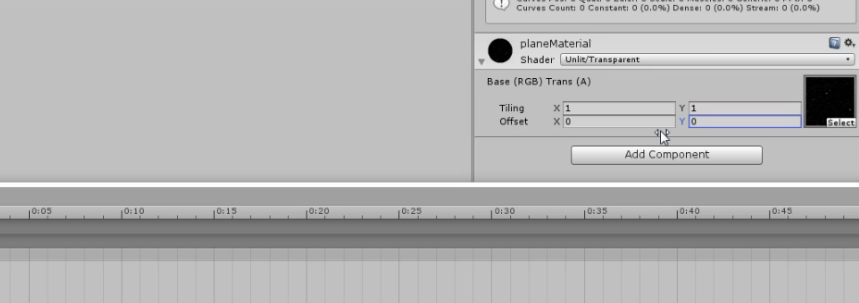
If the background image moves, select this:
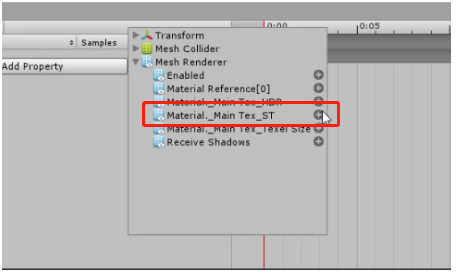
If you want to move circularly, you can set Offset to 1: (attribute in shader)
In addition, in addition to animation, you can also use code to cycle:
public class under_plane_move : MonoBehaviour {
	public float moveSpeed;
	// Use this for initialization
	void Start () {

	}
	// I have a coincidence problem
	void Update () {
		if (transform.position.z <= -8.0f) {
			transform.position = new Vector3 (transform.position.x, transform.position.x, 8.0f);
		}
		transform.Translate (-Vector3.forward * moveSpeed * Time.deltaTime);
	}
}
The premise is to copy a background plane and calculate when it is appropriate. I'm too lazy to enter a few numbers casually, which can be realized, but there will be overlapping parts.
Control the movement of the aircraft (player)
If you touch the wasd boundary, you can continue to move.
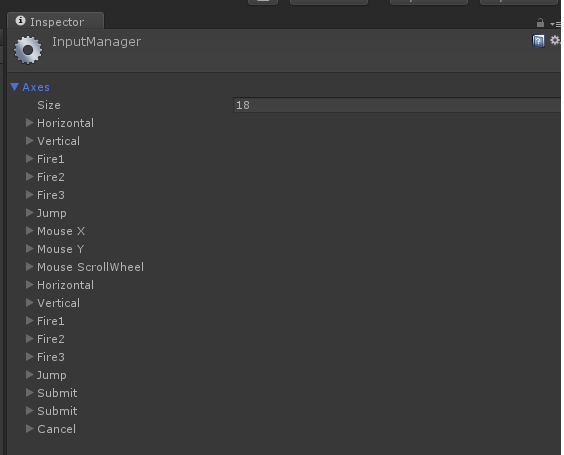
It can be implemented here in code. The premise of the code is to know the input attribute in the project setting: there are the following:
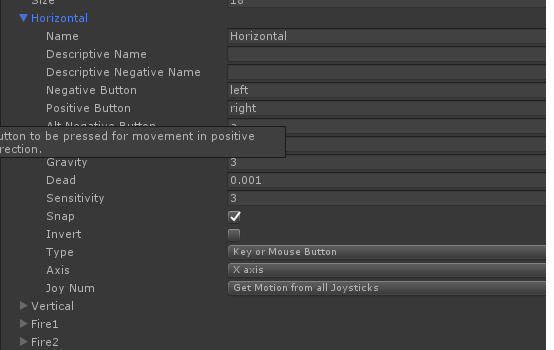
The code here is written according to this attribute:
public class Player_Control : MonoBehaviour {
	public GameObject prefab;
	public Transform kong;
	public float movespeed;
	// Use this for initialization
	void Start () {
	}
	void Update () {
	float Horizontal = Input.GetAxis ("Horizontal");
		if (transform.position.x <= -3.79 &&Horizontal >0.0f) {
			Horizontal = 0.0f;
		}
		if (transform.position.x >= 3.68 &&Horizontal <0.0f) {
			Horizontal = 0.0f;
		}
		transform.Translate (new Vector3 (Horizontal*movespeed*Time.deltaTime, 0, 0), Space.Self);

		float Vertical = Input.GetAxis ("Vertical");
		if (transform.position.z <= -2.00 &&Vertical >0.0f) {
			Vertical = 0.0f;
		}
		if (transform.position.z >= 1.42 &&Vertical <0.0f) {
			Vertical = 0.0f;
		}
		transform.Translate (new Vector3 (0, 0, Vertical*movespeed*Time.deltaTime), Space.Self);
		if (Input.GetMouseButtonDown (0)) {
			Instantiate (prefab, kong.position, prefab.transform.rotation);
		}
	}
}
Bullet preset
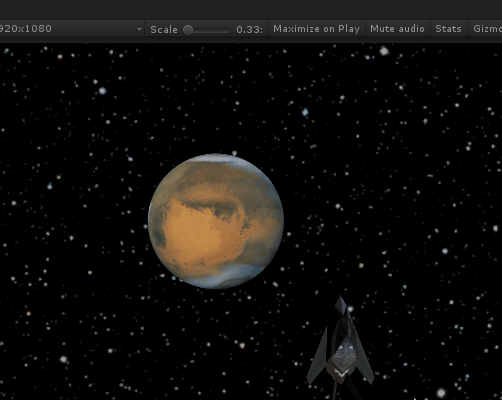
Here is the effect of shooting bullets.
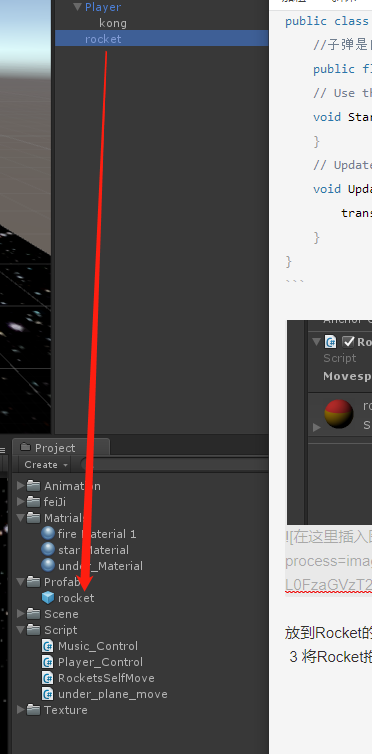
1. First, put the bullet in the appropriate position, adjust the size, and name it Rocket. This Rocket can be checked out, because there will be no bullet without pressing the left mouse button.
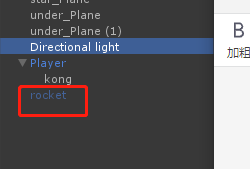
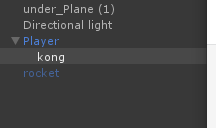
1 then set up an empty object kong, which is used as a clone of Rocket and a tool man.
2 write a code that the bullet can fly straight forward:
public class RocketsSelfMove : MonoBehaviour {
	//Bullets move automatically
	public float movespeed;
	// Use this for initialization
	void Start () {
	}
	// Update is called once per frame
	void Update () {
		transform.Translate (-Vector3.forward * movespeed );
	}
}
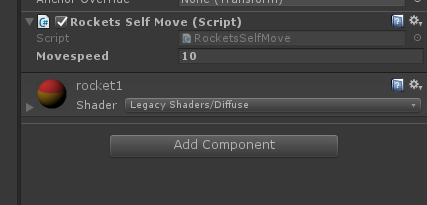
Put it in the Rocket module.
3. Drag the Rocket into the preset:
3. Write the code (it's already in the above. Here's a summary):
public GameObject prefab;    //Declare a preset, which is the same attribute as the bullet
public Transform kong;		//This empty object is mainly used to explain where the bullet is going to run
if (Input.GetMouseButtonDown (0)) {
			Instantiate (prefab, kong.position, prefab.transform.rotation);
		}
Instance (preset object, preset position to run, preset rotation angle);
kong's location:
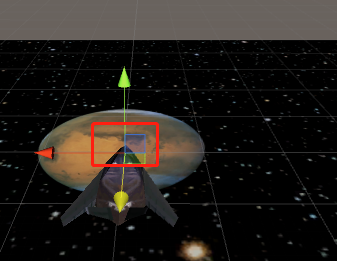
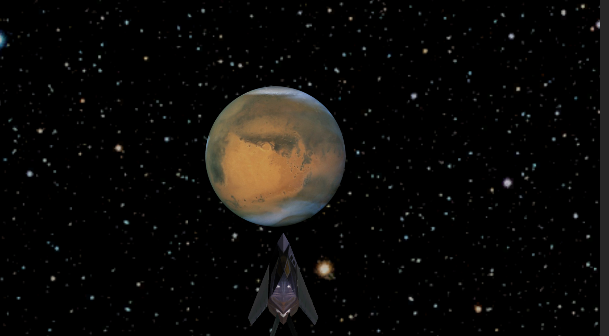
Final results:
Key points of this chapter:
Use of presets
Attribute in input: how to make the object move left and right up and down
How to click the left button to respond
Usage of instance:
