0 preparation
- Environment configuration, reference here
- Download an official yolov5s PT model, placed in yolov5 root directory, download link here perhaps here
- Prepare the dataset in the format shown below. Each picture has its corresponding xml format annotation file.
yolov5
├── models
├── runs
├── utils
├── data
│   ├── project01
│   │   ├── images
│   │   │   ├── 1.jpg
│   │   │   ├── 2.jpg
│   │   │   ├── ...
│   │   ├── xml
│   │   │   ├── 1.xml
│   │   │   ├── 2.xml
│   │   │   ├── ...
1 partition data set
Modify -- XML in code_ Path and data/project01/labels, here is' data/project01/xml '. If it is a new folder under the data directory of yolov5 like me, directly replace project01 with your folder name. Then run the code
train_percent is the proportion of training set. General training set: verification set, 9:1 or 8:2. 9:1 is used here
Note: this split Py is placed in the yolov5 root directory at the same level as the data folder.
# split.py
import os
import random
import argparse

parser = argparse.ArgumentParser()
parser.add_argument('--xml_path', default='data/project01/xml', type=str, help='input xml label path')
parser.add_argument('--txt_path', default='data/project01/labels', type=str, help='output txt label path')
opt = parser.parse_args()

trainval_percent = 1.0
train_percent = 0.9
xmlfilepath = opt.xml_path
txtsavepath = opt.txt_path
total_xml = os.listdir(xmlfilepath)
if not os.path.exists(txtsavepath):
    os.makedirs(txtsavepath)

num = len(total_xml)
list_index = range(num)
tv = int(num * trainval_percent)
tr = int(tv * train_percent)
trainval = random.sample(list_index, tv)
train = random.sample(trainval, tr)

file_trainval = open(txtsavepath + '/trainval.txt', 'w')
file_test = open(txtsavepath + '/test.txt', 'w')
file_train = open(txtsavepath + '/train.txt', 'w')
file_val = open(txtsavepath + '/val.txt', 'w')

for i in list_index:
    name = total_xml[i][:-4] + '\n'
    if i in trainval:
        file_trainval.write(name)
        if i in train:
            file_train.write(name)
        else:
            file_val.write(name)
    else:
        file_test.write(name)

file_trainval.close()
file_train.close()
file_val.close()
file_test.close()
2 conversion label
- There are four changes here
classes = ['plane', 'ship'], here is your category name in quotation marks
def convert_ In the annotation function_ File and out_file path. If it is a new folder created in the data directory of yolov5 like me, directly replace project01 with your folder name.
There are five paths at the end of the file. If it is a new folder created in the data directory of yolov5 like me, directly replace project01 with your folder name.
Important: the end of the fifth path is jpg\n, if your picture format is bmp, change it to bmp\n, other formats are similar.
Then run the code directly
# txt2yolo_label.py
# -*- coding: utf-8 -*-

import xml.etree.ElementTree as ET
from tqdm import tqdm
import os
from os import getcwd

sets = ['train', 'val', 'test']
classes = ['plane', 'ship']


def convert(size, box):
    dw = 1. / (size[0])
    dh = 1. / (size[1])
    x = (box[0] + box[1]) / 2.0 - 1
    y = (box[2] + box[3]) / 2.0 - 1
    w = box[1] - box[0]
    h = box[3] - box[2]
    x = x * dw
    w = w * dw
    y = y * dh
    h = h * dh
    return x, y, w, h


def convert_annotation(image_id):
    # try:
        in_file = open('data/project01/xml/%s.xml' % (image_id), encoding='utf-8')
        out_file = open('data/project01/labels/%s.txt' % (image_id), 'w', encoding='utf-8')
        tree = ET.parse(in_file)
        root = tree.getroot()
        size = root.find('size')
        w = int(size.find('width').text)
        h = int(size.find('height').text)
        for obj in root.iter('object'):
            # difficult = obj.find('difficult').text
            cls = obj.find('name').text
            # if cls not in classes or int(difficult) == 1:
            if cls not in classes :
                continue
            cls_id = classes.index(cls)
            xmlbox = obj.find('bndbox')
            b = (float(xmlbox.find('xmin').text), float(xmlbox.find('xmax').text), float(xmlbox.find('ymin').text),
                 float(xmlbox.find('ymax').text))
            b1, b2, b3, b4 = b
            # Mark out of range correction
            if b2 > w:
                b2 = w
            if b4 > h:
                b4 = h
            b = (b1, b2, b3, b4)
            bb = convert((w, h), b)
            out_file.write(str(cls_id) + " " +
                           " ".join([str(a) for a in bb]) + '\n')


wd = getcwd()
for image_set in sets:
    if not os.path.exists('data/project01/labels/'):
        os.makedirs('data/project01/labels/')
    image_ids = open('data/project01/labels/%s.txt' %
                     (image_set)).read().strip().split()
    list_file = open('data/project01/%s.txt' % (image_set), 'w')
    for image_id in tqdm(image_ids):
        list_file.write('data/project01/images/%s.jpg\n' % (image_id))
        convert_annotation(image_id)
    list_file.close()
3 create yaml file
Create a new project01 in the data directory Yaml file
train: data/dat/train.txt
val: data/dat/val.txt
test: data/dat/test.txt
# Classes
nc: 2  # number of classes
names: classes = ['plane', 'ship'] #Note here the order and txt2yolo_ label. The classes in the PY file are consistent
4 start training
Mode 1:
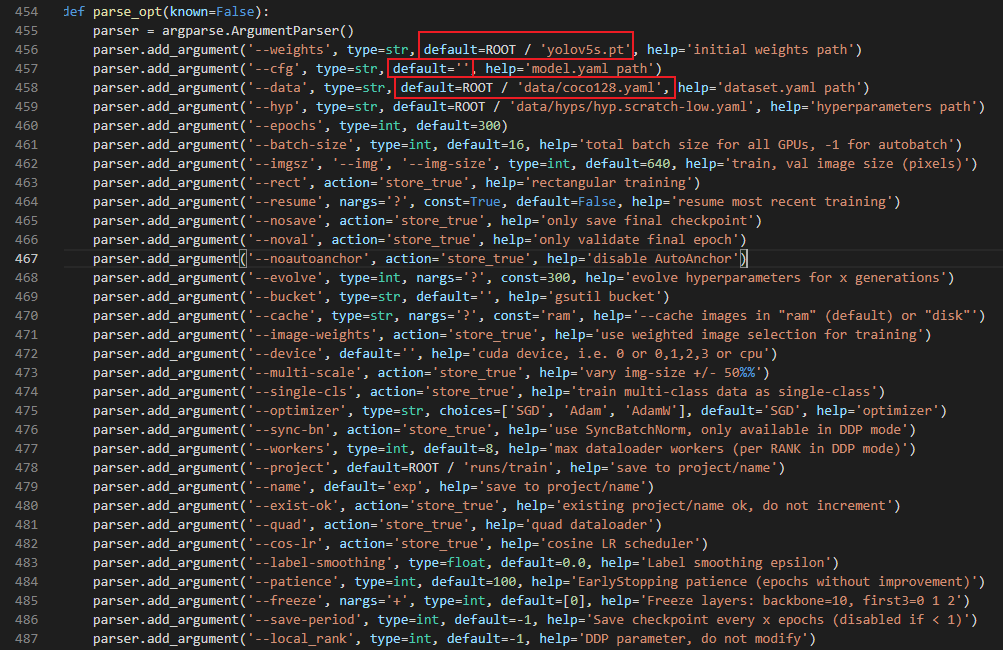
- Open train. In yolov5 root directory Py file, find the location shown in the figure below
- The first red box is the location of the model, if you have downloaded yolov5s Pt and placed in the root directory, there is no need to modify here, otherwise it will be the location of your model.
- The second red box is the model correspondence The yaml location is usually in the model folder and needs to correspond to the model. Therefore, yolov5s is used here Pt, so here should be
default=ROOT / 'models/yolov5s.yaml'. - The third red box is the yaml location corresponding to our dataset, that is, the yaml file location created in step 3. Here should be
default=ROOT / 'data/project01.yaml'
Then you can run train directly Py file for training
Here are some parameters to explain
– total training rounds of epoch # model, 300 by default
– batch size: batch size
– imgsz -- img size: enter the resolution size of the picture
– resume: resume the training, and then continue the training according to the last interrupted result
For more parameter explanations, please refer to This article Blog, very detailed

Mode 2:
Execute Python train on the terminal py --weights yolov5s. pt --cfg models/yolov5s. yaml --data data/project01. yaml
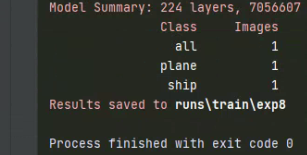
All training results are saved in the running directory of runs/train / increment, such as runs/train/exp2, runs/train/exp3, etc.
After the training, you will be told where to save it

5 use the trained model for detection
Open detect Py file,
Modify -- weights default = 'runs / train / exp / weights / best PT '(some of them may be exp xx, which can be modified according to their saving location)
Modify -- source, default = 'mypath' # mypath is the path where you store the test pictures, which can be relative path or absolute path
Then run detect Py. After the test, go to the runs\detect\exp directory to see the test results.
