This article refers to:
[1]Unity shader shield effect, author: QQ_ sixteen million nine hundred and eighty-two thousand three hundred and twenty-three
Have you ever played crash 3? This is the shield in the game
Full of sense of technology and extremely comfortable visual effects, this is still a domestic mobile game for 16 years. MIHA, you cow!
Unfortunately, if you want to copy such a shield effect, you need not only to model yourself, but also UV relocation. For a guy like me who just wants to care about how shader writes, it looks like his skull hurts.
But the effect is so delicious. I'll imitate the source code of article [2] and change it blindly, and then match it with the idea of [1]. Hey, change a fairly passable energy mask effect.
Final effect (with bloom post-processing):
OK, from now on, write an ordinary transparent shader:
// Upgrade NOTE: replaced 'mul(UNITY_MATRIX_MVP,*)' with 'UnityObjectToClipPos(*)'

Shader "Unlit/EnergyShield"
{
    Properties
    {
        _MainTex ("Main post map", 2D) = "white" {}
		_MaskTex ("Mask Mapping", 2D) = "white"{}
		_BaseColor ("Color 1", Color) = (1,1,1,1)
		_HighLightColor ("Color 2",Color) = (1,1,1,1)
    }
    SubShader
    {
        Tags { "RenderType"="Transparent" "Queue"="Transparent" "IgnoreProjector" = "true"}
        LOD 100

		CGINCLUDE

		#include "UnityCG.cginc"
		struct a2v
		{
			float4 vertex : POSITION;
			float3 normal : NORMAL;
			float2 uv : TEXCOORD0;
		};

		struct v2f
		{
			float4 pos : SV_POSITION;
			float2 uv : TEXCOORD0;
		};

		sampler2D _MainTex;
		float4 _MainTex_ST;
		sampler2D _MaskTex;
		float4 _MaskTex_ST;
		fixed4 _Color;
		fixed4 _HighLightColor;

		v2f vert(a2v v)
		{
			v2f o;
			o.pos = UnityObjectToClipPos(v.vertex);
			return o;
		}

		fixed4 frag(v2f i) : SV_TARGET0
		{
			return lerp(_Color,_HighLightColor,0.4);
		}

		ENDCG


        Pass
        {
			ZWrite Off
			//Blend SrcAlpha OneMinusSrcAlpha
            Blend One One
			CGPROGRAM
            #pragma vertex vert
            #pragma fragment frag

            ENDCG
        }
    }
}
This is the first task that Pass needs to complete, drawing a transparent bottom ball.
The second Pass will complete the peripheral honeycomb effect.
The first is the vertex shader, in which the vertices protrude outward in the normal direction in model space.
v2f outvert(a2v v)
		{
			v2f o;
			v.vertex += float4(v.normal,1.0) * 0.05;
			o.pos = UnityObjectToClipPos(v.vertex);
			o.uv = TRANSFORM_TEX(v.uv,_MainTex);
			return o;
		}
The second is the slice shader, which realizes the streamer effect by offsetting the sampling mask map.
fixed4 outfrag(v2f i) : SV_TARGET0
		{
			i.uv.x += _Time.x;	//Let the map offset laterally to form the "rotation" effect of the ball in the figure
			float mask = tex2D(_MaskTex,i.uv + float2(0,_Time.y * 0.5)).r;	//mask graph sampling, there's nothing to say
			float4 texColor = tex2D(_MainTex,i.uv);
			float main = 1 - texColor.a;	//Inverts the transparency of the main map
			fixed4 finalColor = lerp(_Color,_HighLightColor,main);
			finalColor = lerp(fixed4(0,0,0,1),finalColor,mask);
			return finalColor * 4;	//Multiply by a number to make the color brighter
		}
And the last Pass block:
Note that the mixing factor here is one one instead of srcalpha and oneminussrcalpha, which we usually use. The combination of Blend one one and the default BlendOp Max instruction is brighter than the ordinary mixing using transparency channel factor.
        Pass
        {
			ZWrite Off
			Blend one one
            CGPROGRAM
            #pragma vertex outvert
            #pragma fragment outfrag

            ENDCG
        }
PS: actually, these words bothered me for a while.
			float4 texColor = tex2D(_MainTex,i.uv);
			float main = 1 - texColor.a;	//Inverts the transparency of the main map
			fixed4 finalColor = lerp(_Color,_HighLightColor,main);
Because the inside of the lerp function is like this:
float lerp(float min,float max,float t)
{
	return min + (max-min) * t ;
}
Obviously, it's just a numerical calculation. Why can we get the effect of the whole map sampling by passing its A-channel sampling value into t of lerp? (the following figure shows the effect of changing the main of the code to 0.3)
However, the final effect can be obtained by changing to the value of channel a??
Then I thought it was complicated.. Because what the slice shader does is slice by slice. The map has a slice element at the corresponding position. For example, if the value of channel a at map p is 1 and the value passed to t is 1, the color effect will be returned, while the value of channel a at q is 0, which means that the slice element is completely transparent. In this way, the "honeycomb effect" is naturally obtained only through lerp.
The complete code is as follows:
// Upgrade NOTE: replaced 'mul(UNITY_MATRIX_MVP,*)' with 'UnityObjectToClipPos(*)'

Shader "Unlit/EnergyShield"
{
    Properties
    {
        _MainTex ("Main post map", 2D) = "white" {}
		_MaskTex ("Mask Mapping", 2D) = "white"{}
		_BaseColor ("Color 1", Color) = (1,1,1,1)
		_HighLightColor ("Color 2",Color) = (1,1,1,1)
		_BasicColorLerp ("Bottom ball color brightness",Range(0.0 , 1.0)) = 0.1
    }
    SubShader
    {
        Tags { "RenderType"="Transparent" "Queue"="Transparent" "IgnoreProjector" = "true"}
        LOD 100

		CGINCLUDE

		#include "UnityCG.cginc"
		struct a2v
		{
			float4 vertex : POSITION;
			float3 normal : NORMAL;
			float2 uv : TEXCOORD0;
		};

		struct v2f
		{
			float4 pos : SV_POSITION;
			float2 uv : TEXCOORD0;
		};

		sampler2D _MainTex;
		float4 _MainTex_ST;
		sampler2D _MaskTex;
		float4 _MaskTex_ST;
		fixed4 _Color;
		fixed4 _HighLightColor;
		fixed _BasicColorLerp;

		v2f vert(a2v v)
		{
			v2f o;
			o.pos = UnityObjectToClipPos(v.vertex);
			o.uv = TRANSFORM_TEX(v.uv,_MainTex);
			return o;
		}

		fixed4 frag(v2f i) : SV_TARGET0
		{
			return lerp(_Color,_HighLightColor,_BasicColorLerp);
		}


		v2f outvert(a2v v)
		{
			v2f o;
			v.vertex += float4(v.normal,1.0) * 0.05;
			o.pos = UnityObjectToClipPos(v.vertex);
			o.uv = TRANSFORM_TEX(v.uv,_MainTex);
			return o;
		}

		fixed4 outfrag(v2f i) : SV_TARGET0
		{
			i.uv.x += _Time.x;
			float mask = tex2D(_MaskTex,i.uv + float2(0,_Time.y * 0.5)).r;
			float4 texColor = tex2D(_MainTex,i.uv);
			float main = 1 - texColor.a;
			fixed4 finalColor = lerp(_Color,_HighLightColor,main);
			finalColor = lerp(fixed4(0,0,0,0),finalColor,mask);
			return finalColor * 4;
		}


		ENDCG


        Pass
        {
			ZWrite Off
			//Blend SrcAlpha OneMinusSrcAlpha
            Blend One One
			CGPROGRAM
            #pragma vertex vert
            #pragma fragment frag

            ENDCG
        }

        Pass
        {
			ZWrite Off
			//BlendOp Max
			Blend one one
			//Blend SrcAlpha OneMinusSrcAlpha
            CGPROGRAM
            #pragma vertex outvert
            #pragma fragment outfrag

            ENDCG
        }
    }
}
Final effect (no Bloom):
(with Bloom):

Poster:
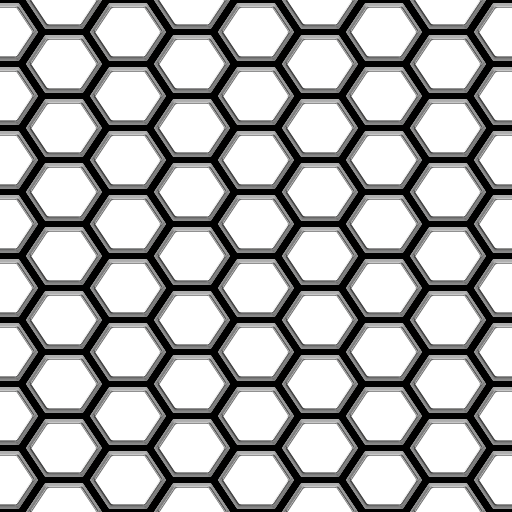
Mask texture:

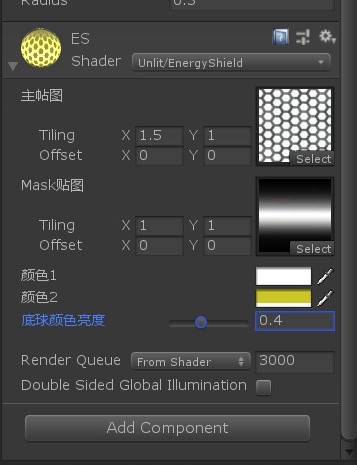
Material parameters: